Tag: food storage

  • Recipe: Chicken & Gravy Over Rice[2020]

    Recipe: Chicken & Gravy Over Rice[2020]

    What foods to store in a food storage program is a popular topic – but what about making meals from that food? Not so much.

    This recipe is extremely easy in both its preparation as well as its cooking. It can be made on a Coleman stove or a typical home grill.

    Ingredients

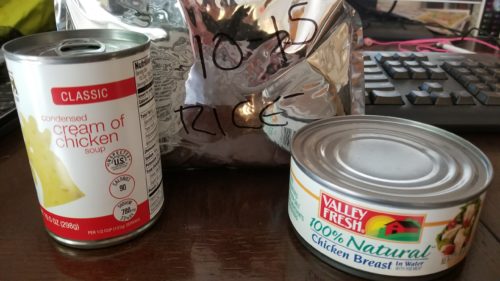
    2 ½ cups chicken gravy (or use cream of chicken soup)
    1-2 cans chicken
    4 cups hot cooked rice

    survival, recipe, prepper, food storage, chicken, rice,

    Instructions

    • Cook rice to the desired consistency
    • Add chicken to the gravy/soup and heat
    • Serve chicken/gravy over rice

    chicken gravy and rice, SHTF, prepper recipe,

    Recipe Tip: Season as desired. A bit of salt, pepper, and paprika will add additional flavoring. A can of corn can be added as an additional side dish.

    Enjoy!!

    survival, prepper, preparedness, SHTF, civil war, Patreon

  • Food Storage Recipe:  Oven-Roasted Turkey SPAM and Potatoes[2020]

    Food Storage Recipe: Oven-Roasted Turkey SPAM and Potatoes[2020]

    food storage, recipe, food recipe, SPAM, SHTF, preparedness, prepper, survival

    What foods to store in a food storage program is a popular topic – but what about making meals from that food? Not so much.

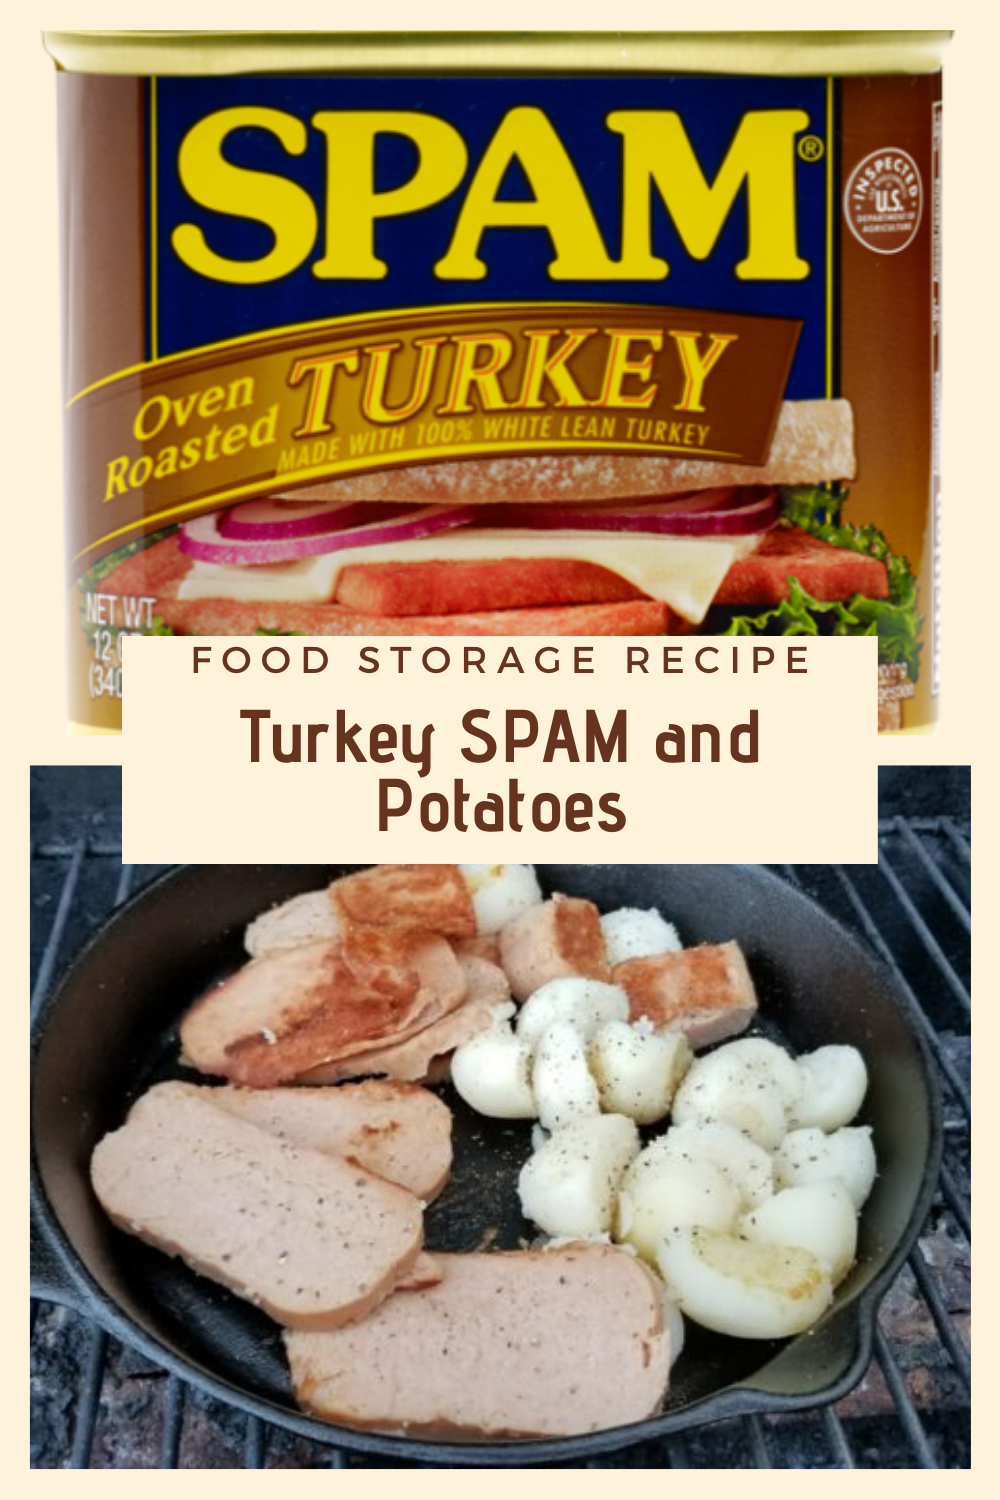
    This recipe, I put together something a little different – Turkey SPAM & Canned Potatoes. SPAM is often considered a joke when it comes to food storage but the truth is it’s a viable source of sustenance. As a kid, I used to eat it on a regular basis thinking it came from small SPAM animals that were raised on a farm somewhere. I liked it but once I was old enough to decide what I ate I moved on to other things like……cake. Cake is good.

    SPAM, turkey, survival, food storage, prepper, preparedness, recipe

    Not knowing how well I would like SPAM some 30 years later I grabbed a can of Tukey SPAM. Out to the grill with a cast iron pan and a can of potatoes.

    Here we go…..

    Ingredients

    • 1 can Turkey SPAM(say that 10 times real fast)
    • 1 can Whole Potatoes
    • salt, pepper, seasoning as desired

    Instructions

    • Apply non-stick spray to frying pan or use a seasoned cast iron pan
    • Set temperature to medium to medium-high
    • Open the SPAM, cut into cubes or slices – place in frying pan
    • Open can of potatoes, drain excess fluid – empty into frying pan
    • Cook until browning has occurred on most pieces of SPAM and potatoes.
    • Apply seasoning when food is almost complete.
    • Turn SPAM and stir potatoes every few minutes until done.
    • Serve and enjoy

    While this may not be the most delectable meal, however, I was surprised at just how good the SPAM was. Very good. I could imagine coming in from a cold winter patrol and absolutely loving this meal.

    At 655 calories(50+ grams of protein) this is very filling for one but could be split between two people as well.

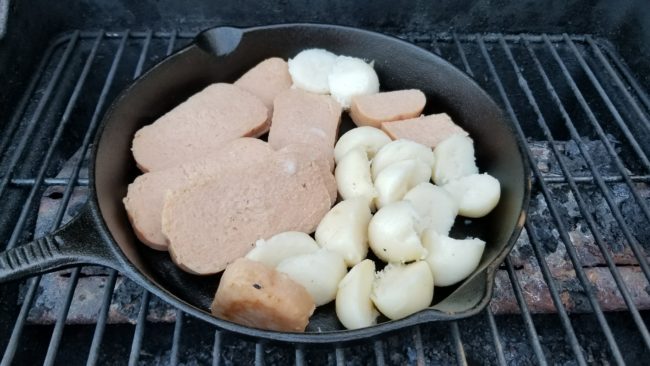
    [TOP – Fresh on the grill]


    [TOP – Turned and Stirred – Pepper Added]


    [TOP – COMPLETE]

    line

    Canned SPAM is an excellent source of protein with a long shelf life – and fairly inexpensive. In this specific meal a simple can of potatoes and can of SPAM makes for a pretty tasty meal.

    Now….where’s that cake at?

    Rourke

  • Food Storage Recipe: SHEEPDOG PIE

    Food Storage Recipe: SHEEPDOG PIE

    When thinking about what types of food that can be stored long-term canned goods are the first thing that comes to mind. Canned items can be mixed together to make a meal or just eaten alone. Stocking up on canned soups, stews or other pasta meals like Chef Boyardee makes perfect sense, especially if you are on the move and not in a set location. However, I still think there is something to be said for having something that resembles a home-cooked meal to lift spirits during difficult times. That is why I have tried to take my regular supper meals and make them out of things that I might have long term. Normally I use ground beef browned with onions as my meat in Shepherd’s Pie but I thought for this food storage recipe canned pot roast might make a good substitute.

    For the record, this Northern Maine girl had NEVER tasted canned potatoes until I made this meal and I will always prefer my potatoes “uncanned”.  Yes, potatoes are grown in Maine. Maine is not all lobsters and lighthouses. Aroostook County, known as “The County” by Mainers, is located in Northern Maine and is known for its abundance of potato farms. If you ever get a chance to visit you can pick up a bag of locally grown potatoes at a roadside stand between September and October. Just leave money in the box.

    Anyway, this recipe turned out to be a very tasty and filling meal that can easily be made with only a few cans of food.

    What you will need for Sheepdog Pie:

    8×8 inch pan

    Aluminum Foil

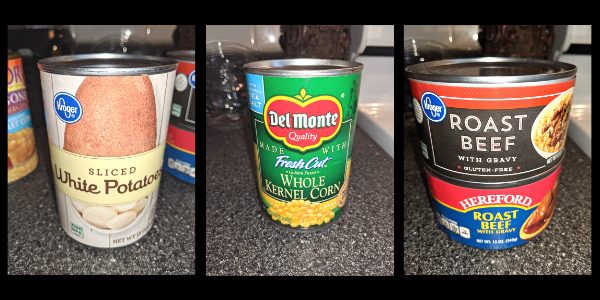
    2 cans of Roast Beef

    1 can of corn

    2 cans of sliced potatoes

    Garlic salt and pepper to taste


    Directions

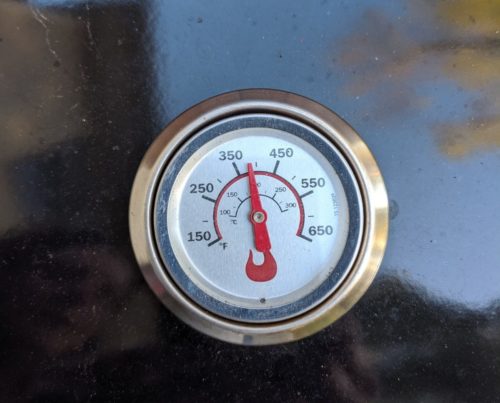
    1. Preheat the grill to 375 degrees F

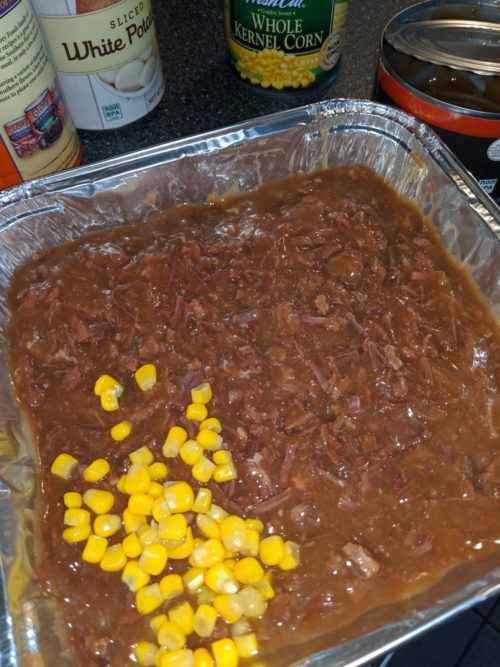
    2. Mash roast beef chunks and sauce with a fork and spread evenly on bottom of 8×8 pan

    3. Drain can of corn and spread evenly over top of roast beef

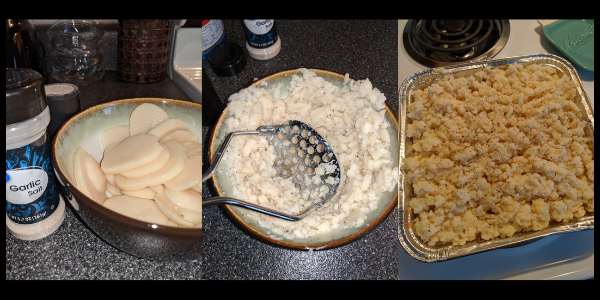
    4. Drain cans of potatoes and mash or place slices over the top of the corn. I choose to mash the potatoes with a potato masher but I think laying the slices over the top would also be good and faster. I also added some garlic salt and pepper to taste.


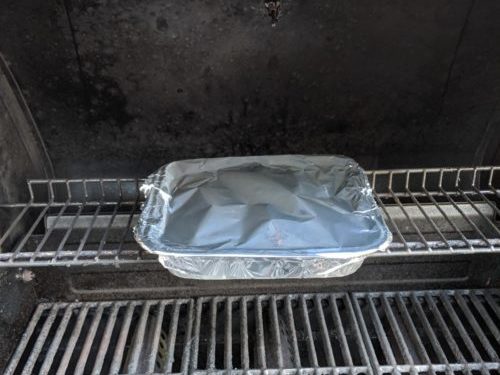
    5. Cover with tin foil and place on top rack of preheated grill for approximately 30 minutes


    6. It’s ready when hot and bubbly.

    If available, top with shredded or parmesan cheese. The homemade banana bread made the meal even better.

    Enjoy!!!

    shepherds pie, prepper, prepper meal, food, food storage, shtf

    MainePrepperGirl

    Maine, prepper, girl, MainePrepperGirl


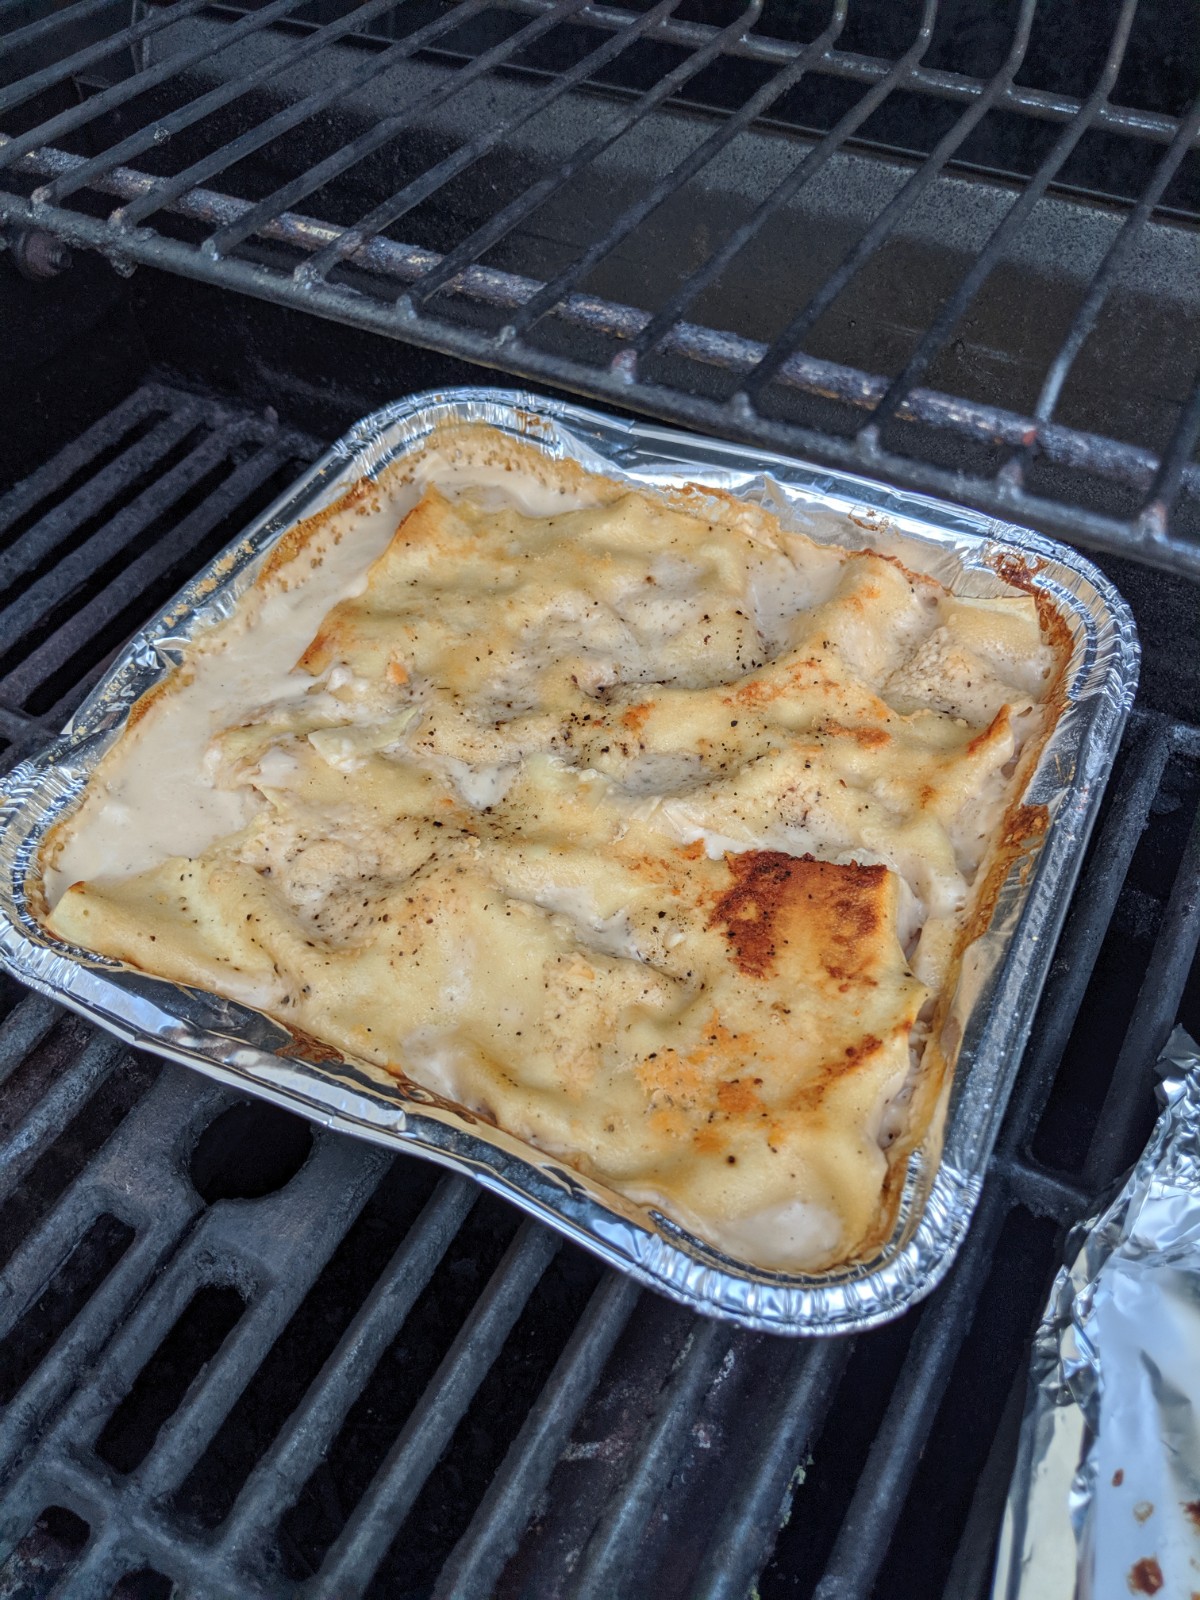
  • Apocalyptic Chicken Alfredo Lasagna

    Apocalyptic Chicken Alfredo Lasagna

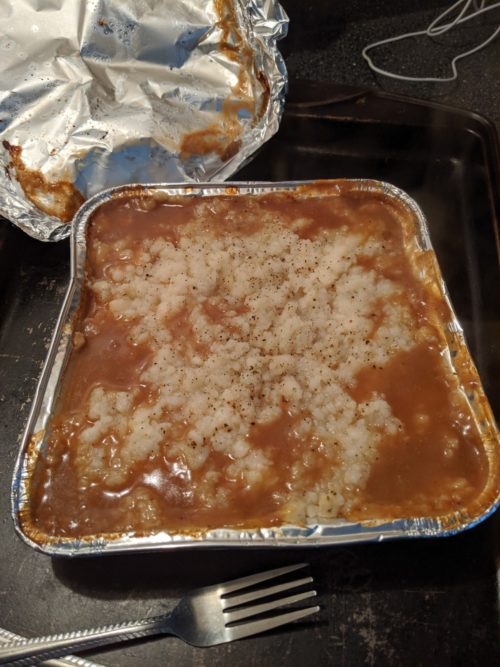
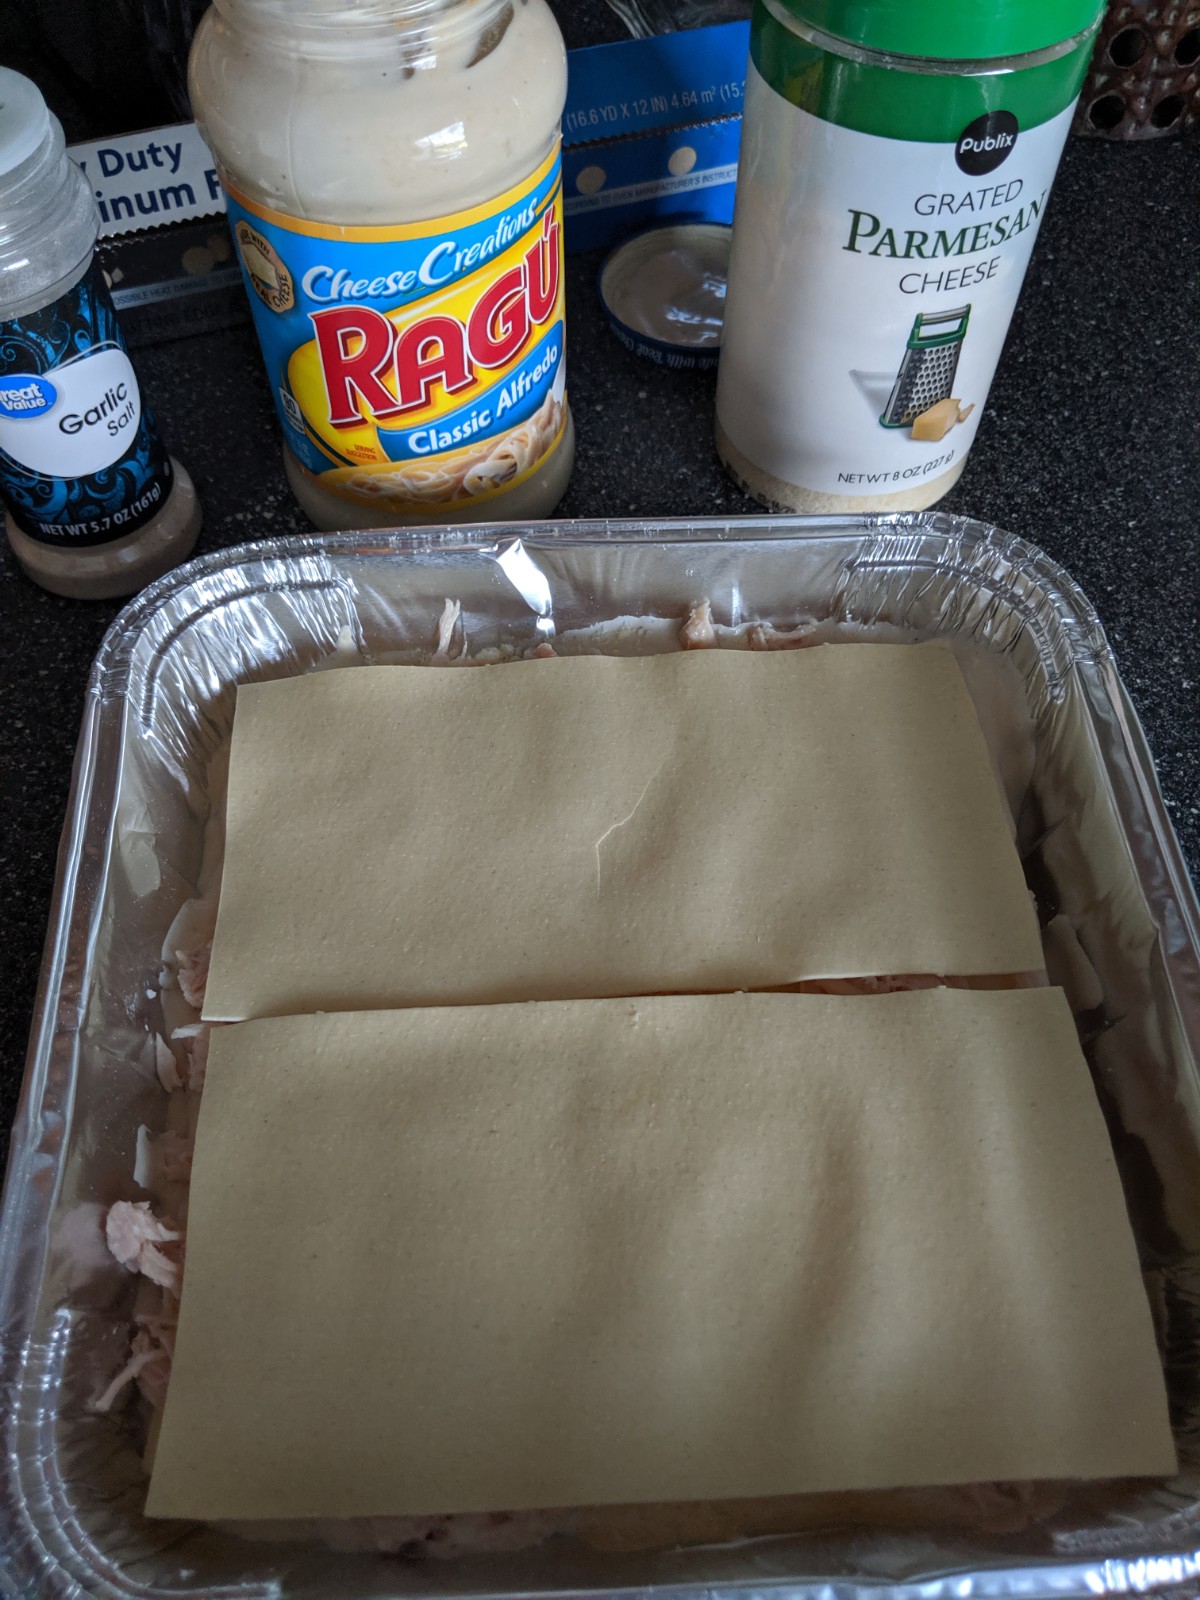
    When planning meals and items that I would store in a food pantry in a SHTF situation I consider all tastebuds. This recipe made me think of the teenage food palate because just about every teenager I know loves Alfredo. I was a bit skeptical when I came up with this recipe at first because it was so simple, but that is what we are going for after all! This simple and easy to prepare meal gives the prepper another option other than beans and rice and although the no boil noodles are not able to be stored as long as beans and rice it will give you some options in the first year or so while you continue to plan for future meals. I think this Chicken Alfredo Lasagna will provide a tasteful comfort food feel when sitting around the kitchen table together.

    Let me know what you think!

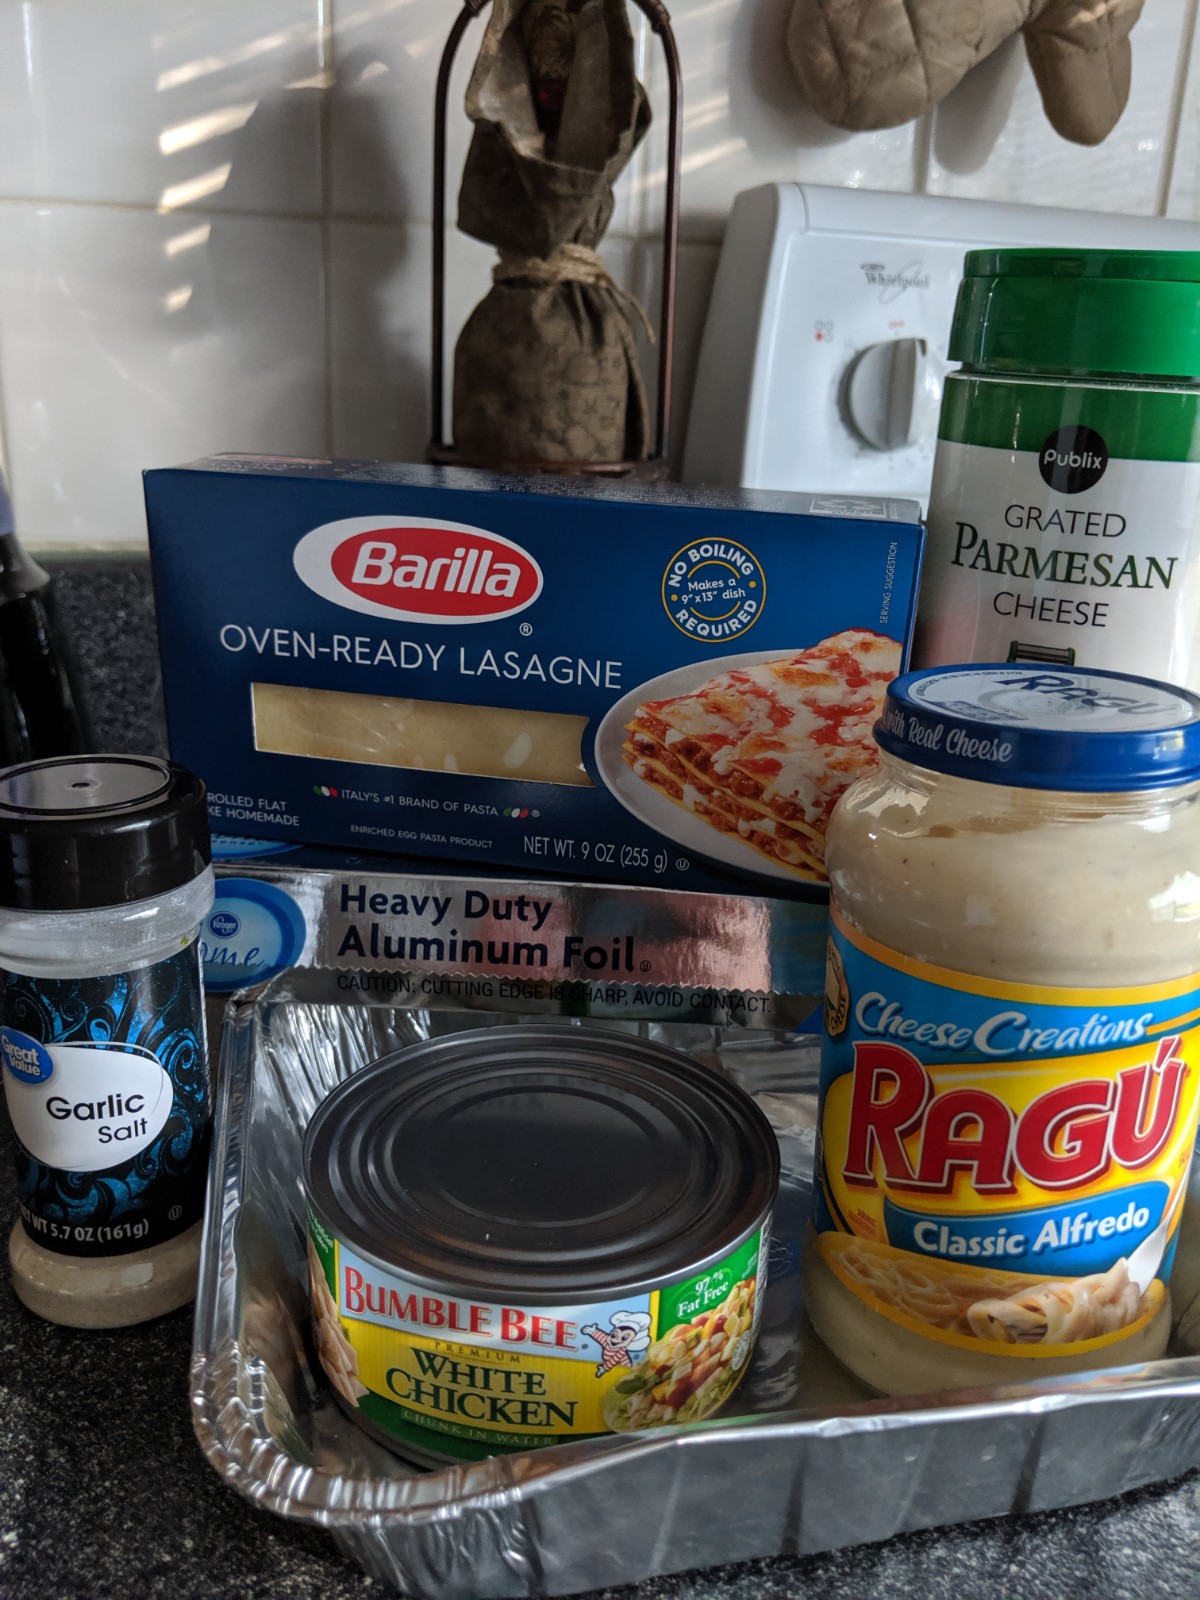
    What you will need:                                                             

    8×8 inch pan

    16oz jar of Alfredo Sauce

    Oven Ready Lasagna Noodles

    5oz can of White Chicken

    6 Tablespoons Parmesan Cheese

    Garlic Salt to taste


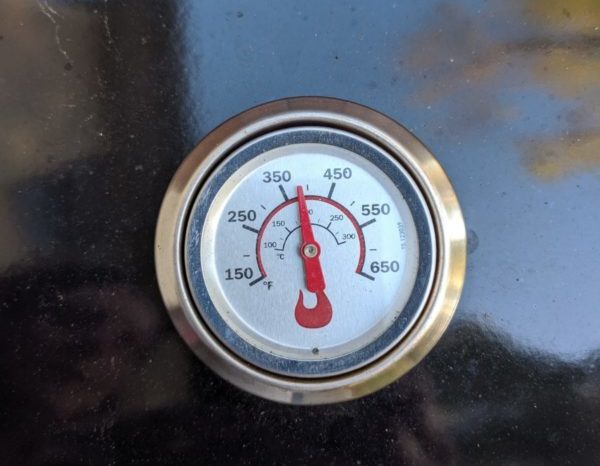
    1. Preheat the grill to 375ºF


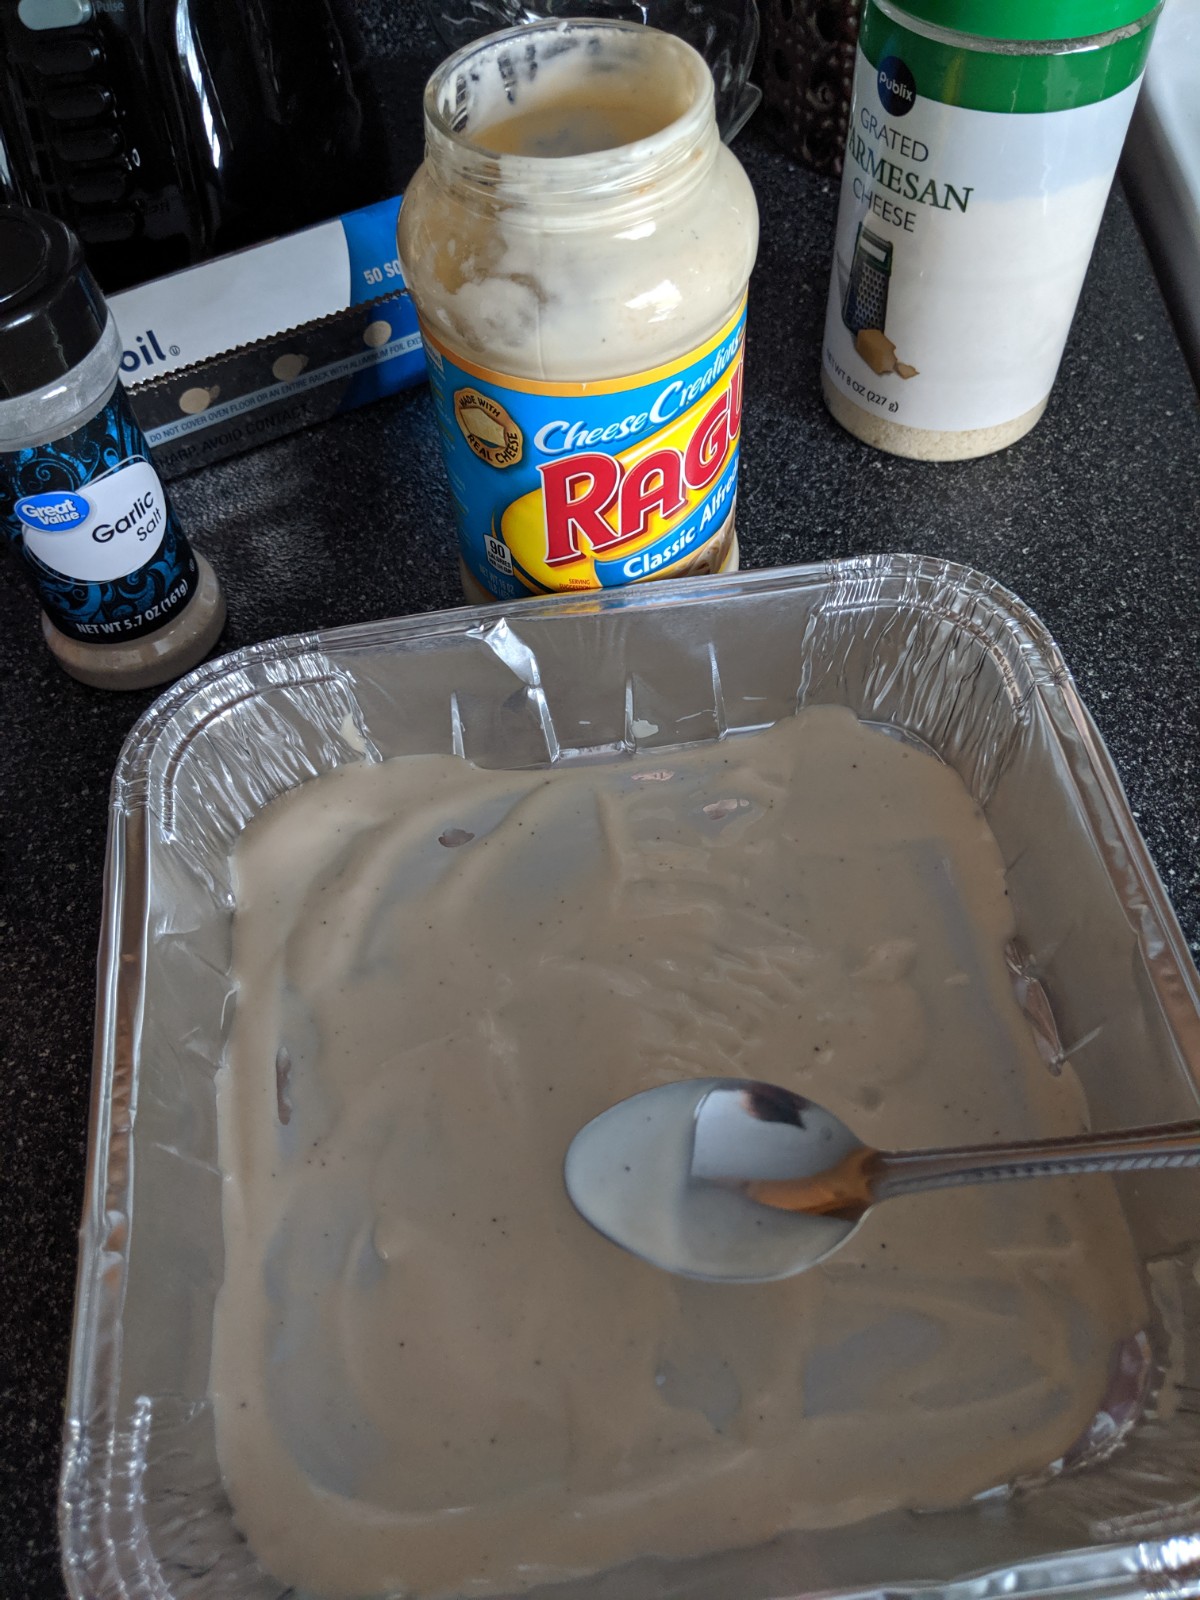
    2. Coat the bottom of the pan with a thin layer of Alfredo sauce


    3. Place 2 lasagna noodles over the sauce lined pan


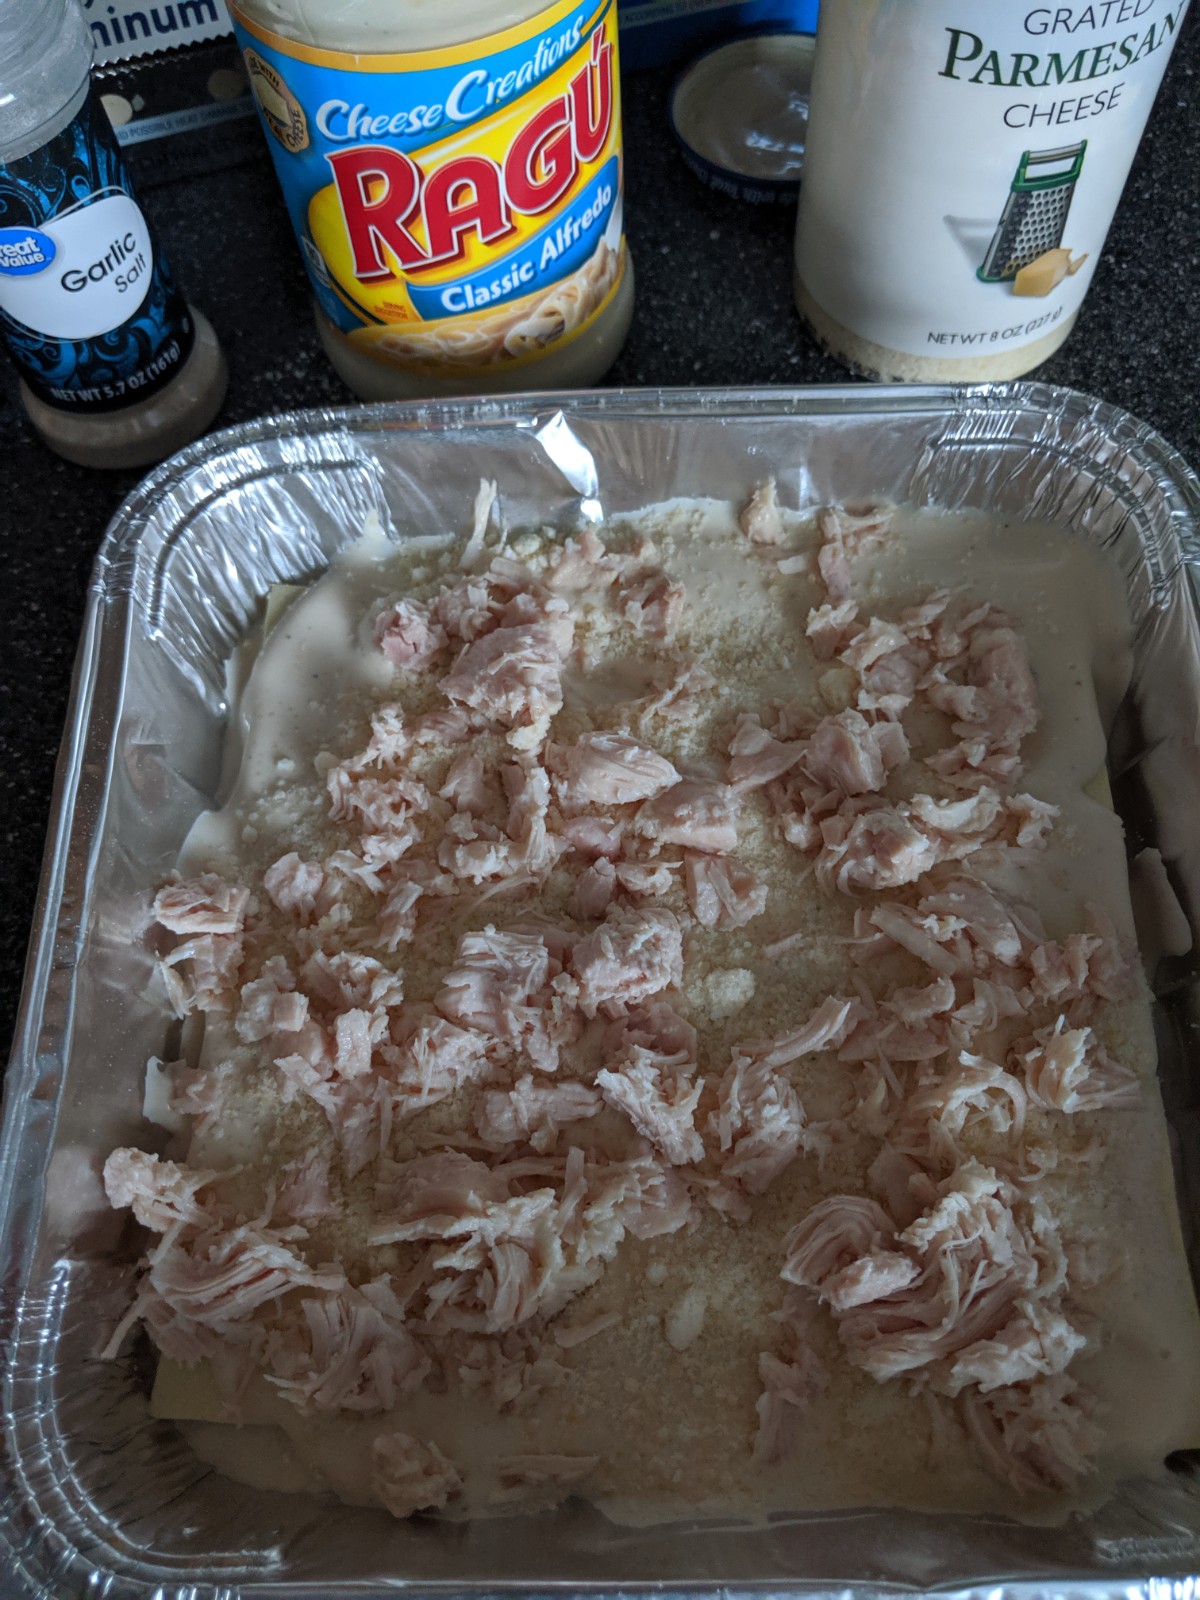
    4. Coat the lasagna noodles with a layer of Alfredo sauce, ½ the can of chicken, 2 tablespoons of parmesan cheese and garlic salt. Place 2 noodles over the top.


    5. Repeat step 4

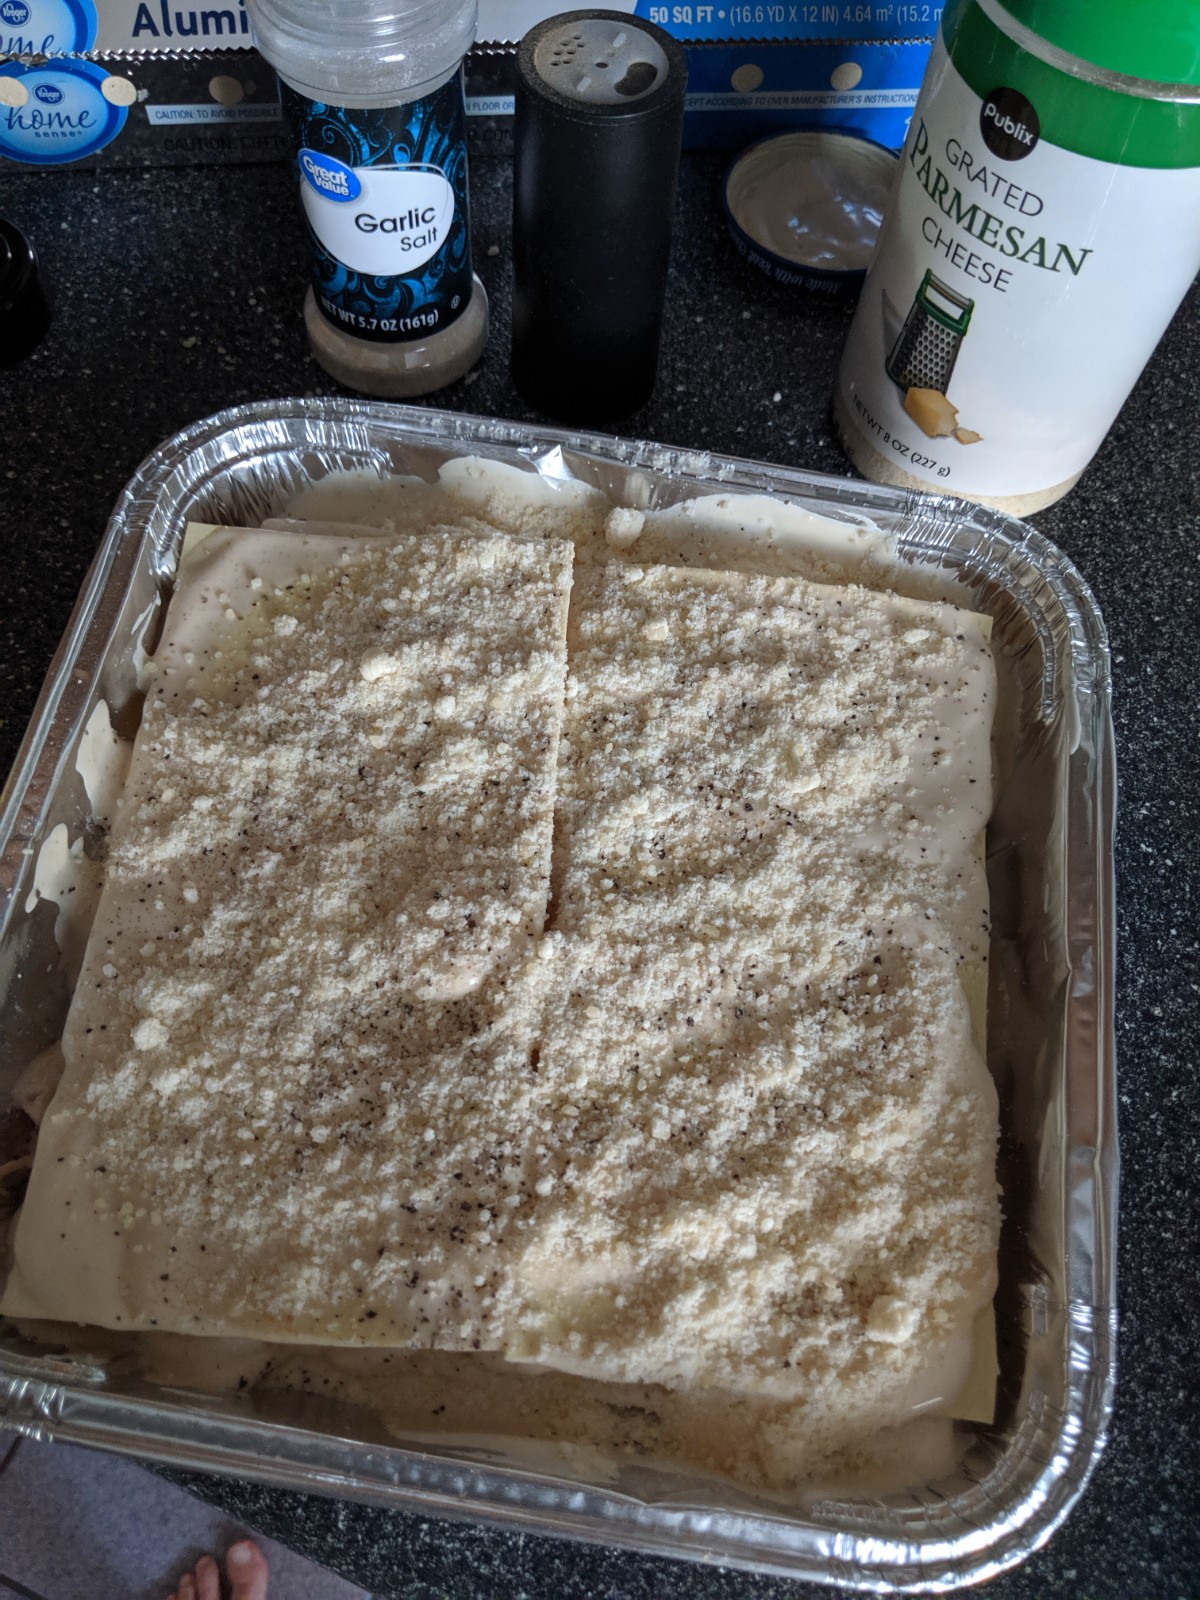
    6. Coat the top layer with Alfredo sauce and sprinkle with 2 tablespoons of parmesan cheese and sprinkle with garlic salt to taste.


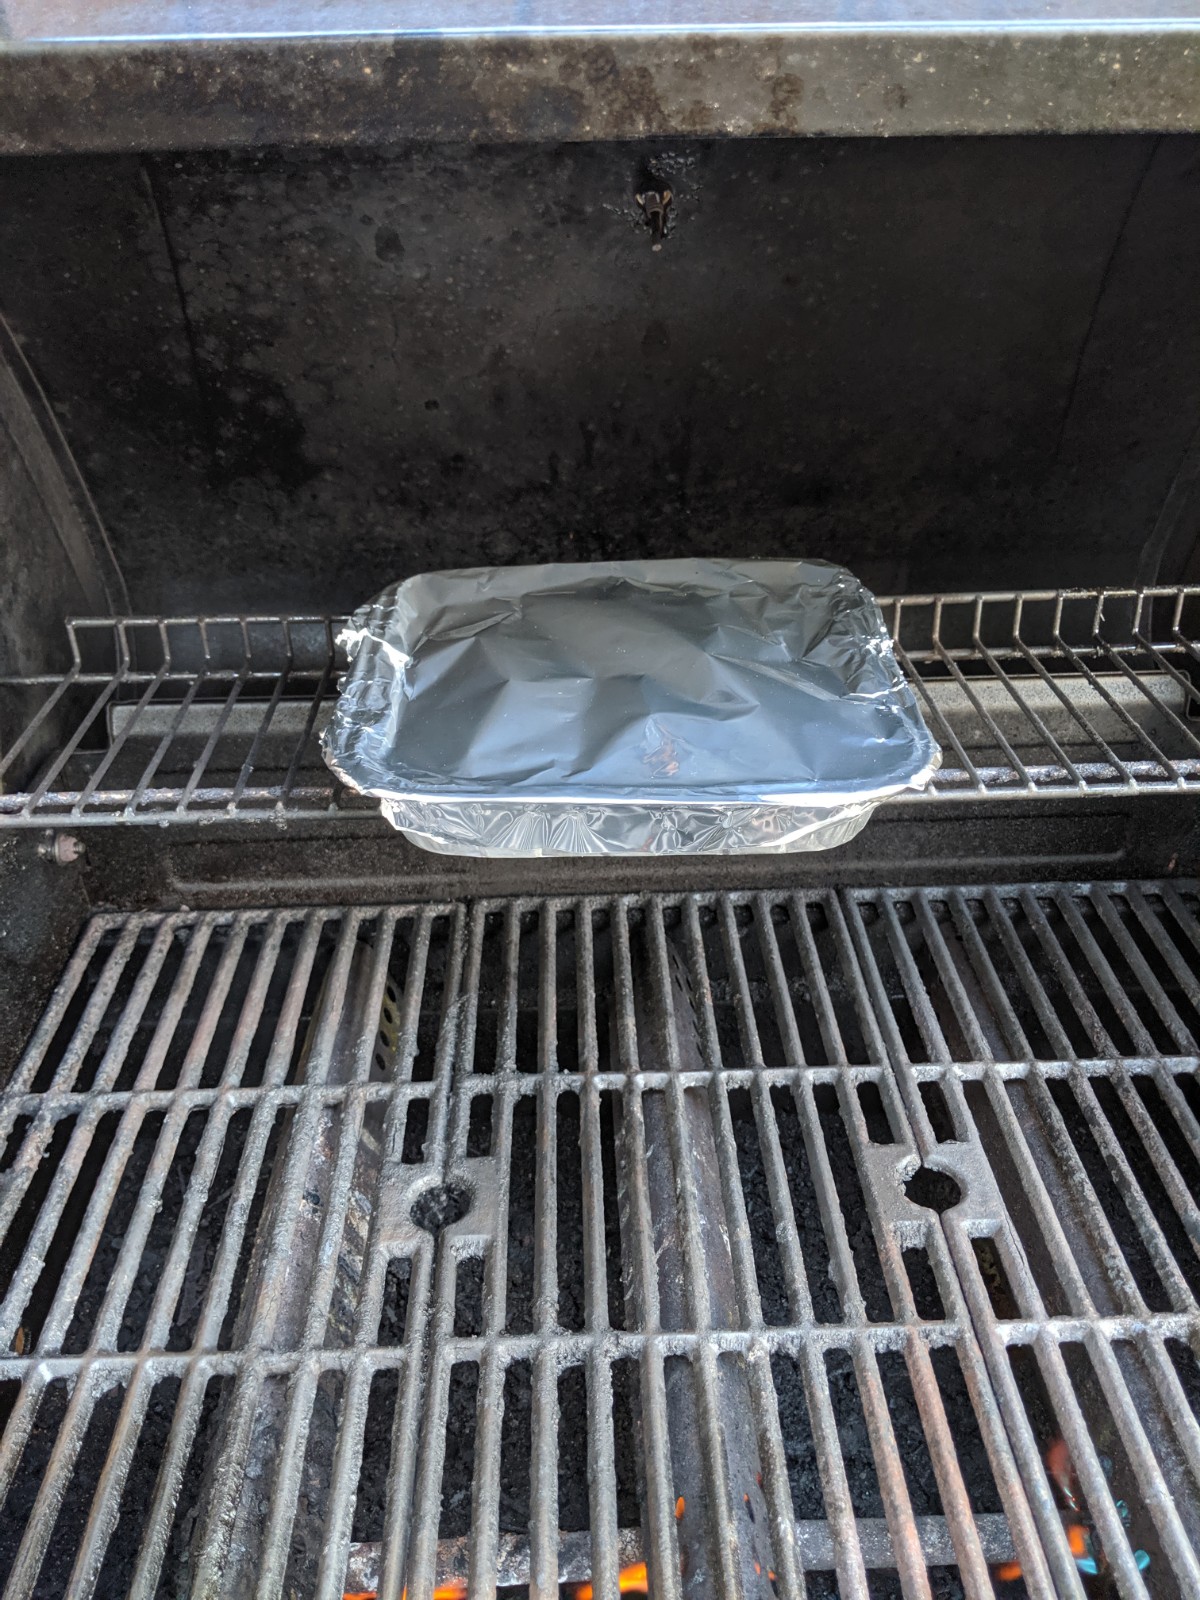
    7. Cover with tin foil

    8. Place on top rack of preheated grill


    9. Cook for approximately 30 minutes. You can tell if it is done when you stick a fork in it and the noodles are soft.


    10. ENJOY!


    MainePrepperGirl

    Maine, prepper, girl, MainePrepperGirl


  • Widespread Reporting on Coming Food Shortage

    Widespread Reporting on Coming Food Shortage


    Spend a little time on Youtube and you’ll see many video’s warning people of a coming food shortage. Extensive crop loss is blamed on excessive rainfall and corresponding flooding within the United States. Proponents of the food shortage also blame “climate change” and state the next several years will see rising food prices, declining supply levels, and increasing economic impact on populations as a larger percentage of income is spent on groceries.

    While many of us are not believers in man-induced climate change there is little doubt that climate changes all the time.  No matter which side of the argument you’re on – a food shortage is a food shortage.

    As preparedness-minded folks, stocking up on food is nothing new. As for myself, I’ve felt a tremendous need to stock up on food lately. Not as glamorous or exciting as the latest “tacticool” pistols and accessories there is little more important than food.

    Recommended: Stock Up Now

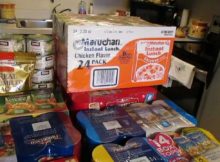
    Store more of what you eat. Common sense, right? With each visit to the grocery store buy a bit more than you normally would with an emphasis on things that have a longer shelf life. Canned foods are the most obvious as they will last years past their marked expiration date.

    Bulk foods such as rice, beans, dried corn, and pasta can be mylar packed and stored for years. These are some of the least expensive food storage options to consider.

    food storage, bucket, prepper, preparedness, SHTF, food shortage

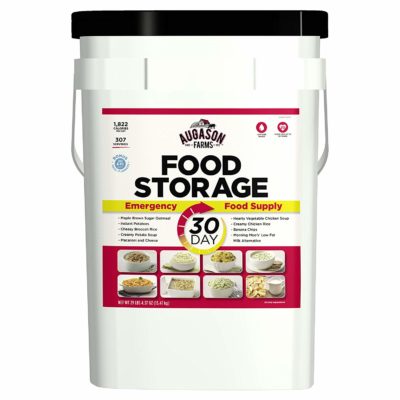
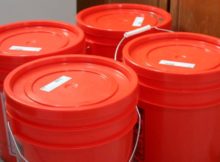
    Freeze dried food is on the expensive side but is lightweight and stores for upwards of 25 years. One of these best deals I’ve found is a 30-day bucket for one person for $99.99 and free shipping. On a budget? Grab one of these each month and in a short time a decent supply will be put back.


    Regardless if there is some impending food shortage around the corner stocking up on food just makes sense.


  • 5 Morale Boosting Foods With a Long Shelf Life

    5 Morale Boosting Foods With a Long Shelf Life


    Any high-stress disastrous event will create a definite morale issue for most people. The absence of normal life comforts combined with potential life-altering conditions will wreak havoc on people – especially children. Having as part of any food storage system some specific foods to boost – even just a little – the morale of friends and family is simple and inexpensive.

    Here are 5 morale-boosting foods with a long shelf-life:

    Jelly Beans – Jelly Beans provide an explosive amount of flavors as well as a sugar rush. Shelf Life: 1-2 years.

    M&M’s – Chocolate is one of the most popular comfort foods. M&M’s themselves are a popular favorite. Shelf Life: 1 year

    Starburst – A fruity fix when times are tough? Starburst fit the bill perfectly. Shelf Life: 2-3 years.

    Peppermint Hard Candy – Long lasting with an intense peppermint flavor. Shelf Life: 12-18 months.

    MRE Cakes – Candy is great but MRE cakes will provide a smile when it seems impossible. Shelf Life: up to 7 years.

    It would be recommended to store all of these foods – even the MRE desserts –  in a vacuum sealed bag via a Foodsaver to extend life as far as possible.

    While there is not a food in existence that can fix property destruction and heal wounds – the mental anguish often associated with disasters may be lessened just a bit – with morale boosting foods.

    What’s your favorite?

    Rourke


    line

    Support 1776PatriotUSA in 3 Simple Steps……

    1.  Click on any Amazon link.

    2.  Purchase any item at no additional cost to you.

    3.  Accept my humble “Thank You!”

    Amazon-Logo-schwarz

    Amazon Camping & Hiking

    Amazon Backpacks and Bags

    Amazon Hunting and Fishing

    Amazon Hunting and Survival Knives

    Amazon Tactical and Defense

    Amazon Shooting Supplies

    Amazon Survival & Preparedness Supplies

    line

    Don’t forget to vote for this website over at the Top Prepper Sites. Click HERE to vote.

    vote

      *    *    *    *    *    *    *    *    *    *    *

    Recommended reading for every Patriot? 

    Untitled design (8)

  • Chicken Noodle Soup Taste Test: 4 Years Expired

    Chicken Noodle Soup Taste Test: 4 Years Expired


    While I stock up on freeze dried and bulk foods such as rice, canned goods are the staple of my own food storage program. I have written about the myths surrounding expiration dates and suffice it to say canned foods will last years past labeled expiration date if properly stored. This goes for almost every kind of canned food including meats, soups, stews, fruits, and vegetables.

    I’ve saved an assortment of canned goods over the years that the wifey wanted to throw out. Every so often I pull one out and serve it. So far I’ve had no issues with any of them.

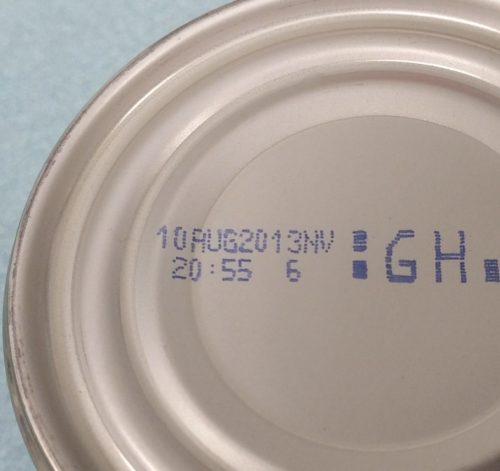
    Recently I reached deep into the back behind stacks and stacks of food all over my house and…….well, Ok I went to the cabinet and got a can of chicken noodle soup. The can expired in 2013 which makes it well over 4 years past the point most people would have thrown it out.


    I opened the can, heated it up and put it in my belly. No issues whatsoever. As I expected the appearance, smell, texture, and flavor we all like the can was processed the day before. So while I would like to write up some eloquent article on my taste test it really boils down to opening a can, heating it up – and eating it.

    ****Note: Do not consume canned that are bulging or leaking. It’s not good for canned food – or people.

    [slideshow_deploy id=’9383′]

  • Recipe: Chicken & Gravy Over Rice

    Recipe: Chicken & Gravy Over Rice


    What foods to store in a food storage program is a popular topic – but what about making meals from that food? Not so much.

    This recipe is extremely easy in both its preparation as well as its cooking.

    Ingredients

    2 ½ cups chicken gravy (or use cream of chicken soup)
    1-2 cans chicken
    4 cups hot cooked rice

    survival, recipe, prepper, food storage, chicken, rice,

    Instructions

    • Cook rice to the desired consistency
    • Add chicken to the gravy/soup and heat
    • Serve chicken/gravy over rice

    chicken gravy and rice, SHTF, prepper recipe,

    Recipe Tip: Season as desired. A bit of salt, pepper, and paprika will add additional flavoring. A can of corn can be added as an additional side dish.

    Enjoy!!

    Join the Patriot’s Brigade……
    and receive a FREE digital copy of the prepper fiction book A Survival Story
    – written by John Rourke
    As a member of The Patriot Brigade, you will receive a FREE digital copy of my book – A Survival Story. You will also receive periodic emails providing information on current events, projects, and special offers and discounts.
     

    CLICK HERE TO SIGN UP

  • Building a Simple & Inexpensive Raised Bed Garden

    Building a Simple & Inexpensive Raised Bed Garden

    Gardening is one of the Top 5 Prepper Skills I recommend people learn. It can be both extremely rewarding – and fairly frustrating. I’ve been gardening for close to 15 years in my backyard using a 25′ x 30′ foot in-ground spot as well as buckets, raised beds, and various containers.

    For many, space is lacking and soil is questionable. It is important to get started NOW to learn gardening and get your spots ready. Soil can be improved over time – and it can be made worse. The point is the sooner you start the better off you’ll be.

    For many, raised beds offer a quick and simple way to get started. There are a lot of positives with raised beds such as being able to place them pretty much anywhere that will get sufficient sun.

    Here is a simple, easy method for building a raised bed garden:


    Needed Supplies:

    1     12-foot board – or an 8-foot and 4-foot(width of board determines height of raised bed. I recommend no less than a 6″ inch board)

    8     nails or screws 2″+ in length


    Needed Tools:

    1     saw (jig saw or table saw will work)

    1     ruler

    1     pen or pencil

    1     drill or hammer

    1     drill bit slighter smaller than whatever size nail/screw selected


    Steps to Building a Simple & Inexpensive Raised Bed Garden

    The first thing to do is get everything together in one place. Make sure batteries are charged and power tools are plugged in.


    Next – we need to create two 4-foot pieces. If you have an 8-foot board simply mark it off and cut it in half. If you have a longer 12-foot piece mark off 4 foot – cut it, then mark another 4 foot and cut again.

    Either way, there should be a single 4-foot piece left at this point. Measure its length and cut it in half.

    Above – a total of 4 pieces should be available. Two should measure 4 feet and the other two 2 feet.


    Pre-drill the holes for the screws/nails. This step is not necessary but helpful to reduce the chance the wood will split.


    Now – go ahead and screw all the boards together in a rectangle shape. Make sure the longer boards are set on the outside of the short boards for each side or the rectangle will be off.


    Your finished product should look like the photo above. Now simply place the raised bed wherever you wish, fill with soil – and plant some seeds or plants.

    *     *     *     *     *     *     *

    This project is not complicated and it’s not rocket science. I considered generalizing the instructions without all the pictures and lists but decided to make it a bit more detailed. The size of the bed can be easily adjusted to whatever you wish. 4′ x 8′ beds work well. Going longer has its advantages but going wider makes it difficult to reach in and pick.

    Soil? That’s always a question and searching on the internet you’ll come up with all kinds of concoctions. I can only tell you what has worked for me and your mileage may vary:

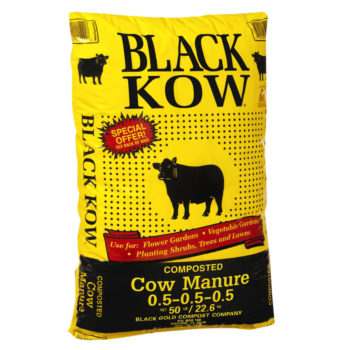
    1/3 composted cow manure(Black Kow brand if you can get it)

    1/3 peat moss

    1/3 natural soil from area

    The above formula is pretty much what I have been using for the past few years and it has worked well. A high-quality potting soil can be substituted for the peat moss or use it with everything else if you wish.

    There is a lot of talk about “Mel’s Mix” on the net if you do a search for raised beds. It might work – but it is EXPENSIVE! I’ll pass.

    When growing vegetables in raised beds here are two tips to keep in mind:

    1. WATER: You need to WATER MORE OFTEN than in-ground gardens. In a raised bed gravity naturally pulls the water from the soil thus daily – and even twice daily watering – may be needed. I’ve seen many gardens start off looking good and then hear complaints stuff didn’t grow. Reason? Lack of water. The larger the raised bed the less of an issue this is.
    2. MULCHING: Mulching is a huge benefit to decreasing moisture loss through evaporation and reducing weed growth. I’ve used grass clippings, dead leaves, pine bark, and local city mulch available to the public. Be careful with grass clippings as if any of the cut grass grew enough to have seed you just planted them in your raised bed.

    prepardness, survival, garden, gardening, prepper, SHTF

    This post may not seem very timely as much of the country is nearing the end of growing season…but WAIT, there’s MORE!!

    Fall gardens are being prepared and readied for planting now.

    No better time than now to jump on the gardening bandwagon.

    line

    Recommended Gardening Books:


  • Protein For Preppers: Canning Chicken

    Protein For Preppers: Canning Chicken

    Canning meat is an area of preparedness that I have zero experience with. One of the members of the 1776PatriotUSA Facebook Group just started a YouTube channel. Her first two videos are on canning chicken. With my recent interest in canning meat, this was perfect timing.

    As Sheila mentions meat must be canned using a pressure canner. I have the same Presto pressure canner featured in the video and for the money, it does a great job. A higher quality but much more expensive option is the All American. One advantage of the All American is there is not a replaceable lid seal to worry about.

    I’m going to talk to the Wifey and give it a shot soon.


    Canning Chicken Part 1:


    Canning Chicken Part 2:

  • Taste Test: Yoders Canned Bacon

    Taste Test: Yoders Canned Bacon

    Bacon. Say “bacon” around a group of people and watch how their attention is instantly drawn to you. Hey – either you like bacon, or you’re wrong. For prepper’s considering what food to stock up on bacon is usually just a pipe dream due to its extremely limited shelf life.

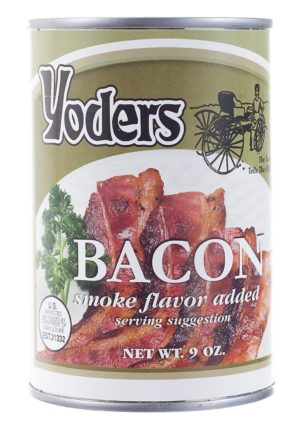
    Enter: Yoders Bacon.

    I bought a few can’s of Yoders Bacon back in 2015. I decided to open one up and give it a try. Why? It’s bacon! I also wanted to see if the taste was good enough to purchase more.


    The Test: Yoders Bacon

    Yoder's canned bacon, SHTF, prepper, preparedness, food storage

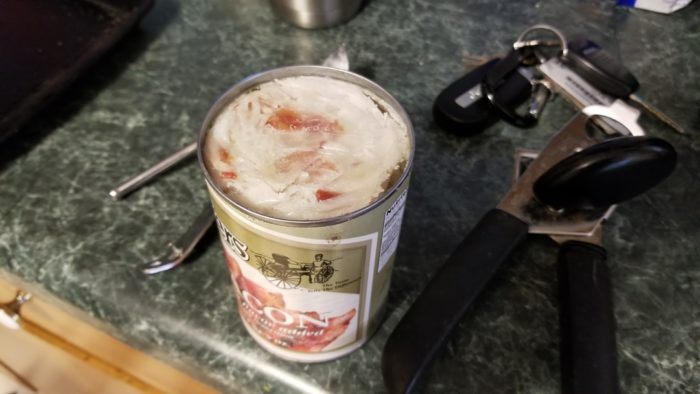
    Opening the can shows the bacon wrapped in wax paper and pressed in the can. The smell is “bacon-like” and I would not call it exactly good.


    Yoder's canned bacon, SHTF, prepper, preparedness, food storage

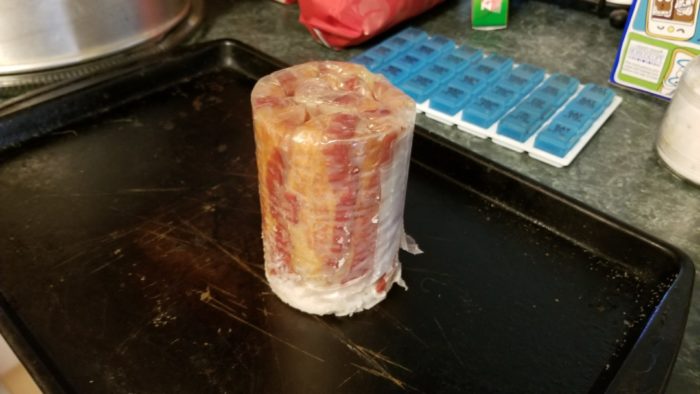
    Pulling the wax paper and bacon out shows just how everything is packed. There was an accumulation of hardened grease at the bottom. While some may be grossed out by the appearance it was no big deal to me.


    Yoder's canned bacon, SHTF, prepper, preparedness, food storage

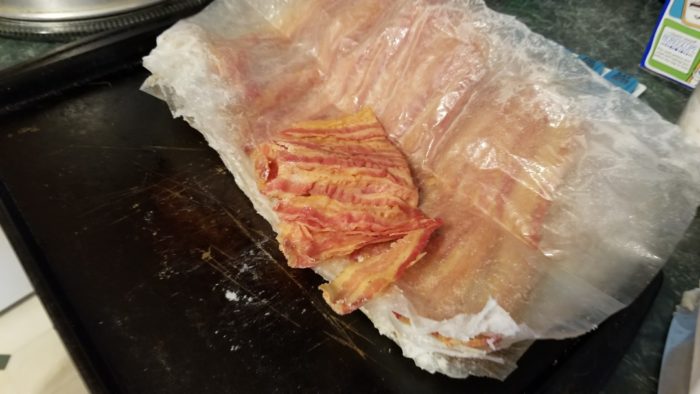
    The bacon is placed in the can as full-length fully-cooked pieces. They are laid across the wax paper and then folded and rolled to fit in the can. I tried a piece fresh out of the can and it tasted like – well, bacon. It had a little different taste than I was used to. It might be the smoke flavoring – but it was good.

    In fact – if I had come in on a cold winters day out hunting and had a piece – it would be VERY good.


    Yoder's canned bacon, SHTF, prepper, preparedness, food storage

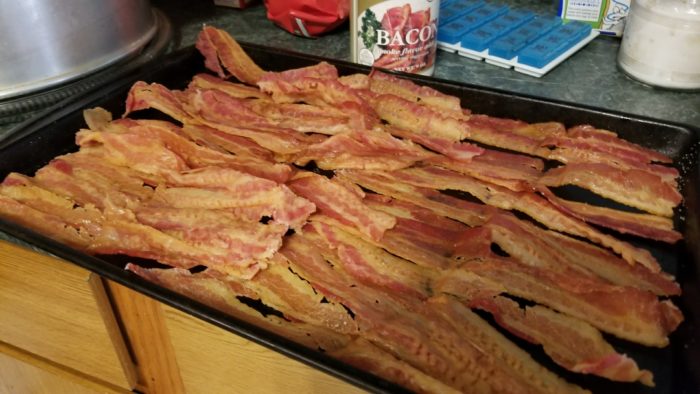
    I prefer my bacon warm so we spread some out on a pan to place in the oven. There is a lot of bacon in that can. The picture above does NOT represent all of the bacon. There was some still in the wax paper.

    Yoders Bacon is not very thick so while heating some care must be taken to not burn it.

    Shelf life is claimed to be upwards of 10 years. I would assume storage methods would influence this heavily.  Compared to other food storage options for bacon this is excellent.

    RECOMMENDED

    While Yoders Bacon can be found on sale throughout the year the best average price I have found is on Amazon.

    As of this publication:

    1 can Yoders Bacon – $17.00

    3 cans Yoders Bacon – $49.00 [$16.33/can]

    6 cans Yoders Bacon – $88.00 [$14.66/can]

    12 cans(case) Yoders Bacon – $169.00 [$14.08/can]

    bacon, humor, bacon rules,

    Rourke

  • Save Money With This Food Storage Secret

    Save Money With This Food Storage Secret

    Next to firearms food storage is probably the most popular topic on survival and preparedness websites all over the internet. Dehydrated and freeze dried food is highly sought after due to their taste retention and long storage life. While freeze dried food is an excellent option it is extremely expensive compared to other options such as canned goods.

    ENTER: Sam’s Club

    It’s no secret that Sam’s Club carries a variety of food products that are attractive to prepper’s. What is not well known are their tremendous deep discounts on Augason Farm’s products.

    Augason Farm’s has been an industry leader in the preparedness market for over 40 years. They pride themselves on being family-owned providing high quality and delicious food storage solutions.

    Augason Farms, Sam's Club,

    Here are a few examples of the incredible savings at Sam’s Club:

    Augason Farms Lunch & Dinner Pail – Augason Farms price: $79.99 / Sam’s Club: $56.98

    Augason Farms 30-Day Pantry Pack – Augason Farms price: $274.89 / Sam’s Club: $151.98

    Augason Farms Emergency Food Supply Pail – Augason Farms price: $79.99 / Sam’s Club: $66.98

    Augason Farms 30 Day Emergency Food Supply – Augason Farms price: $99.99 / Sam’s Club: $69.98

    ***NOTE: Prices can change at any time at either AugusonFarms.com or SamsClub.com.

    line

    Click HERE to visit Augason Farms and check prices.

    Click HERE to visit Sam’s Club and check prices.

    Click HERE to visit Emergency Essentials and check and compare prices.

    line

    With a Sam’s Club membership these products can be purchased online and most delivered right to your home for free. The cost per serving as well as cost per calorie is simply the cheapest I have been able to find for comparable food products.

    I put together a spreadsheet that has several examples of foods with comparisons from AugasonFarms.com and Samsclub.com. Cost per serving and even cost per calorie is displayed. Again – prices were accurate when the information was gathered.

    It truly is a food storage secret that can save preppers a ton of money while building their food supply.

    Rourke

  • REMINDER: Giveaway – 1 Week Food Kit from Valley Food Storage

    REMINDER: Giveaway – 1 Week Food Kit from Valley Food Storage


    ALMOST OVER!!!

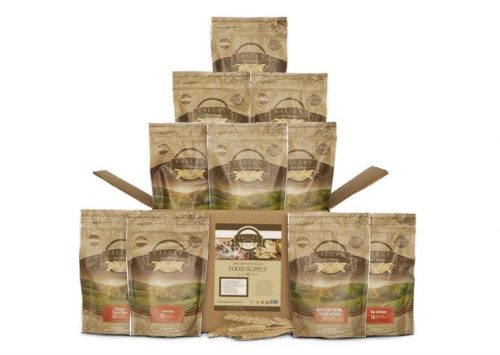
    Through June 30th you can enter to win a Valley Food Storage 1 Week Food Variety Kit.

    To enter simply visit THIS PAGE and sign up as a member of The Patriot Brigade.

    Not only will you get a chance to win the 1 Week Food Variety Kit but you will also receive a FREE pdf copy of my book – A Survival Story.

    1 week food supply, food storage, giveaway, preparedness, prepper

    The winner will be announced July 1st.

    GOOD LUCK!!


  • The Ultimate Bug Out Food Bar

    The Ultimate Bug Out Food Bar


    There is a huge market for specialty food bars made just for survival kits and bug out bags. I’m not talking about those 3,600 calorie bricks of cardboard that will enable you to try out your emergency dental kit. I’m talking high calorie, high protein energy bars that were developed by a Navy Seal and somehow due to the precise ingredient mix allows them to attain a “tactical” level of existence.

    While many of these survival bars are great – they are also expensive and often difficult to find. There are alternatives right around the corner and down the street at the checkout of your local grocery store and corner market. That’s right – the candy bar.

    After taste testing close to a dozen of the top selling candy bars(it’s a tough job but someone has to do it) and evaluating the nutritional and environmental ruggedness of each I came to one conclusion:

    The Payday Peanut Caramel Bar is the ULTIMATE bug out bag food bar.

    So – why does the Payday rank so high?

    While a Snickers bar combines that ultimate combination of chocolate, caramel, nougat, and peanuts the extreme heat sitting in a vehicle trunk will leave that Snickers looking like something created after eating at Taco Bell.

    By the way – what the hell is nougat?

    Anyways – while the Payday will soften inside a hot car it doesn’t become a disaster like any chocolate confection. The combination of peanuts and caramel taste great and provide a very high-calorie protein boost.

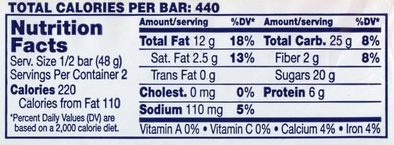
    Here is the nutrient breakdown for the KING SIZE Payday bar:

    In the King Size format, there are two smaller bars in one pack. For the entire 2 bar pack, there are 440 calories, 50 grams of carbs, 24 grams of fat, and 12 grams of protein. For someone expending a lot of energy via walking, running, or physical labor this is some serious fuel.

    Shelf life pales in comparison to many of the more expensive cardboard survival bars. 6 months or so is a good estimate depending on storage conditions. Running less than $2.00 per Payday bar they extremely affordable.

    So – when the asteroids are pummeling through the Earth’s atmosphere and zombies are crossing the railroad tracks to eat your brain and you need some quick energy – make it a Payday.

    Rourke

  • GIVEAWAY: 1 Week Food Kit from Valley Food Storage

    GIVEAWAY: 1 Week Food Kit from Valley Food Storage


    We are hosting a giveaway!!

    Through June 30th you can enter to win a Valley Food Storage 1 Week Food Variety Kit.

    To enter simply visit THIS PAGE and sign up as a member of The Patriot Brigade.

    Not only will you get a chance to win the 1 Week Food Variety Kit but you will also receive a FREE pdf copy of my book – A Survival Story.

    1 week food supply, food storage, giveaway, preparedness, prepper

    The winner will be announced July 1st.

    GOOD LUCK!!


  • 5 Morale Boosting Foods With a Long Shelf Life

    5 Morale Boosting Foods With a Long Shelf Life

    Any high-stress disastrous event will create a definite morale issue for most people. The absence of normal life comforts combined with potential life-altering conditions will wreak havoc on people – especially children. Having as part of any food storage system some specific foods to boost – even just a little – the morale of friends and family is simple and inexpensive.

    Here are 5 morale-boosting foods with a long shelf-life:

    Jelly Beans – Jelly Beans provide an explosive amount of flavors as well as a sugar rush. Shelf Life: 1-2 years.

    M&M’s – Chocolate is one of the most popular comfort foods. M&M’s themselves are a popular favorite. Shelf Life: 1 year

    Starburst – A fruity fix when times are tough? Starburst fit the bill perfectly. Shelf Life: 2-3 years.

    Peppermint Hard Candy – Long lasting with an intense peppermint flavor. Shelf Life: 12-18 months.

    MRE Cakes – Candy is great but MRE cakes will provide a smile when it seems impossible. Shelf Life: up to 7 years.

    It would be recommended to store all of these foods – even the MRE desserts –  in a vacuum sealed bag via a Foodsaver to extend life as far as possible.

    While there is not a food in existence that can fix property destruction and heal wounds – the mental anguish often associated with disasters may be lessened just a bit – with morale boosting foods.

    What’s your favorite?

    Rourke


    line

    Support 1776PatriotUSA in 3 Simple Steps……

    1.  Click on any Amazon link.

    2.  Purchase any item at no additional cost to you.

    3.  Accept my humble “Thank You!”

    Amazon-Logo-schwarz

    Amazon Camping & Hiking

    Amazon Backpacks and Bags

    Amazon Hunting and Fishing

    Amazon Hunting and Survival Knives

    Amazon Tactical and Defense

    Amazon Shooting Supplies

    Amazon Survival & Preparedness Supplies

    line

    Don’t forget to vote for this website over at the Top Prepper Sites. Click HERE to vote.

    vote

      *    *    *    *    *    *    *    *    *    *    *

    Recommended reading for every Patriot? 

    Untitled design (8)

  • Jericho Episode 17 – One Man’s Terrorist

    Jericho Episode 17 – One Man’s Terrorist


    Here is the seventeenth of a weekly installment discussing an episode of the popular TV series – Jericho – which aired originally back in 2006. Every Tuesday night we are watching an episode and then will discuss what happens the following day. It can be watched free on Netflix or purchased on VUDU. Jericho is also available on DVD.

    jerichorecaps_eps17_roger

    Summary:

    Desperation is taking over Jericho as the town discovers the Marines were not real – and no help is coming. The town’s food supply and rations are not lasting. It is determined the refugees have got to go. That news is not taken well and violence ensues.

    Discussion:

    The desperation in the town is overdue – but inevitable. With the average household having approx a week’s worth of food and most stores only three days on the shelves any large emergency will have people hungry in short order. But not us, right? As common sense thinking individuals we prepare by putting back extra. It’s not insanity. It’s not hoarding. It is simply common sense and totally logical.

    Lesson learned for this episode: Keep extra food on hand “just in case”.

    Rourke

    line

    Don’t forget to vote for this website over at the Top Prepper Sites. Click HERE to vote.

    vote

      *    *    *    *    *    *    *    *    *    *    *

    1475722738198768

  • Inexpensive Long Term Food Storage: Canned Goods

    Inexpensive Long Term Food Storage: Canned Goods

    I can’t imagine the incredible amount of food every year that is thrown away because the magical “best buy” or expiration date arrives. It is really a waste. There are many instances where canned foods have been consumed 10 or more years after the expiration date with absolutely zero issues. While I am a big believer in freeze dried foods, rice, and other common foods used for long term storage canned goods should not be ignored.

    A good example of this: A 40 year old can of sweet corn was found in a basement in California and a can of relish was discovered aboard the sunken USS Monitor. The foods in both cases were perfectly edible. In fact – the canned corn was reported to no different than fresh.

    old_cream_corn

    While canned goods hold several negatives compared to freeze dried they remain extremely budget-friendly and tasty with superior choices which to choose.

    Just don’t forget the can opener.

    Rourke

    line

    Item Spotlight:

    KMASHI Portable Power Battery Bank – I have been using one of these for the past several weeks and it works great. Enough capacity to charge my cell phone at least twice – it is great for when a power cord or outlet just isn’t available. Works for pretty much any device that will charge via a USB port.

    powerbank

  • Oxygen Absorber Size and Mylar Bags

    Oxygen Absorber Size and Mylar Bags

    A major part of my food storage program involves storing a variety of foods in sealed mylar bags with oxygen absorber and then placed in 5-gallon buckets. This is an EXTREMELY economical method for storing food.

    I don’t know how many times I have been asked what size oxygen absorber should be used with different sizes of mylar bags. Figured I would go ahead and put this information out there:

    which-oxygen-absorber-to-use

  • From the Desk of John Rourke – November 1st, 2016

    From the Desk of John Rourke – November 1st, 2016


    The situation and tension between Russia and the United States continues to be eventful. Late last week it was reported that on October 17th there was a near miss in Syria where Russian and US military jets had a near collision.  How close? Within a half mile. Might not sound like a big deal but this involves two countries involved on opposite sides of a conflict…..that have massive amounts of nuclear weapons. Any type of direct conflict  – even accidental – would be very dangerous.

    ◊ ◊ ◊ ◊ ◊

    Enjoying the cooler weather as we head into my favorite part of the year. That time between Thanksgiving and Christmas is so special to me. I wish my parents were still alive so I could tell them about all the memories I have from my childhood during this time. They did a great job making my childhood memorable.

    ◊ ◊ ◊ ◊ ◊

    fb_img_1475122207857

    ◊ ◊ ◊ ◊ ◊

    I have been off Facebook for a month or so. Found it was not a valuable use of time and find I really do not miss it. I deactivated my account so I can get back on when I feel like it. Will likely jump back on between Thanksgiving and Christmas.

    ◊ ◊ ◊ ◊ ◊

    Working on a review of the Imalent DN12 1000 Lumen Flashlight. Taking some nighttime pictures right now. One of the most unique flashlights I have ever had. Beyond the powerful 1000 lumen beam the light is dimmable from 1000 lumens all the way down to 1 lumen. I have never seen this before. Pretty cool.

    For $50 it’s a solid piece of equipment.

    ◊ ◊ ◊ ◊ ◊

    Recently heard that over 15% of Venezuelans get part of their diet from the trash dumpster.

    Folks – go to Sam’s or Costco and buy 100 pounds of rice. Today.


    Don’t forget to vote for this website over at the Top Prepper Sites. Click HERE to vote.

    vote


  • LAST CHANCE: Emergency Essentials Massive Mountain House Sale

    LAST CHANCE: Emergency Essentials Massive Mountain House Sale

    As usual Emergency Essentials is having another great monthly sale. October in particular is special as all Mountain House freeze dried foods are discounted up to 50%. With these trying times putting back long term foods is not just important it’s essential. At these fantastic prices improving your food storage is much more affordable.

    Here are a few examples:

    Mountain House® Freeze-Dried Chili Mac with Beef – – $14.99/can

    Mountain House® Ground Beef –  – $36.99/can

    Mountain House® Classic Assortment (12 pouches) – – $68.99

    Mountain House® Beef Stroganoff – – $19.99/can

    Mountain House® Freeze-Dried Scrambled Eggs with Bacon – – $24.79/can

    Mountain House® Freeze-Dried Fuji Cinnamon Apple Slices – – $11.99/can

    Mountain House® Freeze-Dried Chicken Teriyaki – – $19.99/can

    Mountain House® Freeze-Dried Chicken Stew – – $24.99/can

    …….and more!!


    Sale ends on October 31st.

    Rourke

    line

  • How to Can Bacon

    How to Can Bacon

    Rourke: This post was originally published over at SeasonedCitizenPrepper.com. It has since been removed however it’s being preserved here in Projects for your reference. NOTE: The following is NOT the recommended method for canning bacon by the USDA.

    line

    by sevantheart

    You will need:   a large (tall) pressure canner; a rack on feet OR 2 racks and jelly jars with caps and rings;  quart jars with caps and rings, preferably wide-mouth, thick-sliced bacon,  and parchment paper (or paper bags).

    Get lots of parchment paper; I buy mine in rolls at Sam’s – much cheaper this way.

    Get your jars ready –  quarts will work best for this project, and wide-mouth will be easier to fill than regular mouth jars.

    Remember that canning bacon works best with thick-sliced; most other will disintegrate or turn into a large blob of bacon.

    Cook your bacon in advance (trust me when I say this works better than packing raw bacon, although, you CAN do that, too!). I microwave ours; but, cook it until it’s “crispy” (or, however you like it cooked). You will have to cook it up again to crisp it again when you open the jars, but, that won’t take much “cooking” when you pack it cooked.

    Tear off a strip of parchment paper to hold about 8 slices, rolled up; if you get it too short, it doesn’t matter; you’ll just pull off another piece of parchment and keep going. Parchment paper cans just fine; don’t use wax paper – it does not. You CAN use paper bags, if necessary, but, parchment paper works best.

    bacon-is-the-answer-4

    Roll your bacon, one cooked strip at a time, in parchment, making sure each strip is rolled and protected from the next strip by paper; if the bacon is wrapped meat-to-meat; it will all stick together after processing and cooling, and you will have one big lump of bacon. Good luck getting that out of the jar!

    When you have about 8 strips (you may be able to get more in there!); fold the strips of wrapped bacon in “half”; trim the ends of the parchment, leaving about one (1) inch at either end of the bacon (one inch parchment paper hangover on each end).

    GENTLY stuff the folded strips down inside your jars. This is where you will understand why I tell you wide-mouth is best here. You CAN use regular mouth, but, GENTLY work it down, using a spatula, or some such tool. And try not to mutter to yourself too much while stuffing regular mouth jars!

    When the jar is filled (it’s o.k. if it’s not “full-full”, as in there are air spaces – that’s normal for this project), wipe jar openings with hot water. Each jar opening needs to be wiped down with VERY hot water and a fresh paper towel; fat is very easy to transfer. Wear protective insulated rubber gloves for handling the hot paper towels, but use one fresh paper towel per jar.

    Sterilize your caps and place them; sterilize your rings and place them.

    Now, you can process these down in the water, and the result will be “o.k.”. What I find works much better is to DRY CAN THE BACON. This is not running your canner dry – that will ruin your canner; what it means is the jars need to be held ABOVE the water line while processing. (BTW: you can use this method to sterilize tools and instruments, but, that’s another story for another day).

    This is where the height of your canner is important, and thus, a bigger canner works better for this project  – make sure you have three (3) inches of clearance between the top of your bacon jars and the top of your canner, when it is sealed. So, when you put in all your racks and your jelly jars of water, or whatever, then your next rack and the jars of bacon, you need 3 inches of clearance at the top.

    Make sure you have about three (3) inches of water in your canner; you don’t want to run out of water.

    Use a rack with legs that hold the jars above the water line (good luck finding THAT!), or – do this:

    1.  Place one rack in the bottom of the canner, as you always do.

    2.  Fill at least four (4) jelly jars with water and add lids and rings; you can either process good, clean water (not municipal, fluoride, nano-particle drug water!) and store it as sterile water (an excellent prep item – use for cleaning out wounds, etc.), or, just sacrifice a few caps for the sake of the project without saving the water – you can use the same jelly jars of water as many times as you need. Let them cool a little between loads. You’re going to use the jelly jars to build up the height for processing bacon; YOU CAN NOT DO THIS WITH EMPTY JARS – THEY WILL ‘FLOAT”, AND CRACK DURING PROCESSING. You can not process other food in the jelly jars at the same time, as jelly jars are much smaller than quarts; food processed in a jelly jar for that length of time will turn to mush.

    3.  Place jelly jars of water atop first rack that is protecting them from bottom of canner.

    4.  Place a second rack on top of jelly jars – this rack can literally lay across them
    5. Set your quarts of bacon atop this SECOND rack. Check your water in canner – you need three (3) inches of water; if water laps bottom of jars, o.k., but you don’t want them immersed in water.

    6.  Seal your canner and fire her up!

    7. On high heat, build your steam; steam it out for 10 minutes, as always (10 minute tornado from the vent pipe);

    8.  Place your counterweight on the vent pipe; bring to 10 lbs. pressure and process @ 10 lbs. for 90 minutes because we’re doing quarts. After 90 minutes at 10 lbs. pressure, turn off heat if gas, remove from heat if electric.

    9.  Allow to cool naturally; remove jars; if wide-mouth, remember, they don’t make the noise regular mouth make when sealing, and they don’t make the same sound when tapped. NEVER TAP THE CENTER OF THE CAP TO TEST – TAP AROUND THE EDGES.

    10.  When thoroughly cooled, wash your jars of bacon in hot, soapy water (fat everywhere!), rinse in hot water, allow jars to thoroughly dry; mark caps with contents and date and store away.

    To enjoy: it’s already cooked; you could just set it out in the sun and heat it up, or, eat it straight from the jar. But, Yes! It will be greasy (the paper does absorb a lot of the grease). I like to throw it in a pre-heated cast iron skillet and just “re-crisp” it. It doesn’t take long at all!

    This works out great for camping (even though it is in glass). That glass jar comes in handy for storing other leftovers, as well, so, you’ll get more than one use from the jar while traveling.

    It’s also convenient to have pre-cooked bacon at the ready for a quick breakfast, casserole, etc.

    How long is this good? 5-6 years, if you store it out of direct sunlight, and away from heat sources.

    And now you know: how to dry can bacon! If you don’t want to dry can, just use the standard method of one rack sitting in the water; all other instructions do not change.
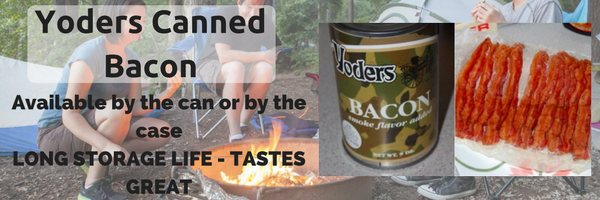
    yoders-canned-bacon

  • Emergency Essentials Massive Mountain House Sale

    Emergency Essentials Massive Mountain House Sale

    As usual Emergency Essentials is having another great monthly sale. October in particular is special as all Mountain House freeze dried foods are discounted up to 50%. With these trying times putting back long term foods is not just important it’s essential. At these fantastic prices improving your food storage is much more affordable.

    Here are a few examples:

    Mountain House® Freeze-Dried Chili Mac with Beef – – $14.99/can

    Mountain House® Ground Beef –  – $36.99/can

    Mountain House® Classic Assortment (12 pouches) – – $68.99

    Mountain House® Beef Stroganoff – – $19.99/can

    Mountain House® Freeze-Dried Scrambled Eggs with Bacon – – $24.79/can

    Mountain House® Freeze-Dried Fuji Cinnamon Apple Slices – – $11.99/can

    Mountain House® Freeze-Dried Chicken Teriyaki – – $19.99/can

    Mountain House® Freeze-Dried Chicken Stew – – $24.99/can

    …….and more!!


    Sale ends on October 31st.

    Rourke

  • MyPatriotSupply.com video ad…..

    MyPatriotSupply.com video ad…..

    Check out this video from MyPatriotSupply.com.  There is a lot of metaphorical meaning represented. I think it’s really well done and is certainly motivational. 

    My Patriot Supply is an official affiliate for this website and I have been a customer for the last 9 months or so. They are also the same company as Patriot Pantry. They have some great sales and email specials.

    Anyways – check out the video.

    Rourke


  • Take Action: Food Storage

    Take Action: Food Storage

    This is the second of a new ongoing series – Take Action – whch will emphasize a very specific action to take based on my recommendations. The recommendation may be due to current events, predictable future events, or just importance for preparation.

    Recommended Action: Secure food supply supply as soon as possible.

    Food. In most any widespread crisis food becomes scarce. Our nations just-in-time delivery system has left stores with very little food in backrooms. Once shelves are cleared out trucks are needed to replenish supplies. Anyone who has witnessed bread and milk shortages as a winter storm approaches understands. With food being of paramount importance to all of our survival stocking up must be a priority.

    With this installment of Take Action it is highly suggested to get your food supply in order. How much? As much as you can put back. It is useless to suggest a 1 year supply if you’re sitting on a couple weeks worth and do not have the finances. Whatever you can afford improve your current position.

    Develop a plan for the next several weeks. Shop sales. Take advantage of coupons. Go to Sam’s or Costco.

    Here is an example:

    Week 1:  Sam’s/Costco

    Rice, 25 lb bag – approx. $9.00

    Bean, Pinto 10 pound bag – approx $6.00

    Pancake Mix, Just Add Water 10 lb. bag – $6.00

    Week 2:  Discount Grocery Store (Aldi’s)

    Corn, 6 cans – $3.00

    Potatoes, 6 cans – $4.50

    Tomatoes, 6 cans – $3.00

    Peaches, 6 cans – $5.60

    Maple Syrup, 2 bottles – $2.00 approx

    Salt, 1 lb. – .49 cents

    Week 3: Grocery Store Sales

    Spaghetti, thin 8 boxes, $5.00

    Spaghetti sauce, 3 cans – $3.00

    Chicken, canned, 6 cans – $10.00

    Peanut butter, jars 2 – $4.00

    Week 4: Wal-Mart

    Beef Stew, 5 cans – $10.00

    Water, cases of 32 bottles, 2 – $7.50

    Soup, canned, 12 cans – $10.00

    Ramen Noodles, 2 cases – $5.75


    This is just an example and not a massive supply of food but a great start or addition to someone’s food stores. We’re talking about less than $30 a week or so.

    Bottom line stock up now. Develop your plan and put it into action.

    Rourke


    Are You Disaster Ready?
     

  • Preparedness Supplies: Emergency Essential July Sale!!

    Preparedness Supplies: Emergency Essential July Sale!!

    Emergency Essentials continues their monthly specials by hosting another fantastic one for July. 

    Highlighted this month are their usual food storage solutions as well as several water storage and general preparedness deals. Emergency Essentials has been an industry leader for decades and have helped countless thousands prepare for unpredictable times ahead.

    Here are a few of this month’s special sales:

    55 Gallon Water Barrel  SALE: $69.99

    Freeze Dried White Chicken #10 Can  SALE: $33.79 GREAT PRICE!!

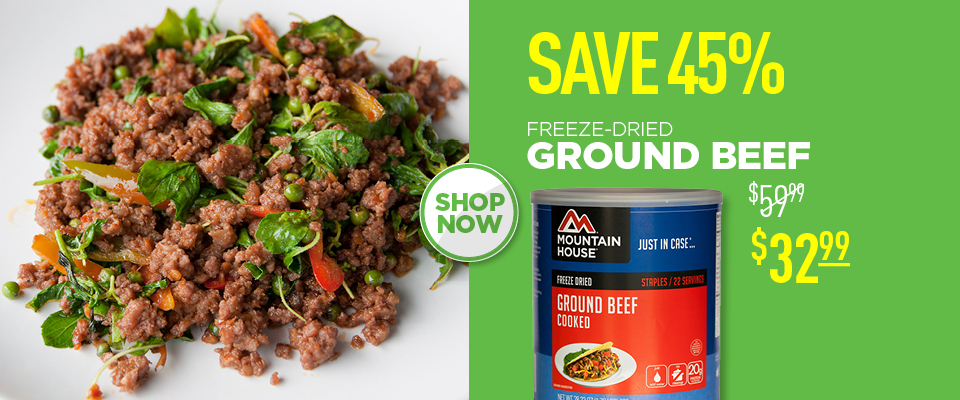
    Mountain House Freeze Dried Ground Beef #10 Can  SALE: $32.99

    Peanut Butter Powder  SALE: $15.95

    Scrambled Egg Mix #10 Can  SALE: $27.99

    Mountain House Freeze Dried  Macaroni & Cheese #10 Can  SALE: $18.79

    Premier 4 Person 72 Hour Food Kit  SALE: $114.99

    Goal Zero 7 Solar Kit  SALE: $44.99

    For more information and to see all products on sale click HERE.

    Rourke

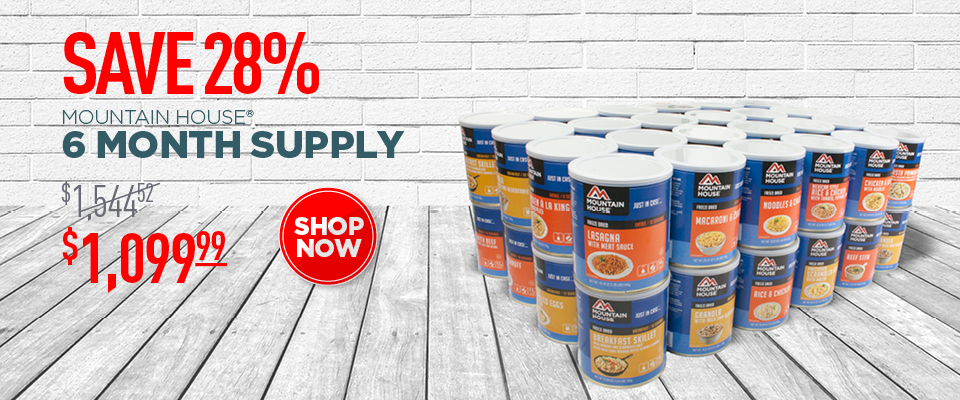
    6-Month-Supply

    Ground_Beef

  • MyPatriotSupply.com Now Supporting 1776PatriotUSA.com

    MyPatriotSupply.com Now Supporting 1776PatriotUSA.com

    1776PatriotUSA.com was just approved as an official affiliate for popular survival & preparedness retailer MyPatriotSupply.com. They are a major supplier of food storage products, long term storage seeds, water filtration, and other survival gear.

    I have been a customer of MyPatriotSupply.com for several months. They frequently advertise great deals and special promotions.

    Here is an excerpt from their website:

    In 2008, My Patriot Supply was born with a passion for helping Americans achieve independence through preparedness and self-reliance.

    As active participants in the preparedness lifestyle, we understand today’s complex concerns and challenges that come with getting prepared, because we’ve been through it.

    We believe that true patriotism is not the expectation that others will care for your needs but that freedom comes from attaining a certain level of self-reliance.

    webslide_1776

    I have called in orders on a few occasions and the salespeople were very friendly, knowledgable, and low pressure.

    Excellent selection, great prices, and a company who believes in America and the ultimate freedom – self reliance.

    I am very excited to be affiliated with My Patriot Supply.

    For more information – watch the following video and visit MyPatriotSupply.com.

    Rourke


  • The best food for bug out bags

    The best food for bug out bags

    I have messed around a lot with different foods for bug out bags, get home kits, and general backpacking. There are advantages and disadvantages to every type. While there is no one food that will fit everyone’s menu and needs I have come to a conclusion:

    Freeze dried foods are the best foods for bug out bags.

    Here’s why: If someone is bugging out they are likely traveling some distance on foot. Weight is a major factor and that is where freeze dried food really shines. Freeze dried foods are extremely light weight. I can throw in several meal pouches for just a couple poundsThey are also very simple to prepare and are very nutritious. Most of the freeze dried food that I have eaten has tasted no different than regular food although a few samples were on the salty side.

    Drawbacks? They require water to reconstitute and prepare. If you live in a desert this could be a serious dilemma as carrying water is quite a task due to its weight. They also do not provide a ton of calories in the smaller pouch-sized packages. For longer term time periods this could be an issue.

    MRE’s are another option and not a bad one either. Again – weight is the issue at hand as they are on the heavy side. Sure – a few cans of soup can be thrown in a pack as well as a peanut butter and jelly sandwich or twelve but to me freeze dried foods make a lot better choice.

    My favorites:

    Chili Mac

    Lasagna with Meat Sauce

    Chicken Fried Rice

    Scrambled Eggs with Bacon

    Spaghetti with Meat Sauce


    Anyone have a favorite they have tried?

    JR