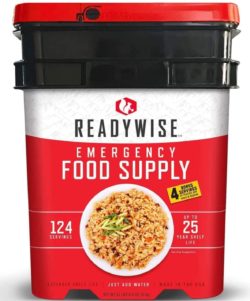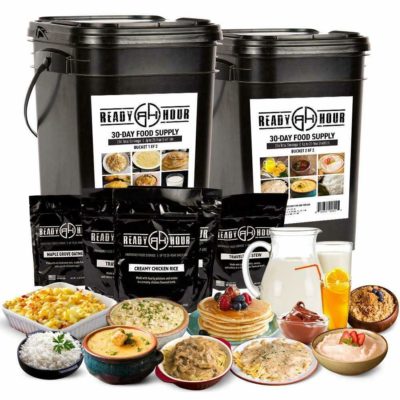
Tag: food storage

  • 5 Morale-Boosting Foods with Long Shelf Life

    5 Morale-Boosting Foods with Long Shelf Life

    In any high-stress situation—whether it’s a natural disaster, extended power outage, or widespread emergency—morale is often one of the first things to suffer. When daily routines vanish and uncertainty creeps in, a little comfort can go a long way, especially for children and those feeling overwhelmed.

    That’s why it’s wise to include a few simple, shelf-stable morale boosters in your food storage. While they won’t solve the bigger problems, a familiar taste or a quick burst of sweetness can lift spirits, spark conversation, or calm nerves during stressful times.

    Even in hard times, a small treat can make a big difference.

    Here are 5 morale-boosting foods that store well and deliver a small spark of joy when it’s needed most:


    1. Jelly Beans
    Colorful, full of flavor, and fun to eat—jelly beans offer a quick sugar rush and a taste of normalcy.
    Shelf Life: 1–2+ years

    2. M&M’s
    Chocolate has a way of bringing comfort, and M&M’s are easy to portion, share, and enjoy.
    Shelf Life: 1-2+ years

    3. Starburst
    These chewy fruit candies pack a punch and can provide a moment of escape during difficult days.
    Shelf Life: 2–3+ years

    4. Peppermint Hard Candy
    Not only do they last a long time, but peppermint candies can soothe an upset stomach and provide a refreshing lift.
    Shelf Life: 24+ months

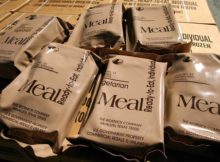
    5. MRE Cakes
    Packaged with shelf life in mind, these compact MRE desserts from military rations can feel like a real treat when options are limited.
    Shelf Life: Up to 7+ years


    Bonus Picks:

    6. Hot Cocoa Mix
    Just add hot water, and you’ve got a warm, soothing drink that feels like home—even when you’re far from it.
    Shelf Life: 1–2+ years (longer if vacuum sealed)

    7. Peanut Butter Cups (Vacuum Sealed)
    A perfect blend of salty and sweet, these can be a small luxury. Vacuum sealing extends freshness significantly.
    Shelf Life: 6–12+ months (longer when stored properly.


    Storage Tip:
    For maximum freshness, consider vacuum sealing these items using a FoodSaver or similar system. Store in a cool, dark place to extend their shelf life. Freezing can also extend storage dramatically.

    While no snack can undo a disaster, a little sweetness or a familiar flavor can remind us that not everything is lost—and that better days still lie ahead.

    What’s your go-to morale booster?

    – Rourke

    line

    Support 1776PatriotUSA in 3 Simple Steps……

    1.  Click on any Amazon link.

    2.  Purchase any item at no additional cost to you.

    3.  Accept my humble “Thank You!”

    Amazon-Logo-schwarz

    Amazon Camping & Hiking

    Amazon Backpacks and Bags

    Amazon Hunting and Fishing

    Amazon Hunting and Survival Knives

    Amazon Tactical and Defense

    Amazon Shooting Supplies

    Amazon Survival & Preparedness Supplies

    line

    Don’t forget to vote for this website over at the Top Prepper Sites. Click HERE to vote.

    vote

      *    *    *    *    *    *    *    *    *    *    *

    Recommended reading for every Patriot? 

    Untitled design (8)

  • Practice and Learn- What I Learned From Preparing Augason Farm 72-Hour Emergency Food Kit

    Practice and Learn- What I Learned From Preparing Augason Farm 72-Hour Emergency Food Kit

    [A Blast from the Past and slightly updated…..Here’s a rare post by The Maine Prepper Girl.] I consider myself a prepper in training. I can remember back in the early 2000’s wanting to be prepared for winter time in Northern Maine. The year after that my awareness for the need to be prepared for other situations grew. It was a sixth sense of sorts that is hard to explain.  Wanting to keep my family safe, I thought about potential situations that I could face and need to be prepared for. Each fall time, without fail, I would feel the need to prepare for the winter ahead.

    Planning for the winter ahead included, stocking up the extra freezer I had in the basement with half of a beef from the local butcher. Furnishing the basement with shelves to put extra canned goods to keep was another. I had a camp stove with some small cans of propane to prepare food. Having extra coolers to keep my food cold and safe outside in a snowbank was also an option for food storage if needed.

    Knowing there was a big hole in my plans because I had no secondary source of heat I needed another plan. Without heat, I would have to go to relatives if that was needed. In retrospect, I would have put in a wood stove in the event of a power outage. I had plenty of wood on my 12 acres and would have kept seasoned wood in the basement for emergencies. 

    Many people in Maine put in secondary sources of heat in their homes but both relied on electricity which made no sense to me. Others had generators which was probably what I would have gone with if I had not sold and moved. I often saw generators used to keep the heat on if nothing else during a power outage in winter. My next home will have a wood stove for sure! 

    Anyway, back to the creamy chicken rice, my point is that being accurately prepared takes a lot more than just buying stuff. Figuring out what works for you in your environment while considering the needs of those around you and other possible needs BEFORE you need them is crucial. I thought Mr. Rourke was silly for wanting to try some of the freeze dried/dehydrated food. Why would we want to waste good food that can be stored long-term? Well, I am glad that in this instance he was correct. (Rourke: She has since learned I’m always right!)

    I learned a few things that I will consider when buying more freeze-dried and dehydrated food.

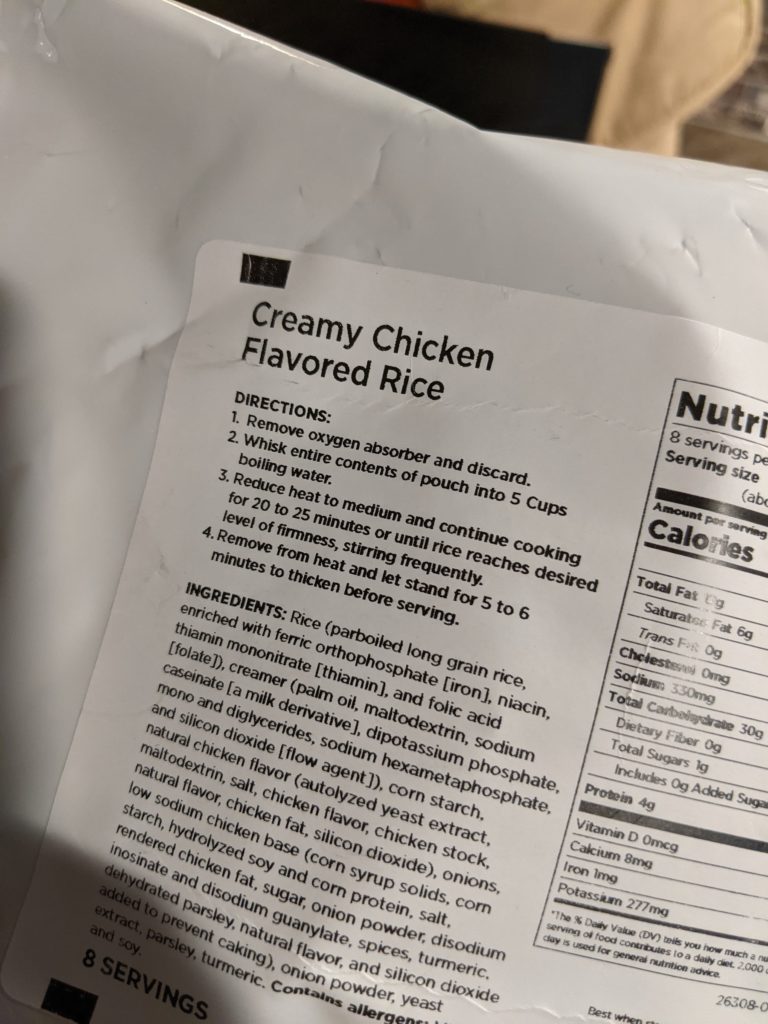
    1. The first thing I learned was how much water you need to make the meals that come in this kit. The creamy chicken flavored rice needed 5 cups of water and a couple of the other meals needed 8 cups and 10 cups.
    2. Another thing I learned when making this side dish was that it could have easily been made into a main dish by adding a can of chicken and/or a can of veggies. The container says it is 8 servings so adding more would either feed more or let you have a bigger portion.
    3. Also worth noting was that a little garlic salt really made a difference in the taste.
    4. The last thing I learned was that although this kit was for 1 person for 72 hours, unless I planned on eating just chicken flavored rice all day, I would need a way of storing the prepared food. You could just make half, but you would still need a way of storing the packet of dried ingredients for another day.  Containers and plastic storage bags would make things easier when trying to store the leftovers.  

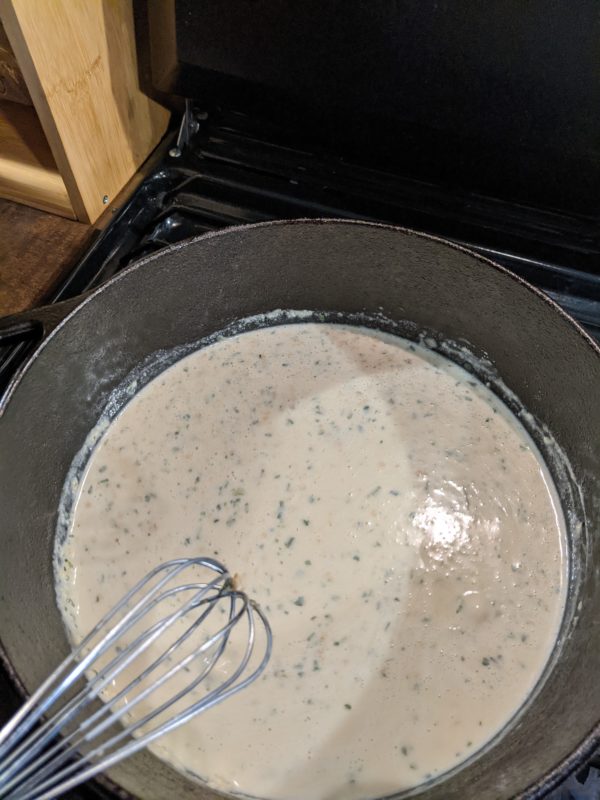
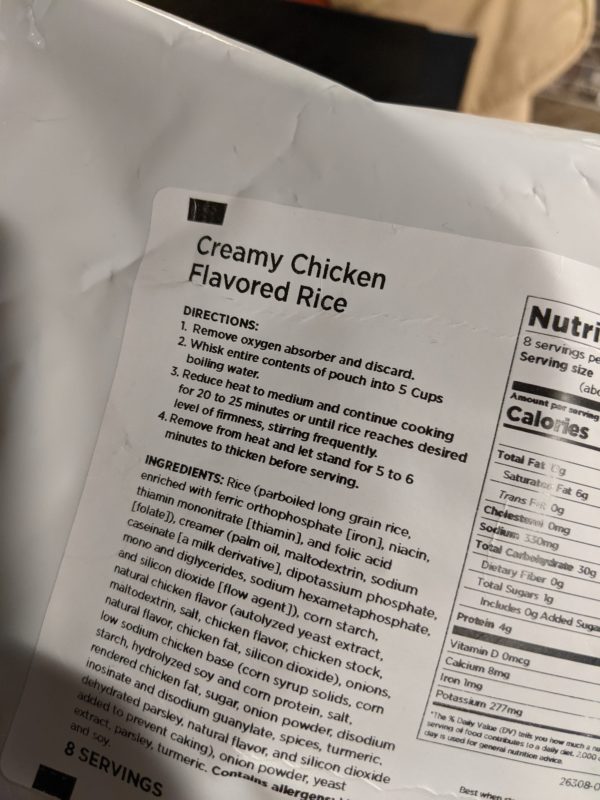
    The Creamy Chicken Flavored Rice was very simple to make. I did have to stand there and stir quite often to prevent clumping but other than that you only need a few things. You will need a pot, a measuring cup, 5 cups of water, and a whisk.

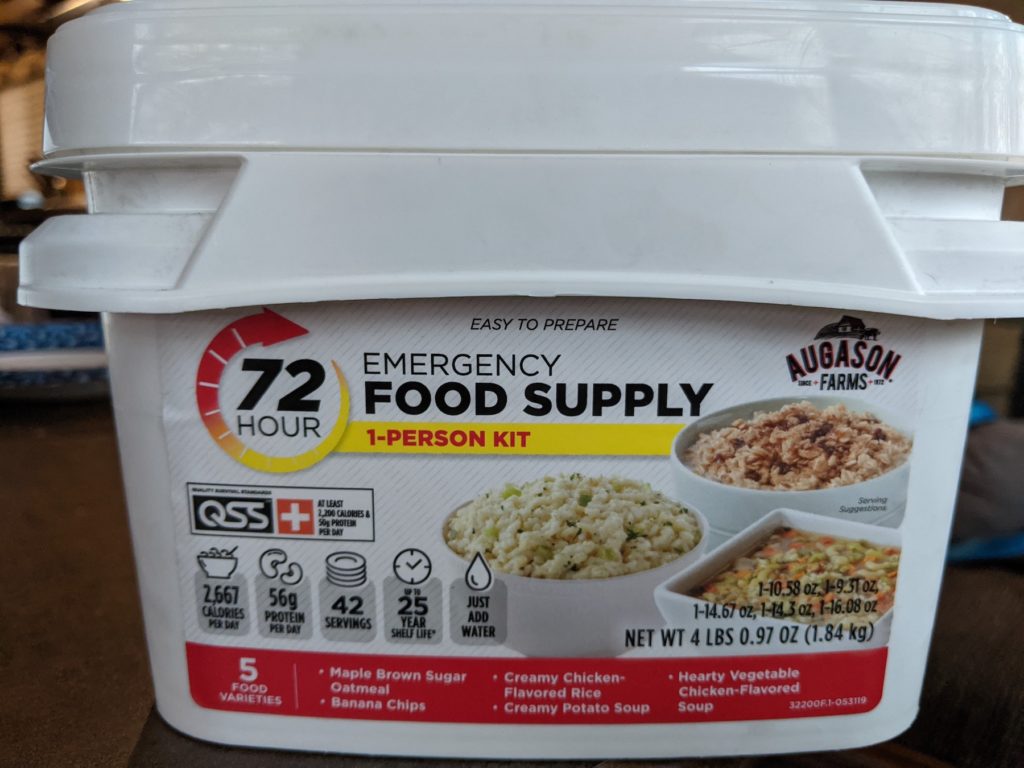
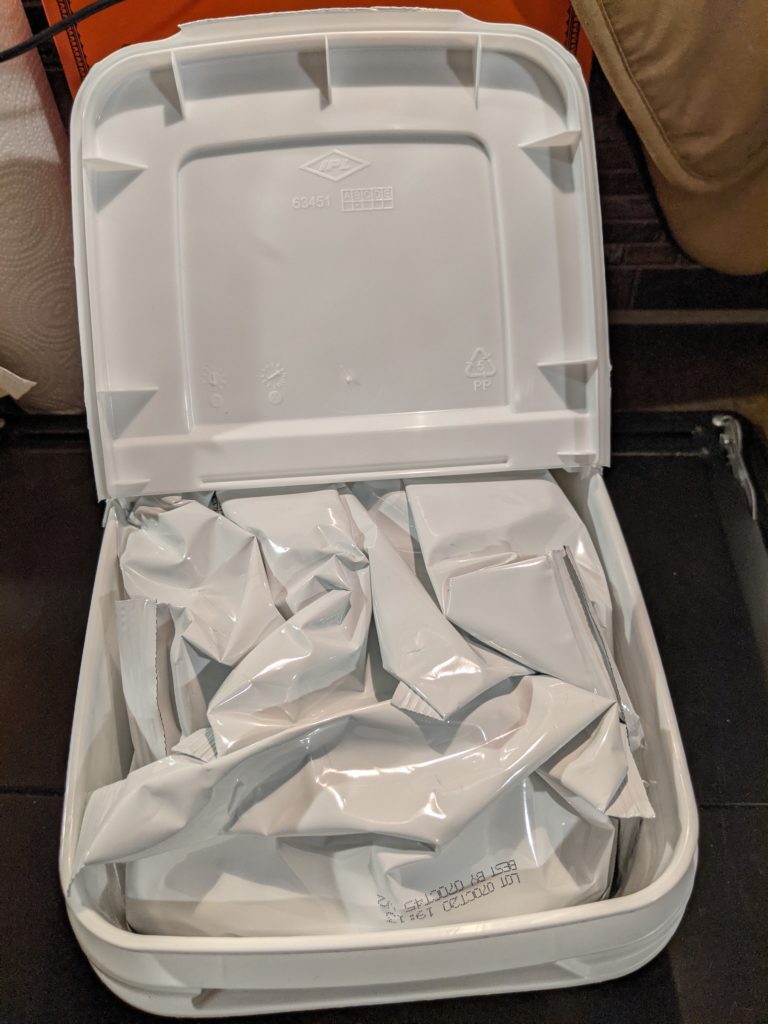
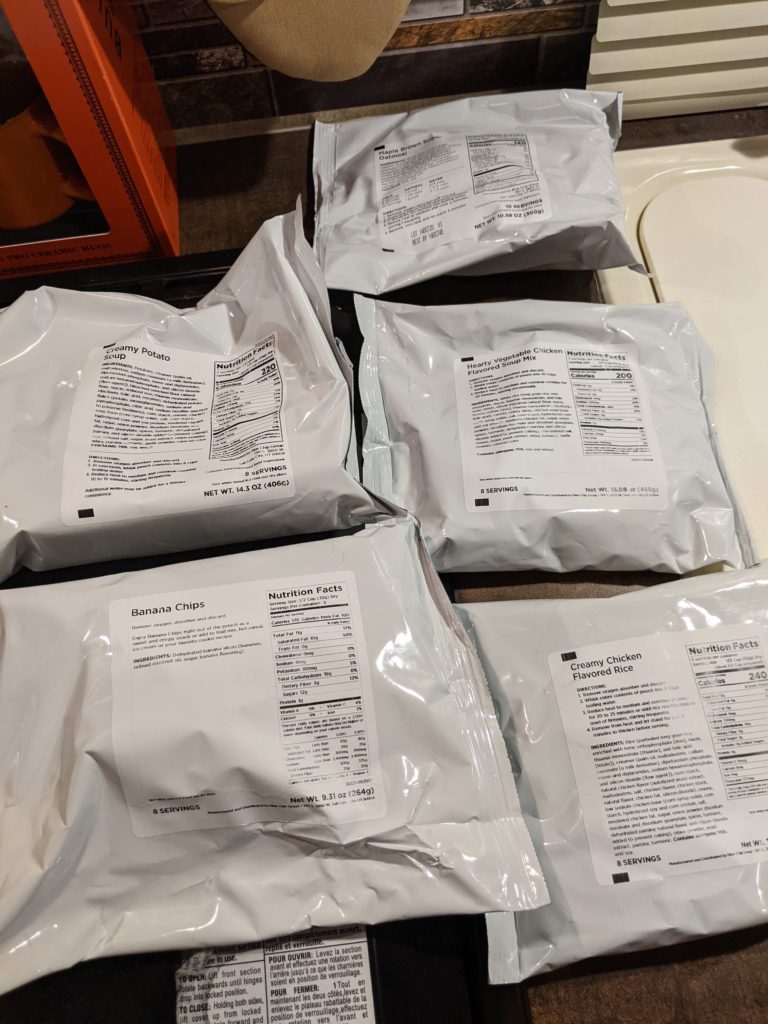
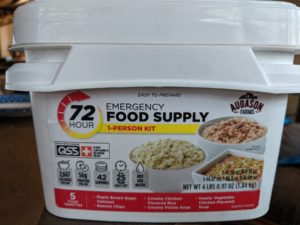
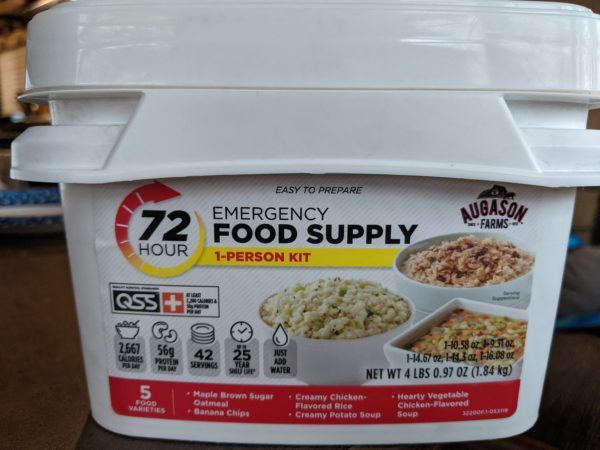
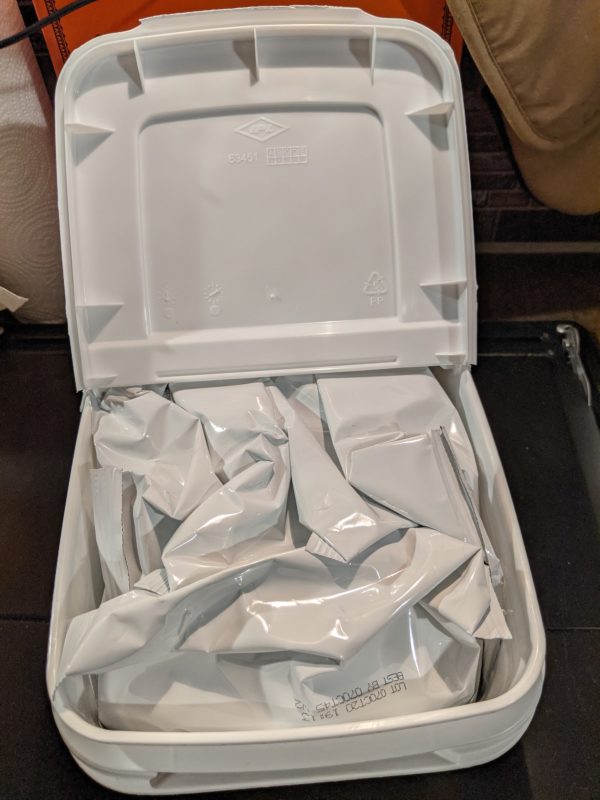
    Here is the container of food, how it looked when we opened it, and all the individual bags that come in it.


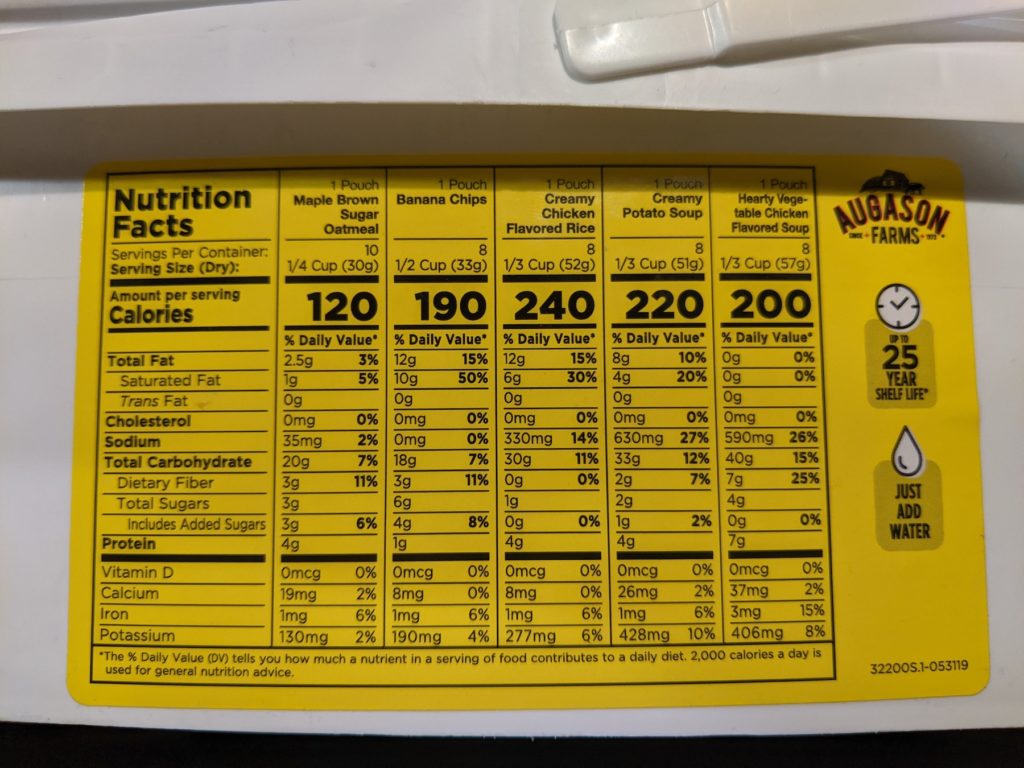
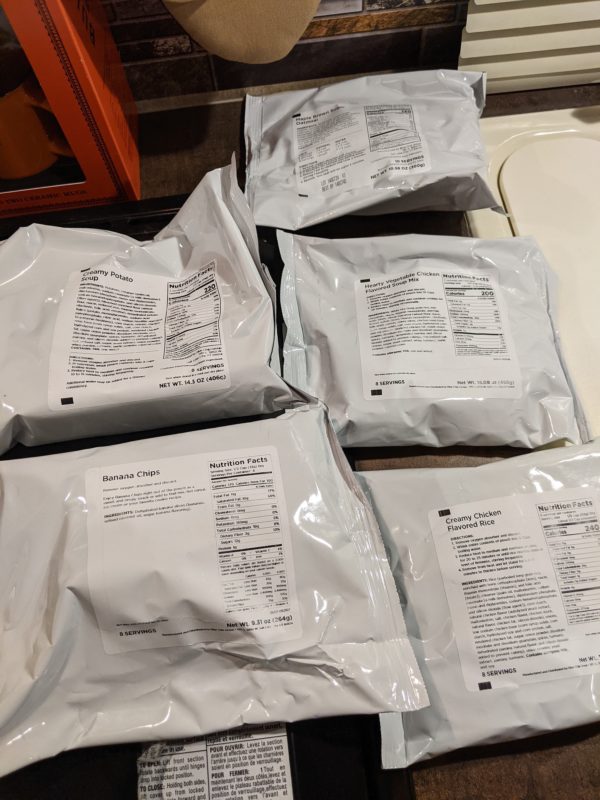
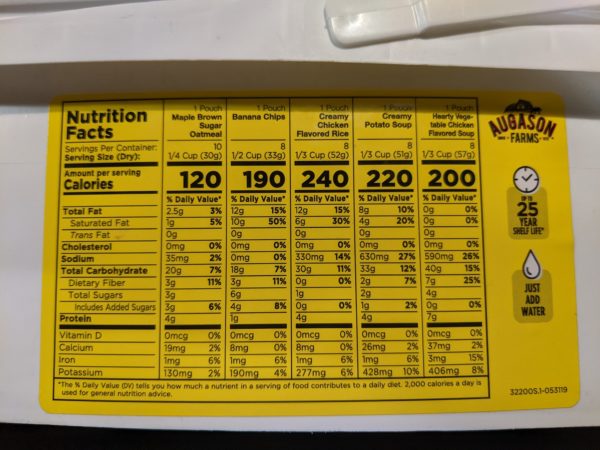
    Here is the nutrition information of all the packages in the 72-hour food supply. We chose to have the Creamy Chicken Flavored Rice. It has 240 calories for 1/3 cup and says it is 8 servings.

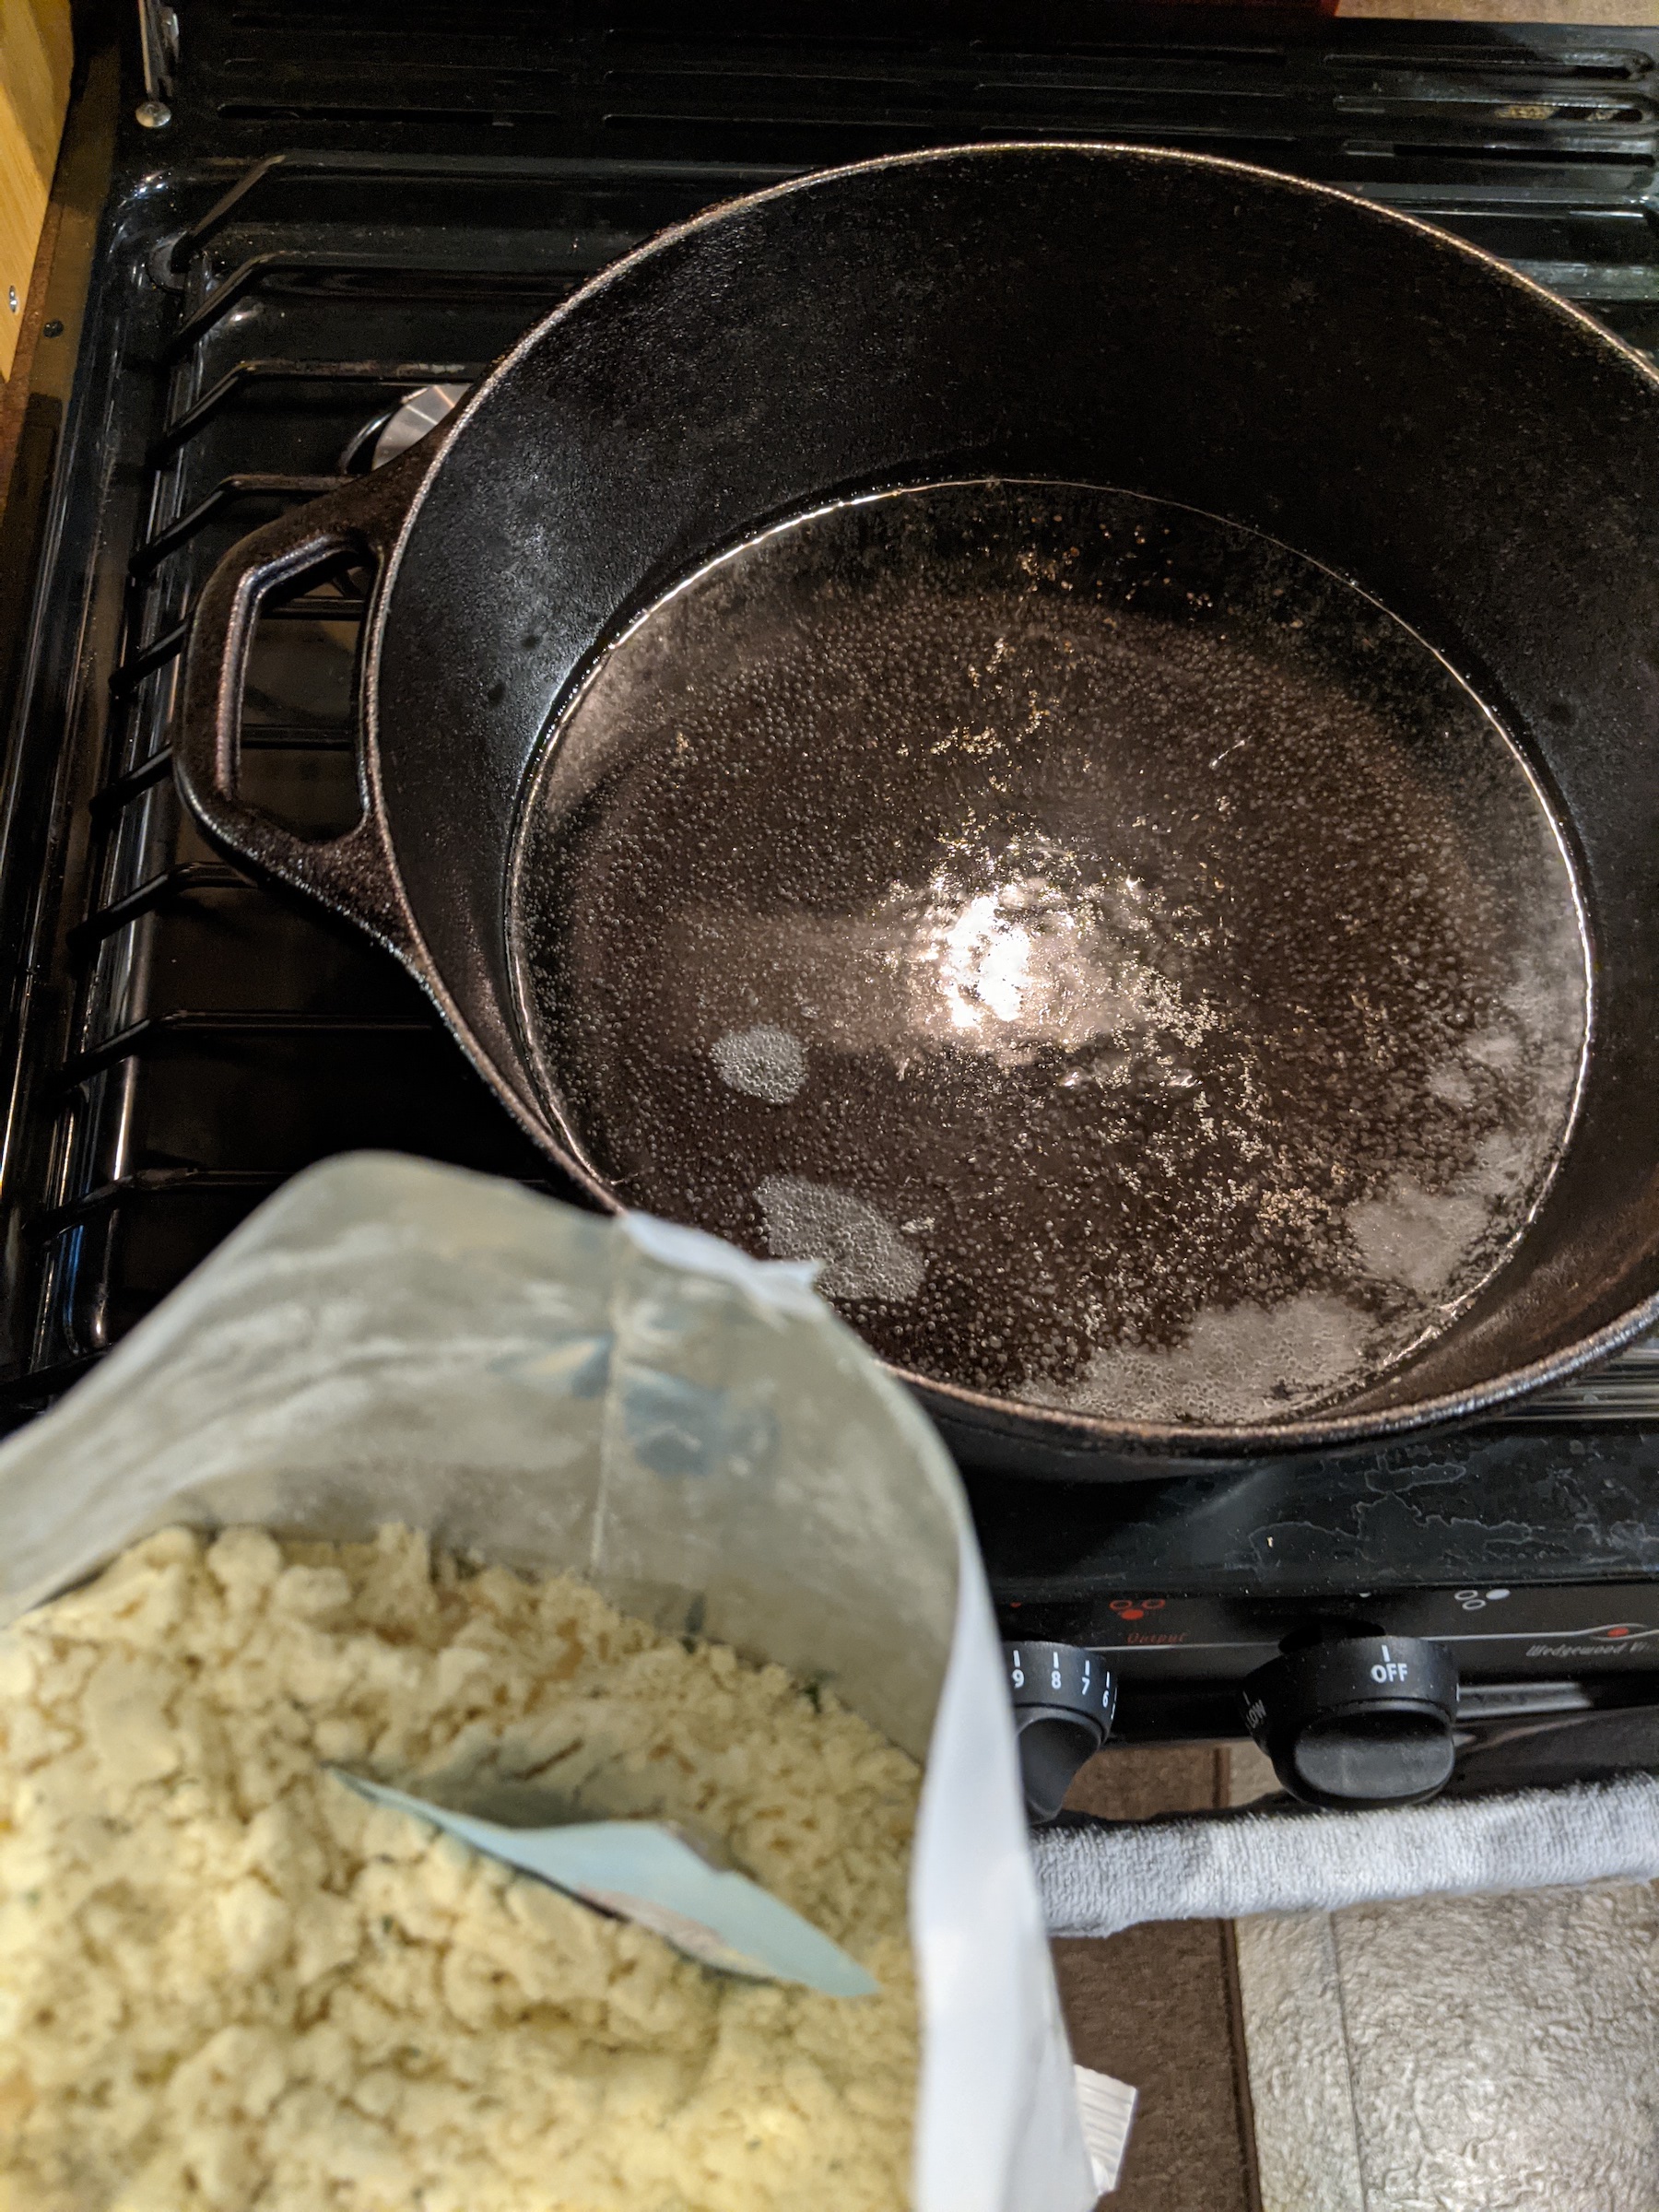
    The only thing we had to do was boil five cups of water and add the contents. 


    As stated previously, I had to tend to the dish by stirring occasionally to prevent any clumping.

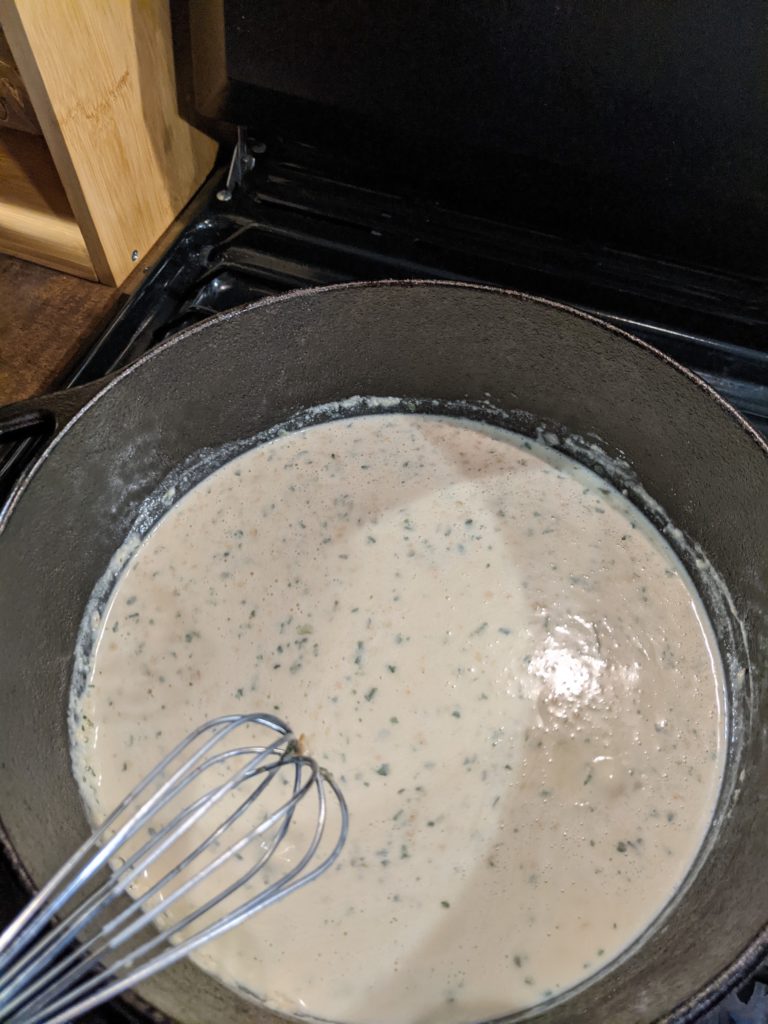
    The final product was very good alone, however, we did add some garlic salt and pepper for a little more flavor. The consistency was a little thicker than what you would expect from a rice dish, but again, very good.


    Anyone have any experience with freeze dried or dehydrated food that you could share? I would love to hear about them!

    To purchase the Augason Farm 72-Hr Emergency Food Kit mentioned in this article, follow THIS LINK. Current price is less than $25 with Free Shipping.

    Maine Prepper Girl

  • The Best Food for Bug Out Bags

    The Best Food for Bug Out Bags

    I have messed around a lot with different foods for bug-out bags, get-home kits, and general backpacking. There are advantages and disadvantages to every type. While there is no one food that will fit everyone’s menu and needs I have come to a conclusion:

    Freeze-dried foods are the best foods for bug-out bags.

    Here’s why: If someone is bugging out they are likely traveling some distance on foot. Weight is a major factor and that is where freeze-dried food really shines. Freeze-dried foods are extremely lightweight. I can throw in several meal pouches for just a couple of pounds. They are also very simple to prepare and are very nutritious. Most of the freeze-dried food that I have eaten has tasted no different than regular food although a few samples were on the salty side.

    Drawbacks? They require water to reconstitute and prepare. If you live in a desert this could be a serious dilemma as carrying water is quite a task due to its weight. They also do not provide a ton of calories in the smaller pouch-sized packages. For longer term time periods this could be an issue.

    MREs are another option and not a bad one either. Again, weight is the issue at hand as they are heavy. Sure – a few cans of soup can be thrown in a pack as well as a peanut butter and jelly sandwich or twelve but to me, freeze-dried foods make a lot better choice.

    My favorites:

    Chili Mac

    Lasagna with Meat Sauce

    Chicken Fried Rice

    Scrambled Eggs with Bacon

    Spaghetti with Meat Sauce

    Now this should be assumed, but, I’ll go ahead and state the obvious: Having a couple of Payday bars or something that requires no preparation should certainly be included on a bug-out bag. Some calories on the go will certainly be needed.

    Anyone have a favorite they have tried?

    JR


    [ecwid_product id=”421553533″ display=”picture title price options addtobag” version=”2″ show_border=”1″ show_price_on_button=”1″ center_align=”0″]


  • The Ultimate Bug Out Food Bar

    The Ultimate Bug Out Food Bar

    bugging out, food, food bar, survival, prepper, preparedness

    There is a huge market for specialty prepper food bars made just for survival kits and bug-out bags. I’m not talking about those 3,600-calorie bricks of cardboard that will enable you to try out your emergency dental kit. I’m talking high calorie, high protein energy bars that were developed by some “Navy Seal” and due to the “precise ingredient mix” allows them to attain a “tactical” level of existence. Yes – a bit of sarcasm thrown in.

    While many of these survival bars are great – they are also expensive and often difficult to find. There are alternatives right around the corner and down the street at the checkout of your local grocery store and corner market. That’s right – the candy bar.

    After taste-testing close to a dozen of the top-selling candy bars(it’s a tough job but someone has to do it) and evaluating the nutritional and environmental ruggedness of each I came to one conclusion:

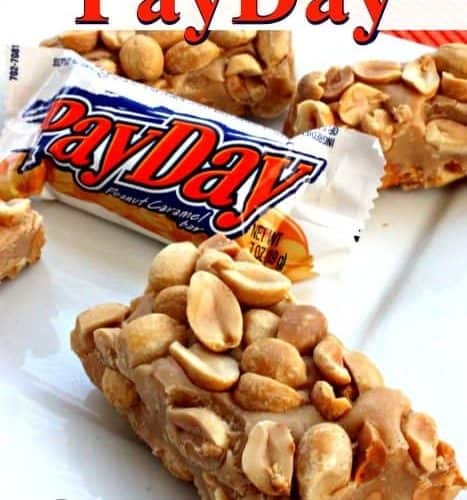
    The Payday Peanut Caramel Bar is the ULTIMATE bug-out bag food bar.

    So – why does the Payday rank so high?

    While a Snickers bar combines that ultimate combination of chocolate, caramel, nougat, and peanuts the extreme heat sitting in a vehicle trunk will leave that Snickers looking like something created after eating at Taco Bell.

    By the way – what the hell is nougat?

    Anyways – while the Payday will soften inside a hot car it doesn’t become a disaster like any chocolate confection. The combination of peanuts and caramel taste great and provide a very high-calorie protein boost.

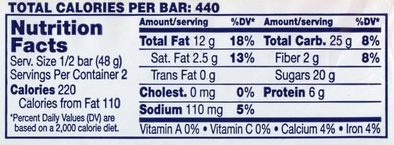
    Here is the nutrient breakdown for the KING SIZE Payday bar:

    In the King Size format, there are two smaller bars in one pack. For the entire 2 bar pack, there are 440 calories, 50 grams of carbs, 24 grams of fat, and 12 grams of protein. For someone expending a lot of energy via walking, running, or physical labor this is some serious fuel.

    Shelf life pales in comparison to many of the more expensive cardboard survival bars. 6-12 months or so is a good estimate depending on storage conditions. Running less than $3.00 per Payday bar they are extremely affordable.

    So – when the asteroids are pummeling through the Earth’s atmosphere and zombies are crossing the railroad tracks to eat your brain and you need some quick energy – make it a Payday.

    Rourke

    tactical, shooting, deals, save money, prepping, ammunition, firearms, daily deals

    [ecwid_product id=”381953032″ display=”picture title price options addtobag” version=”2″ show_border=”1″ show_price_on_button=”1″ center_align=”0″][ecwid_product id=”469631828″ display=”picture title price options addtobag” version=”2″ show_border=”1″ show_price_on_button=”1″ center_align=”0″]

  • Practice and Learn- What I Learned From Preparing Augason Farm Food

    Practice and Learn- What I Learned From Preparing Augason Farm Food

    Augason Farms Creamy Chicken Flavored Rice 

    I consider myself a prepper in training. I can remember back in the early 2000’s wanting to be prepared for wintertime in Northern Maine. The year after that my awareness for the need to be prepared for other situations grew. It was the sixth sense of sorts that is hard to explain.  Wanting to keep my family safe, I thought about potential situations that I could face and need to be prepared for. Each fall time, without fail, I would feel the need to prepare for the winter ahead.

    Planning for the winter ahead included, stocking up the extra freezer I had in the basement with half of a beef from the local butcher. Furnishing the basement with shelves to put extra canned goods to keep was another. I had a camp stove with some small cans of propane to prepare food. Having extra coolers to keep my food cold and safe outside in a snowbank was also an option for food storage if needed.

    Knowing there was a big hole in my plans because I had no secondary source of heat I needed another plan. Without heat, I would have to go to relatives if that was needed. In retrospect, I would have put in a wood stove in the event of a power outage. I had plenty of wood on my 12 acres and would have kept seasoned wood in the basement for emergencies. 

    Many people in Maine put in secondary sources of heat in their homes but both relied on electricity which made no sense to me. Others had generators which was probably what I would have gone with if I had not sold and moved. I ofter saw generators used to keep the heat on if nothing else during a power outage in winter. My next home will have a wood stove for sure! 

    Anyway, back to the creamy chicken rice, my point is that being accurately prepared takes a lot more than just buying stuff. Figuring out what works for you in your environment while considering the needs of those around you and other possible needs BEFORE you need them is crucial. I thought Mr. Rourke was silly for wanting to try some of the freeze-dried food. Why would we want to waste good food that can be stored long-term? Well, I am glad that in this instance he was correct.

    I learned a few things that I will consider when buying more freeze-dried food.

    1. The first thing I learned was how much water you need to make the meals that come in this kit. The creamy chicken-flavored rice needed 5 cups of water and a couple of the other meals needed 8 cups and 10 cups.
    2. Another thing I learned when making this side dish was that it could have easily been made into a main dish by adding a can of chicken and/or a can of veggies. The container says it is 8 servings so adding more would either feed more or let you have a bigger portion.
    3. Also worth noting was that a little garlic salt really made a difference in the taste.
    4. The last thing I learned was that although this kit was for 1 person for 72 hours unless I planned on eating just chicken-flavored rice all day I would need a way of storing the prepared food. You could just make half but you would still need a way of storing the packet of dried ingredients for another day.  Containers and plastic storage bags would make things easier when trying to store the leftovers.  

    The Creamy Chicken Flavored Rice was very simple to make. I did have to stand there and stir quite often to prevent clumping but other than that you only need a few things. You will need a pot, measuring cup, 5 cups of water, and a whisk.

    Here is the container of food, how it looked when we opened it, and all the individual bags that come in it.


    Here is the nutrition information of all the packages in the 72-hour food supply. We chose to have the Creamy Chicken Flavored Rice. It has 240 calories for 1/3 cup and says it is 8 servings.

    The only thing we had to do was boil five cups of boiling water and add the contents. 


    As stated previously I had to tend to the dish by stirring occasionally to prevent any clumping.

    The final product was very good alone, however, we did add some garlic salt and pepper for a little more flavor. The consistency was a little thicker than what you would expect from a rice dish, but again very good.


    Anyone have any experience with freeze-dried or dehydrated food that you could share? I would love to hear about them!

    To purchase the Auguson Farm 72-Hr Emergency Food Kit mentioned in this article follow THIS LINK. The current price is less than $25 with Free Shipping.

    Maine Prepper Girl

  • CanCooker Beef Stew

    CanCooker Beef Stew

    I published this quite some time ago and I love the CanCooker so much that I thought I’d share it once again. There are many new visitors so for those that missed it the first time……

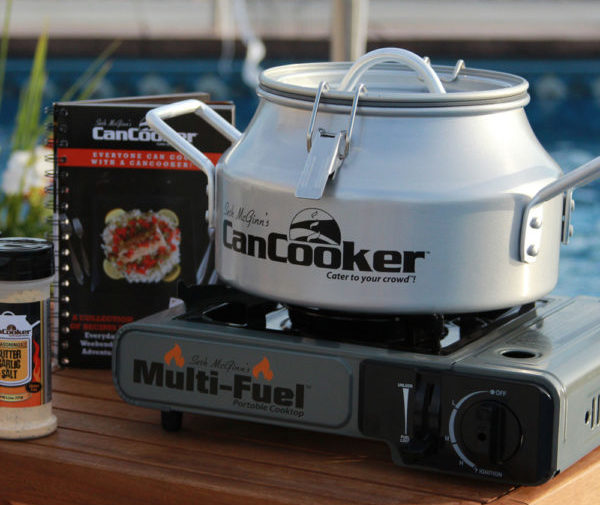
    I got a brand new CanCooker Companion for Christmas. I love to cook and especially love using a crockpot. Although this is not a crockpot in the sense that you can set it and forget it all day, it is however a way to throw everything in one pot with the added bonus of being able to use it on an open fire or grill. In the event of a power outage, it is definitely something you can use to feed your family. It is very similar to an Instapot except it is vented the entire time.

    There are 3 different sizes of the Can Cooker: The Companion which holds 1.5 gallons and feeds 6, the CanCooker Jr is 2 gallons and feeds 8, and the CanCooker Original holds up to 4 gallons and feeds up to 20. They all have a non-stick coating and have a variety of accessories that can be purchased separately. The rack that can be placed on the bottom is the next thing I would like so that I can bake things in my CanCooker. It would make a great Valentine’s Day gift (hint, hint)!

    For my first time using it I chose a fairly easy recipe from the CanCooker website.

    INGREDIENTS:

    • 2 lbs beef, cut into 1-inch pieces
    • 1 lb potatoes, cut into 1-inch pieces
    • 6 oz portobello mushrooms caps, cut into 1-inch pieces
    • 2 medium onions, cut into wedges
    • 2 cups fresh baby carrots
    • 1 (14-oz) can beef broth
    • 1 (14-oz) can diced tomatoes with Italian herbs
    • 1 cup Burgundy or Pinot Noir wine
    • ½ tsp pepper

    DIRECTIONS:

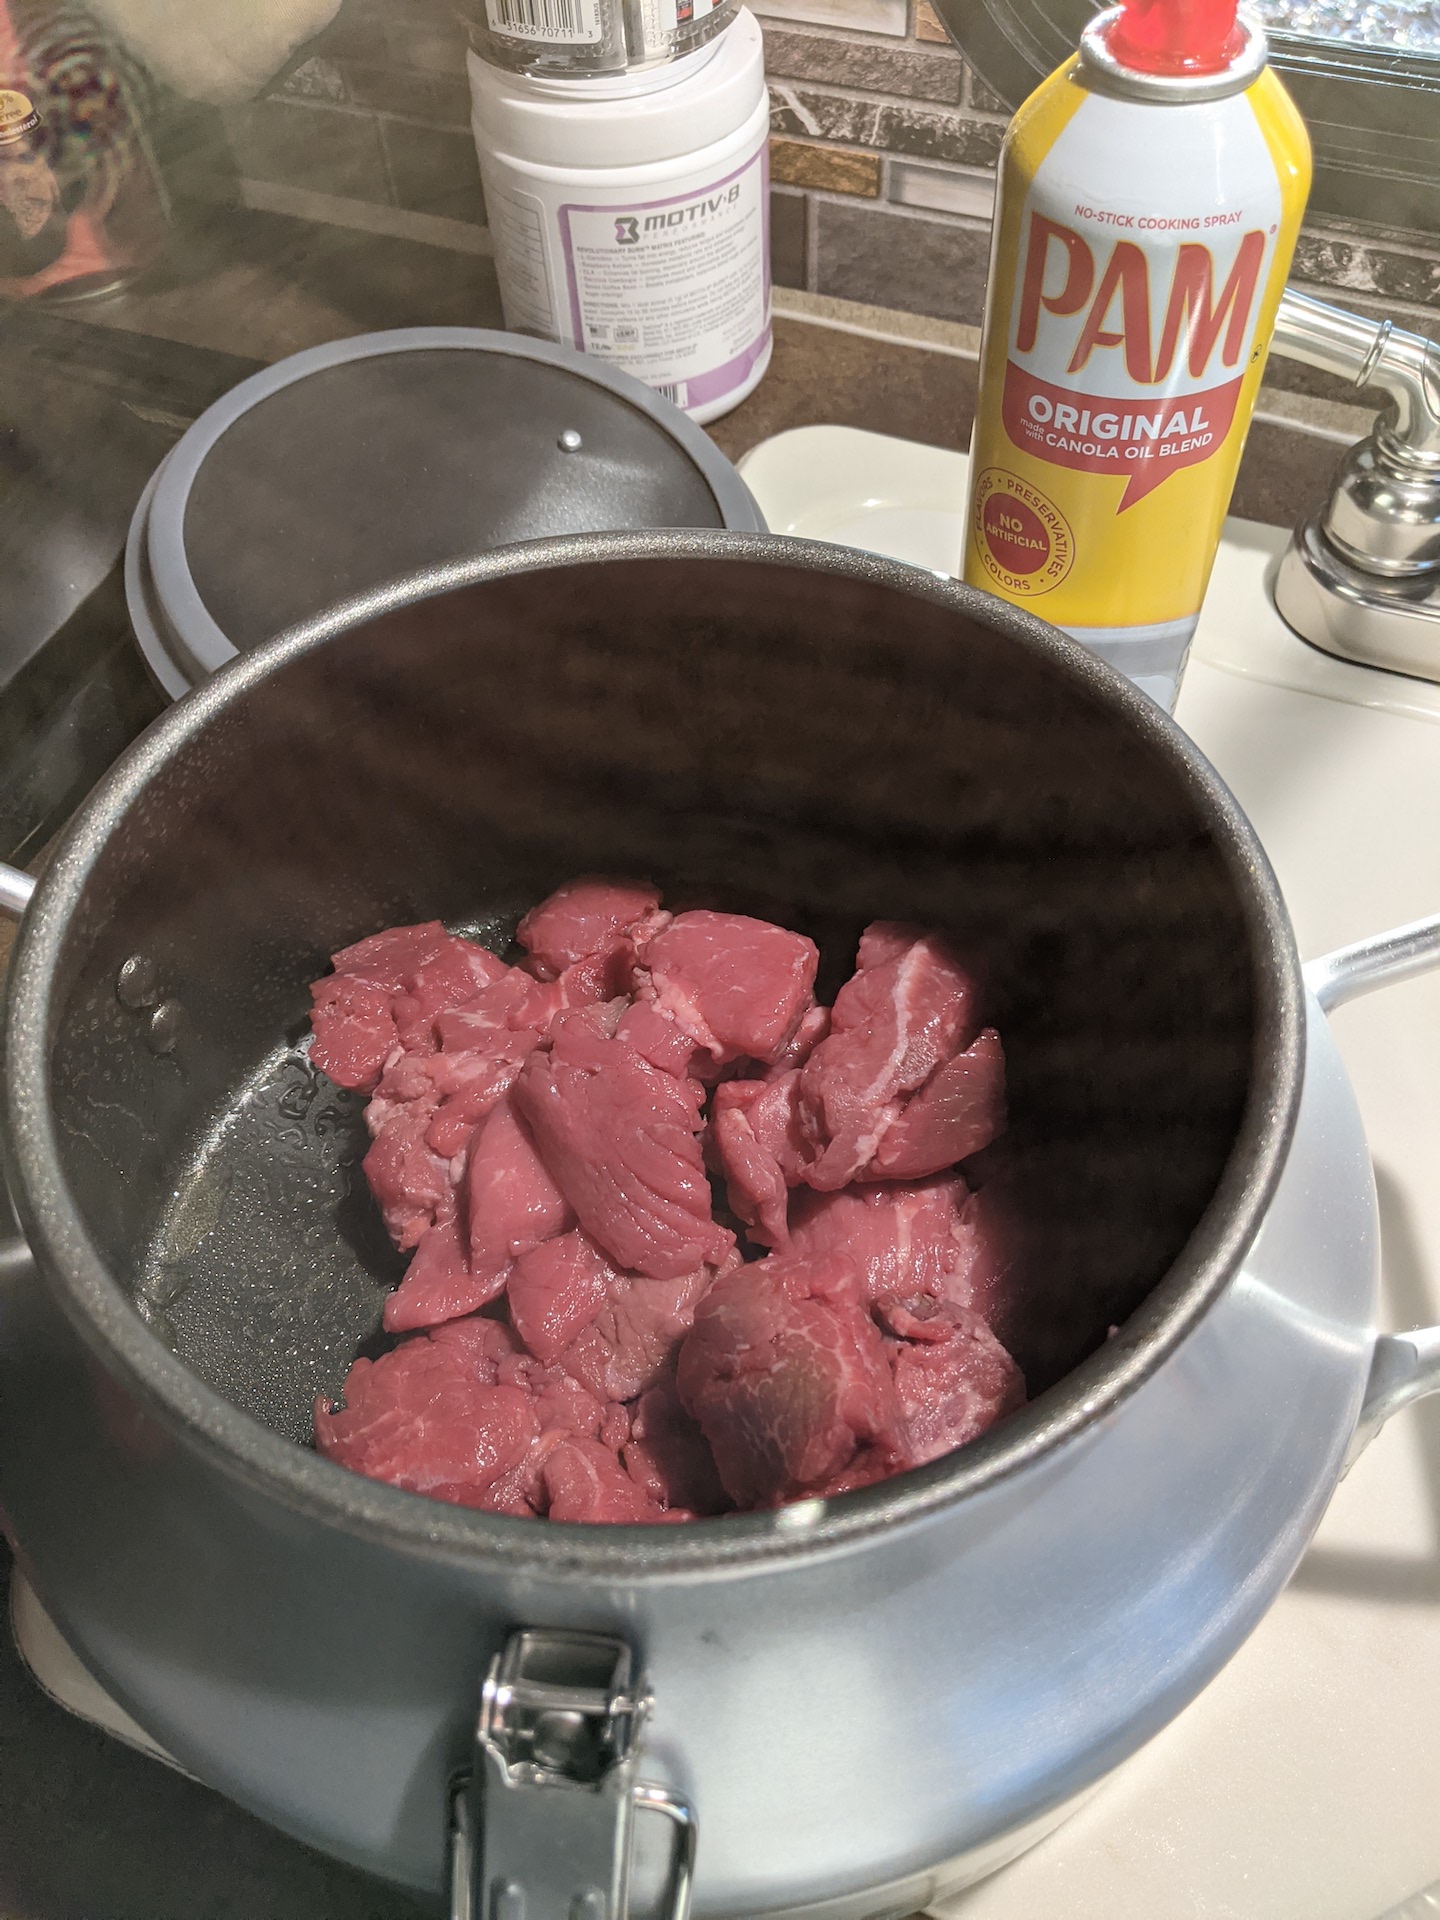
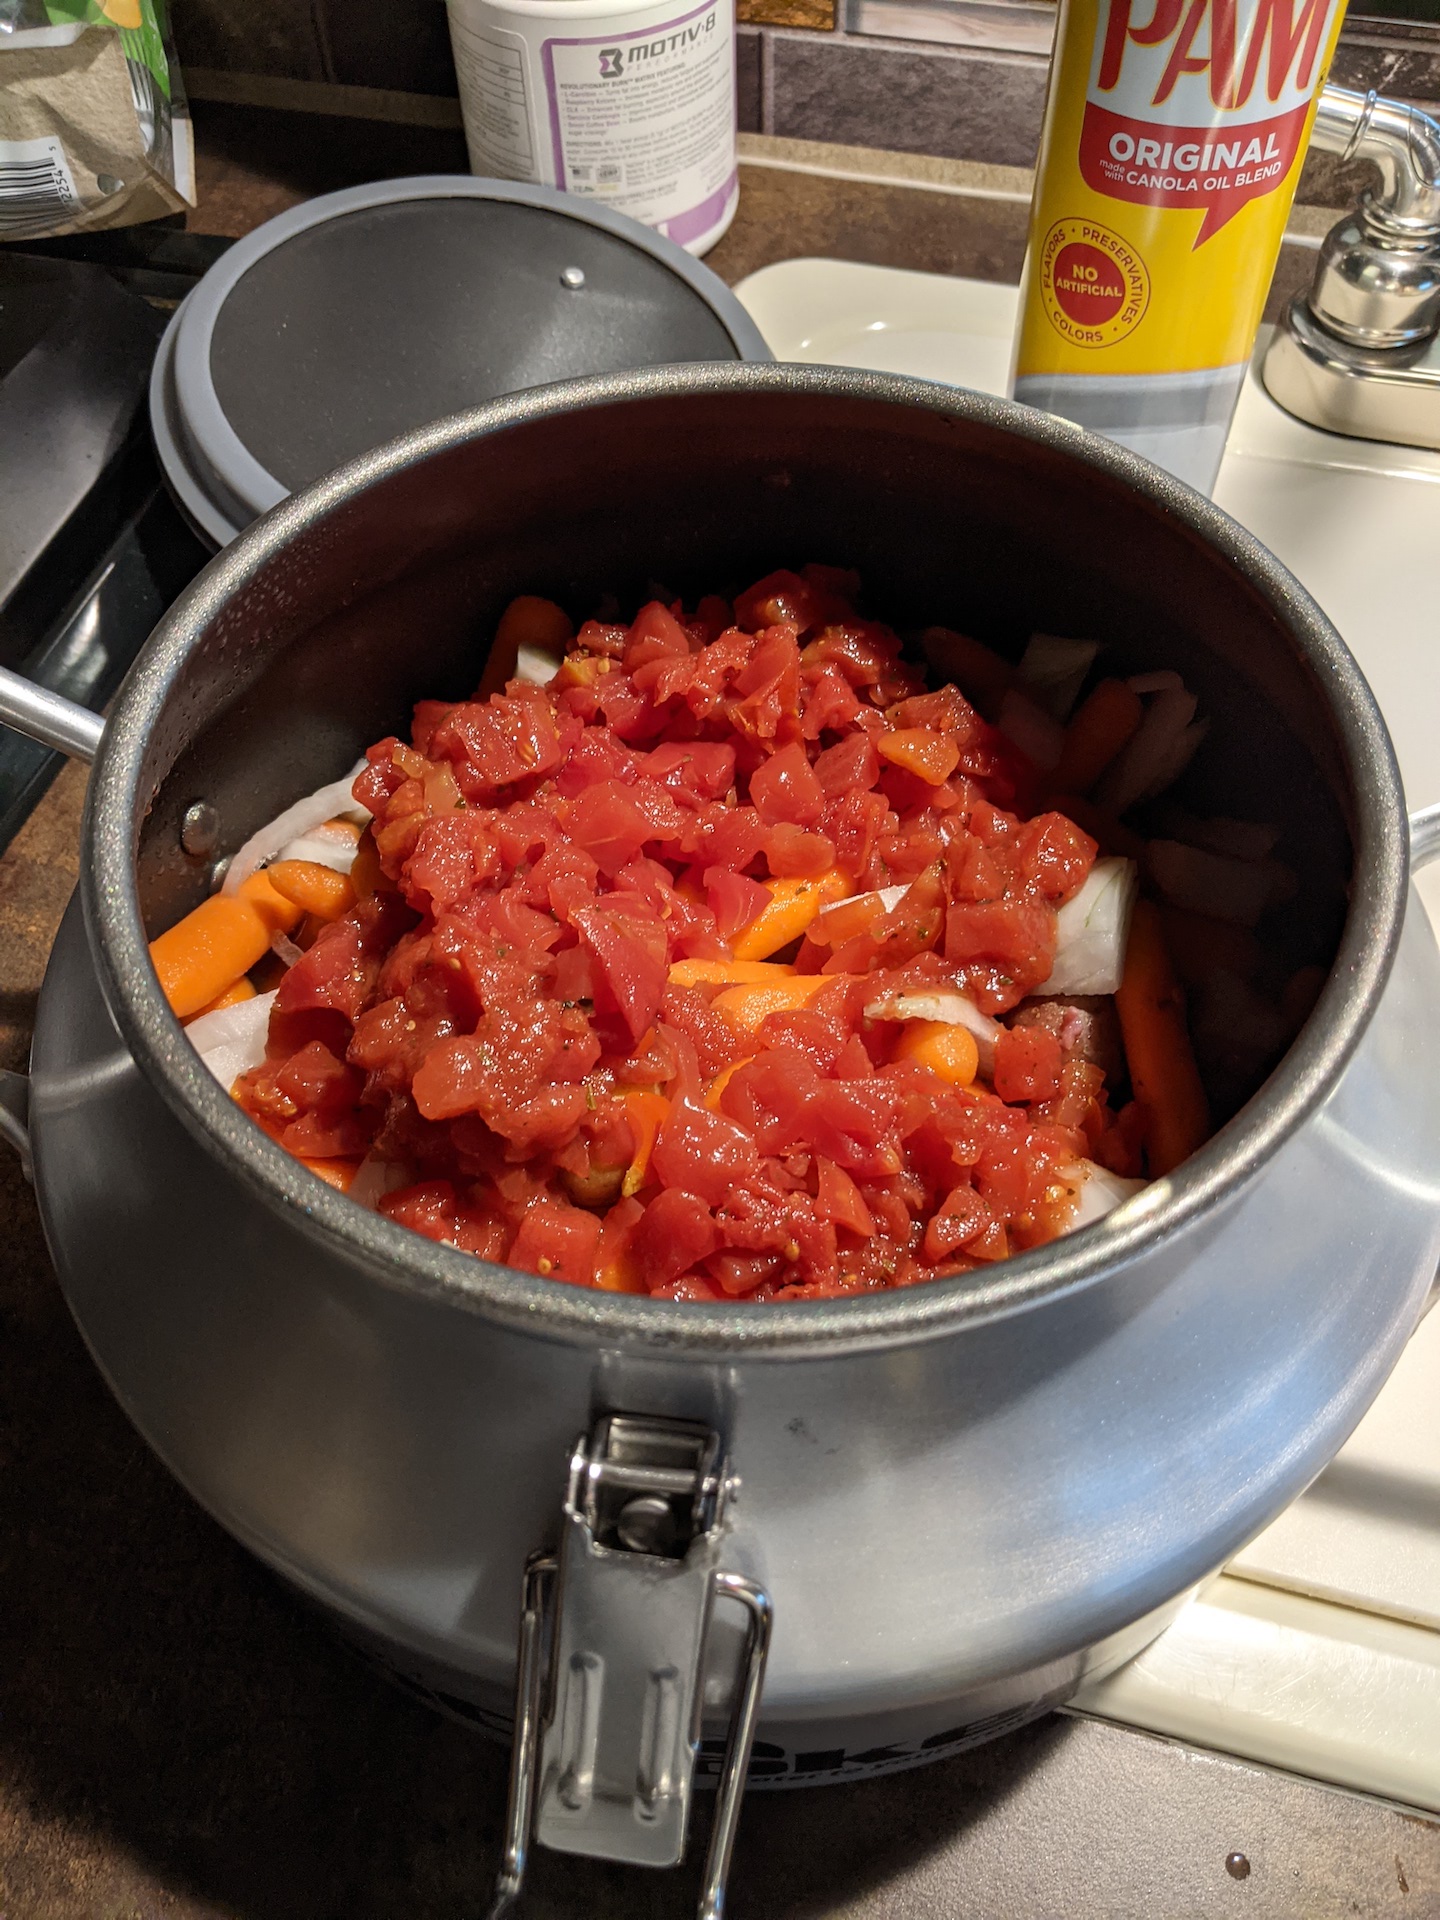
    Spray non-stick cooking spray inside the CanCooker. Add the beef, then the remaining ingredients. Latch lid and cook on medium / low heat for 45 minutes.

    Carefully remove the lid, and let stand for a minute. Stir in a mixture* of water and all-purpose flour to thicken the stew to desired consistency.

    Remove from heat and serve!

    *Mixture to thicken stew: 3 tbsp water and ¼ cup all-purpose flour. 

    Note: You can increase or decrease the amount of ingredients in this recipe but please make sure to use at least 12 oz. of liquid.

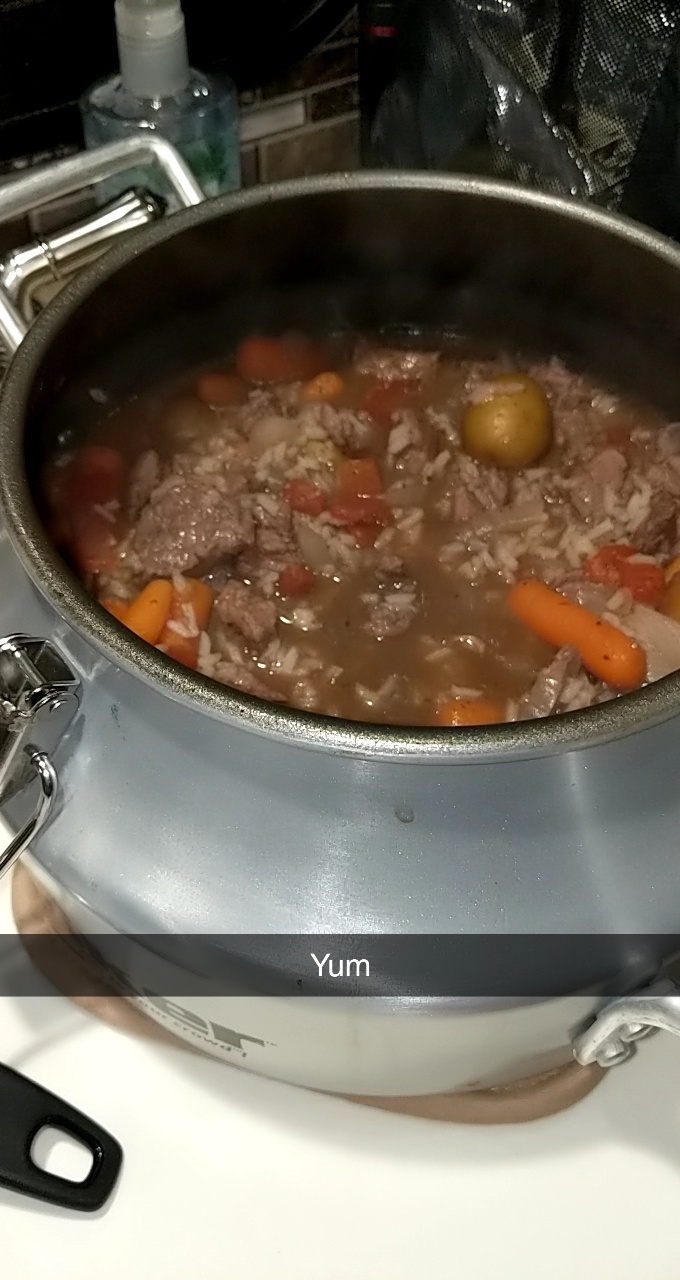
    I did not add the mushrooms ( I am not a picky eater, but those things I cannot stand no matter how many times I try them) and instead of thickening with flour I chose to add 1 cup of rice the last 20 minutes of cooking and it turned out great!

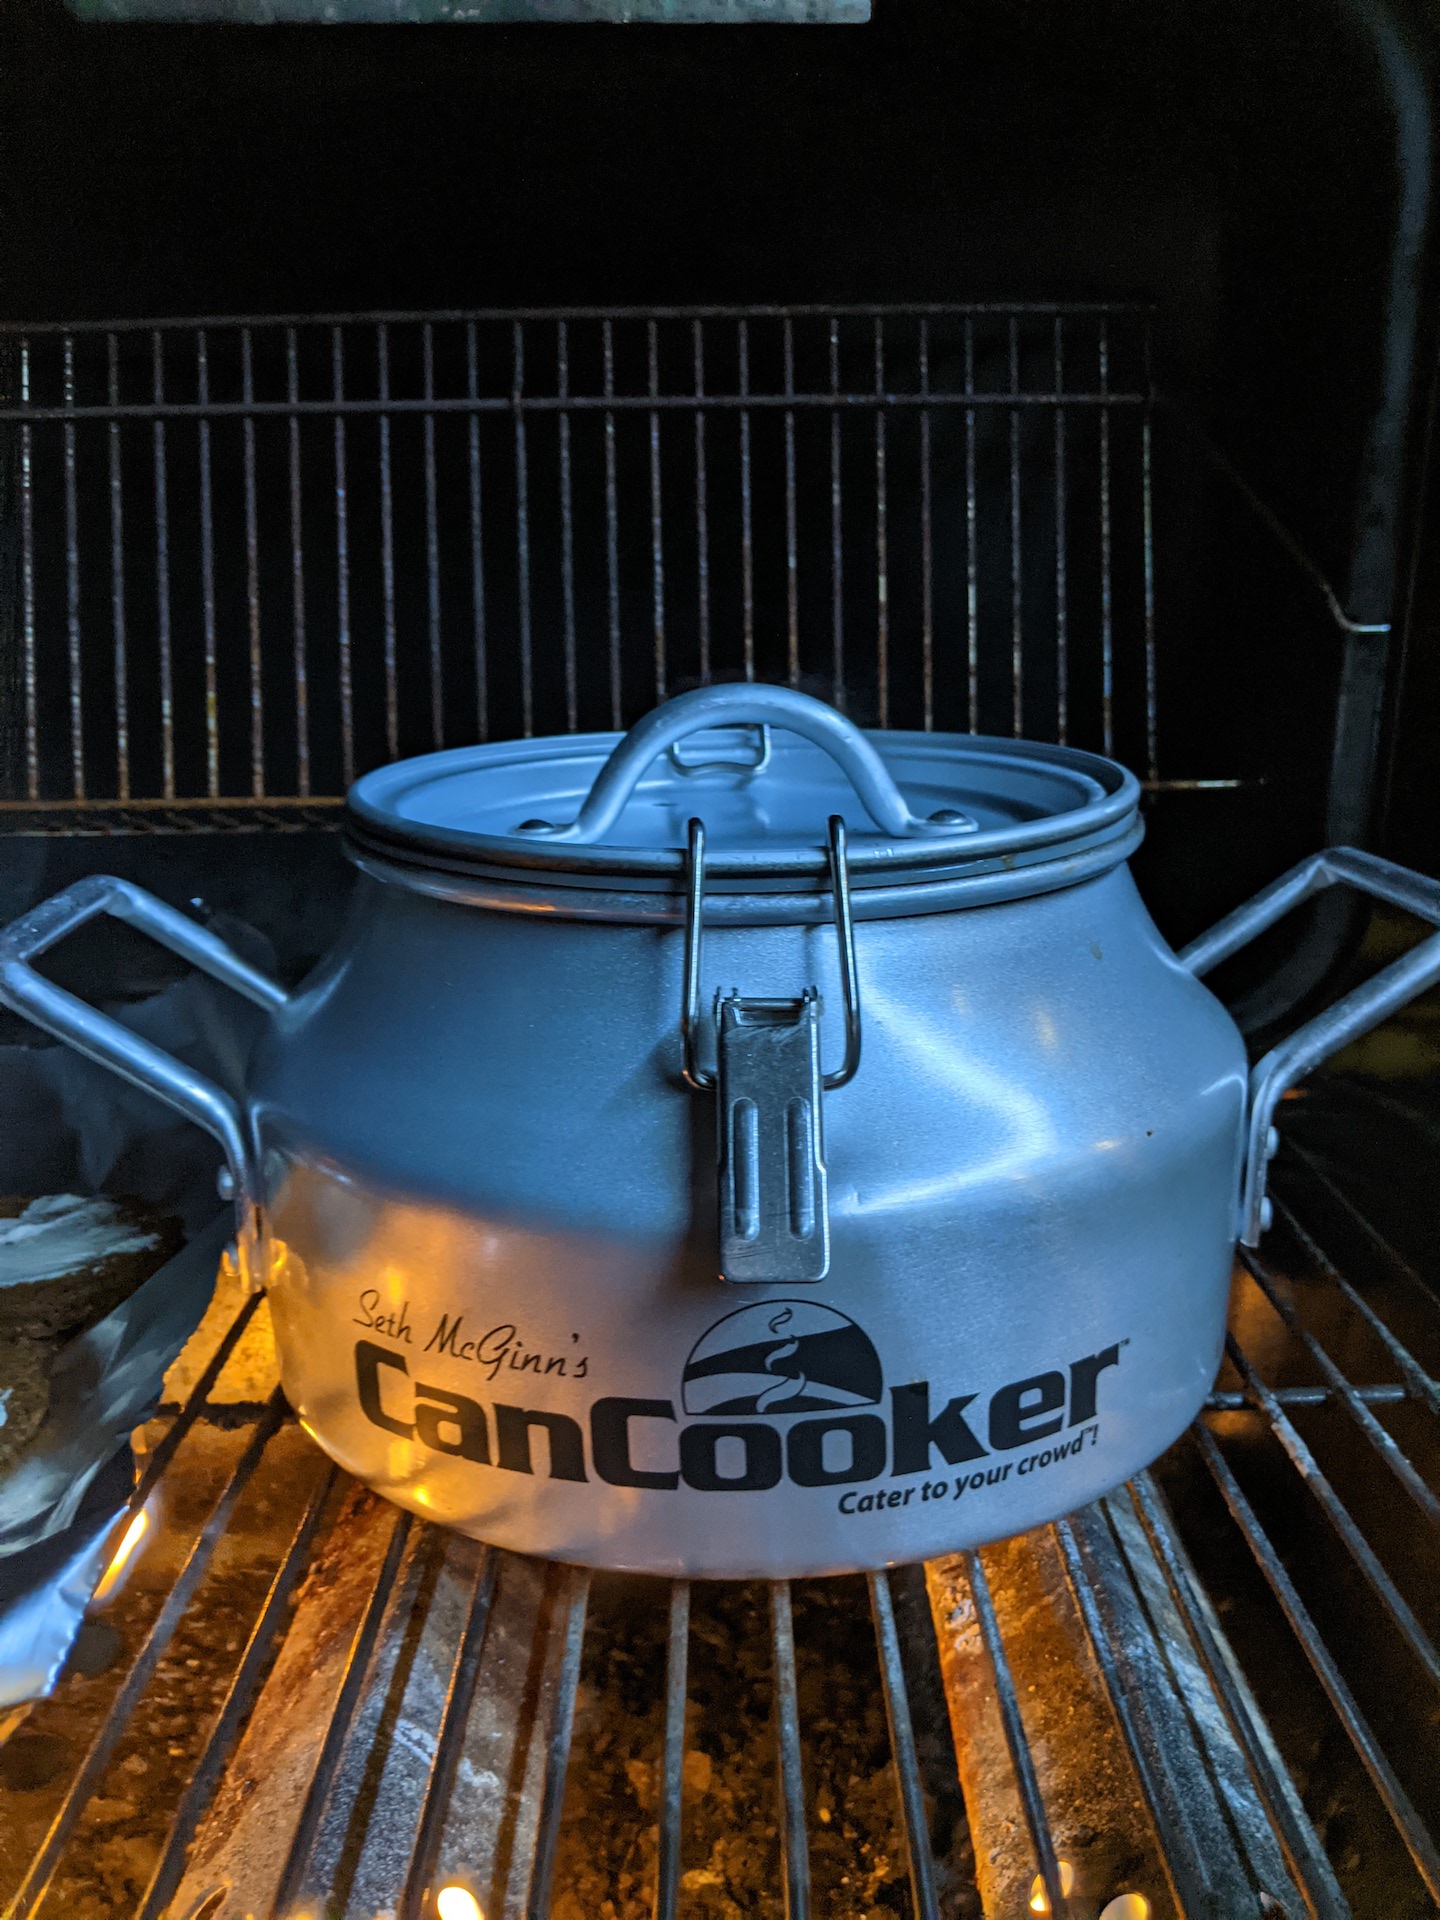
    This was so simple, throw everything in and then on to the grill!

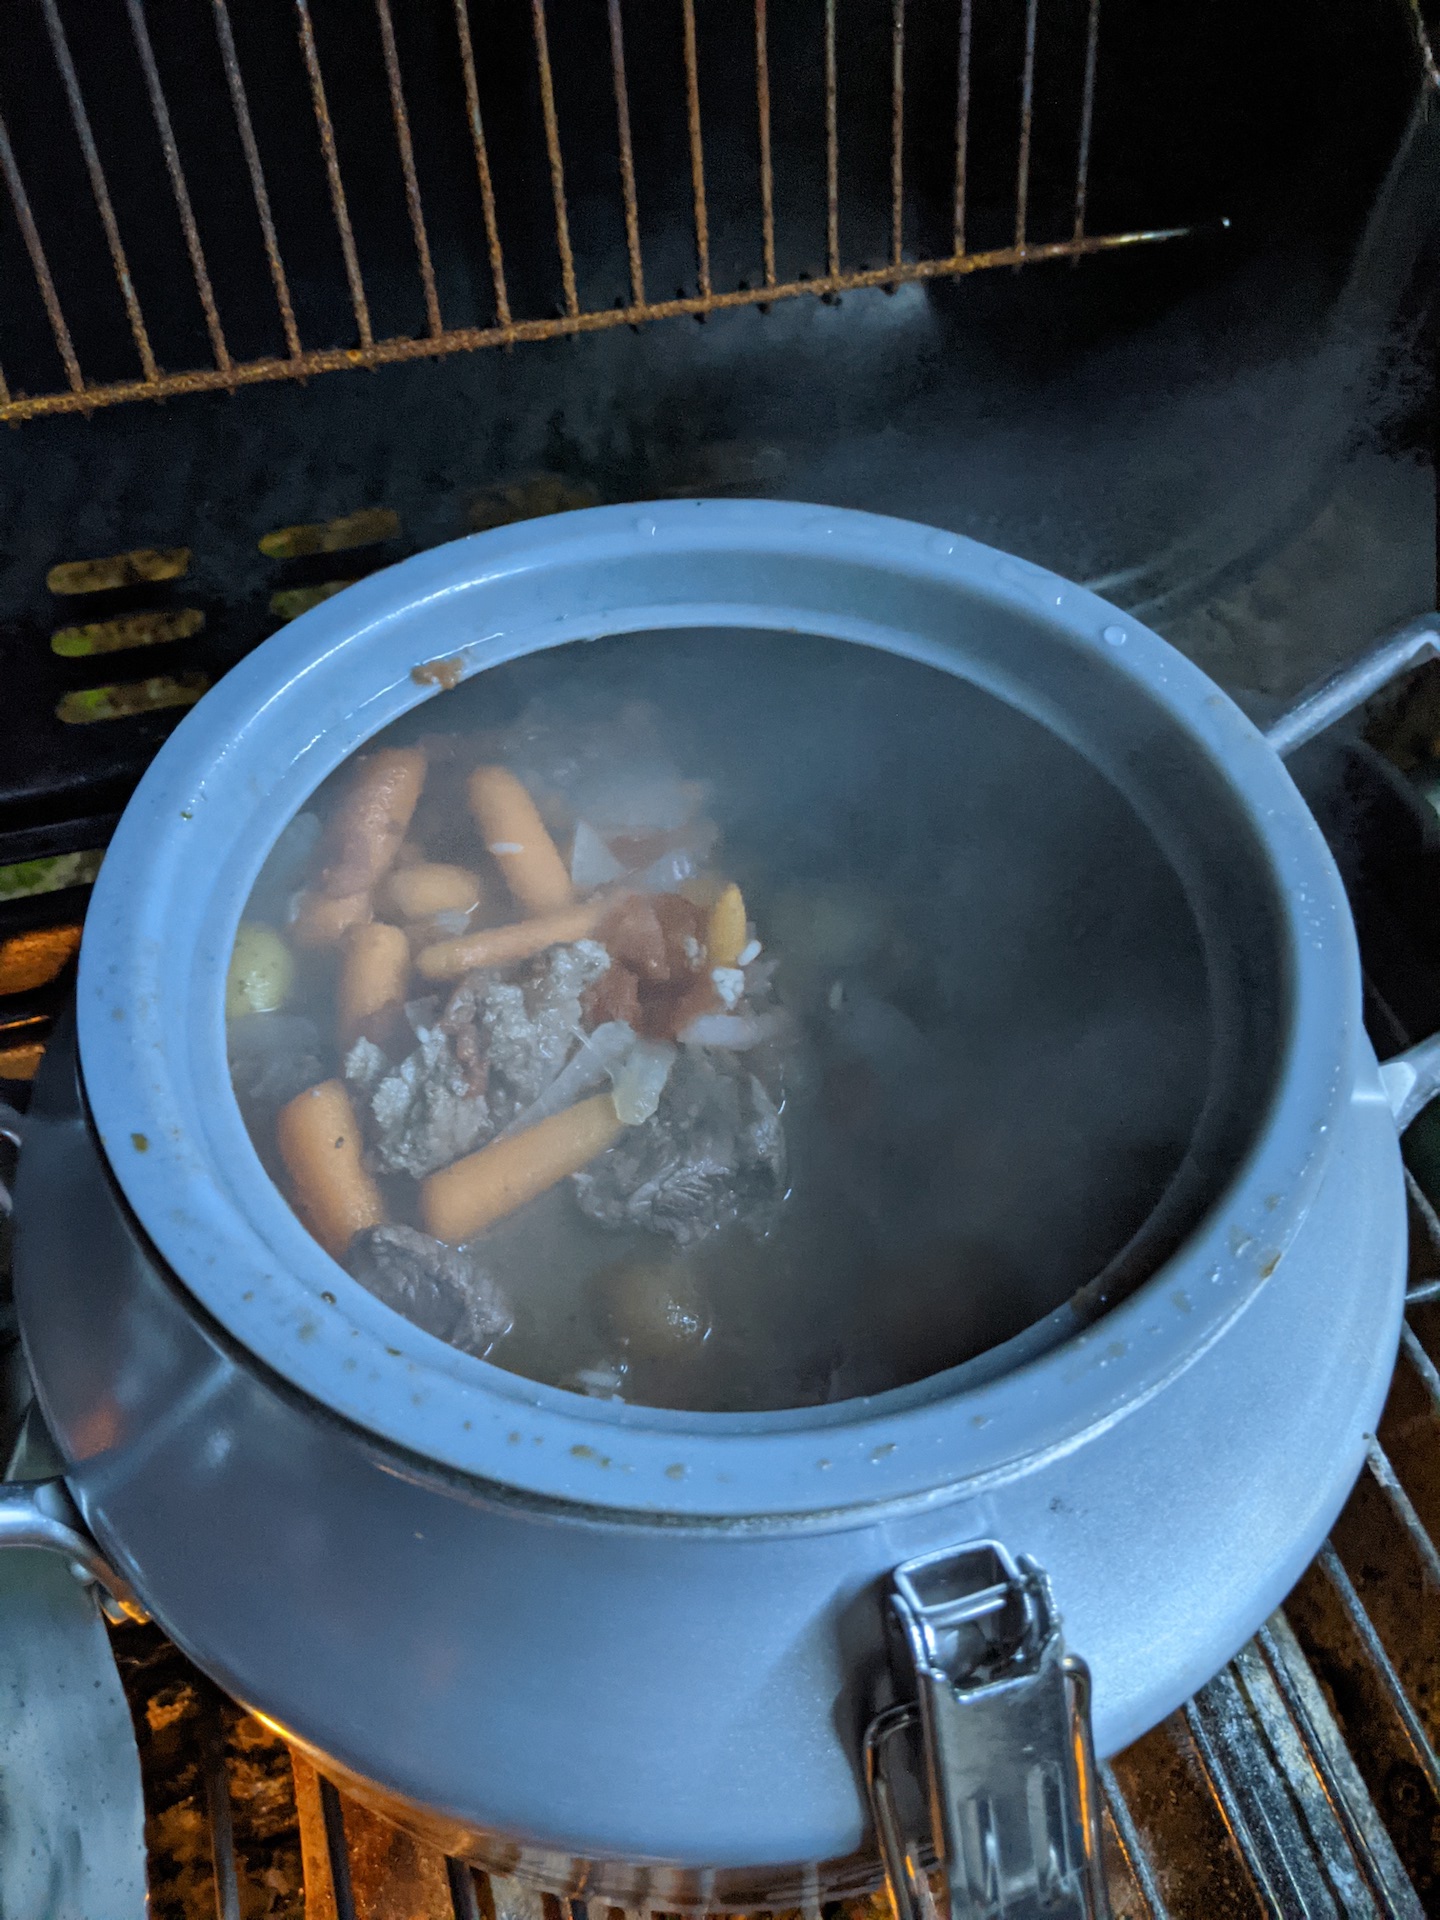
    I placed it on high heat at first then when it started to steam I turned it down so that I could no longer see the steam as per the instructions on the website. after about 25 -30 minutes I added the rice. This is how it looked when I lifted the cover.

    The finished product….

    Needless to say, we are both stuffed and have a lot of leftovers for tomorrow. Cooking at home is not only healthier and cheaper than eating out it’s great practice. Being able to use the tools you have in the event of a SHTF situation is crucial and should be an important part of your prepping!

    Happy Prepping!

    Maine Prepper Girl

    tactical, shooting, deals, save money, prepping, ammunition, firearms, daily deals

    [ecwid_product id=”461762568″ display=”picture title price options addtobag” version=”2″ show_border=”1″ show_price_on_button=”1″ center_align=”0″]

  • How to Can Bacon

    How to Can Bacon

    canning, bacon, how to, food storage, preparedness, prepper, SHTF

    NOTE: The following is NOT the recommended method for canning bacon by the USDA.

    line

    It’s been a while since I’ve published this. For those who have missed it…..

    You will need a large (tall) pressure canner; a rack on feet OR 2 racks and jelly jars with caps and rings;  quart jars with caps and rings, preferably wide-mouth, thick-sliced bacon,  and parchment paper (or paper bags).

    Get lots of parchment paper; I buy mine in rolls at Sam’s – much cheaper this way.

    Get your jars ready –  quarts will work best for this project, and wide-mouth will be easier to fill than regular mouth jars.

    Remember that canning bacon works best with thick-sliced; most others will disintegrate or turn into a large blob of bacon.

    Cook your bacon in advance (trust me when I say this works better than packing raw bacon, although, you CAN do that, too!). I microwave ours; but, cook it until it’s “crispy” (or, however you like it cooked). You will have to cook it up again to crisp it when you open the jars, but, that won’t take much “cooking” when you pack it cooked.

    Tear off a strip of parchment paper to hold about 8 slices, rolled up; if you get it too short, it doesn’t matter; you’ll just pull off another piece of parchment and keep going. Parchment paper cans just fine; don’t use wax paper – it does not. You CAN use paper bags, if necessary, but, parchment paper works best.

    bacon-is-the-answer-4

    Roll your bacon, one cooked strip at a time, in parchment, making sure each strip is rolled and protected from the next strip by paper; if the bacon is wrapped meat-to-meat; it will all stick together after processing and cooling, and you will have one big lump of bacon. Good luck getting that out of the jar!

    When you have about 8 strips (you may be able to get more in there!); fold the strips of wrapped bacon in “half”; trim the ends of the parchment, leaving about one (1) inch at either end of the bacon (one inch parchment paper hangover on each end).

    GENTLY stuff the folded strips down inside your jars. This is where you will understand why I tell you wide-mouth is best here. You CAN use regular mouth, but, GENTLY work it down, using a spatula, or some such tool. And try not to mutter to yourself too much while stuffing regular mouth jars!

    When the jar is filled (it’s o.k. if it’s not “full-full”, as in there are air spaces – that’s normal for this project), wipe jar openings with hot water. Each jar opening needs to be wiped down with VERY hot water and a fresh paper towel; fat is very easy to transfer. Wear protective insulated rubber gloves for handling the hot paper towels, but use one fresh paper towel per jar.

    Sterilize your caps and place them; sterilize your rings and place them.

    Now, you can process these down in the water, and the result will be “o.k.”. What I find works much better is to DRY CAN THE BACON. This is not running your canner dry – that will ruin your canner; what it means is the jars need to be held ABOVE the water line while processing. (BTW: you can use this method to sterilize tools and instruments, but, that’s another story for another day).

    This is where the height of your canner is important, and thus, a bigger canner works better for this project  – make sure you have three (3) inches of clearance between the top of your bacon jars and the top of your canner, when it is sealed. So, when you put in all your racks and your jelly jars of water, or whatever, then your next rack and the jars of bacon, you need 3 inches of clearance at the top.

    Make sure you have about three (3) inches of water in your canner; you don’t want to run out of water.

    Use a rack with legs that hold the jars above the waterline (good luck finding THAT!), or – do this:

    1.  Place one rack in the bottom of the canner, as you always do.

    2.  Fill at least four (4) jelly jars with water and add lids and rings; you can either process good, clean water (not municipal, fluoride, nano-particle drug water!) and store it as sterile water (an excellent prep item – use for cleaning out wounds, etc.), or, just sacrifice a few caps for the sake of the project without saving the water – you can use the same jelly jars of water as many times as you need. Let them cool a little between loads. You’re going to use the jelly jars to build up the height for processing bacon; YOU CAN NOT DO THIS WITH EMPTY JARS – THEY WILL ‘FLOAT”, AND CRACK DURING PROCESSING. You can not process other food in the jelly jars at the same time, as jelly jars are much smaller than quarts; food processed in a jelly jar for that length of time will turn to mush.

    3.  Place jelly jars of water atop the first rack that is protecting them from bottom of canner.

    4.  Place a second rack on top of jelly jars – this rack can literally lay across them
    5. Set your quarts of bacon atop this SECOND rack. Check your water in canner – you need three (3) inches of water; if water laps bottom of jars, o.k., but you don’t want them immersed in water.

    6.  Seal your canner and fire her up!

    7. On high heat, build your steam; steam it out for 10 minutes, as always (10-minute tornado from the vent pipe);

    8.  Place your counterweight on the vent pipe; bring to 10 lbs. pressure and process @ 10 lbs. for 90 minutes because we’re doing quarts. After 90 minutes at 10 lbs. pressure, turn off heat if gas, remove from heat if electric.

    9.  Allow to cool naturally; remove jars; if wide-mouth, remember, they don’t make the noise regular mouth make when sealing, and they don’t make the same sound when tapped. NEVER TAP THE CENTER OF THE CAP TO TEST – TAP AROUND THE EDGES.

    10.  When thoroughly cooled, wash your jars of bacon in hot, soapy water (fat everywhere!), rinse in hot water, allow jars to thoroughly dry; mark caps with contents and date and store away.

    To enjoy: it’s already cooked; you could just set it out in the sun and heat it up, or, eat it straight from the jar. But, Yes! It will be greasy (the paper does absorb a lot of the grease). I like to throw it in a pre-heated cast iron skillet and just “re-crisp” it. It doesn’t take long at all!

    This works out great for camping (even though it is in glass). That glass jar comes in handy for storing other leftovers, as well, so, you’ll get more than one use from the jar while traveling.

    It’s also convenient to have pre-cooked bacon at the ready for a quick breakfast, casserole, etc.

    How long is this good? 5-6 years, if you store it out of direct sunlight, and away from heat sources.

    And now you know how to dry can bacon! If you don’t want to dry can, just use the standard method of one rack sitting in the water; all other instructions do not change.

    Guest Post by S.

    *    *    *    *    *    *    *    *    *    *    *

    From the Supply Depot:


    *    *    *    *    *    *    *    *    *    *    *

    [ecwid_product id=”448227252″ display=”picture title price options addtobag” version=”2″ show_border=”1″ show_price_on_button=”1″ center_align=”0″]

    *    *    *    *    *    *    *    *    *    *    *

    THE ABSOLUTE BEST SURVIVAL KNIFE FOR THE


  • Putting Together a 2 Week(or close) Food Storage Bucket

    Putting Together a 2 Week(or close) Food Storage Bucket

    I put together a 2 week(or close) food bucket. Just showing what can be done with a minimal budget. Certainly not the ideal diet…lol, but better than starving. The next bucket will be completely different and will add variety along with this one.

    Take care all –

    Rourke


  • Prepper Food Storage Tip: Peanut Butter

    Prepper Food Storage Tip: Peanut Butter

    With all the talk of supply chain issues and possible food shortages over the next couple of years, food storage is becoming a very hot topic. Inflation continues to erode our buying power and inconsistent product selection at the market is ever-present. Stockpiling those frequently used items not only helps through “bumps in the road” but provides food security should true food shortages actually arrive. Peanut butter is hugely popular and a common item most families have on a regular basis.

    I’ve mentioned over the years many times that peanut butter can be frozen to extend shelflife. In this video, I reiterate the practice with some commentary.

    Take care all –

    Rourke

    line
    [ecwid widgets=”productbrowser” default_category_id=”0″ default_product_id=”0″ minicart_layout=”MiniAttachToProductBrowser”]
     

  • Things Are Getting Crazy!! Store Food Now!!

    Things Are Getting Crazy!! Store Food Now!!

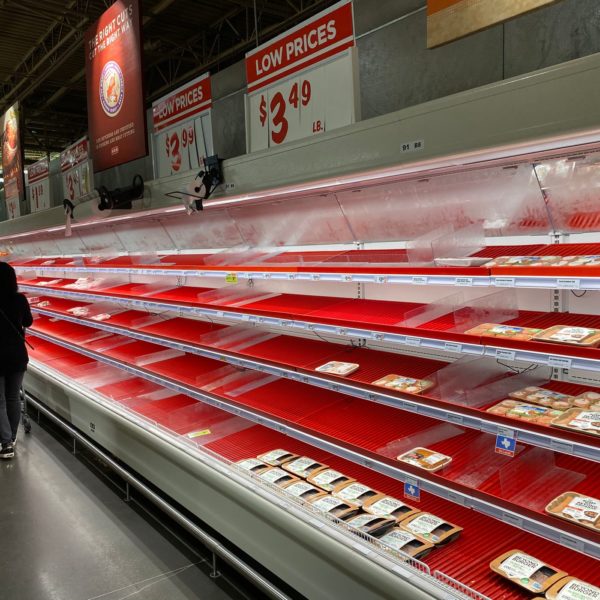
    I’m not a fear-monger – but, things are getting crazy. The writing’s on the wall and we need to get ready. Store shelves are getting bare and what’s left is costing more.

    When it comes to preparedness FOOD must be the number one priority.

    Stack it deep!!!

    Rourke

    .line

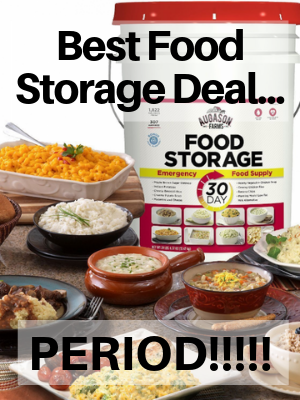
    Best Food Storage Deal Available

  • Food Storage is the Most Important Prep

    Food Storage is the Most Important Prep

    I’ve been guilty of emphasizing guns and ammunition when it comes to preps over food and other critical supplies. As we travel down this path into the future and face challenges that right now we struggle to comprehend. The keyword looking down that path that comes to mind is “independence”.

    The ability to NOT rely on the government or governmental systems is critical so as not to bow down to their policies and commands. The ability to nourish one’s self is a huge step towards self-reliance and independence.

    Food storage is the first step towards self-reliance. While any food storage program will involve a supply level that will eventually run out, it buys valuable time to compensate for the inability to utilize normal, everyday services such as grocery stores. That “time” that we are buying must entail gardening, growing, and animal husbandry. At a minimum providing the majority of nourishment for oneself at least diminishes the dependence on normal supply streams. That is a good thing.

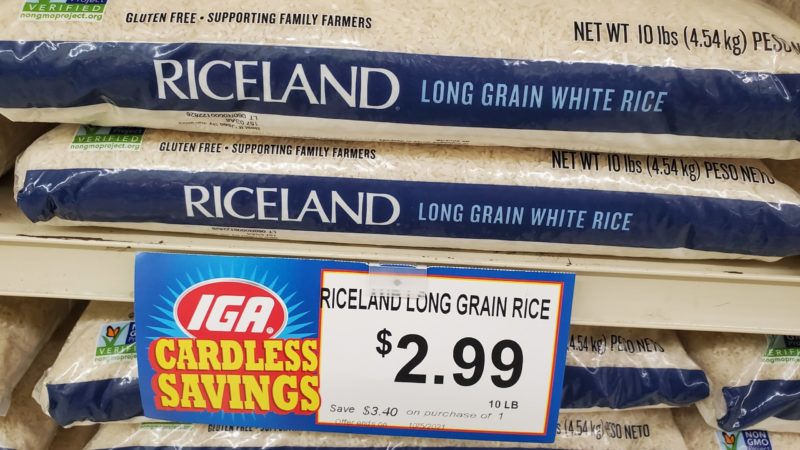
    This has likely been an extremely long way of saying food and calories are important. Right now you can grab 25 pounds of rice for somewhere south of $15.  That’s cheap.  At about 1,600 calories per pound, 25 pounds would equate to 40,000 calories. From a macro perspective that’s  20 days of calories at 2,000 per day. Think about that – 20 days for less than $15.  Of course, eating nothing but rice would not be a very good existence.

    Here’s the bottom line – stock up on food. Lots and lots of food. Guns and ammo and all the other cool stuff are important but having all that while you starve would absolutely suck.

    Stack it to the rafters and then some.

    Rourke

    30 day, food storage, bucket, best deal, save money, prepper, preparedness, SHTF

    [ecwid_product id=”361908918″ display=”picture title price options addtobag” version=”2″ show_border=”1″ show_price_on_button=”1″ center_align=”1″][ecwid_product id=”421553533″ display=”picture title price options addtobag” version=”2″ show_border=”1″ show_price_on_button=”1″ center_align=”1″]

  • China Tells Population to Stock Up on Food

    China Tells Population to Stock Up on Food

    Headline is pretty eye-catching, isn’t it? Talk is spreading across the preparedness community like a ripple from a rock thrown in a stagnant pond.

    Yes – China told its citizens to stock up on food and supplies this winter. The big question is……. “WHY?”

    Could it be that they believe resources will be taxed due to war or efforts from taking over Taiwan? I doubt it.

    Could it be that they believe there is a possibility that there will be severe lockdowns due to COVID and people will have to spend weeks or months in their homes? Likely. They have demonstrated severe actions to get control of any outbreak.

    Could it be they are expecting supply chain issues? Probably.

    Here’s the deal: If something significant occurs in China it WILL affect the United States which means all of us. It’s worth noting that a major superpower is foretelling that something significant will possibly occur over the next several months. Would the United States government ever tell its people if they knew that there was going to be a food shortage? Hell no!  We all know why – – there would be a massive run on food that would clear out the grocery stores in just a few hours and create, you guessed it – a food shortage.

    Hey – you’re not worried are you? You have already put back a good supply of extra food and your most commonly used supplies. Right?

    Stack it to the rafters!!

    Rourke

    Use Coupon Code “1776PATRIOT” for 15% Off

    *    *    *    *    *    *    *    *    *    *    *

    *    *    *    *    *    *    *    *    *    *    *




  • Food Prices Continue to Climb Upward

    Food Prices Continue to Climb Upward

    I typically do most of the grocery shopping for our bunker, err, OK – for our camper. Over the past week, I’ve made several trips to different stores and really paid attention to the prices of certain items. The prices are crazy and the increases are not over.

    With fuel prices continuing upwards, continued high demand, and supply chain issues remaining, we have the perfect storm which will generate further increases in food products. With winter bearing down on us and energy prices also moving upwards the costs involved to heat stores and transport food will also increase. Wages are certainly not being adjusted to keep up with inflation thus the vast majority of us are losing purchasing power as time goes by. Those of us who must live on a tight budget must search for areas which to reduce expenses and purchase items at the lowest possible price.

    Here are a few thoughts:

    • Stocking up on food NOW is a good investment as it is almost a certainty that prices will continue to increase.
    • Buying in bulk often reduces the cost per item.
    • Utilizing coupons and sales can generate significant savings.
    • Shopping deep discount stores such as Aldi’s and Lidl can make your dollars go a long way.
    • Plan your trips to save fuel costs. Make a list of errands and things needed and make one trip per week rather than several.
    • If you are still running air conditioning, take the setpoint up 2 degrees so it runs less.
    • Running heat? Wear a sweatshirt around the house and keep the setpoint low.
    • Cut out costs such as buying bottled water. Buy an inexpensive water filter and filter tap water.
    • Have a friend who has Netflix? Maybe get them to share their login info and split the cost and cancel your own account.
    • Visit your mobile carrier and see if there are changes that can be made to your plan to reduce costs.
    • Speaking of mobile carriers – use apps on your phone to find lower prices on items including gasoline. Ibotta is a free app that many are using to save money and earn cash rewards.
    • Eat out less and cook at home more.
    • Have more than one vehicle? Drive the one that gets the best gas mileage as much as possible.
    • Look at less expensive store brands of bought products. Frequently there is little if any quality drop when buying the non-mainstream brand.
    • Consider cooking alternatives such as chicken thighs rather than chicken breasts.

    A little money saved here and there will add up over time.

    Take care all –

    Rourke

    [ecwid_product id=”266134480″ display=”picture title price options addtobag” version=”2″ show_border=”1″ show_price_on_button=”1″ center_align=”1″][ecwid_product id=”409414550″ display=”picture title price options addtobag” version=”2″ show_border=”1″ show_price_on_button=”1″ center_align=”1″]

  • Apocalyptic Chicken Alfredo Lasagna

    Apocalyptic Chicken Alfredo Lasagna

    I previously published this a few years ago and with new people visiting the site thought it would be a good idea to bring it back around. This particular recipe is one of my favorites that MainePrepperGirl has concocted. From a preparedness perspective, shelf-stable ingredients are used and variants can be made easily. From a flavor perspective, it packs a punch. – Rourke


    When planning meals and items that I would store in a food pantry in a SHTF situation I consider all tastebuds. This recipe made me think of the teenage food palate because just about every teenager I know loves Alfredo. I was a bit skeptical when I came up with this recipe at first because it was so simple, but that is what we are going for after all! This simple and easy to prepare meal gives the prepper another option other than beans and rice and although the no boil noodles are not able to be stored as long as beans and rice it will give you some options in the first year or so while you continue to plan for future meals. I think this Chicken Alfredo Lasagna will provide a tasteful comfort food feel when sitting around the kitchen table together.

    Let me know what you think!

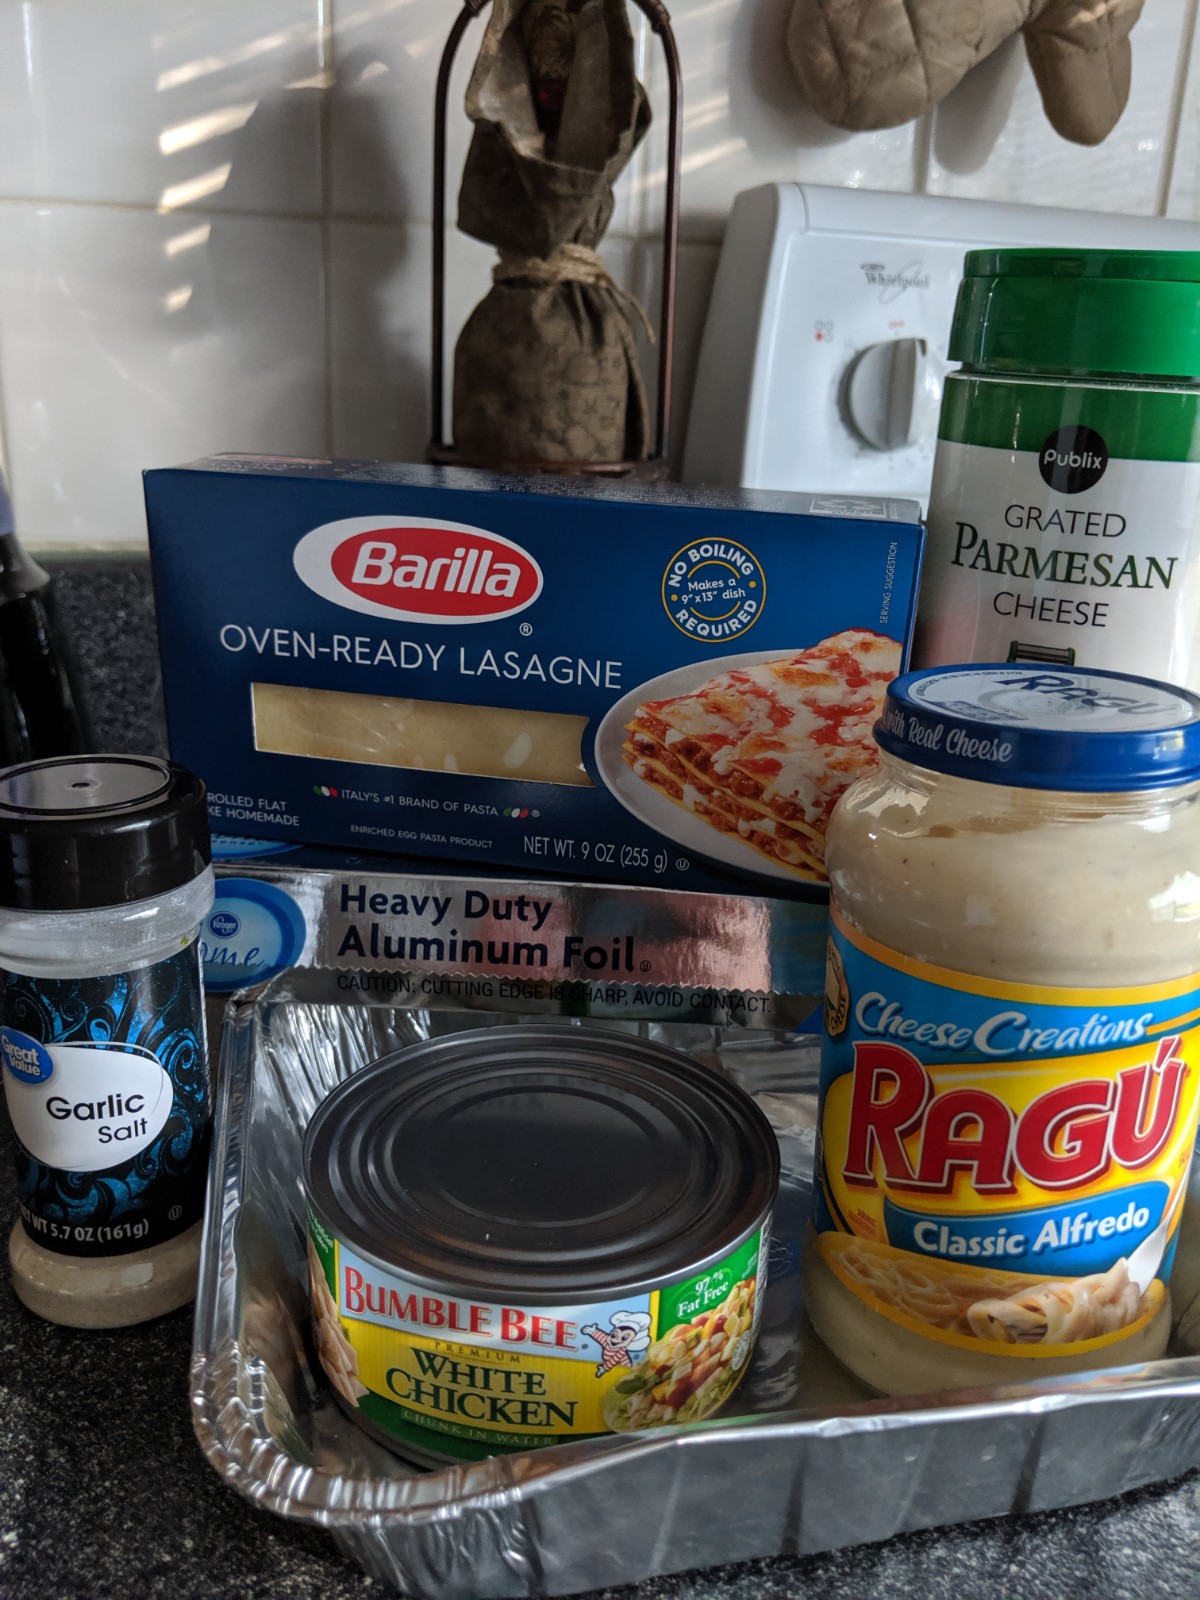
    What you will need:                                                             

    8×8 inch pan

    16oz jar of Alfredo Sauce

    Oven Ready Lasagna Noodles

    5oz can of White Chicken

    6 Tablespoons Parmesan Cheese

    Garlic Salt to taste


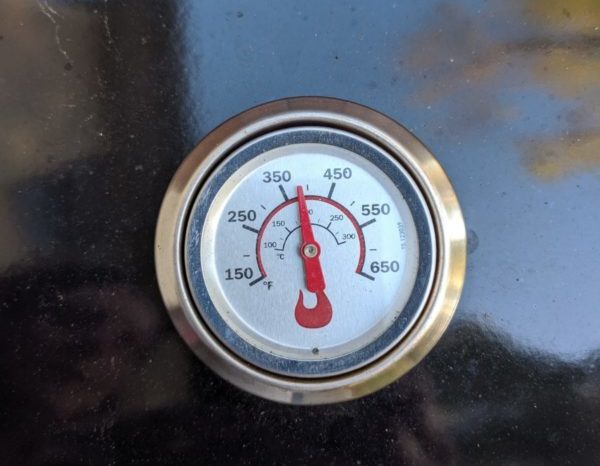
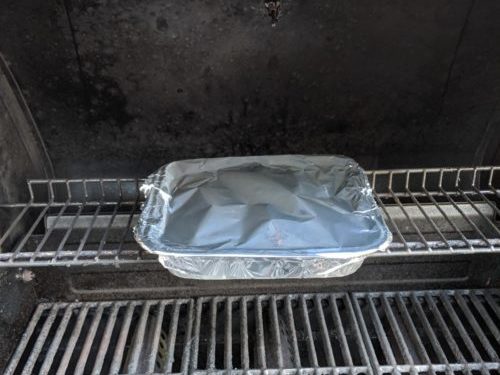
    1. Preheat the grill to 375ºF


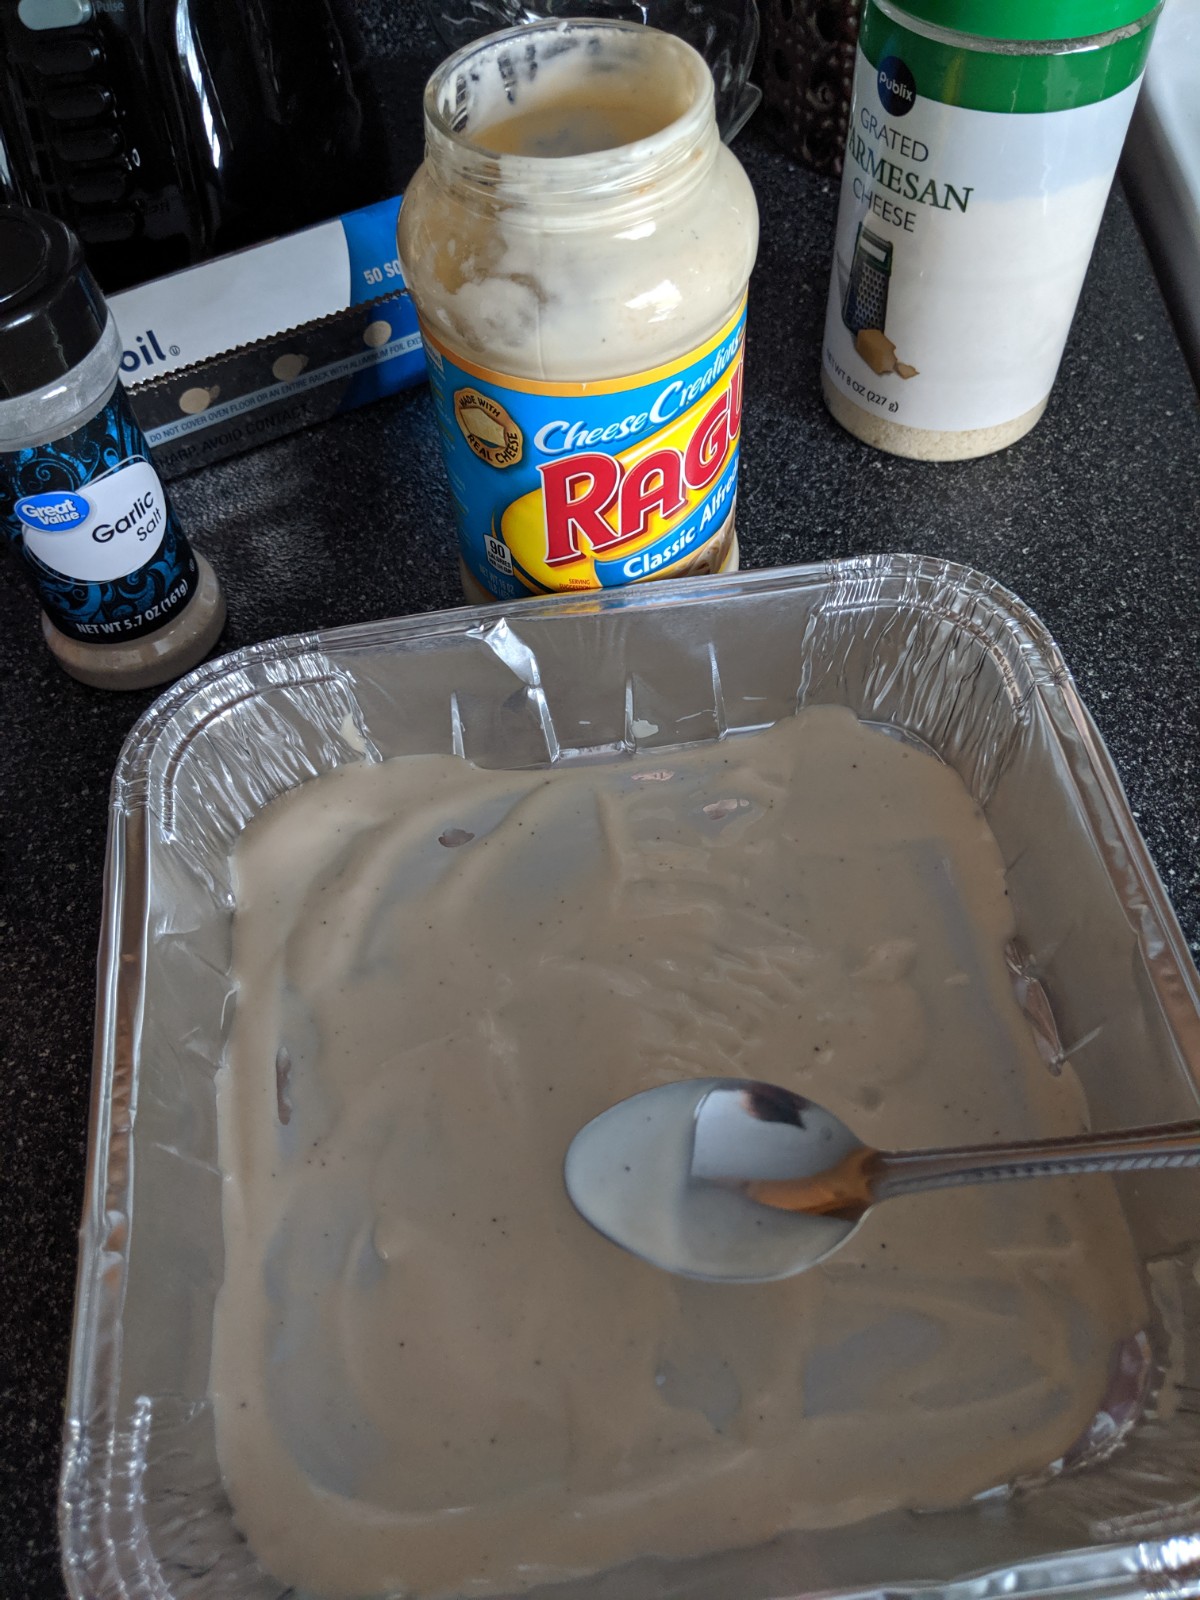
    2. Coat the bottom of the pan with a thin layer of Alfredo sauce


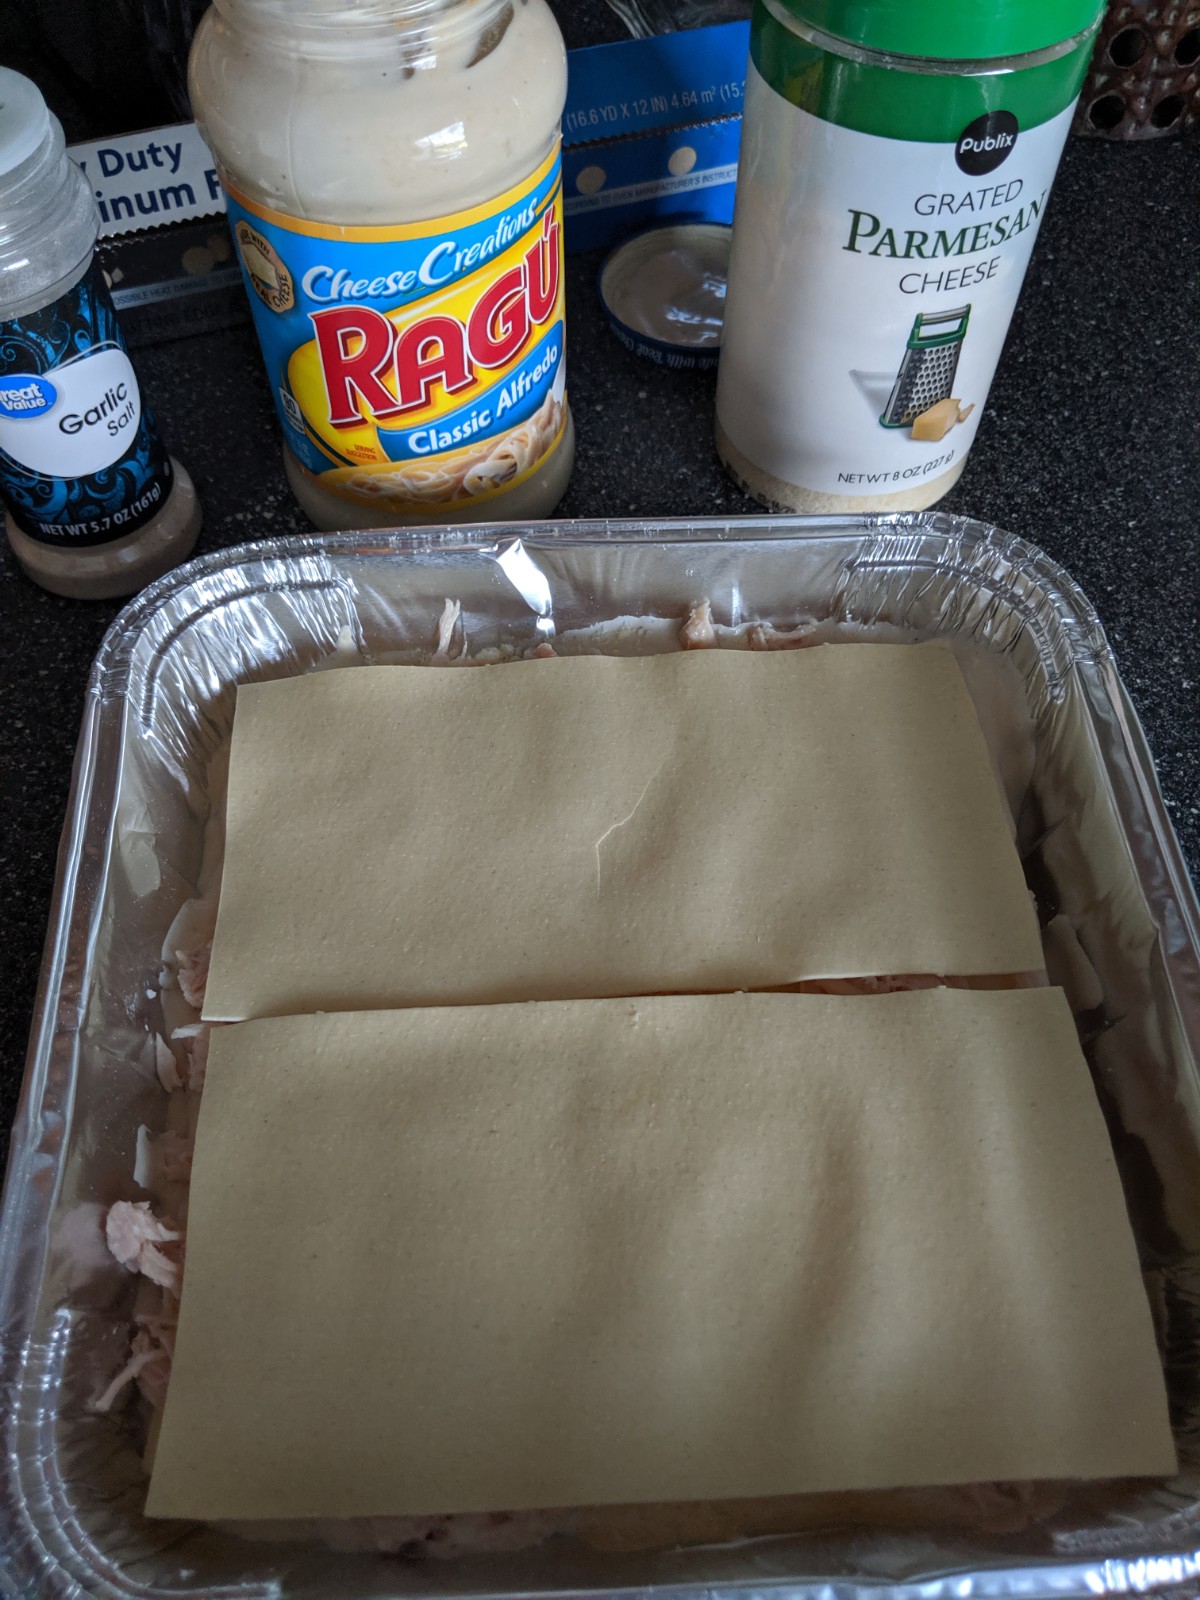
    3. Place 2 lasagna noodles over the sauce lined pan


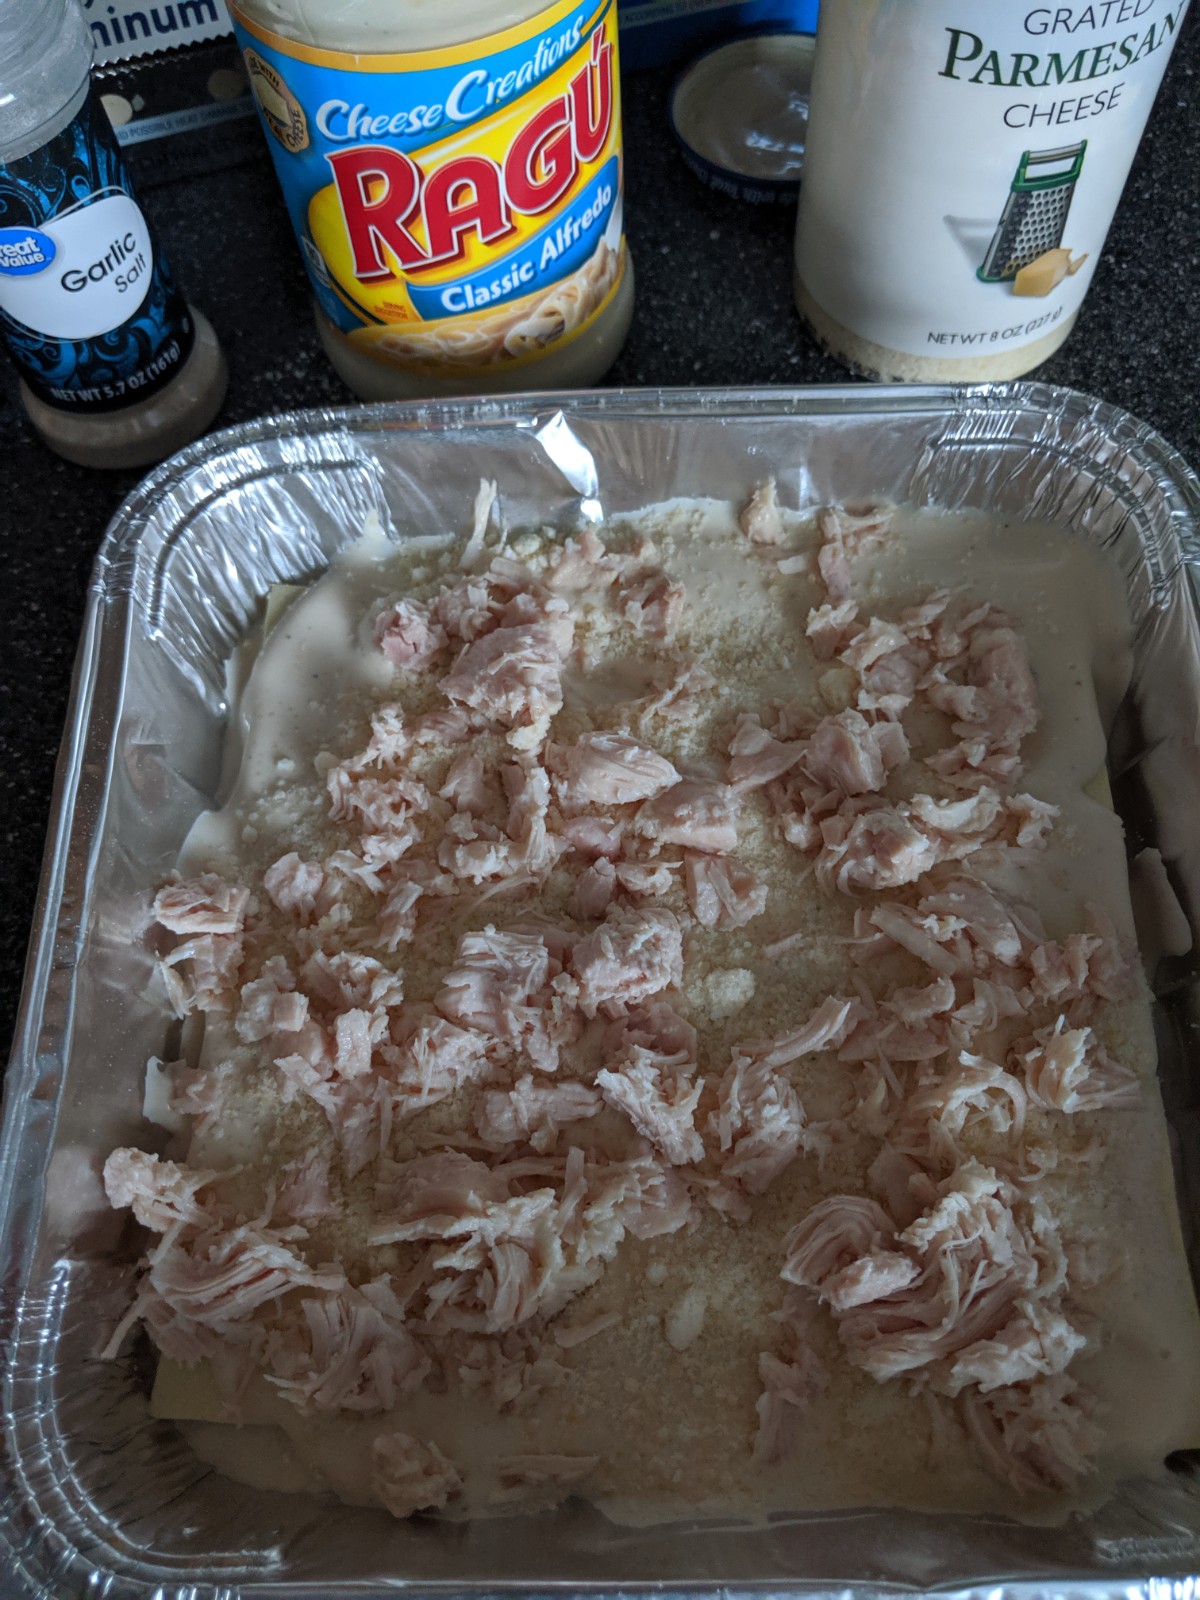
    4. Coat the lasagna noodles with a layer of Alfredo sauce, ½ the can of chicken, 2 tablespoons of parmesan cheese and garlic salt. Place 2 noodles over the top.


    5. Repeat step 4

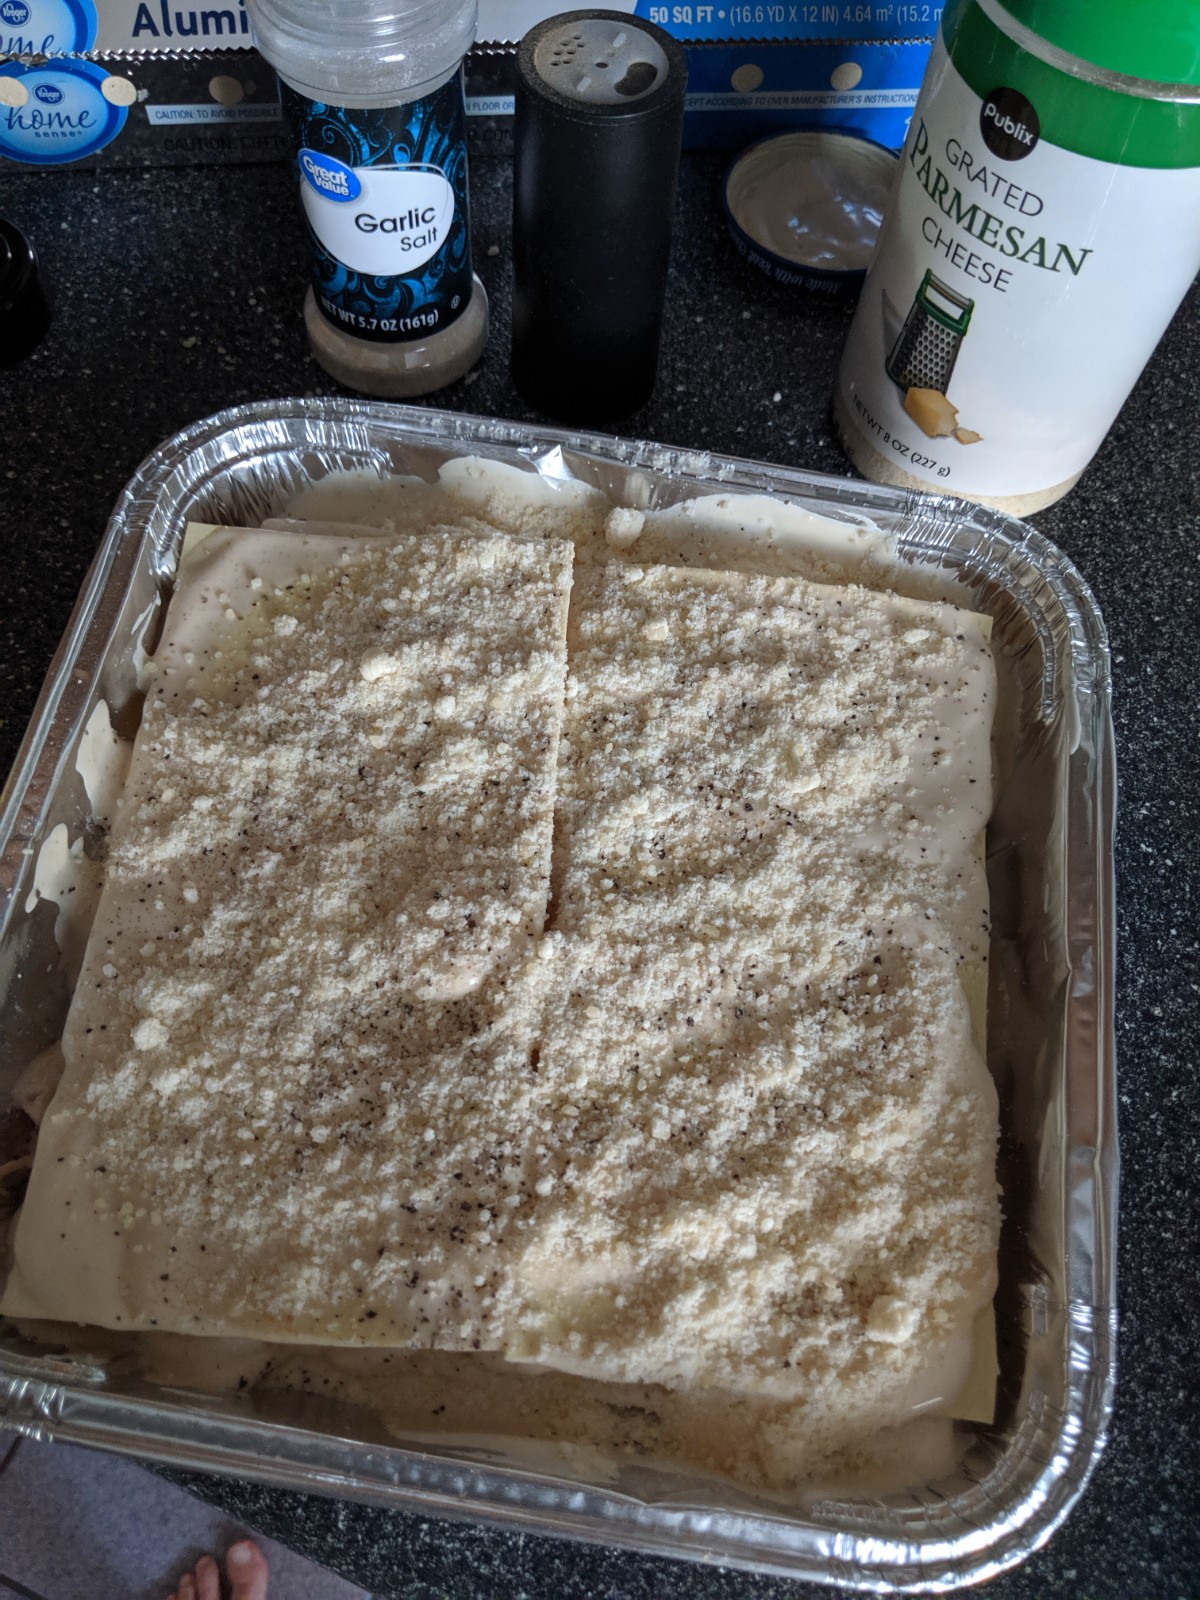
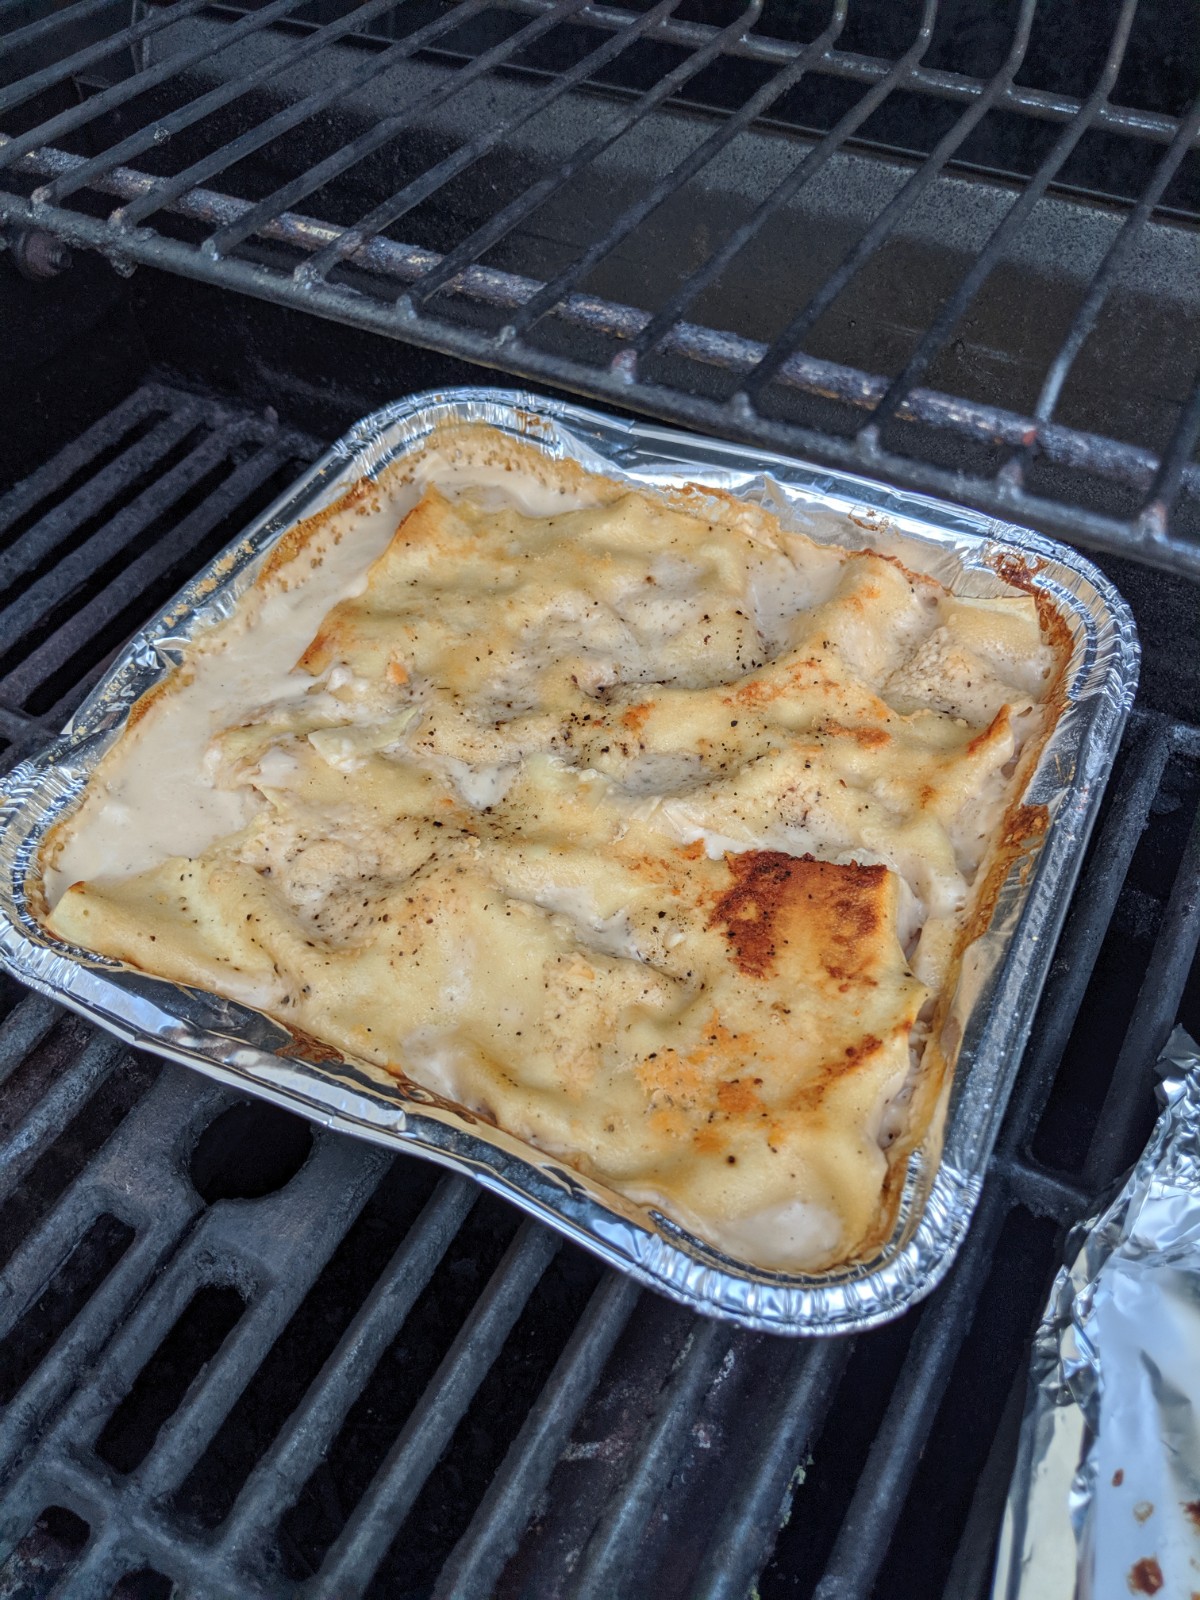
    6. Coat the top layer with Alfredo sauce and sprinkle with 2 tablespoons of parmesan cheese and sprinkle with garlic salt to taste.


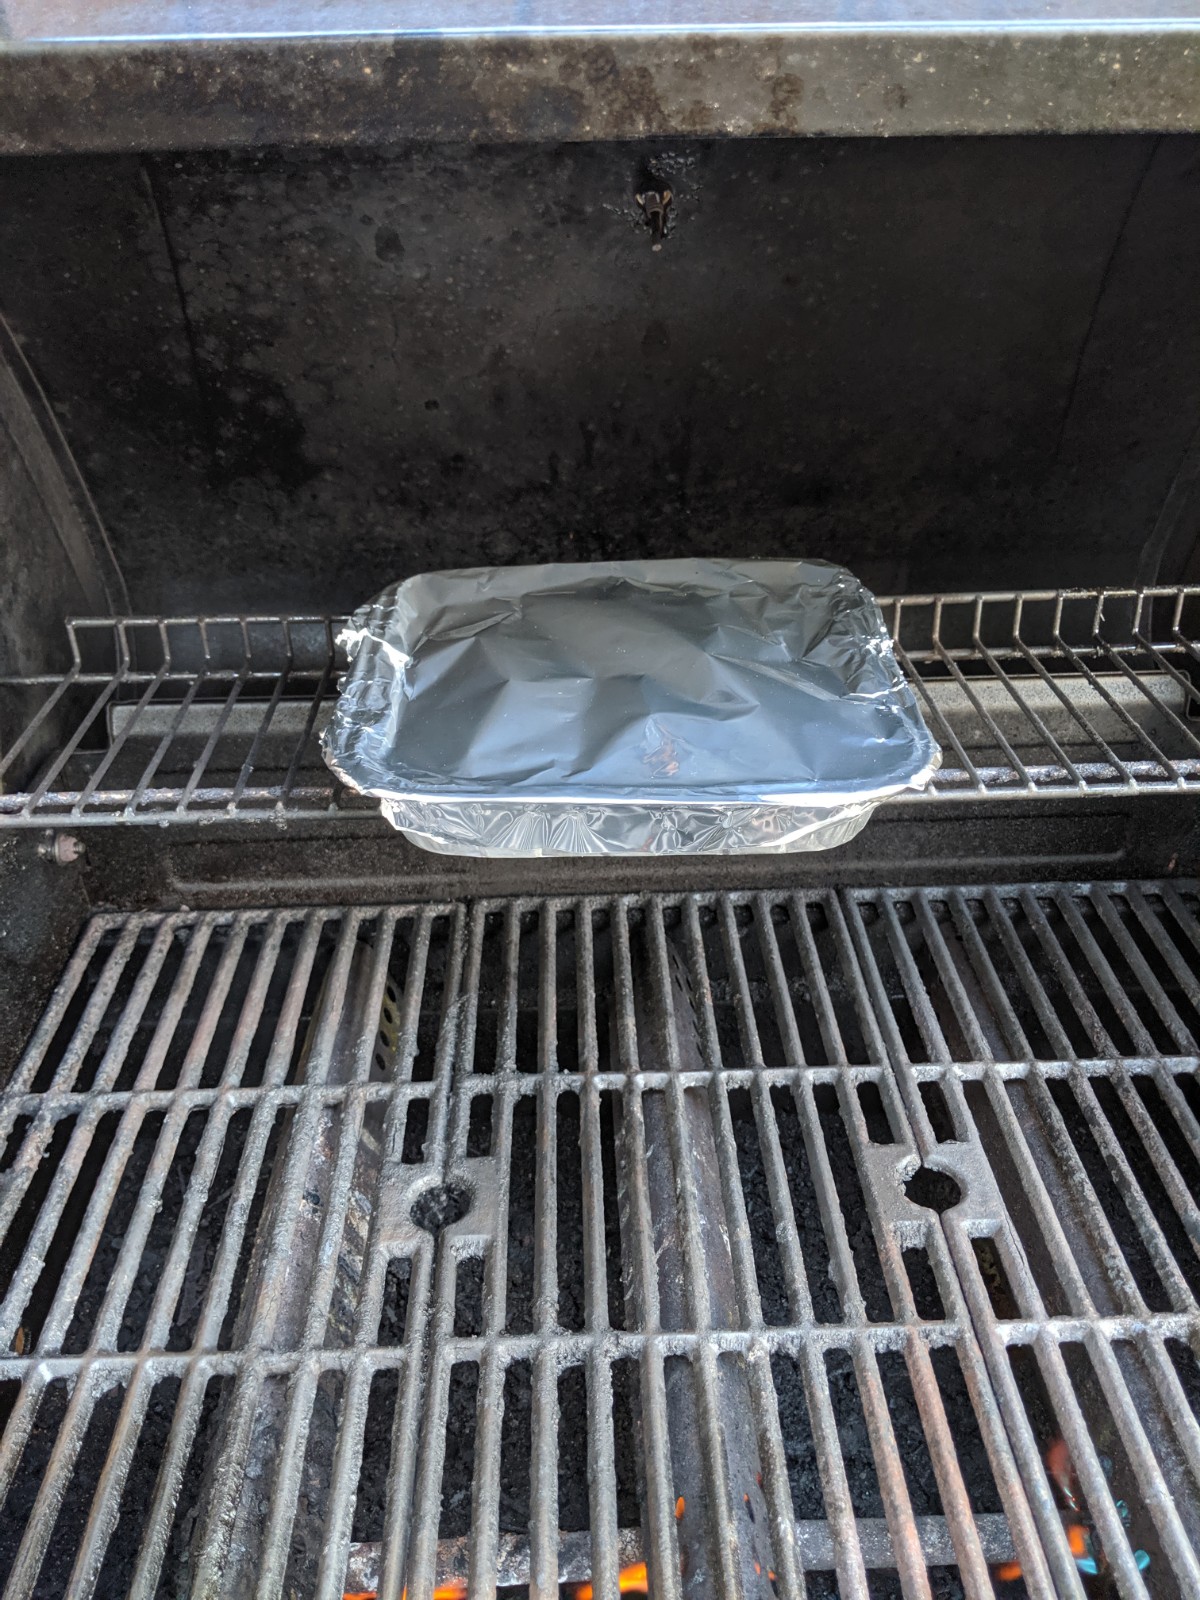
    7. Cover with tin foil

    8. Place on top rack of preheated grill


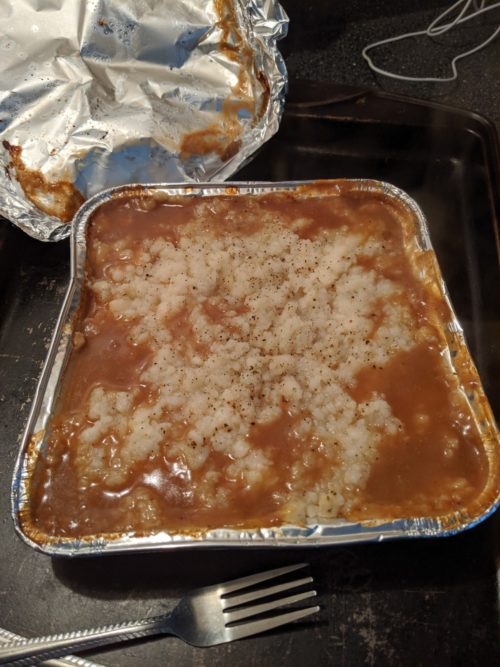
    9. Cook for approximately 30 minutes. You can tell if it is done when you stick a fork in it and the noodles are soft.


    10. ENJOY!


    MainePrepperGirl

    Maine, prepper, girl, MainePrepperGirl


  • [MEMBER]The Truth Behind Survival Food

    [MEMBER]The Truth Behind Survival Food

    Here’s some truth: Long-term survival food is expensive. Period. I am talking freeze-dried “survival food”. These products are marketed by numerous companies and a few I have relationships with. I’ve tried almost every brand and have a few thoughts I’ll share:

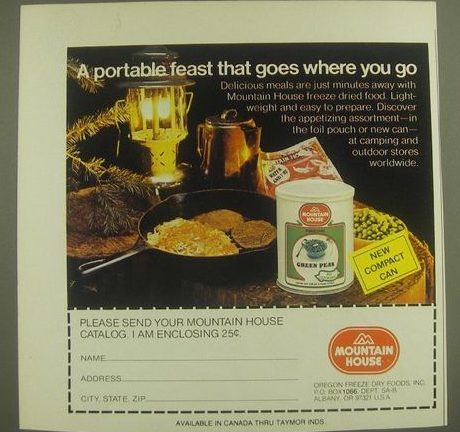
    First, Mountain House has been in the long-term food storage business for several decades. Way back in the 80’s I remember seeing their ads in the magazines. They have been around long enough that there is solid proof their food will last three decades – or longer. They are also probably the most expensive brand. I’ve eaten lots of Mountain House and have – so far – not found any of their offerings that I did not like. Quality is excellent and I have several cases of Mountain House in cans myself. I can wholeheartedly recommend Mountain House completely.

    Mountain House, freeze dried, foods, old, advertisement, ad, classic

    All the other survival food suppliers are certainly options and some do better than others. I’ll cover my experience and your mileage may vary:

    Augason Farms – The most economical and variety-filled option I’ve come across. Taste for what I have had has been pretty good. Not all Augason Farm products are freeze-dried and many options have a shelf life of well less than 30 years. It is important to look at the details when ordering and make sure shelf life is known prior to ordering.

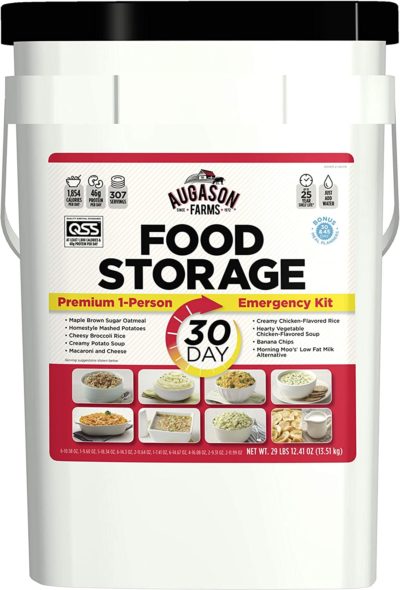
    One of the best food storage options are the buckets that Augason offers. They have 4 person 72-hr buckets and up to 30-day buckets. I have several of their 30-day buckets and for the money they can’t be beat.


    WISE/ReadyWise – They have pretty good sales, however, taste is less than ideal. I’ve had a few soup options that were good but beyond that….kinda gross. Cold, hungry, and in need of calories? Absolutely ReadyWise will fit the bill. I have a few of their small multi-day packs in my truck.


    MyPatriotSupply.com/Ready Hour – I purchased several of their 2-week totes when the company Patriot Pantry first started. This was a while ago so I don’t know if things have changed. Customer service was fantastic. I called to order their special deal and was on the phone with customer service for about 10 minutes. Low pressure – the guy asked me if I wanted to hear about their current special offers and I said, “Yes.” I didn’t buy anything else and the rep said he appreciated the order and that was it. Taste and prep for the few I’ve tried were good.

    They are much more expensive than Augason Farms, however, there are more calories and the offerings are higher quality. Comparing the Ready Hour 30-day bucket to Augason Farms the difference is clear: Calories, flavor, and variety. Don’t get me wrong Augason is a great choice and well worth the money. Same goes for Ready Hour.

    Options are good.

    Legacy Food Storage – Expensive. I would choose Mountain House if I were to fund a purchase to this level. I’ve had ONE entree and it was pretty good. Simply too expensive. Check out one deal here.

    line

    So – the final truth ends just how it started: Mountain House. Mountain House is the best choice, HOWEVER, budget and other factors may dictate another company’s product as ideal for you.

    Options are good.

    Rourke

  • Stocking Up On Protein

    Stocking Up On Protein

    For the past few years, there’s been a lot of talk of coming food shortages. Between cyberattacks, crazy weather, government subsidies, and supply chain/labor shortages – anything is possible.

    David over at SoutherPrepper1 discusses storing meat as a source of protein. As he mentions Amazon is not the best place to buy canned foods, however, I’ll add a few links below for reference.


    ****NOTE: David references a Glen Beck video – find it here: https://www.youtube.com/watch?v=JRhkNJAnh1I

    Right now canned meat is fairly plentiful and inexpensive. Perfect time to head to the grocery store, SAM’s Club, and stock up.

    Links:

    Polar Salmon Filets – LINK

    Valley Fresh Canned Chicken – 10 ounce – Pack of 12 – LINK

    Hormel Canned Chicken – 5 ounce – Pack of 12 – LINK

    Classic SPAM – 12 ounce – Pack of 12 – LINK

    Keystone Ground Beef – LINK

    Keystone Turkey – LINK

    Keystone Chicken – LINK

    Keystone Pork – LINK

    DAK Canned Ham – LINK

    Stack it deep!!

    Rourke

    line

    [ecwid_product id=”242168723″ display=”picture title price options addtobag” version=”2″ show_border=”1″ show_price_on_button=”1″ center_align=”1″][ecwid_product id=”361908918″ display=”picture title price options addtobag” version=”2″ show_border=”1″ show_price_on_button=”1″ center_align=”1″][ecwid_product id=”266134480″ display=”picture title price options addtobag” version=”2″ show_border=”1″ show_price_on_button=”1″ center_align=”1″]


  • Food Storage Recipe: SHEEPDOG PIE

    Food Storage Recipe: SHEEPDOG PIE

    From Rourke: This was previously posted over a year ago. Reactions were mixed, to say the least. I’ll tell you from first-hand experience it’s a great tasting recipe. When looking at food storage items such as canned goods creating flavorful concoctions is so important to keep morale high. While it may look like something your cat did after consuming a large juicy rat…..it’s very tasty.

    OK – on with the recipe.

    When thinking about what types of food that can be stored long-term canned goods are the first thing that comes to mind. Canned items can be mixed together to make a meal or just eaten alone. Stocking up on canned soups, stews or other pasta meals like Chef Boyardee makes perfect sense, especially if you are on the move and not in a set location. However, I still think there is something to be said for having something that resembles a home-cooked meal to lift spirits during difficult times. That is why I have tried to take my regular supper meals and make them out of things that I might have long-term. Normally I use ground beef browned with onions as my meat in Shepherd’s Pie but I thought for this food storage recipe canned pot roast might make a good substitute.

    For the record, this Northern Maine girl had NEVER tasted canned potatoes until I made this meal and I will always prefer my potatoes “uncanned”.  Yes, potatoes are grown in Maine. Maine is not all lobsters and lighthouses. Aroostook County, known as “The County” by Mainers, is located in Northern Maine and is known for its abundance of potato farms. If you ever get a chance to visit you can pick up a bag of locally grown potatoes at a roadside stand between September and October. Just leave money in the box.

    Anyway, this recipe turned out to be a very tasty and filling meal that can easily be made with only a few cans of food.

    What you will need for Sheepdog Pie:

    8×8 inch pan

    Aluminum Foil

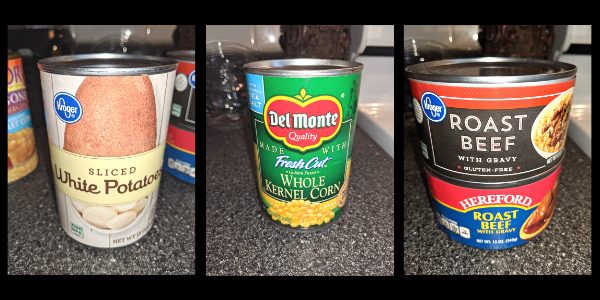
    2 cans of Roast Beef

    1 can of corn

    2 cans of sliced potatoes

    Garlic salt and pepper to taste


    Directions

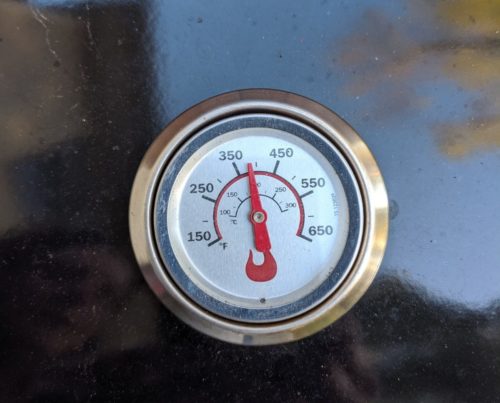
    1. Preheat the grill to 375 degrees F

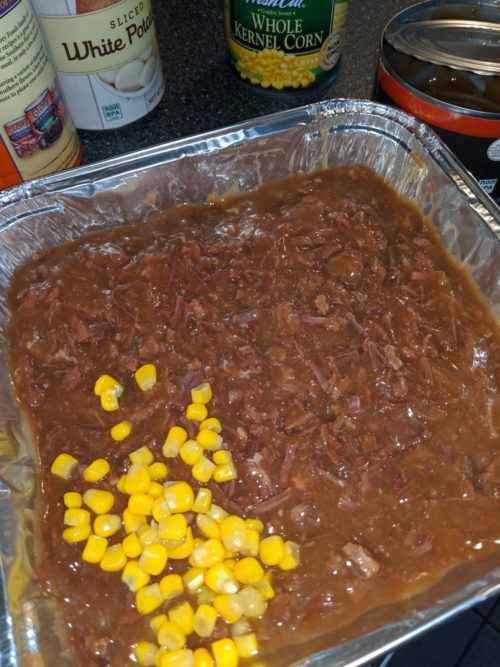
    2. Mash roast beef chunks and sauce with a fork and spread evenly on bottom of 8×8 pan

    3. Drain can of corn and spread evenly over top of roast beef

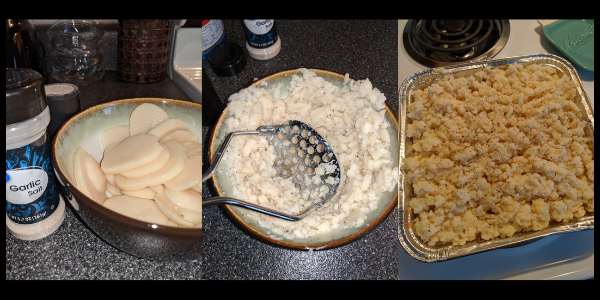
    4. Drain cans of potatoes and mash or place slices over the top of the corn. I choose to mash the potatoes with a potato masher but I think laying the slices over the top would also be good and faster. I also added some garlic salt and pepper to taste.


    5. Cover with tin foil and place on top rack of preheated grill for approximately 30 minutes


    6. It’s ready when hot and bubbly.

    If available, top with shredded or parmesan cheese. The homemade banana bread made the meal even better.

    Enjoy!!!

    shepherds pie, prepper, prepper meal, food, food storage, shtf

    MainePrepperGirl

    Maine, prepper, girl, MainePrepperGirl


  • Budget Gamma Lids

    Budget Gamma Lids

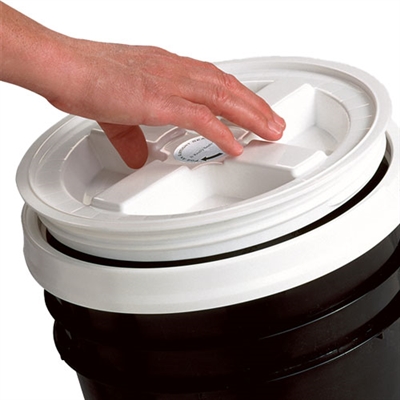
    Storing foods in buckets is popular for a reason: Buckets are cheap and extremely durable. The main issue with buckets(like the Home Depot versions) is once you put a lid on it getting back into it is not the easiest thing.

    Gamma Lids came out years ago and allowed easy access as they unscrewed, provided access, and then could be screwed back on keeping the contents safe and sealed.

    Those looking for a budget-friendly alternative to ordering Gamma’s online check your local Home Depot in the paint department.

    Gamma lids on Amazon: https://amzn.to/2L0KuWb

    Rourke

  • MRE Dessert…..Yum!!

    MRE Dessert…..Yum!!

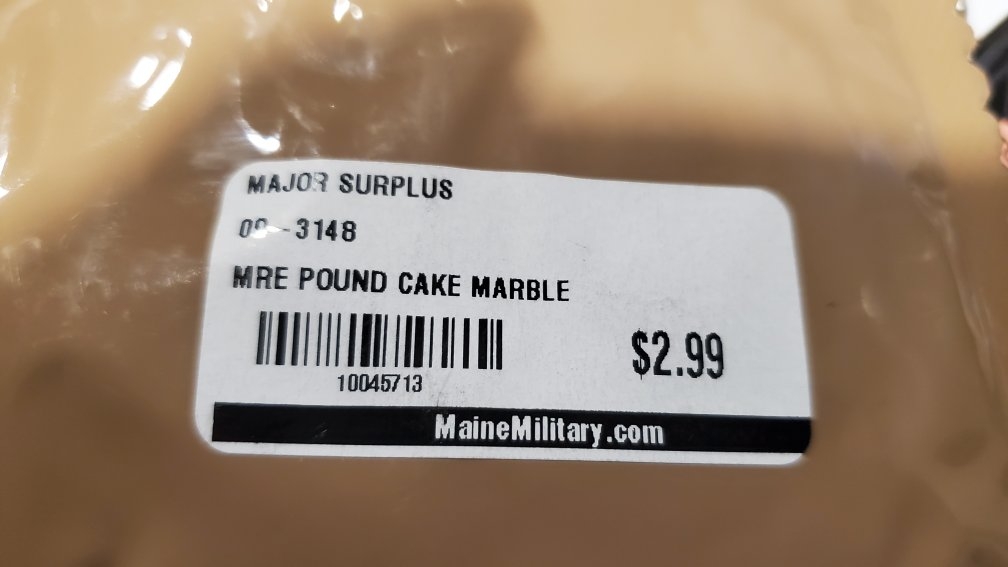
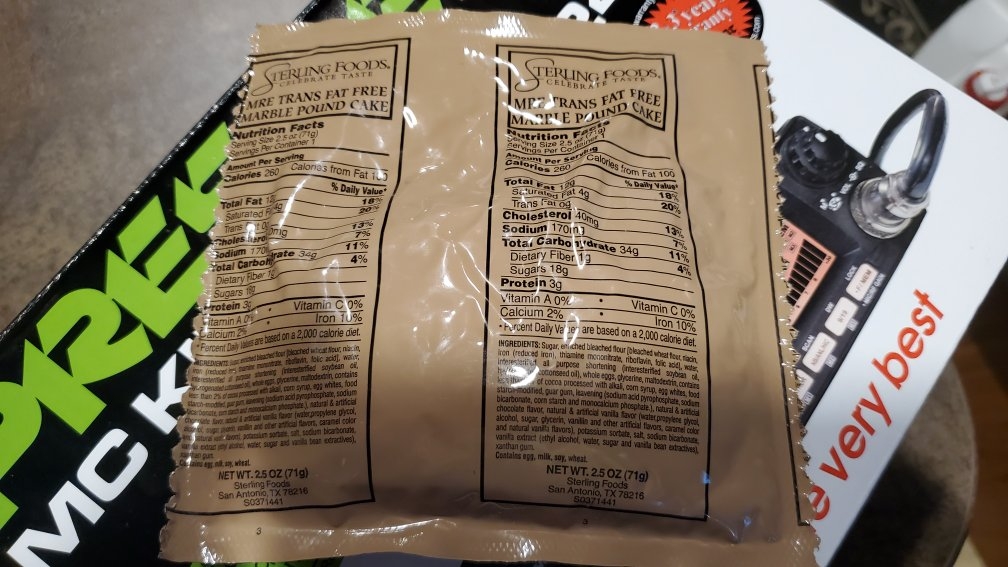
    Picked up a few MRE Desserts at Maine Military Surplus during some recent traveling. It had been a while since I tried.

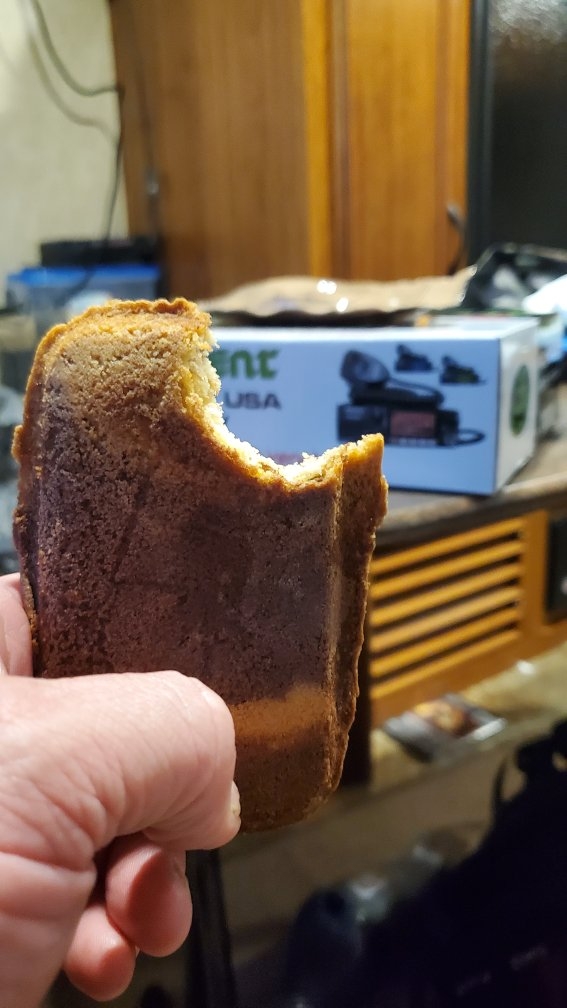
    Short post – – > Good stuff!!!

    Worth grabbing a few – or twelve. I store them in the fridge as I figure that will extend their already lengthy shelf life.

    Follow the link to get started – – > https://amzn.to/3n6F8aC

    The Applesauce Poundcake is my favorite.

    Rourke

    [ecwid_product id=”258960673″ display=”picture title price options addtobag” version=”2″ show_border=”1″ show_price_on_button=”1″ center_align=”1″][ecwid_product id=”262391061″ display=”picture title price options addtobag” version=”2″ show_border=”1″ show_price_on_button=”1″ center_align=”1″][ecwid_product id=”242168717″ display=”picture title price options addtobag” version=”2″ show_border=”1″ show_price_on_button=”1″ center_align=”1″]

  • Why Mountain House for long term food storage?

    Why Mountain House for long term food storage?

    Mountain House has been the ruler of long-term food storage for decades. The reasons are many including taste, excellent marketing, industry-best shelf life, and for quite some time they were the only major player. Today there are many competitors and options on the market. Over the last 30 years, I’ve seen several companies come and go – and I’ve eaten my fair share of them.

    After all this time I’ve continued to come to the same conclusion over and over again: Mountain House is the absolute best option for long-term food storage. Period.

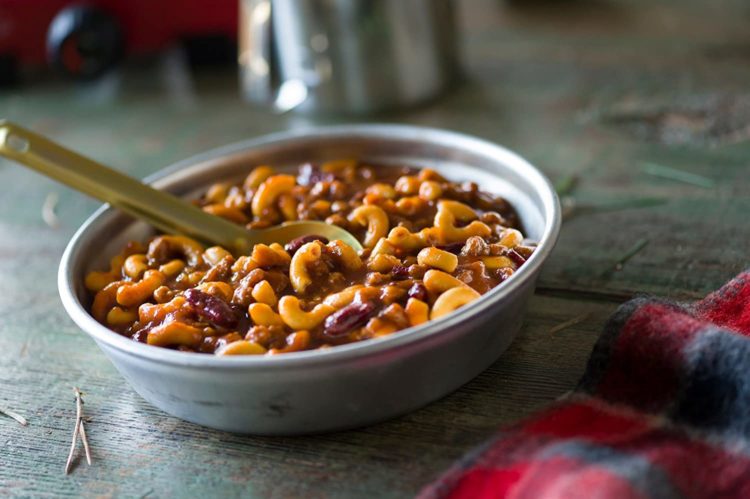
    “Mountain House Chili Mac”


    Why is Mountain House the Best?

    Unlike the majority of dehydrated and freeze-dried brands, Mountain House uses real meat in their products. Many other companies use TVP or textured vegetable protein in the vast majority of their products. This is especially prevalent in emergency bucket kits. While those bucket kits can be a great deal for an emergency food supply and to supplement other food storage they rarely contain any real meat. Research the Wise 120-serving Food Bucket and you will find no meat in the bucket at all.

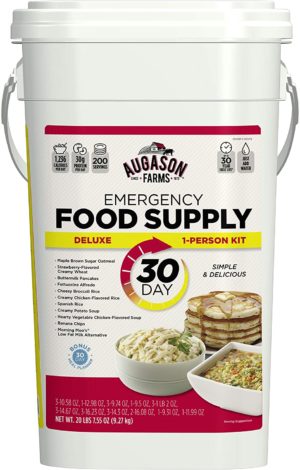
    “Augason Farms 30-Day Bucket. $77.98 – best deal in food storage”

    Take a look at many offerings from other leading food storage companies and many of the entrees offered in bucket kits are primarily soup. Mountain House has real entrees that would look right-at-home at a restaurant or dining room table. While it’s easy to suggest that Mountain House is overpriced, a true comparison needs to be made to make certain apples are being compared to apples.

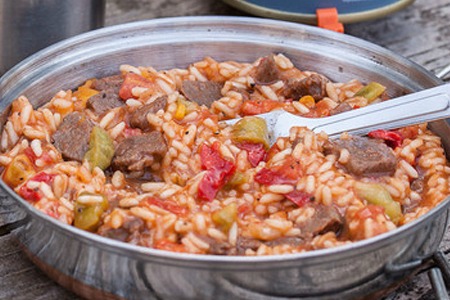
    “Mountain House Pepper Steak with Rice and Tomatoes”

    The shelf life of Mountain house foods is proven(30+ years). Numerous studies have been shown that other companies provide a “theoretical” shelf life and independent studies have shown it not to be on par with Mountain House.

    Another big benefit that I really like about Mountain House is when purchased in pouches the entire entree can be cooked, served, and eaten in the pouch. The vast majority of others require much more complex preparation and longer cooking times.

    Summary

    Understand I’m not really criticizing emergency bucket kits nor food made by Augason, Wise or other brands. I’m merely suggesting that you get what you pay for and far too often in the preparedness community I see thousands spent on tactical gear, but when it comes to food – cheap! I own Mountain House – as well as Augason Farm, Patriot Pantry, and 4Patriots. There is a place for all of these products. Just understand what they are.

    Go grab a few pouches at Walmart or order some on Amazon and see just how good this food is. When the zombies are eating your neighbor’s brain you’ll appreciate it. 🙂

    Bon appetit!

    Rourke

    tactical, shooting, deals, save money, prepping, ammunition, firearms, daily deals

  • 30-Day Food Storage Deal Found – – > $77.98 Free Shipping

    30-Day Food Storage Deal Found – – > $77.98 Free Shipping

    In the preparedness world, “cool” attracts a lot of attention. The latest & greatest guns have wallets being pulled out faster than Joe Biden’s brain cells are leaving his head. Communications equipment with all the bells and whistles that just might have you talking to ET. Bug out vehicles with knobby tires and super-bright aftermarket lights to show all the zombies looking to feast on your flesh. Don’t forget all the knives and backpacks to carry you off into the mountains to become another Grizzly Adams.

    Nope. Food isn’t considered cool.

    Neither is starving.

    I’ve got several of these buckets as part of my food storage program. The price is fantastic.

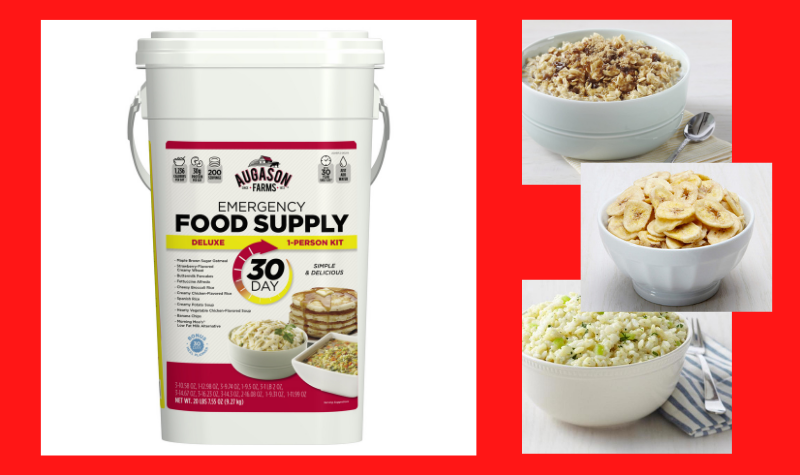
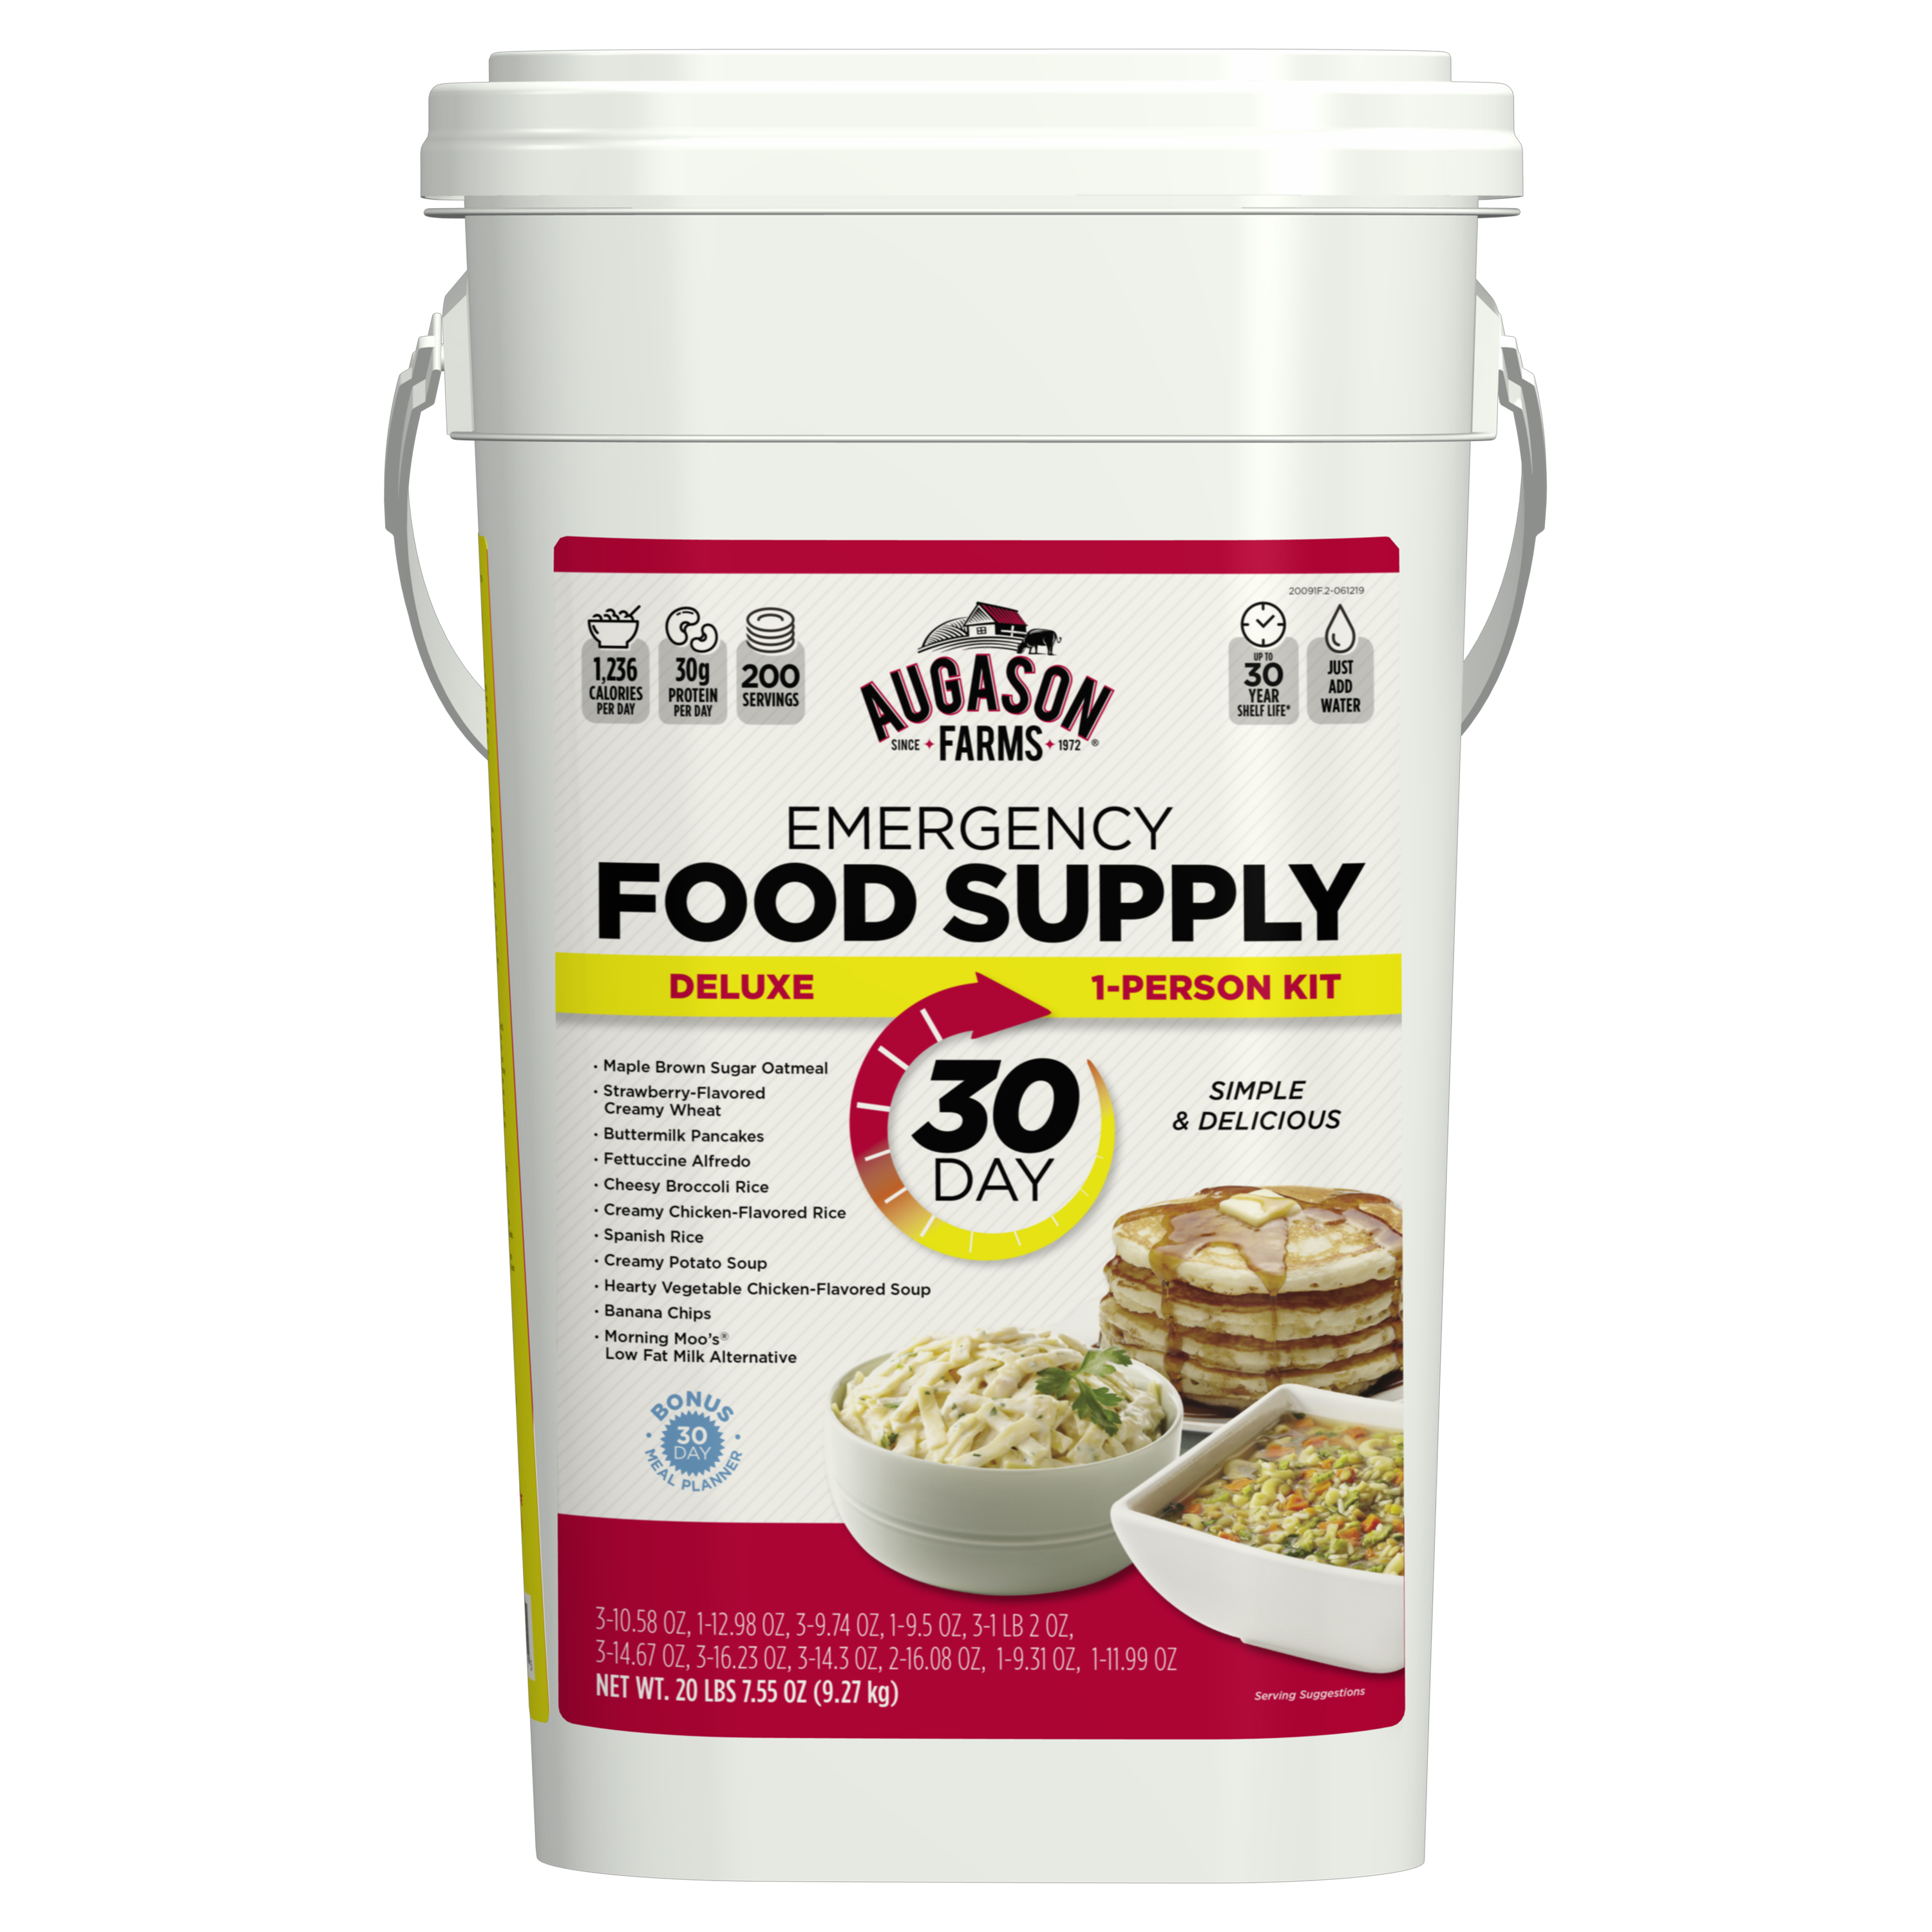
    This is the Auguson Farm’s 30-Day Food Storage Bucket. These have been popular in the past, however, over the past several months skyrocketed in price and sold out in many places. Right now they are available online for only $77.98 with Free Shipping.

    Details:

    • 200 Total Servings and 37,080 Total Calories
    • 1,236 Calories Per Day
    • 24 Pouches and 11 Total Varieties
    • Convenient 30-Day Meal Planner included
    • Shelf life up to 25 years

    If interested – click HERE.

    Rourke

    tactical, shooting, deals, save money, prepping, ammunition, firearms, daily deals

  • Taste Test: Yoders Canned Bacon

    Taste Test: Yoders Canned Bacon

    Bacon. Say “bacon” around a group of people and watch how their attention is instantly drawn to you. Hey – either you like bacon, or you’re wrong. For prepper’s considering what food to stock up on bacon is usually just a pipe dream due to its extremely limited shelf life.

    Enter: Yoders Bacon.

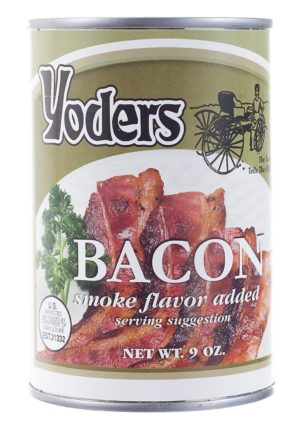
    I bought a few can’s of Yoders Bacon back in 2015. I decided to open one up and give it a try. Why? It’s bacon! I also wanted to see if the taste was good enough to purchase more.


    The Test: Yoders Bacon

    Yoder's canned bacon, SHTF, prepper, preparedness, food storage

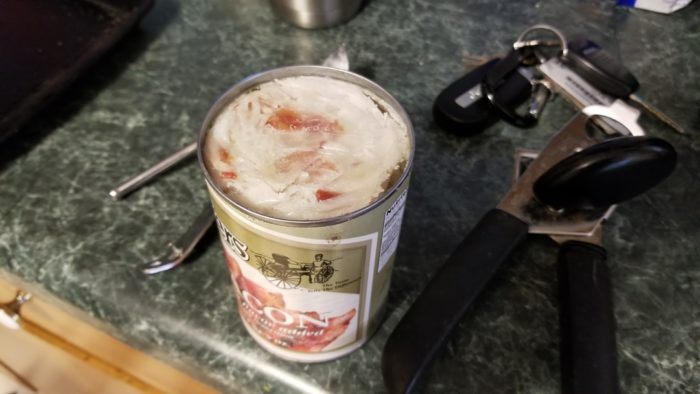
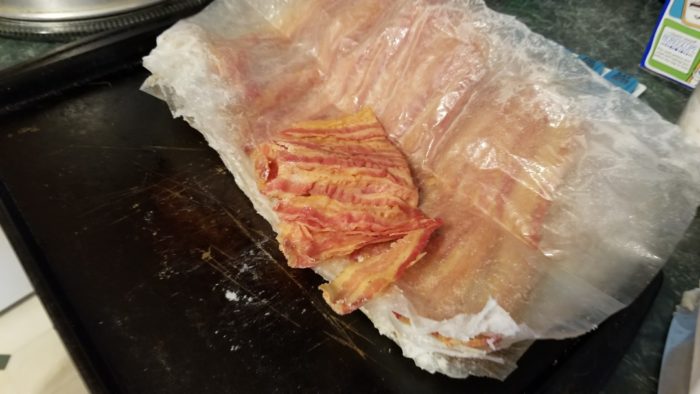
    Opening the can shows the bacon wrapped in wax paper and pressed in the can. The smell is “bacon-like” and I would not call it exactly good.


    Yoder's canned bacon, SHTF, prepper, preparedness, food storage

    Pulling the wax paper and bacon out shows just how everything is packed. There was an accumulation of hardened grease at the bottom. While some may be grossed out by the appearance it was no big deal to me.


    Yoder's canned bacon, SHTF, prepper, preparedness, food storage

    The bacon is placed in the can as full-length fully-cooked pieces. They are laid across the wax paper and then folded and rolled to fit in the can. I tried a piece fresh out of the can and it tasted like – well, bacon. It had a little different taste than I was used to. It might be the smoke flavoring – but it was good.

    In fact – if I had come in on a cold winter’s day out hunting and had a piece – it would be VERY good.


    Yoder's canned bacon, SHTF, prepper, preparedness, food storage

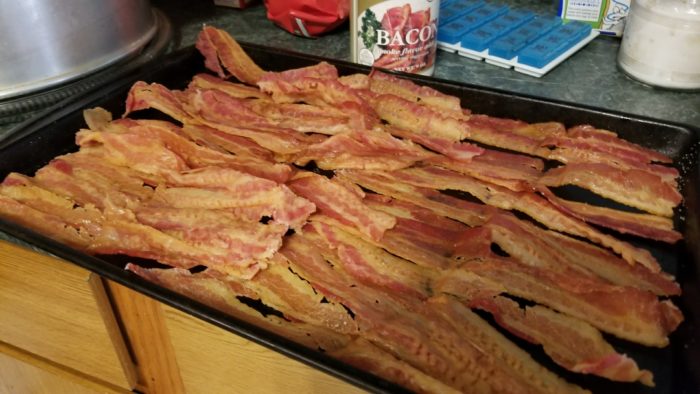
    I prefer my bacon warm so we spread some out on a pan to place in the oven. There is a lot of bacon in that can. The picture above does NOT represent all of the bacon. There was some still in the wax paper.

    Yoders Bacon is not very thick so while heating some care must be taken to not burn it.

    Shelf life is claimed to be upwards of 10 years. I would assume storage methods would influence this heavily.  Compared to other food storage options for bacon this is excellent.

    RECOMMENDED

    While Yoders Bacon can be found on sale throughout the year the best average price I have found is on Amazon. The more you buy the cheaper per can it becomes.

    As of this publication:

    1 can Yoders Bacon

    3 cans Yoders Bacon

    6 cans Yoders Bacon

    12 cans(case) Yoders Bacon

    This stuff is not cheap! However, if it’s bacon you want to add to your food storage this is one viable way.

    bacon, humor, bacon rules,

    Rourke

  • The Ultimate Bug Out Food Bar

    The Ultimate Bug Out Food Bar

    bugging out, food, food bar, survival, prepper, preparedness

    There is a huge market for specialty food bars made just for survival kits and bug out bags. I’m not talking about those 3,600 calorie bricks of cardboard that will enable you to try out your emergency dental kit. I’m talking high calorie, high protein energy bars that were developed by some “Navy Seal” and due to the “precise ingredient mix” allows them to attain a “tactical” level of existence. Yes – a bit of sarcasm.

    While many of these survival bars are great – they are also expensive and often difficult to find. There are alternatives right around the corner and down the street at the checkout of your local grocery store and corner market. That’s right – the candy bar.

    After taste-testing close to a dozen of the top-selling candy bars(it’s a tough job but someone has to do it) and evaluating the nutritional and environmental ruggedness of each I came to one conclusion:

    The Payday Peanut Caramel Bar is the ULTIMATE bug out bag food bar.

    So – why does the Payday rank so high?

    While a Snickers bar combines that ultimate combination of chocolate, caramel, nougat, and peanuts the extreme heat sitting in a vehicle trunk will leave that Snickers looking like something created after eating at Taco Bell.

    By the way – what the hell is nougat?

    Anyways – while the Payday will soften inside a hot car it doesn’t become a disaster like any chocolate confection. The combination of peanuts and caramel taste great and provide a very high-calorie protein boost.

    Here is the nutrient breakdown for the KING SIZE Payday bar:

    In the King Size format, there are two smaller bars in one pack. For the entire 2 bar pack, there are 440 calories, 50 grams of carbs, 24 grams of fat, and 12 grams of protein. For someone expending a lot of energy via walking, running, or physical labor this is some serious fuel.

    Shelf life pales in comparison to many of the more expensive cardboard survival bars. 6-12 months or so is a good estimate depending on storage conditions. Running less than $2.00 per Payday bar they extremely affordable.

    So – when the asteroids are pummeling through the Earth’s atmosphere and zombies are crossing the railroad tracks to eat your brain and you need some quick energy – make it a Payday.

    Rourke

    tactical, shooting, deals, save money, prepping, ammunition, firearms, daily deals

  • CanCooker Beef Stew

    CanCooker Beef Stew

    I got a brand new CanCooker Companion for Christmas. I love to cook and especially love using a crockpot. Although this is not a crockpot in the sense that you can set it and forget it all day, it is however a way to throw everything in one pot with the added bonus of being able to use it on an open fire or grill. In the event of a power outage, it is definitely something you can use to feed your family. It is very similar to an Instapot except it is vented the entire time.

    There are 3 different sizes of the Can Cooker: The Companion which holds 1.5 gallons and feeds 6, the CanCooker Jr is 2 gallons and feeds 8, and the CanCooker Original holds up to 4 gallons and feeds up to 20. They all have a non-stick coating and have a variety of accessories that can be purchased separately. The rack that can be placed on the bottom is the next thing I would like so that I can bake things in my CanCooker. It would make a great Valentine’s Day gift (hint, hint)!

    For my first time using it I chose a fairly easy recipe from the CanCooker website.

    INGREDIENTS:

    • 2 lbs beef, cut into 1-inch pieces
    • 1 lb potatoes, cut into 1-inch pieces
    • 6 oz portobello mushrooms caps, cut into 1-inch pieces
    • 2 medium onions, cut into wedges
    • 2 cups fresh baby carrots
    • 1 (14-oz) can beef broth
    • 1 (14-oz) can diced tomatoes with Italian herbs
    • 1 cup Burgundy or Pinot Noir wine
    • ½ tsp pepper

    DIRECTIONS:

    Spray non-stick cooking spray inside the CanCooker. Add the beef, then the remaining ingredients. Latch lid and cook on medium / low heat for 45 minutes.

    Carefully remove the lid, and let stand for a minute. Stir in a mixture* of water and all-purpose flour to thicken the stew to desired consistency.
    Remove from heat and serve!

    *Mixture to thicken stew: 3 tbsp water and ¼ cup all-purpose flour. 

    Note: You can increase or decrease the amount of ingredients in this recipe but please make sure to use at least 12 oz. of liquid.

    I did not add the mushrooms ( I am not a picky eater, but those things I cannot stand no matter how many times I try them) and instead of thickening with flour I chose to add 1 cup of rice the last 20 minutes of cooking and it turned out great!
    This was so simple, throw everything in and then on to the grill!

    I placed it on high heat at first then when it started to steam I turned it down so that I could no longer see the steam as per the instructions on the website. after about 25 -30 minutes I added the rice. This is how it looked when I lifted the cover.

    The finished product….

    Needless to say, we are both stuffed and have a lot of leftovers for tomorrow. Cooking at home is not only healthier and cheaper than eating out it’s great practice. Being able to use the tools you have in the event of a SHTF situation is crucial and should be an important part of your prepping!

    Happy Prepping!

    Maine Prepper Girl

    tactical, shooting, deals, save money, prepping, ammunition, firearms, daily deals

    patreon, banner, logo, survival, preparedness, SHTF, prepper,

  • How to Can Bacon

    How to Can Bacon

    canning, bacon, how to, food storage, preparedness, prepper, SHTF

    NOTE: The following is NOT the recommended method for canning bacon by the USDA.

    line

    You will need a large (tall) pressure canner; a rack on feet OR 2 racks and jelly jars with caps and rings;  quart jars with caps and rings, preferably wide-mouth, thick-sliced bacon,  and parchment paper (or paper bags).

    Get lots of parchment paper; I buy mine in rolls at Sam’s – much cheaper this way.

    Get your jars ready –  quarts will work best for this project, and wide-mouth will be easier to fill than regular mouth jars.

    Remember that canning bacon works best with thick-sliced; most others will disintegrate or turn into a large blob of bacon.

    Cook your bacon in advance (trust me when I say this works better than packing raw bacon, although, you CAN do that, too!). I microwave ours; but, cook it until it’s “crispy” (or, however you like it cooked). You will have to cook it up again to crisp it when you open the jars, but, that won’t take much “cooking” when you pack it cooked.

    Tear off a strip of parchment paper to hold about 8 slices, rolled up; if you get it too short, it doesn’t matter; you’ll just pull off another piece of parchment and keep going. Parchment paper cans just fine; don’t use wax paper – it does not. You CAN use paper bags, if necessary, but, parchment paper works best.

    bacon-is-the-answer-4

    Roll your bacon, one cooked strip at a time, in parchment, making sure each strip is rolled and protected from the next strip by paper; if the bacon is wrapped meat-to-meat; it will all stick together after processing and cooling, and you will have one big lump of bacon. Good luck getting that out of the jar!

    When you have about 8 strips (you may be able to get more in there!); fold the strips of wrapped bacon in “half”; trim the ends of the parchment, leaving about one (1) inch at either end of the bacon (one inch parchment paper hangover on each end).

    GENTLY stuff the folded strips down inside your jars. This is where you will understand why I tell you wide-mouth is best here. You CAN use regular mouth, but, GENTLY work it down, using a spatula, or some such tool. And try not to mutter to yourself too much while stuffing regular mouth jars!

    When the jar is filled (it’s o.k. if it’s not “full-full”, as in there are air spaces – that’s normal for this project), wipe jar openings with hot water. Each jar opening needs to be wiped down with VERY hot water and a fresh paper towel; fat is very easy to transfer. Wear protective insulated rubber gloves for handling the hot paper towels, but use one fresh paper towel per jar.

    Sterilize your caps and place them; sterilize your rings and place them.

    Now, you can process these down in the water, and the result will be “o.k.”. What I find works much better is to DRY CAN THE BACON. This is not running your canner dry – that will ruin your canner; what it means is the jars need to be held ABOVE the water line while processing. (BTW: you can use this method to sterilize tools and instruments, but, that’s another story for another day).

    This is where the height of your canner is important, and thus, a bigger canner works better for this project  – make sure you have three (3) inches of clearance between the top of your bacon jars and the top of your canner, when it is sealed. So, when you put in all your racks and your jelly jars of water, or whatever, then your next rack and the jars of bacon, you need 3 inches of clearance at the top.

    Make sure you have about three (3) inches of water in your canner; you don’t want to run out of water.

    Use a rack with legs that hold the jars above the waterline (good luck finding THAT!), or – do this:

    1.  Place one rack in the bottom of the canner, as you always do.

    2.  Fill at least four (4) jelly jars with water and add lids and rings; you can either process good, clean water (not municipal, fluoride, nano-particle drug water!) and store it as sterile water (an excellent prep item – use for cleaning out wounds, etc.), or, just sacrifice a few caps for the sake of the project without saving the water – you can use the same jelly jars of water as many times as you need. Let them cool a little between loads. You’re going to use the jelly jars to build up the height for processing bacon; YOU CAN NOT DO THIS WITH EMPTY JARS – THEY WILL ‘FLOAT”, AND CRACK DURING PROCESSING. You can not process other food in the jelly jars at the same time, as jelly jars are much smaller than quarts; food processed in a jelly jar for that length of time will turn to mush.

    3.  Place jelly jars of water atop the first rack that is protecting them from bottom of canner.

    4.  Place a second rack on top of jelly jars – this rack can literally lay across them
    5. Set your quarts of bacon atop this SECOND rack. Check your water in canner – you need three (3) inches of water; if water laps bottom of jars, o.k., but you don’t want them immersed in water.

    6.  Seal your canner and fire her up!

    7. On high heat, build your steam; steam it out for 10 minutes, as always (10-minute tornado from the vent pipe);

    8.  Place your counterweight on the vent pipe; bring to 10 lbs. pressure and process @ 10 lbs. for 90 minutes because we’re doing quarts. After 90 minutes at 10 lbs. pressure, turn off heat if gas, remove from heat if electric.

    9.  Allow to cool naturally; remove jars; if wide-mouth, remember, they don’t make the noise regular mouth make when sealing, and they don’t make the same sound when tapped. NEVER TAP THE CENTER OF THE CAP TO TEST – TAP AROUND THE EDGES.

    10.  When thoroughly cooled, wash your jars of bacon in hot, soapy water (fat everywhere!), rinse in hot water, allow jars to thoroughly dry; mark caps with contents and date and store away.

    To enjoy: it’s already cooked; you could just set it out in the sun and heat it up, or, eat it straight from the jar. But, Yes! It will be greasy (the paper does absorb a lot of the grease). I like to throw it in a pre-heated cast iron skillet and just “re-crisp” it. It doesn’t take long at all!

    This works out great for camping (even though it is in glass). That glass jar comes in handy for storing other leftovers, as well, so, you’ll get more than one use from the jar while traveling.

    It’s also convenient to have pre-cooked bacon at the ready for a quick breakfast, casserole, etc.

    How long is this good? 5-6 years, if you store it out of direct sunlight, and away from heat sources.

    And now you know how to dry can bacon! If you don’t want to dry can, just use the standard method of one rack sitting in the water; all other instructions do not change.

    Guest Post by S.

    yoders-canned-bacon

  • Canned Bread Yay or Nay?

    Canned Bread Yay or Nay?

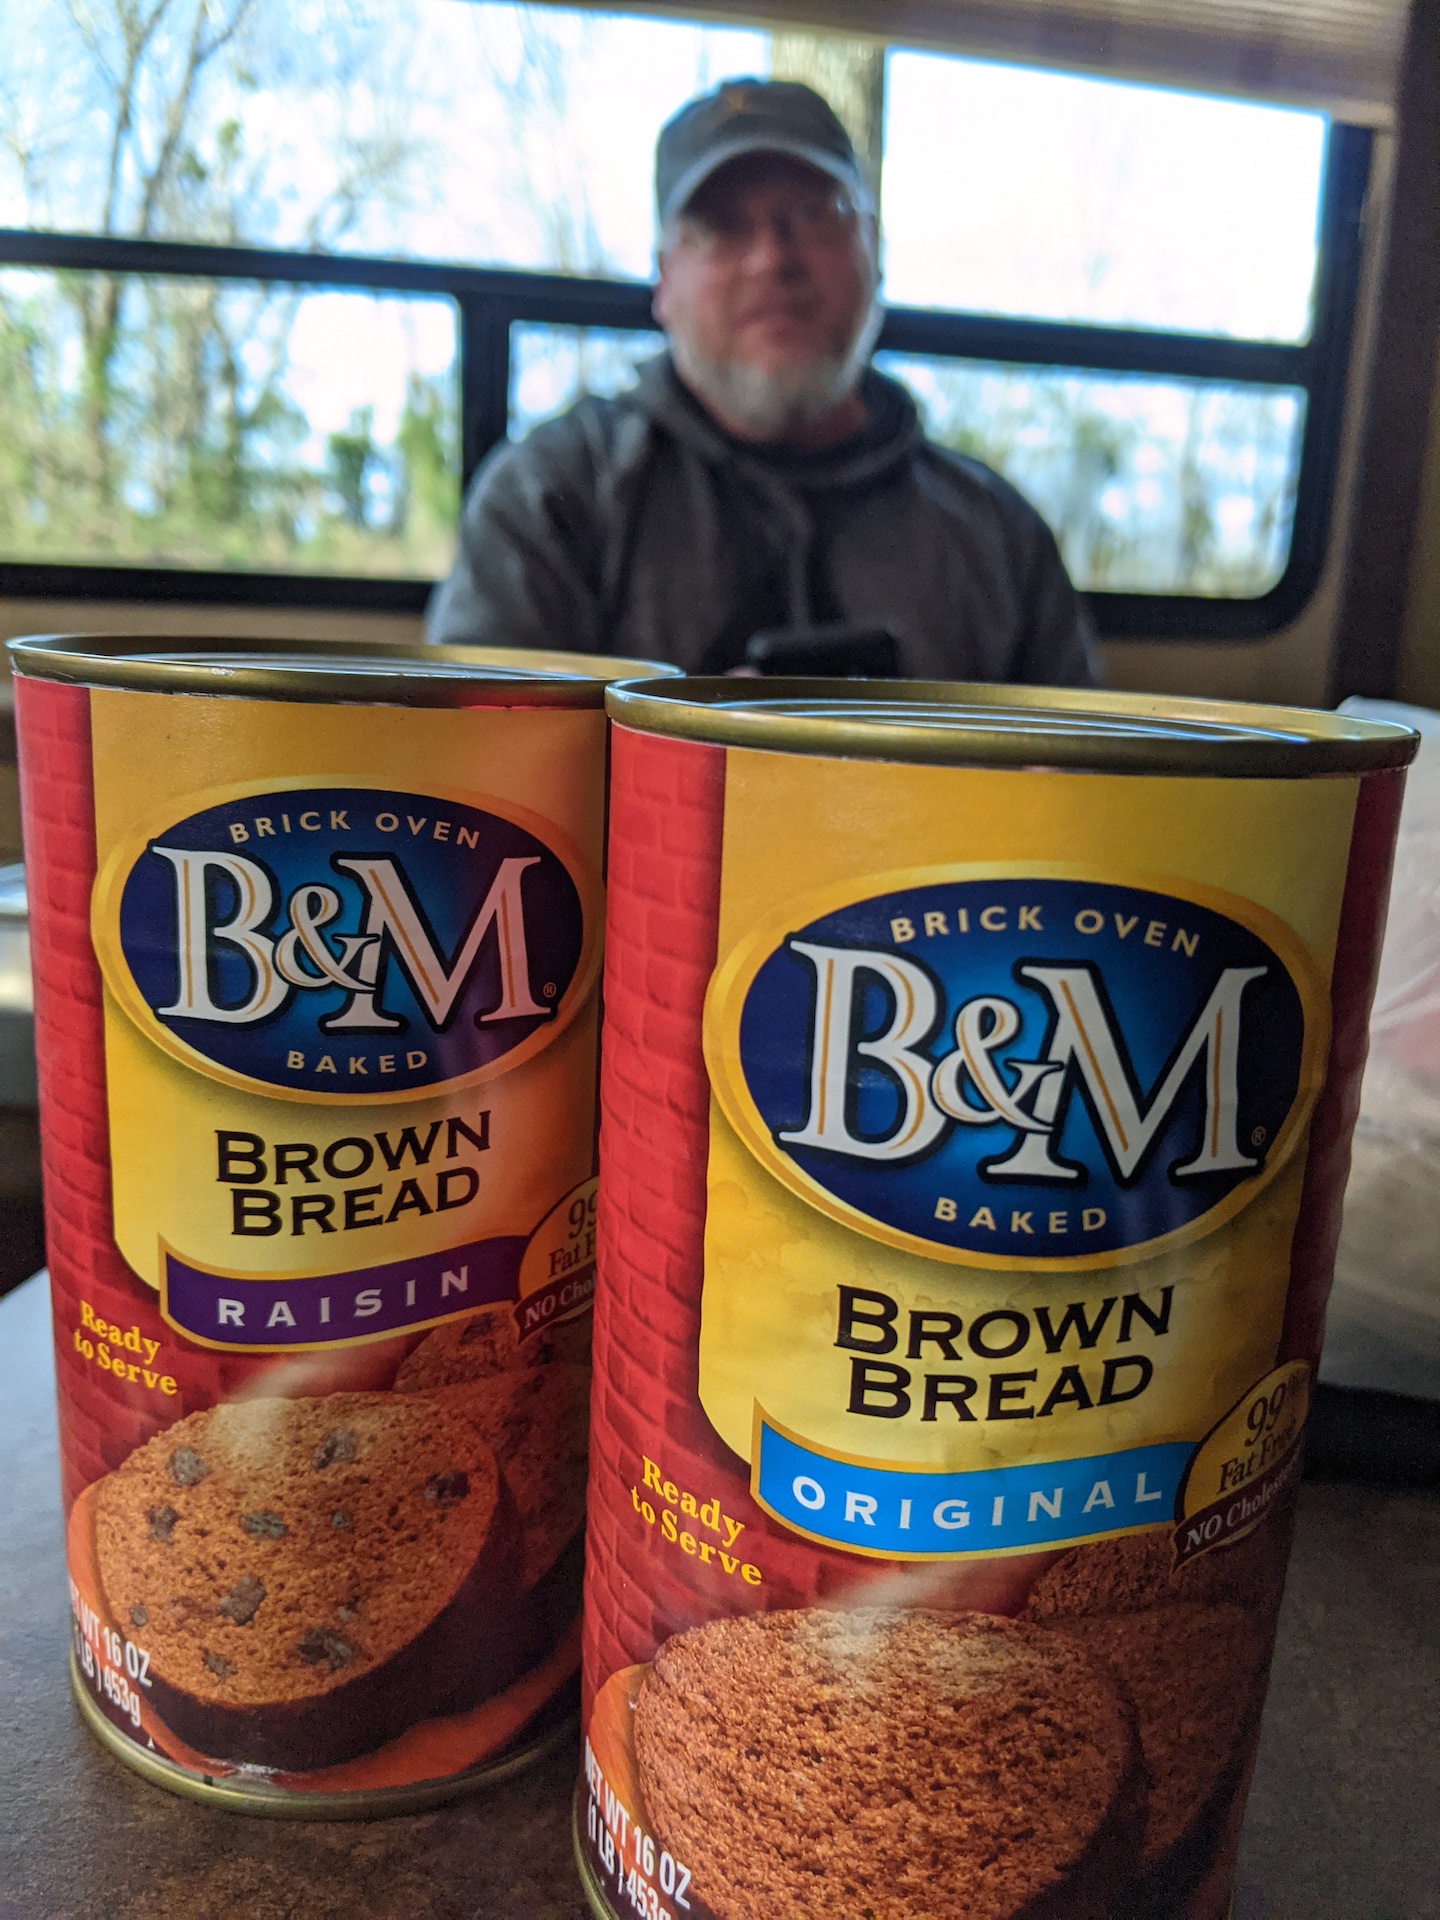
    Mr. Rourke gives this canned bread a big thumbs down. I did get him to like it when toasted with butter, added salt (yes, I added sea salt), and topped with a big slab of Jiff peanut butter. He says everything is better with peanut butter and I cannot disagree. I do, however, think that this bread has a place on the prepper’s pantry shelves. It stores well and for a canned item, it is very light.  The bread is also versatile as it can be a dessert or a meal and if you don’t have time to make bread then boom, you got bread.

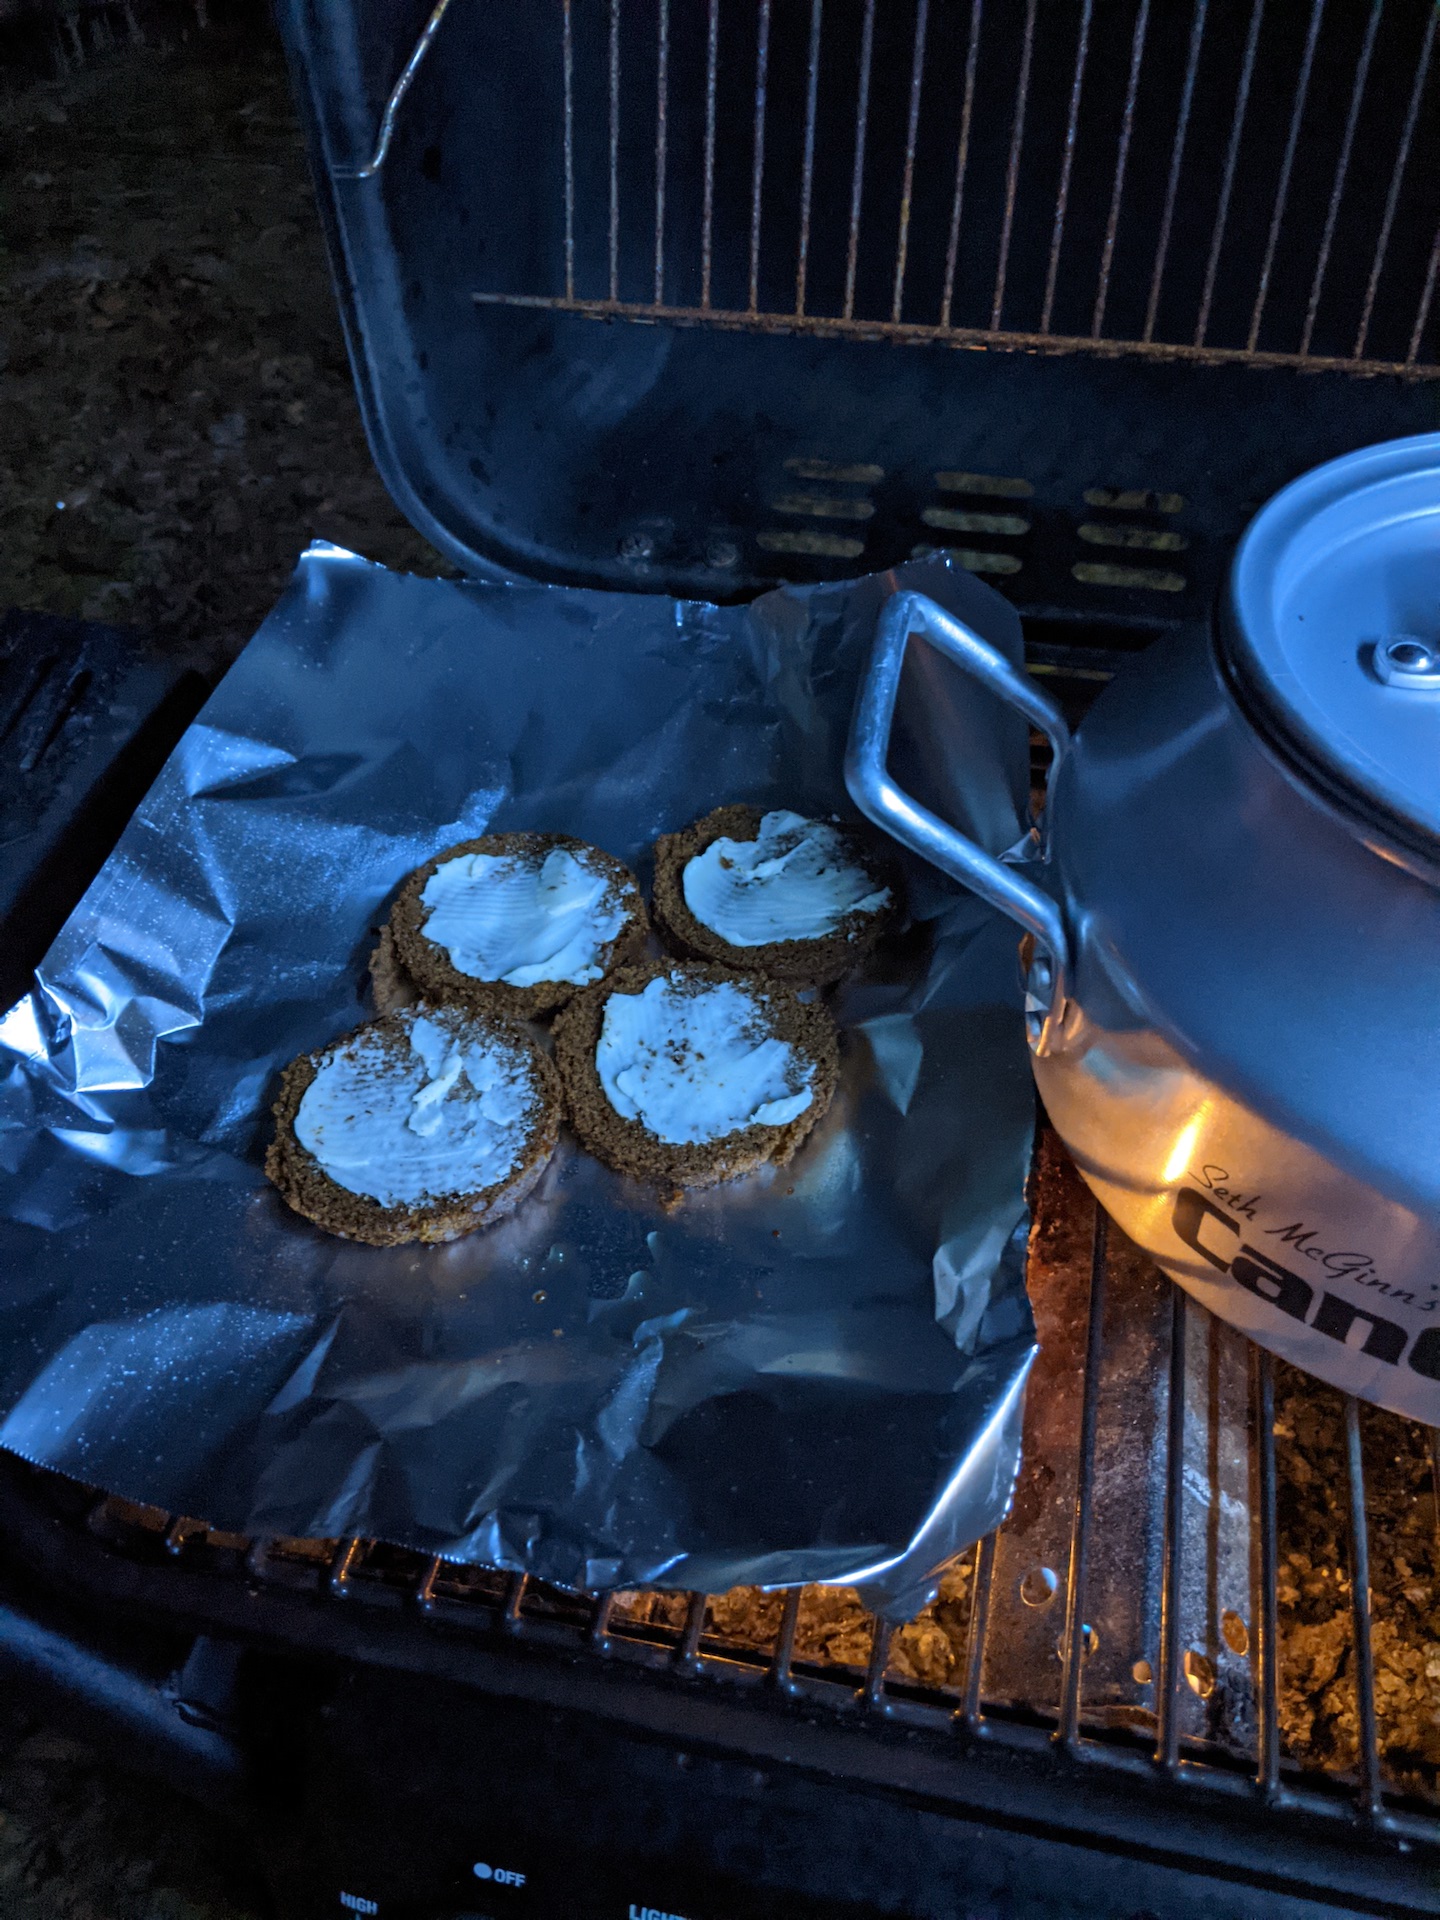
    I toasted the canned bread after slicing it the way you do a can of cranberry sauce at Thanksgiving. I added some butter and put it on the grill. What you see next to the bread is the beef stew I made in a CanCooker (article to follow soon)!

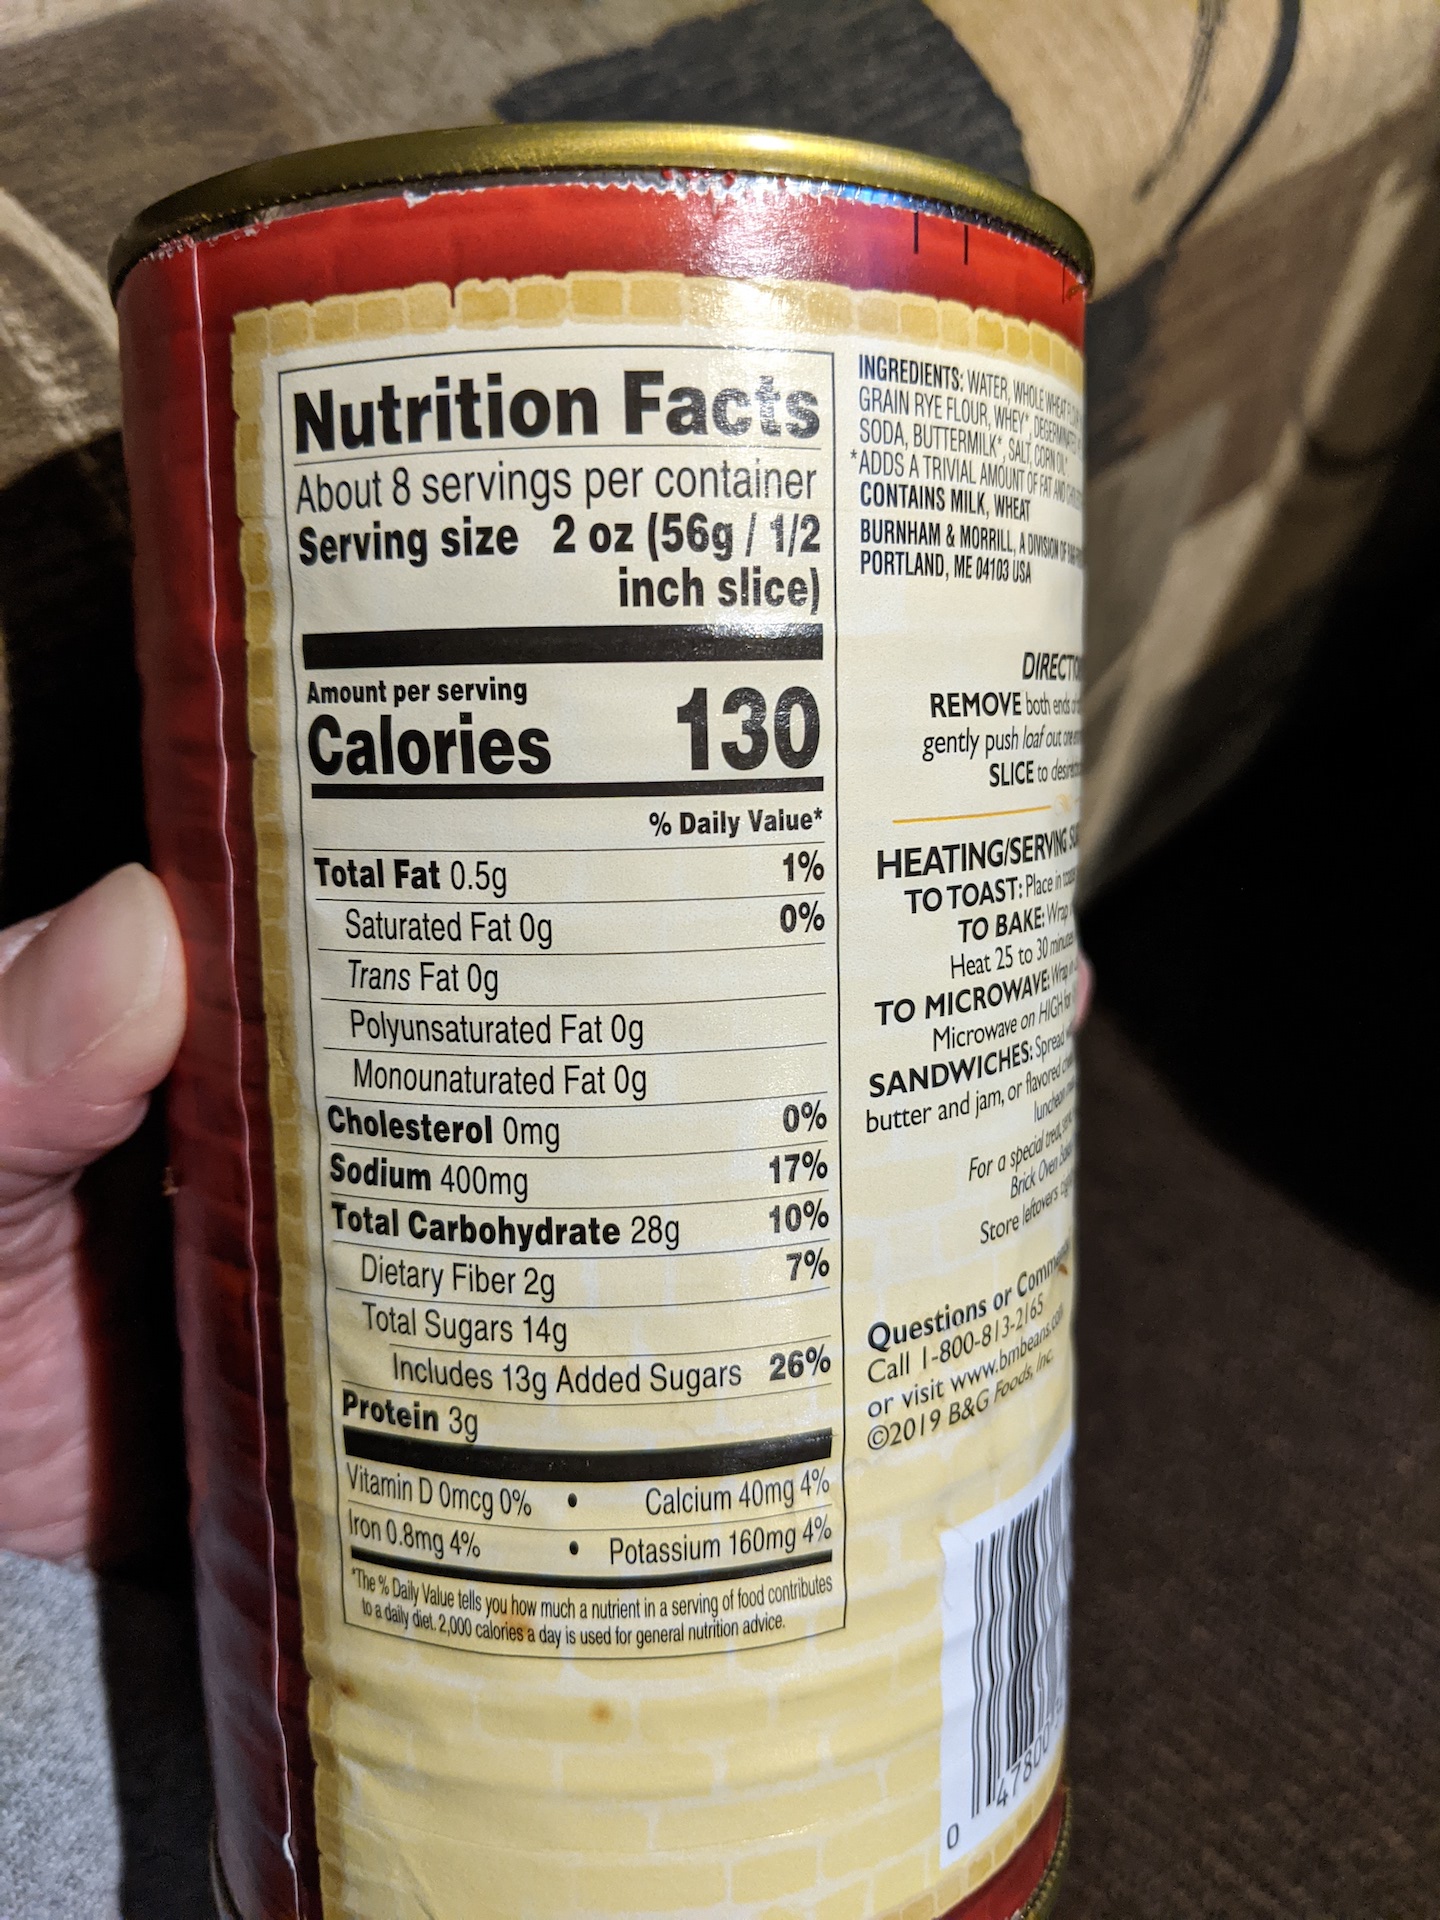
    For those of you who are keeping track of the calories in your pantry here is the nutritional information. The entire can is 1040 calories which I think provides a good amount of calories. The best price I found on Amazon is $2.69 a can if you buy 12 and a subscription. I am thinking you might be able to find them at WalMart too. I know that they have them in many Maine grocery stores if you ever find yourself up that way!

    B&M BROWN BREAD


    Happy Prepping!

    Maine Prepper Girl

  • 30-Day Food Storage Deal Found – – > $77.98 Free Shipping

    30-Day Food Storage Deal Found – – > $77.98 Free Shipping

    Hey – just came across this deal and wanted to pass it on.

    This is the Auguson Farm’s 30-Day Food Storage Bucket. These have been popular in the past, however, over the past several months skyrocketed in price and sold out in many places. Right now they are available online for only $77.98 with Free Shipping.

    Details:

    • 200 Total Servings and 37,080 Total Calories
    • 1,236 Calories Per Day
    • 24 Pouches and 11 Total Varieties
    • Convenient 30-Day Meal Planner included
    • Shelf life up to 25 years

    If interested – click HERE.

    Rourke

  • Practice and Learn- What I Learned From Preparing Auguson Farm Food

    Practice and Learn- What I Learned From Preparing Auguson Farm Food

    Augason Farms Creamy Chicken Flavored Rice 

    I consider myself a prepper in training. I can remember back in the early 2000’s wanting to be prepared for winter time in Northern Maine. The year after that my awareness for the need to be prepared for other situations grew. It was a sixth sense of sorts that is hard to explain.  Wanting to keep my family safe, I thought about potential situations that I could face and need to be prepared for. Each fall time, without fail, I would feel the need to prepare for the winter ahead.

    Planning for the winter ahead included, stocking up the extra freezer I had in the basement with half of a beef from the local butcher. Furnishing the basement with shelves to put extra canned goods to keep was another. I had a camp stove with some small cans of propane to prepare food. Having extra coolers to keep my food cold and safe outside in a snowbank was also an option for food storage if needed.

    Knowing there was a big hole in my plans because I had no secondary source of heat I needed another plan. Without heat, I would have to go to relatives if that was needed. In retrospect, I would have put in a wood stove in the event of a power outage. I had plenty of wood on my 12 acres and would have kept seasoned wood in the basement for emergencies. 

    Many people in Maine put in secondary sources of heat in their homes but both relied on electricity which made no sense to me. Others had generators which was probably what I would have gone with if I had not sold and moved. I ofter saw generators used to keep the heat on if nothing else during a power outage in winter. My next home will have a wood stove for sure! 

    Anyway, back to the creamy chicken rice, my point is that being accurately prepared takes a lot more than just buying stuff. Figuring out what works for you in your environment while considering the needs of those around you and other possible needs BEFORE you need them is crucial. I thought Mr. Rourke was silly for wanting to try some of the freeze dried food. Why would we want to waste good food that can be stored long-term? Well, I am glad that in this instance he was correct.

    I learned a few things that I will consider when buying more freeze dried food.

    1. The first thing I learned was how much water you need to make the meals that come in this kit. The creamy chicken flavored rice needed 5 cups of water and a couple of the other meals needed 8 cups and 10 cups.
    2. Another thing I learned when making this side dish was that it could have easily been made into a main dish by adding a can of chicken and/or a can of veggies. The container says it is 8 servings so adding more would either feed more or let you have a bigger portion.
    3. Also worth noting was that a little garlic salt really made a difference in the taste.
    4. The last thing I learned was that although this kit was for 1 person for 72 hours unless I planned on eating just chicken flavored rice all day I would need a way of storing the prepared food. You could just make half but you would still need a way of storing the packet of dried ingredients for another day.  Containers and plastic storage bags would make things easier when trying to store the leftovers.  

    The Creamy Chicken Flavored Rice was very simple to make. I did have to stand there and stir quite often to prevent clumping but other than that you only need a few things. You will need a pot, measuring cup, 5 cups of water, and a whisk.

    Here is the container of food, how it looked when we opened it, and all the individual bags that come in it.


    Here is the nutrition information of all the packages in the 72-hour food supply. We chose to have the Creamy Chicken Flavored Rice. It has 240 calories for 1/3 cup and says it is 8 servings.

    The only thing we had to do was boil five cups of boiling water and add the contents. 


    As stated previously I had to tend to the dish by stirring occasionally to prevent any clumping.

    The final product was very good alone, however, we did add some garlic salt and pepper for a little more flavor. The consistency was a little thicker than what you would expect from a rice dish, but again very good.


    Anyone have any experience with freeze dried or dehydrated food that you could share? I would love to hear about them!

    To purchase the Auguson Farm 72-Hr Emergency Food Kit mentioned in this article follow THIS LINK. Current price is less than $25 with Free Shipping.

    Maine Prepper Girl

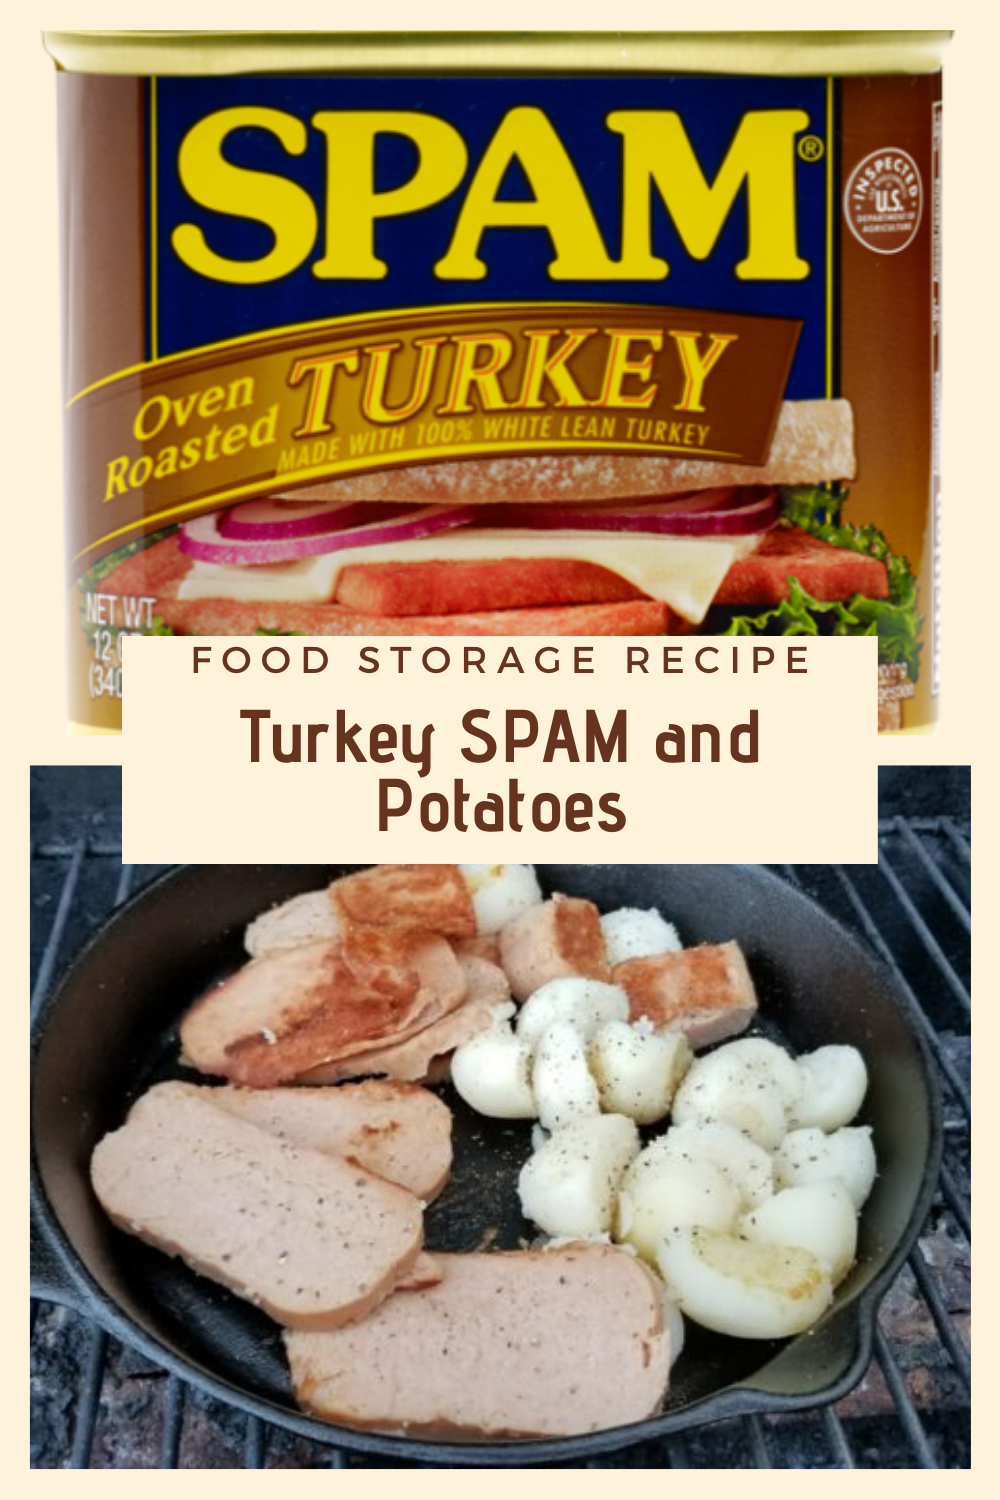
  • Food Storage Recipe:  Oven-Roasted Turkey SPAM and Potatoes[2020]

    Food Storage Recipe: Oven-Roasted Turkey SPAM and Potatoes[2020]

    food storage, recipe, food recipe, SPAM, SHTF, preparedness, prepper, survival

    What foods to store in a food storage program is a popular topic – but what about making meals from that food? Not so much.

    With this recipe, I put together something a little different – Turkey SPAM & Canned Potatoes. SPAM is often considered a joke when it comes to food storage but the truth is it’s a viable source of sustenance. As a kid, I used to eat it on a regular basis thinking it came from small SPAM animals that were raised on a farm somewhere. I liked it but once I was old enough to decide what I ate I moved on to other things like……cake. Cake is good.

    SPAM, turkey, survival, food storage, prepper, preparedness, recipe

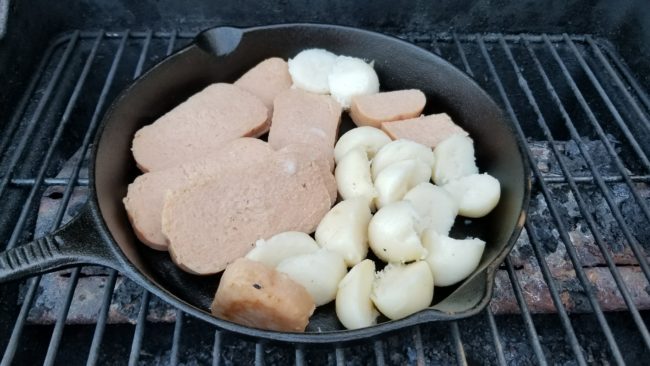
    Not knowing how well I would like SPAM some 30 years later I grabbed a can of Turkey SPAM. Out to the grill with a cast iron pan and a can of potatoes.

    Here we go…..

    Ingredients

    • 1 can Turkey SPAM(say that 10 times real fast)
    • 1 can Whole Potatoes
    • salt, pepper, seasoning as desired

    Instructions

    • Apply non-stick spray to frying pan or use a seasoned cast iron pan
    • Set temperature to medium to medium-high
    • Open the SPAM, cut into cubes or slices – place in frying pan
    • Open can of potatoes, drain excess fluid – empty into frying pan
    • Cook until browning has occurred on most pieces of SPAM and potatoes.
    • Apply seasoning when food is almost complete.
    • Turn SPAM and stir potatoes every few minutes until done.
    • Serve and enjoy

    While this may not be the most delectable meal, however, I was surprised at just how good the SPAM was. Very good. I could imagine coming in from a cold winter patrol and absolutely loving this meal.

    At 655 calories(50+ grams of protein) this is very filling for one but could be split between two people as well.

    [TOP – Fresh on the grill]


    [TOP – Turned and Stirred – Pepper Added]


    [TOP – COMPLETE]

    line

    Canned SPAM is an excellent source of protein with a long shelf life – and fairly inexpensive. In this specific meal a simple can of potatoes and can of SPAM makes for a pretty tasty meal.

    Now….where’s that cake at?

    Rourke

  • The No BS Survival Guide to Food Storage

    The No BS Survival Guide to Food Storage

    I’m going to throw this right out there: I call this a “No BS” guide because most articles like this are loaded with fluff explaining things like how oxygen absorbers work, the canning process, and how dehydrated food is made. That’s not going to be found here and if someone is interested in that there’s a YouTube video no doubt. Google it.

    There’s a growing concern that some tumultuous times are close at hand. I’m talking within the next few years. FOOD has got to be the #1 priority for every person who wishes to not only insulate themselves from what’s coming but survive and thrive. Everyone has their own version of what may be waiting just over the horizon. Regardless of your own version of SHTF food is required and not having it creates an additional set of dangers, risks, and situations.

    We all know you need calories and enough of them. More people in the group means more calories and more food. Pretty simple equation.

    As most of us are on a budget, purchasing as much food as possible for the least amount of money is a major consideration. Let’s get on with it.


    Meal Planning

    The foundation of a solid food storage program begins with meal planning. The idea here is to come up with 7 meals per week for breakfast, 7 for lunch, and 7 for dinner. Total of 21 meals weekly.

    Here’s an example of one lunch meal:

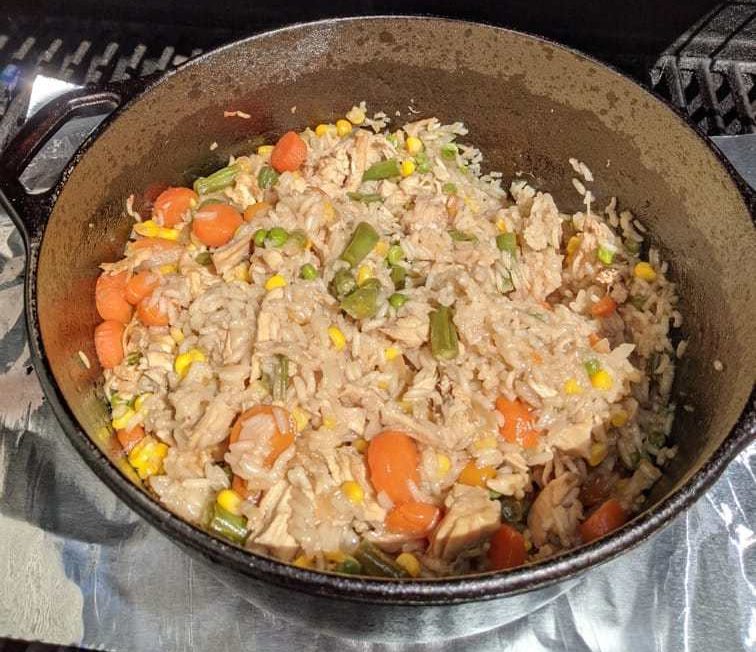
    Chicken and Rice for Four People

    Cans of chicken(2 – 10oz. cans)

    Rice(2 cups)

    Carrots(1 can)

    Corn(1 can)

    Chicken bullion(2 cubes)

    salt, pepper, seasoning as desired

    Nutritional Information(TOTAL): Calories  1280, Fat  27, Carbs  142, Protein  104

    Nutritional Information(per person): Calories  320, Fat 7, Carbs 36, Protein  26

    Cost: Approx $5.00 if bought frugally

    As part of your meal plan, let’s say this is the lunch every Wednesday. If you are meal planning for 3 months/12 weeks then you would need to have the following:

    • 24 cans of chicken
    • 24 cups of rice
    • 12 cans of corn
    • 12 cans of carrots
    • 24 cubes of chicken bullion
    • salt, pepper, etc.

    Do this for 7 meals each for breakfast, lunch, and dinner.

    This simple example can be customized to suit your tastes and needs. All of your food storage supplies will be represented. Some meals may come completely from a can, while others will be a combination of freeze-dried, bulk packed rice, beans, etc, and canned.

    A few other suggested meals:

    • Spaghetti w/meat sauce(1 box of spaghetti + 1 can of meat sauce)
    • Chili(pretty simple, dump chili out of a can into a bowl – or make from scratch)
    • Pancakes(“Just Add Water” pancake mix, water, syrup)

    Does this sound like you will be storing a lot of food? It should. People eat a lot of food.

    Task: Grab a pad of paper and start mapping out your meals.

    food storage, budget, cheap, inepxensive, canned, food, SHTF, prepper, preparedness, survival

    FOOD STORAGE OPTIONS:

    Canned Goods

    Canned goods continue to be a major part of my own food storage program. There is nothing wrong with other options such as freeze-dried foods or bulk packed rice, beans, wheat, and pasta. These are all part of my own system but the point needs to be made and understood that canned goods should NOT be considered secondary or a lesser means which to stock up.

    Canned foods can last well past their expiration dates. They are inexpensive and readily available. One major drawback is weight as they are very heavy. As I write this canned corn is priced at Walmart for .38 cents per can. 100 cans of corn would cost $38.00. From a budgetary perspective along with the incredible variety canned foods are hard to beat.


    Dry Goods

    When it comes to food, dry goods are things like rice, pasta, sugar, grains, beans, lentils,  etc. Canned goods are considered dry goods but I put them in a category of their own.

    Rice, beans, and pasta can be stored for many years in mylar bags with oxygen absorbers. When it comes to calories per dollar – these cannot be beaten.

    Rice and beans in particular can be foundations for many meals. They can be bulk-packed and stored for many years and are inexpensive.


    Freeze-Dried/Dehydrated

    Freeze-dried food can be stored for upwards of 25+ years. Preparation is as simple as boiling water. I have prepared many different meals that were freeze-dried and have yet to find one I did not like. Freeze-dried foods are lightweight as well so they are excellent for transportation in large volumes.

    Amazon often carries 30-day buckets from Auguson Farms. Currently in this unpredictable environment prices are elevated. Regardless – at around $150 or less they remain a bargain for a 30-day food supply.

    30 day, food storage, bucket, best deal, save money, prepper, preparedness, SHTF

    A Quick Shopping List

    Here is a quick list to get you started on the road to food storage:

    • Rice
    • Beans
    • Canned Vegetables
    • Canned Fruits
    • Oats
    • Canned Meats
    • Peanut Butter
    • Pasta
    • Spaghetti Sauce
    • Coffee and Tea
    • Powdered Milk
    • Cooking Oil
    • Salt
    • Powdered Drink Mix Such as Gatorade
    • Pancake Mix
    • Canned Soups
    • Sugar
    • Spices and Seasonings
    • Candy, Snacks, and Morale Boosting Foods
    • Water


    There is NO time for complacency.

    Stack it high and stack it deep!

    Rourke

    line

    Complete Paladin Press Library on USB – $19.99 Free Shipping

    line

    line

    Over 100 GB’s of Survival & Preparedness Information – FREE SHIPPING!

    line

    American Survival Guide, magazine, PDF, collection

    USB drive packed with Over 100 Issues of American Survival Guide – FREE SHIPPING!