Category: Preparedness

  • Need CR123 Batteries?

    Need CR123 Batteries?

    Just saw on Amazon that Tenergy 3V CR123 batteries are at a fantastic price for a pack of 12 at only $15.99.

    I have bought these very same batteries numerous times. If you have flashlights and other devices that utilize CR123’s this is a great price point to stock up.

    FOLLOW THIS LINK

    Remember – prices change often.

    Have a great day everyone!

    Rourke

  • Tabletop Review: Ontario Knife Company 499 Air Force Survival Knife

    Tabletop Review: Ontario Knife Company 499 Air Force Survival Knife

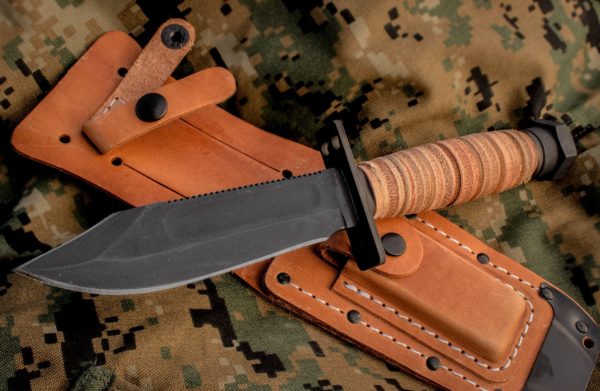
    As part of the building a survival kit series, I ordered the Ontario Air Force Survival Knife. I received it yesterday and was shocked with what came out of the box.

    In short – it’s terrible. This is the dullest knife I have ever purchased. The edge is uneven and looks like it’s been used to cut open cans of corn. Horrible. The sheath is mediocre at best feeling rather thin and cheap. The latch which goes over the sharpening stone is riveted to the sheath. Those rivets protrude into the area where the knife blade enters the sheath. Every time the blade is inserted and withdrawn from the sheath those rivets scratch the hell out of the blade. Crazy!!!

    [slideshow_deploy id=’14466′]

    I have already sent the knife back today and ordered the Mora which was the runner-up. There will be at least one more knife added to the kit at some point in the future. The Ontario will NOT be an option.

    Did I get a lemon? Maybe.

    So disappointed.

    Rourke

    [ecwid_product id=”258965324″ display=”picture title price options addtobag” version=”2″ show_border=”1″ show_price_on_button=”1″ center_align=”1″]

  • Let’s Build a Survival Kit(Part 3) – Food

    Let’s Build a Survival Kit(Part 3) – Food

    We’re going to have some fun designing and building a survival kit together. Here is Part 3 in the series where each week we will vote on a new item to add to the kit and see the results from the previous week.

    Back when I first got involved in preparedness there were lots of discussions about “survival kits.” Nowadays, there are INCH bags, Bug Out bags, Get Home bags, and many more. I may be a bit old school but I’m going back to my roots and survival kit it is.

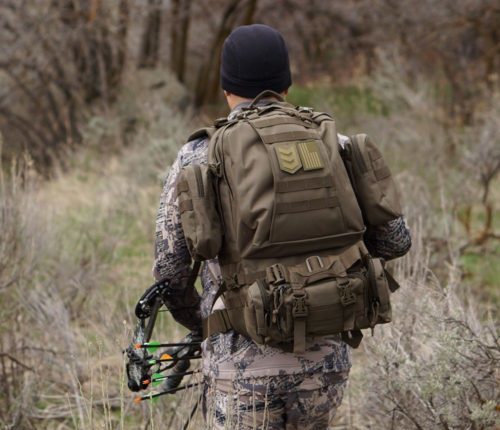
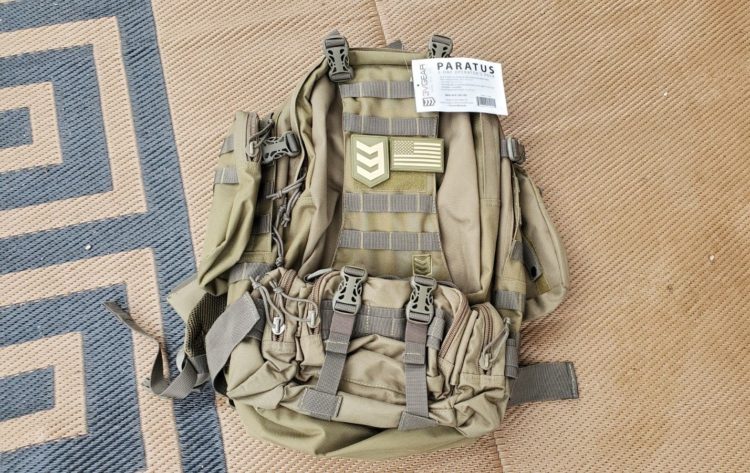
    Here’s the bag we started with: The Paratus 3-Day Operator’s Pack. The Paratus is a popular pack and often considered the “Prepper’s Backpack” as it is high quality, rugged, extremely versatile, and budget-friendly. Cost is phenomenal at well under $100.


    Here’s what we’re going to do. Every week(or so) I’ll post a category of products along with several choices to choose from. Everyone will vote on which items to put in the bag. When the voting is over I’ll buy the selected item and add it to the bag. With each new week, I’ll update what we’ve put in the bag until the kit is completed.

    LAST WEEK: Last week we looked at adding a knife to the kit and it was a close vote. The Ontario Air Force Survival Knife came out on top with the Mora a close second. I have a feeling the Mora may make another appearance. The classic Ontario AF Survival Knife has been ordered and will be added to the bag as soon as it arrives.

    THIS WEEK: We’ve got the bag, a water filter, a knife, so now let’s take a look at another category of survival gear: FOOD

    Vote below to chose which TWO food items needs to go in the bag.

    [poll id=”4″]

    Food will be looked at multiple times. This is merely the first.

    Interested in any of these food options?

    Mountain House Scrambled Eggs & Bacon

    Mountain House Spaghetti with Meat Sauce

    Emergency Ration Bar – 3600 Calories

    Mountain House Gramola with Milk & Blueberries

    Mountain House Chili Mac

    Take care all –

    Rourke

    Here’s the survival kit so far:

    Paratus 3-Day Operator’s Pack

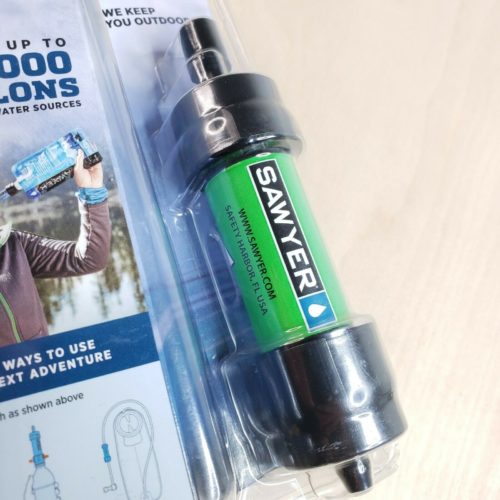
    Sawyer Mini Water Filter

    Ontario Air Force Survival Knife

    Next week I’ll throw some pictures up to show how the kit is coming along.

    tactical, shooting, deals, save money, prepping, ammunition, firearms, daily deals

  • Going Old School – the Nunchuku for Self Defense

    Going Old School – the Nunchuku for Self Defense

    As a kid growing up in the ’80s and seeing Bruce Lee dispatch several opponents with the nunchuku I became an avid practitioner. The speed, versatility, and pure power of the nunchuku had me practicing for hours. Much like riding a bike I can pick them up after not touching them for years and twirl, spin, and swing them like I was 16 years old.

    How good of a weapon is the nunchuku? If it came down to it I would choose them over nothing for sure. What they are very good for is exercise, fun – and improving coordination with defense as an available option.

    There are tons of instructional videos on Youtube and great books to learn the nunchuku. Just getting started? Begin with padded models and go up from there.

    Keep swinging!

    Rourke

  • Let’s Build a Survival Kit(Part 2) – Knife

    Let’s Build a Survival Kit(Part 2) – Knife

    We’re going to have some fun designing and building a survival kit together. Here is Part 2 in the series where each week we will vote on a new item to add to the kit and see the results from the previous week.

    Back when I first got involved in preparedness there were lots of discussions about “survival kits.” Nowadays, there are INCH bags, Bug Out bags, Get Home bags, and many more. I may be a bit old school but I’m going back to my roots and survival kit it is.

    Here’s the bag we started with: The Paratus 3-Day Operator’s Pack. The Paratus is a popular pack and often considered the “Prepper’s Backpack” as it is high quality, rugged, extremely versatile, and budget-friendly. Cost is phenomenal at well under $100.


    Here’s what we’re going to do. Every week(or so) I’ll post a category of products along with several choices to choose from. Everyone will vote on which items to put in the bag. When the voting is over I’ll buy the selected item and add it to the bag. With each new week, I’ll update what we’ve put in the bag until the kit is completed.

    LAST WEEK: Last week we looked at water filtration and voted on three different portable filters. The Sawyer Mini Water Filter came out on top, has been ordered, and will be added to the bag as soon as it comes in.

    Sawyer Mini Water Filter, SHTF, preparedness, survival kit, survival,

    THIS WEEK: We’ve got the bag, a water filter, so now let’s take a look at another category of survival gear: KNIVES

    Vote below to chose which knife needs to go in the bag.

    [poll id=”3″]

    Understand that each category – such as water filters, may be represented more than once as redundancy with some items is necessary.

    Interested in any of these knives?

    CIMA-1 Survival Knife – LINK

    Mora Outdoors Knife – LINK

    Schrade SCHF59 Outdoor Knife – LINK

    Ontario Air Force Survival Knife – LINK

    Take care all –

    Rourke

    tactical, shooting, deals, save money, prepping, ammunition, firearms, daily deals

  • Let’s Build a Survival Kit

    Let’s Build a Survival Kit

    We’re going to have some fun designing and building a survival kit together.

    Back when I first got involved in preparedness there were lots of discussions about “survival kits.” Nowadays, there are INCH bags, Bug Out bags, Get Home bags, and many more. I may be a bit old school but I’m going back to my roots and survival kit it is.

    I recently picked up a Paratus 3-Day Operator’s Pack. The Paratus is a popular pack and often considered the “Prepper’s Backpack” as it is high quality, rugged, extremely versatile, and budget-friendly. Cost is phenomenal at well under $100.

    Parratus, backpack, survival kit, bug out, bag, SHTF, prepper, preparedness, building


    Here’s what we’re going to do. Every week(or so) I’ll post a category of products along with several choices to choose from. Everyone will vote on which items to put in the bag. When the voting is over I’ll buy the selected item and add it to the bag. With each new week, I’ll update what we’ve put in the bag until the kit is completed.

    Cool!!

    We’ve got the bag – now let’s take a look at our first category of survival gear: WATER FILTRATION

    Vote below to chose which water filter needs to go in the bag.

    [poll id=”2″]


    Understand that each category – such as water filters, may be represented more than once as redundancy with some items is necessary.

    Interested in the Paratus backpack?

    3V Gear Purchase Link – CLICK HERE

    Amazon Purchase Link – CLICK HERE

    Take care all –

    Rourke

    tactical, shooting, deals, save money, prepping, ammunition, firearms, daily deals

  • Why Mountain House for long term food storage?

    Why Mountain House for long term food storage?

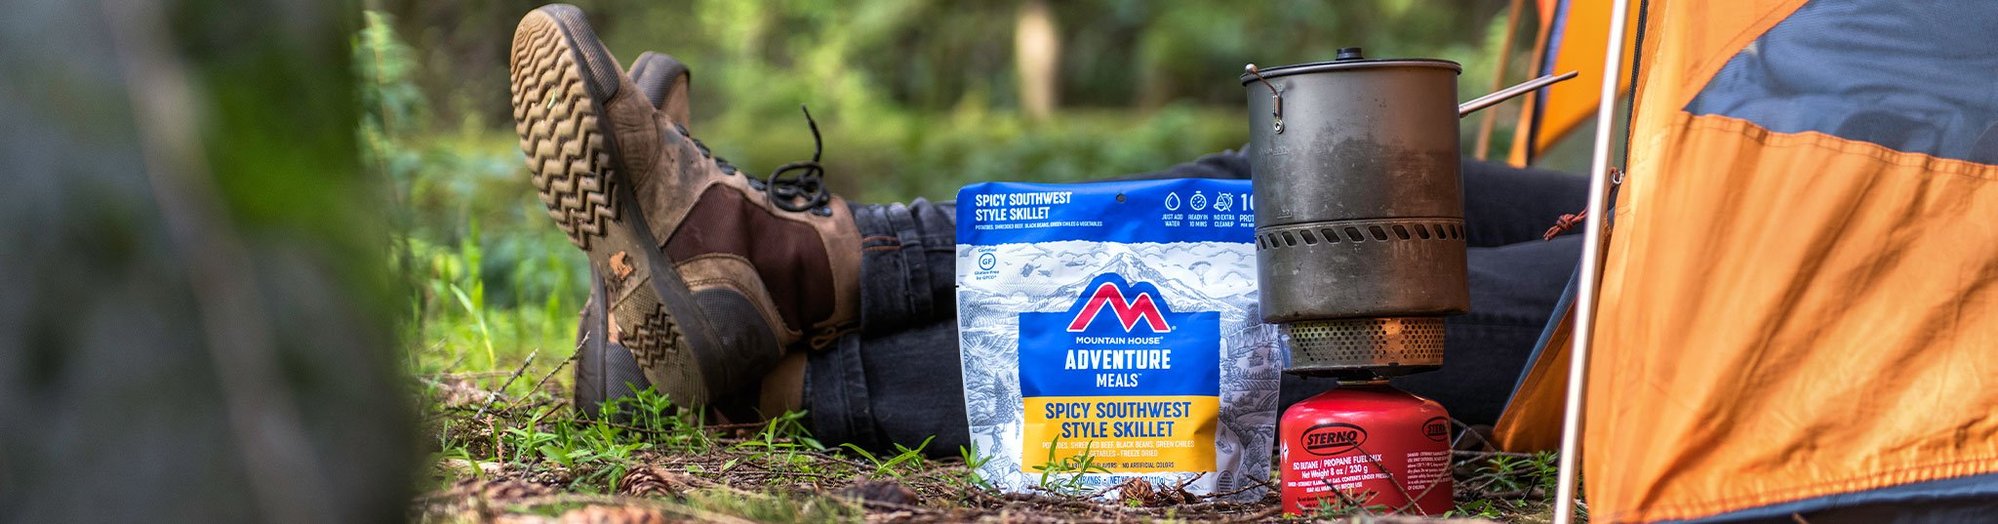
    Mountain House has been the ruler of long-term food storage for decades. The reasons are many including taste, excellent marketing, industry-best shelf life, and for quite some time they were the only major player. Today there are many competitors and options on the market. Over the last 30 years, I’ve seen several companies come and go – and I’ve eaten my fair share of them.

    After all this time I’ve continued to come to the same conclusion over and over again: Mountain House is the absolute best option for long-term food storage. Period.

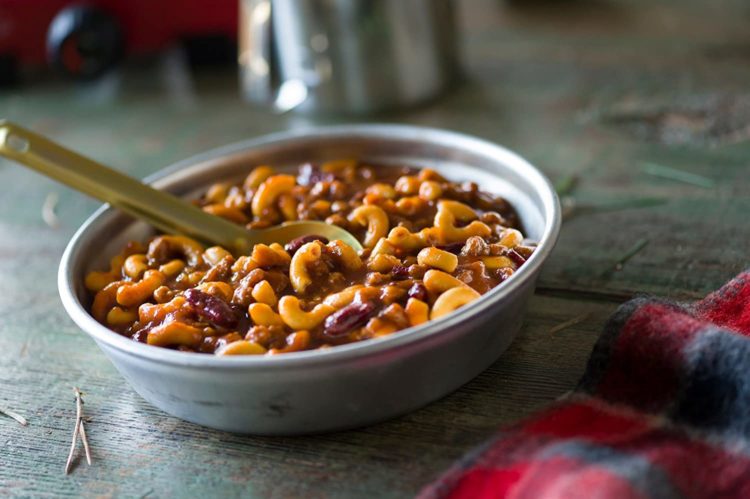
    “Mountain House Chili Mac”


    Why is Mountain House the Best?

    Unlike the majority of dehydrated and freeze-dried brands, Mountain House uses real meat in their products. Many other companies use TVP or textured vegetable protein in the vast majority of their products. This is especially prevalent in emergency bucket kits. While those bucket kits can be a great deal for an emergency food supply and to supplement other food storage they rarely contain any real meat. Research the Wise 120-serving Food Bucket and you will find no meat in the bucket at all.

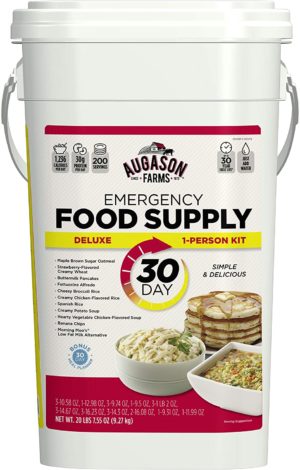
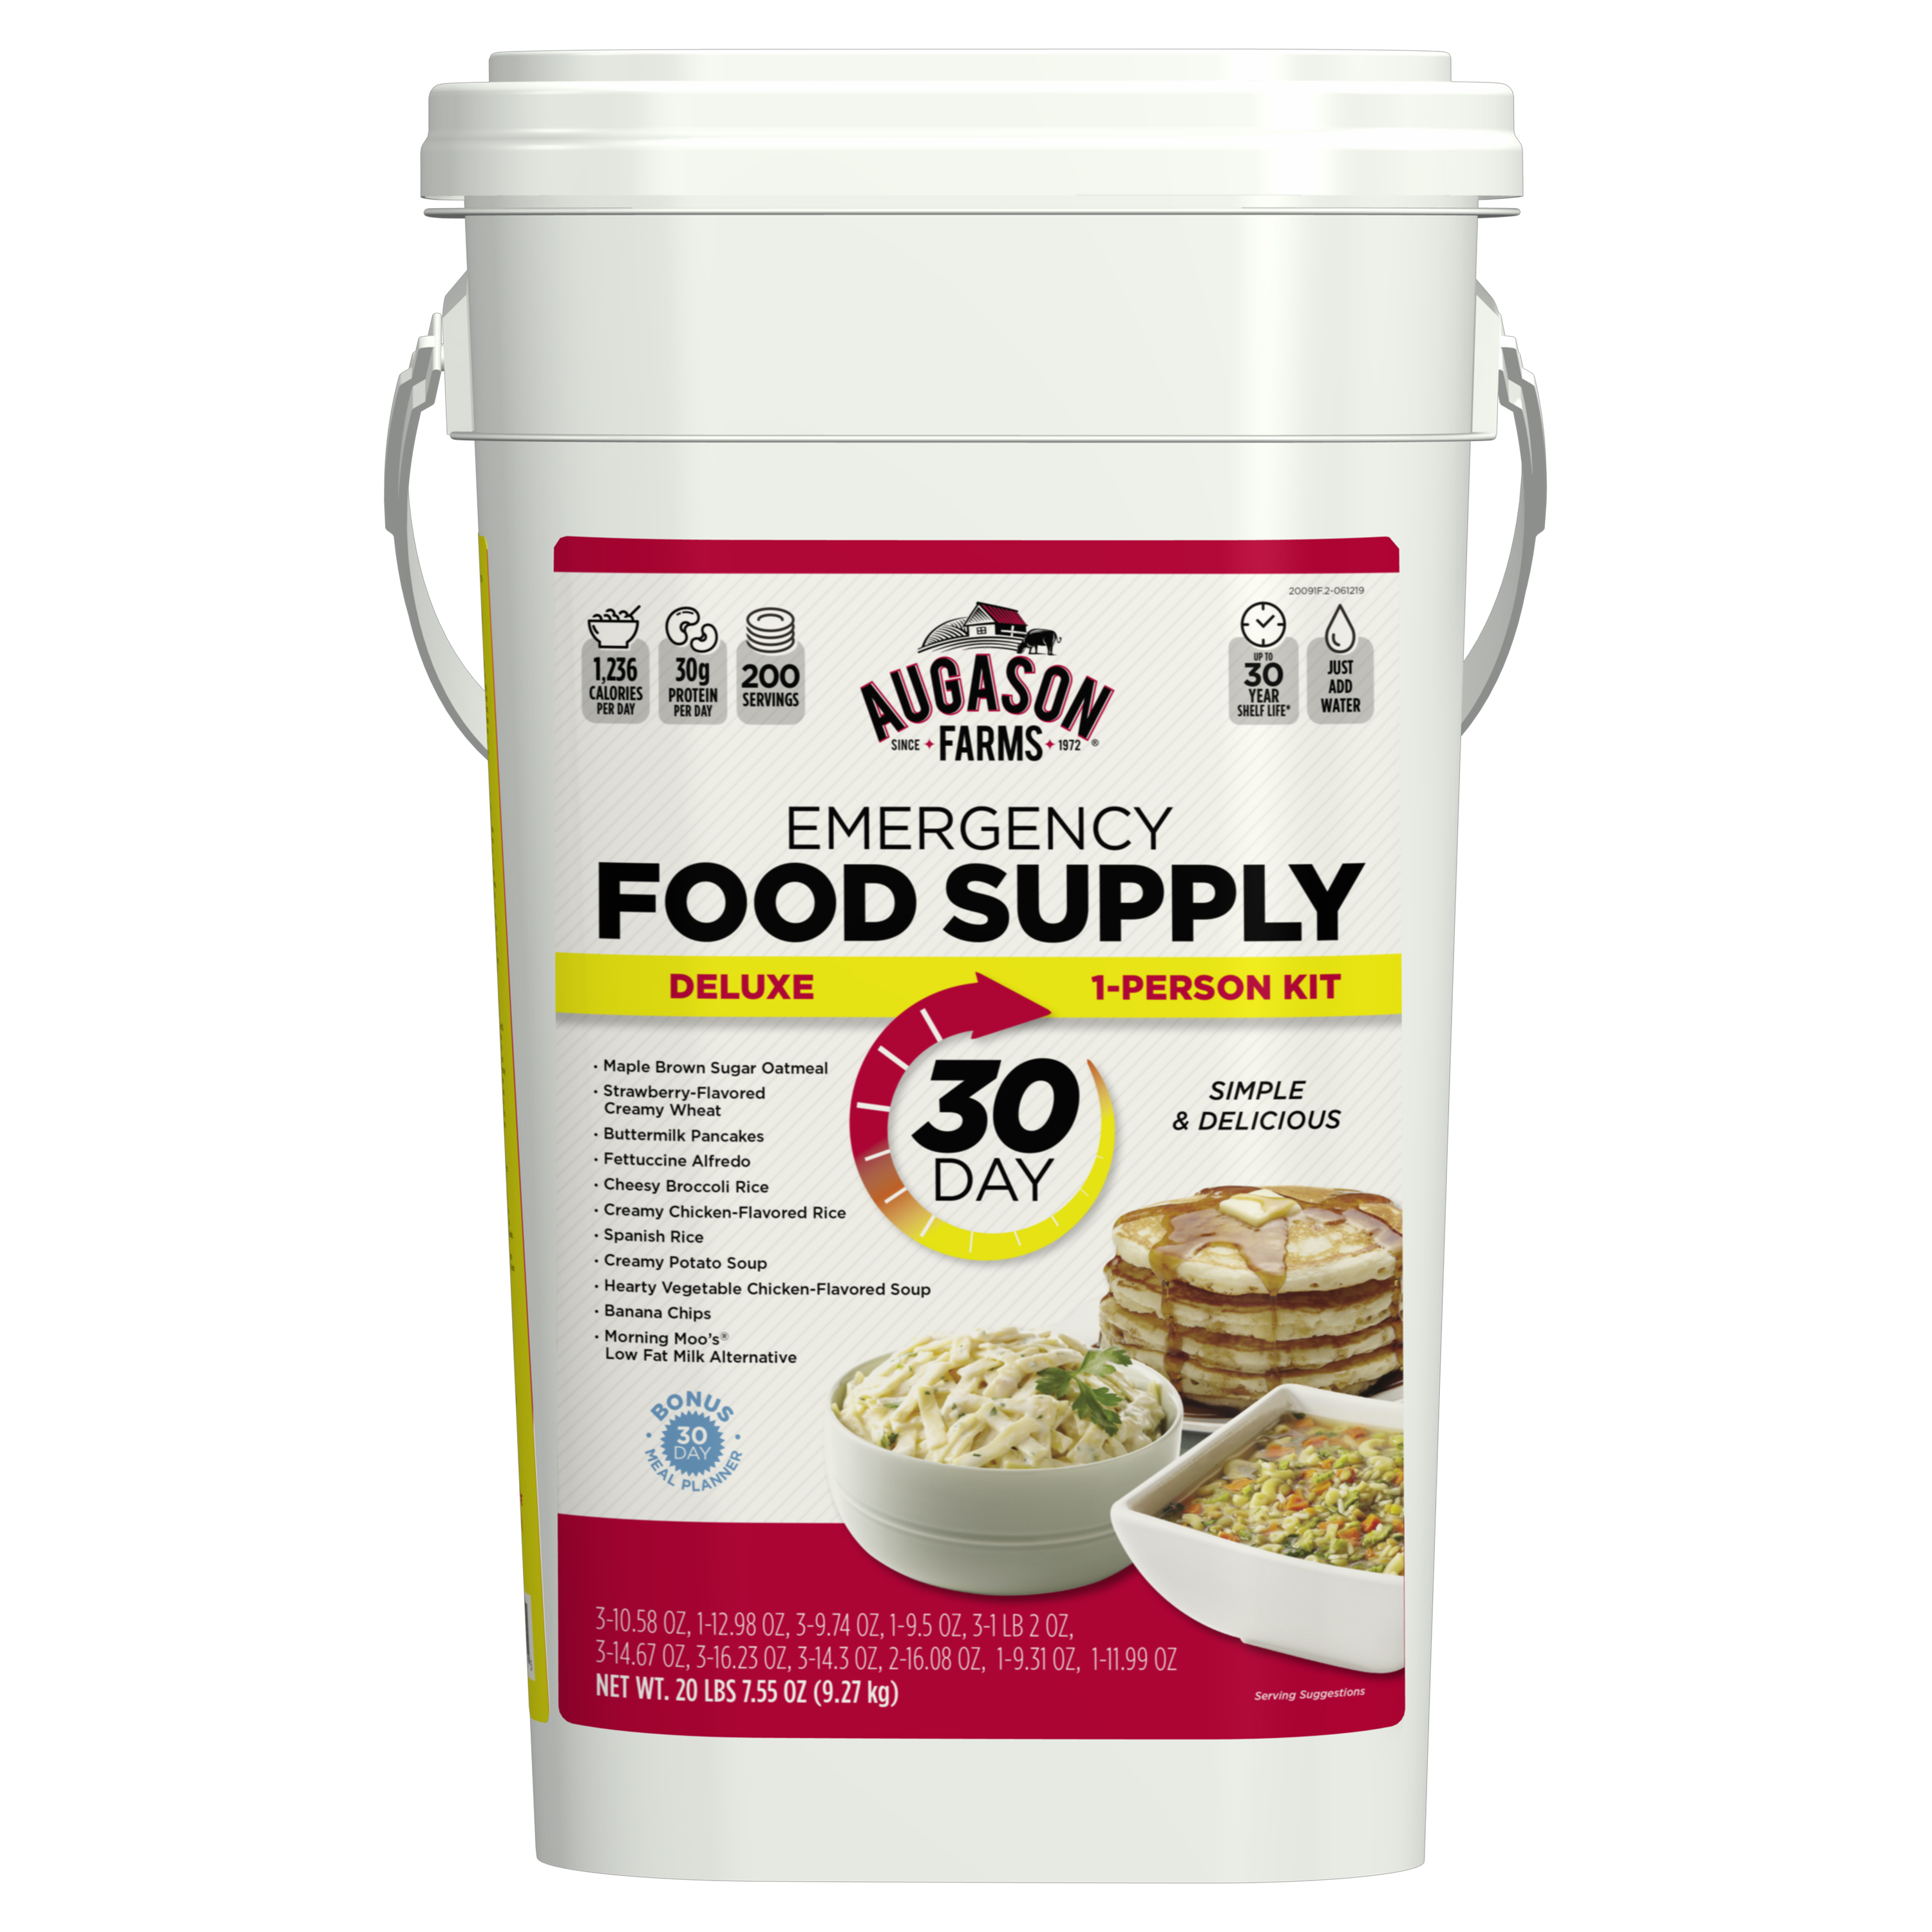
    “Augason Farms 30-Day Bucket. $77.98 – best deal in food storage”

    Take a look at many offerings from other leading food storage companies and many of the entrees offered in bucket kits are primarily soup. Mountain House has real entrees that would look right-at-home at a restaurant or dining room table. While it’s easy to suggest that Mountain House is overpriced, a true comparison needs to be made to make certain apples are being compared to apples.

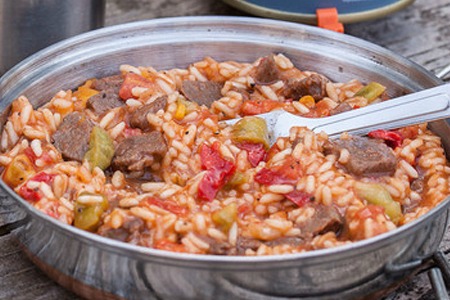
    “Mountain House Pepper Steak with Rice and Tomatoes”

    The shelf life of Mountain house foods is proven(30+ years). Numerous studies have been shown that other companies provide a “theoretical” shelf life and independent studies have shown it not to be on par with Mountain House.

    Another big benefit that I really like about Mountain House is when purchased in pouches the entire entree can be cooked, served, and eaten in the pouch. The vast majority of others require much more complex preparation and longer cooking times.

    Summary

    Understand I’m not really criticizing emergency bucket kits nor food made by Augason, Wise or other brands. I’m merely suggesting that you get what you pay for and far too often in the preparedness community I see thousands spent on tactical gear, but when it comes to food – cheap! I own Mountain House – as well as Augason Farm, Patriot Pantry, and 4Patriots. There is a place for all of these products. Just understand what they are.

    Go grab a few pouches at Walmart or order some on Amazon and see just how good this food is. When the zombies are eating your neighbor’s brain you’ll appreciate it. 🙂

    Bon appetit!

    Rourke

    tactical, shooting, deals, save money, prepping, ammunition, firearms, daily deals

  • 30-Day Food Storage Deal Found – – > $77.98 Free Shipping

    30-Day Food Storage Deal Found – – > $77.98 Free Shipping

    In the preparedness world, “cool” attracts a lot of attention. The latest & greatest guns have wallets being pulled out faster than Joe Biden’s brain cells are leaving his head. Communications equipment with all the bells and whistles that just might have you talking to ET. Bug out vehicles with knobby tires and super-bright aftermarket lights to show all the zombies looking to feast on your flesh. Don’t forget all the knives and backpacks to carry you off into the mountains to become another Grizzly Adams.

    Nope. Food isn’t considered cool.

    Neither is starving.

    I’ve got several of these buckets as part of my food storage program. The price is fantastic.

    This is the Auguson Farm’s 30-Day Food Storage Bucket. These have been popular in the past, however, over the past several months skyrocketed in price and sold out in many places. Right now they are available online for only $77.98 with Free Shipping.

    Details:

    • 200 Total Servings and 37,080 Total Calories
    • 1,236 Calories Per Day
    • 24 Pouches and 11 Total Varieties
    • Convenient 30-Day Meal Planner included
    • Shelf life up to 25 years

    If interested – click HERE.

    Rourke

    tactical, shooting, deals, save money, prepping, ammunition, firearms, daily deals

  • Taste Test: Yoders Canned Bacon

    Taste Test: Yoders Canned Bacon

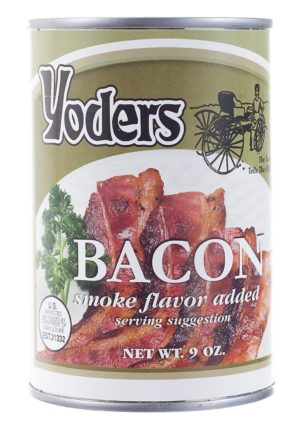
    Bacon. Say “bacon” around a group of people and watch how their attention is instantly drawn to you. Hey – either you like bacon, or you’re wrong. For prepper’s considering what food to stock up on bacon is usually just a pipe dream due to its extremely limited shelf life.

    Enter: Yoders Bacon.

    I bought a few can’s of Yoders Bacon back in 2015. I decided to open one up and give it a try. Why? It’s bacon! I also wanted to see if the taste was good enough to purchase more.


    The Test: Yoders Bacon

    Yoder's canned bacon, SHTF, prepper, preparedness, food storage

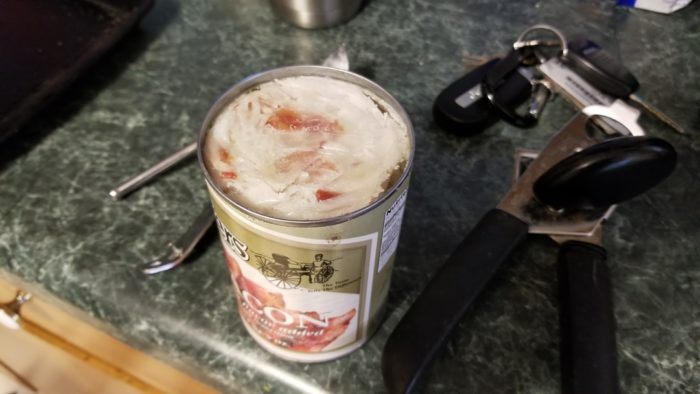
    Opening the can shows the bacon wrapped in wax paper and pressed in the can. The smell is “bacon-like” and I would not call it exactly good.


    Yoder's canned bacon, SHTF, prepper, preparedness, food storage

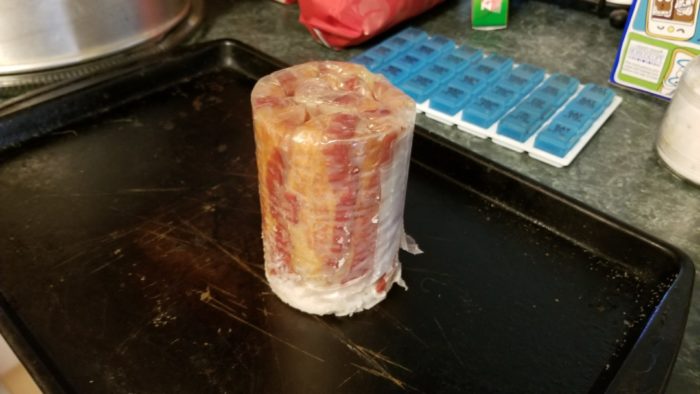
    Pulling the wax paper and bacon out shows just how everything is packed. There was an accumulation of hardened grease at the bottom. While some may be grossed out by the appearance it was no big deal to me.


    Yoder's canned bacon, SHTF, prepper, preparedness, food storage

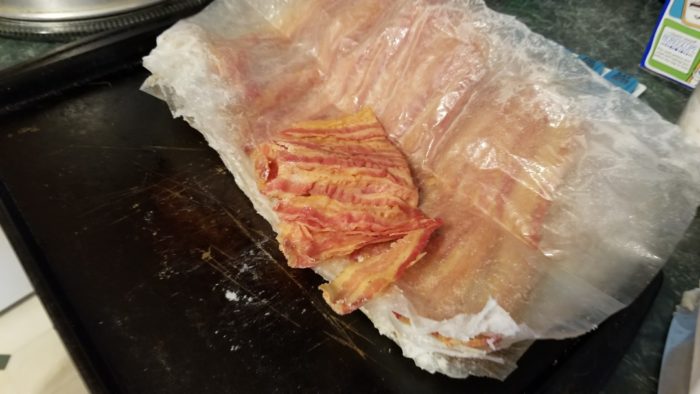
    The bacon is placed in the can as full-length fully-cooked pieces. They are laid across the wax paper and then folded and rolled to fit in the can. I tried a piece fresh out of the can and it tasted like – well, bacon. It had a little different taste than I was used to. It might be the smoke flavoring – but it was good.

    In fact – if I had come in on a cold winter’s day out hunting and had a piece – it would be VERY good.


    Yoder's canned bacon, SHTF, prepper, preparedness, food storage

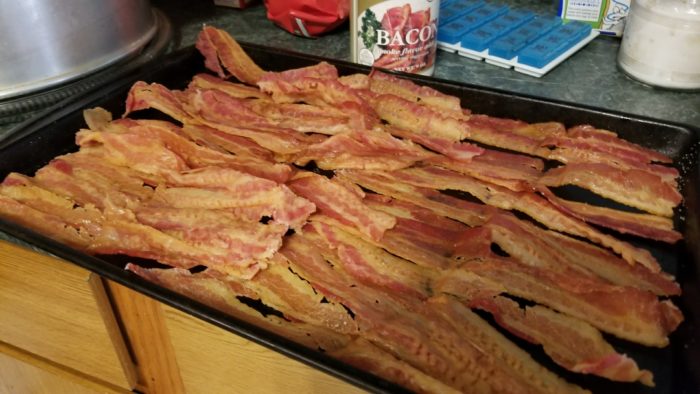
    I prefer my bacon warm so we spread some out on a pan to place in the oven. There is a lot of bacon in that can. The picture above does NOT represent all of the bacon. There was some still in the wax paper.

    Yoders Bacon is not very thick so while heating some care must be taken to not burn it.

    Shelf life is claimed to be upwards of 10 years. I would assume storage methods would influence this heavily.  Compared to other food storage options for bacon this is excellent.

    RECOMMENDED

    While Yoders Bacon can be found on sale throughout the year the best average price I have found is on Amazon. The more you buy the cheaper per can it becomes.

    As of this publication:

    1 can Yoders Bacon

    3 cans Yoders Bacon

    6 cans Yoders Bacon

    12 cans(case) Yoders Bacon

    This stuff is not cheap! However, if it’s bacon you want to add to your food storage this is one viable way.

    bacon, humor, bacon rules,

    Rourke

  • Review: Nekteck 21W Portable Solar Charging Kit

    Review: Nekteck 21W Portable Solar Charging Kit

    I’ll be quick and to the point: Buy it.

    I’ve dabbled with small solar kits for over a decade. Charging battery packs and cell phones are good tasks for these small portable solar panels. The Nekteck 21W Solar Charger is packed with features including two USB ports, a Micro-USB cable, metal eyelets for hanging, and a zipper pouch built-in for storage of other cables and accessories. Build quality appears top-rate which means it’s durable and rugged. Oh – it’s waterproof as well.


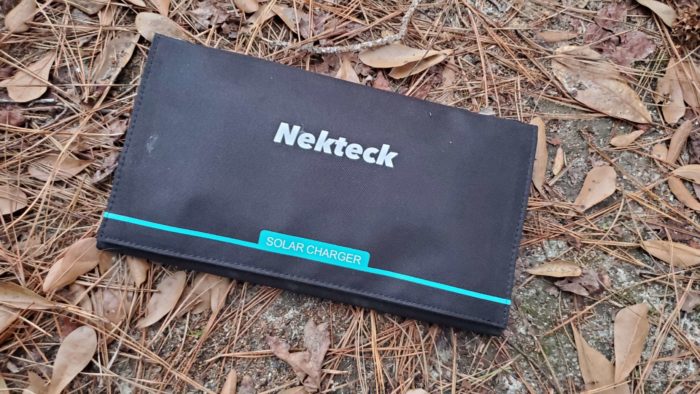
    Above: The Nekteck folds down to 6.3x 11.1x 1.06 inches.

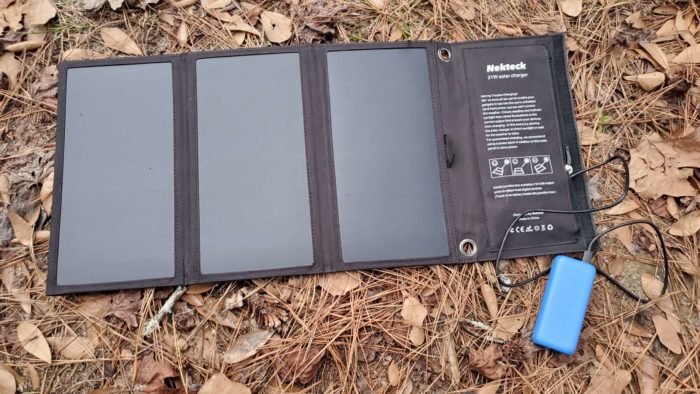
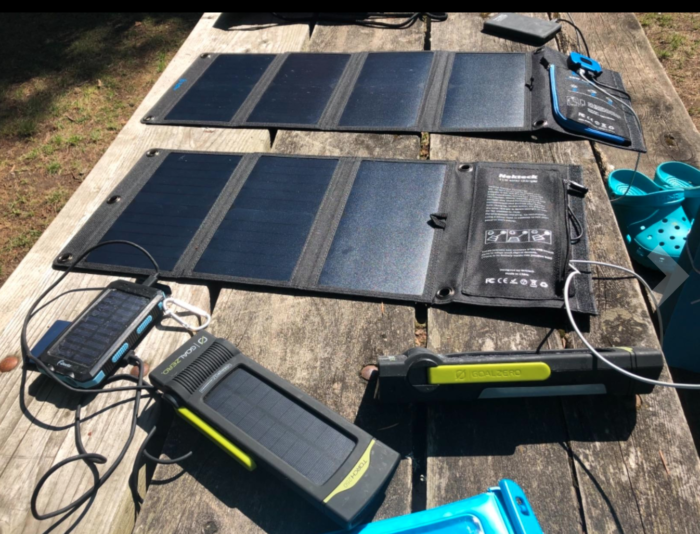
    Above: Opened up, the three Monocrystalline panels collect energy from the sun. The two metal eyelets allow the charger to be hung or connected be positioned for full view of the suns rays.

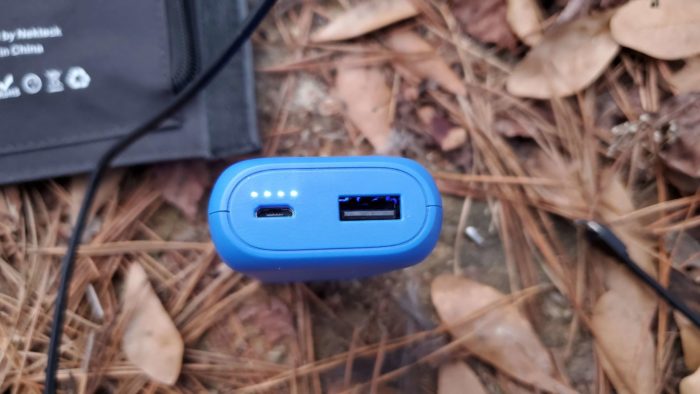
    Below: A 6700mAh portable power bank was used to test the NekTeck. 

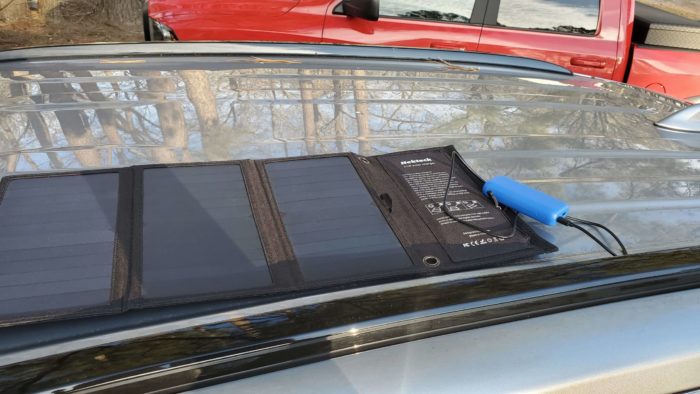
    Below: The NekTeck 21W Portable Solar Charger was connected to the power bank and left on top of a vehicle all day.

    The power bank was completely drained at the start of the day. I checked it at 4:00pm and it was fully charged. I’m not sure how long it took to charge it but the bottom line is it was able to charge it in one session.

    How Might This Be Used?

    These types of solar panels are designed to charge batteries – and battery packs. Charging phones and GPS devices can be done while backpacking, camping, and other outdoor activities that take you away from the grid. Any battery-powered device that is utilized off-grid can have its batteries charged via a solar panel such as this assuming the daily usage does not outrun the charging capacity. One example of this would be an off-grid portable homemade ham repeater. Another would be to charge power banks which would then be used to charge other devices.


    Running under $50 with free shipping this solar charger is a steal.

    HIGH RECOMMENDATION

    For more information follow this link.

    Rourke

    tactical, shooting, deals, save money, prepping, ammunition, firearms, daily deals


  • Ferro Rod & Tool Sharpener = FIRE

    Ferro Rod & Tool Sharpener = FIRE

    Lately, I’ve been playing around with some different fire starting methods including Ferro rods. With the right tinder, I have been really impressed with the results. While I still enjoy the simplicity and ease of use of a Bic lighter – I see the wisdom in more primitive fire starting methods as well.

    A good friend turned me on to a set of large 1/2″ x 6″ ferrocerium rods. They include a lanyard hole and due to their size are easy to hold. Their sheer mass provides a lot of material for starting hundreds of fires.

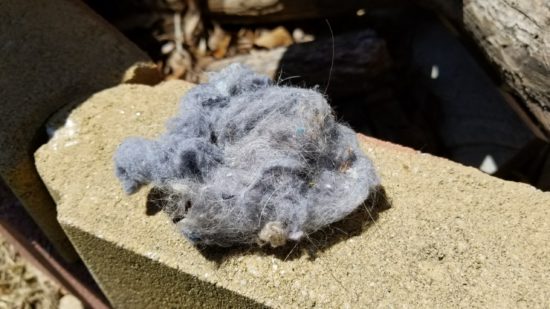
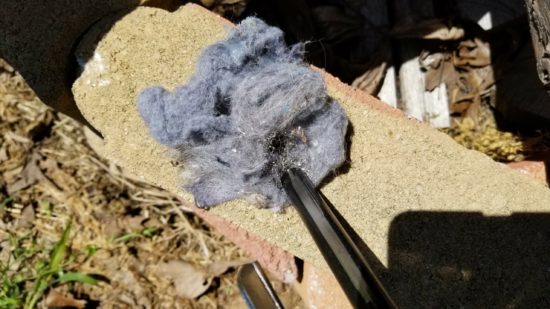
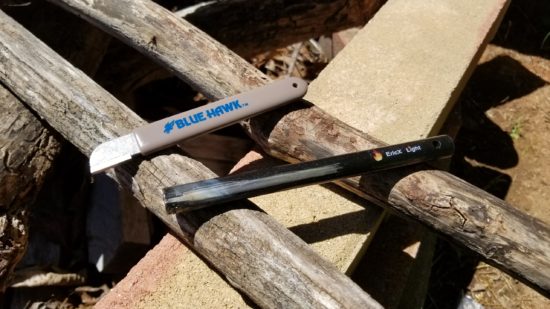
    Here are a few pictures demonstrating the use of the Ferro rod along with a Blue Hawk Tool Sharpener. For a tinder medium, I have dryer lint soaked in some petroleum jelly which is my favorite for fire starting kits.

    ferro rod, fire starting, dryer lint, SHTF, primitive, survival, prepper, preparedness

    Blue Hawk Tool Sharpener / EricX 1/2″ Ferro Rod

     ferro rod, fire starting, dryer lint, SHTF, primitive, survival, prepper, preparedness

    Dryer Lint with Petroleum Jelly


    ferro rod, fire starting, dryer lint, SHTF, primitive, survival, prepper, preparedness

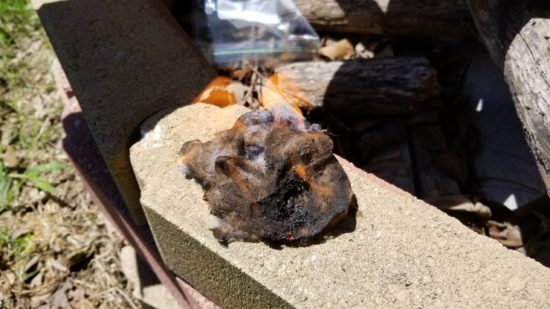
    Using tool sharpener to scrape some shavings onto the dryer lint. The shavings are not necessarily needed.


    ferro rod, fire starting, dryer lint, SHTF, primitive, survival, prepper, preparedness

    Here is a close of the shavings which burn extremely hot.


    ferro rod, fire starting, dryer lint, SHTF, primitive, survival, prepper, preparedness

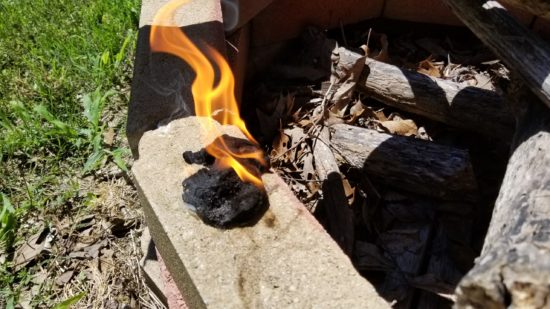
    A quick strike of the tool sharpener sends a shower of sparks onto the lint – FLAMES!!!!


    ferro rod, fire starting, dryer lint, SHTF, primitive, survival, prepper, preparedness

    The dryer lint/petroleum jelly combo burns for several minutes which is excellent for getting a fire going when needed.

    animated fire, fire starting, survival

    line

    These EricX Ferro rods combined with a good tool sharpener work excellent. At $14.95 with free shipping for two rods, they should fit within almost any budget. Putting together a few fire starting kits? Check these out – you won’t regret it.

    Rourke


    NOTE: Items featured in this article:

    Tool Sharpener – LINK

    EricX Ferro Rod – LINK

  • Rourke’s Recommendations

    Rourke’s Recommendations

    Every week JR recommends a few things such as articles, videos, movies, books, and an assortment of gear. Some of these are related to survival & preparedness while others are just interesting. As an Amazon affiliate, we earn a small commission on purchases made after clicking any link from this website at no additional cost to you. Those purchases and commissions help support what we do here. 

    Books:

    Axis of Evil: A Post-Apocalyptic EMP Survival Fiction Series (The Lone Star Series) (Volume 1) – one of my all-time favorite series

    THE JAKARTA PANDEMIC: A Modern Thriller

    Lights Out – The 2nd preparedness fiction book I ever read. Love it.


    Movies/TV:

    Jerimiah TV Series

    Falling Skies  – TV Series

    Surface – One of my all-time favorite series. Very unique.


    Gear:

    Advanced Optics Green Rail-Mounted Pistol Laser

    Atwood Micro Cord Dispenser 100 lb test

    OAKVUE Portable Camping Stove – Stainless Steel Camping Cookware – Lightweight Backpack Stove


    line

    Patreon, survival, preparedness, civil war, CW2

  • The Ultimate Bug Out Food Bar

    The Ultimate Bug Out Food Bar

    bugging out, food, food bar, survival, prepper, preparedness

    There is a huge market for specialty food bars made just for survival kits and bug out bags. I’m not talking about those 3,600 calorie bricks of cardboard that will enable you to try out your emergency dental kit. I’m talking high calorie, high protein energy bars that were developed by some “Navy Seal” and due to the “precise ingredient mix” allows them to attain a “tactical” level of existence. Yes – a bit of sarcasm.

    While many of these survival bars are great – they are also expensive and often difficult to find. There are alternatives right around the corner and down the street at the checkout of your local grocery store and corner market. That’s right – the candy bar.

    After taste-testing close to a dozen of the top-selling candy bars(it’s a tough job but someone has to do it) and evaluating the nutritional and environmental ruggedness of each I came to one conclusion:

    The Payday Peanut Caramel Bar is the ULTIMATE bug out bag food bar.

    So – why does the Payday rank so high?

    While a Snickers bar combines that ultimate combination of chocolate, caramel, nougat, and peanuts the extreme heat sitting in a vehicle trunk will leave that Snickers looking like something created after eating at Taco Bell.

    By the way – what the hell is nougat?

    Anyways – while the Payday will soften inside a hot car it doesn’t become a disaster like any chocolate confection. The combination of peanuts and caramel taste great and provide a very high-calorie protein boost.

    Here is the nutrient breakdown for the KING SIZE Payday bar:

    In the King Size format, there are two smaller bars in one pack. For the entire 2 bar pack, there are 440 calories, 50 grams of carbs, 24 grams of fat, and 12 grams of protein. For someone expending a lot of energy via walking, running, or physical labor this is some serious fuel.

    Shelf life pales in comparison to many of the more expensive cardboard survival bars. 6-12 months or so is a good estimate depending on storage conditions. Running less than $2.00 per Payday bar they extremely affordable.

    So – when the asteroids are pummeling through the Earth’s atmosphere and zombies are crossing the railroad tracks to eat your brain and you need some quick energy – make it a Payday.

    Rourke

    tactical, shooting, deals, save money, prepping, ammunition, firearms, daily deals

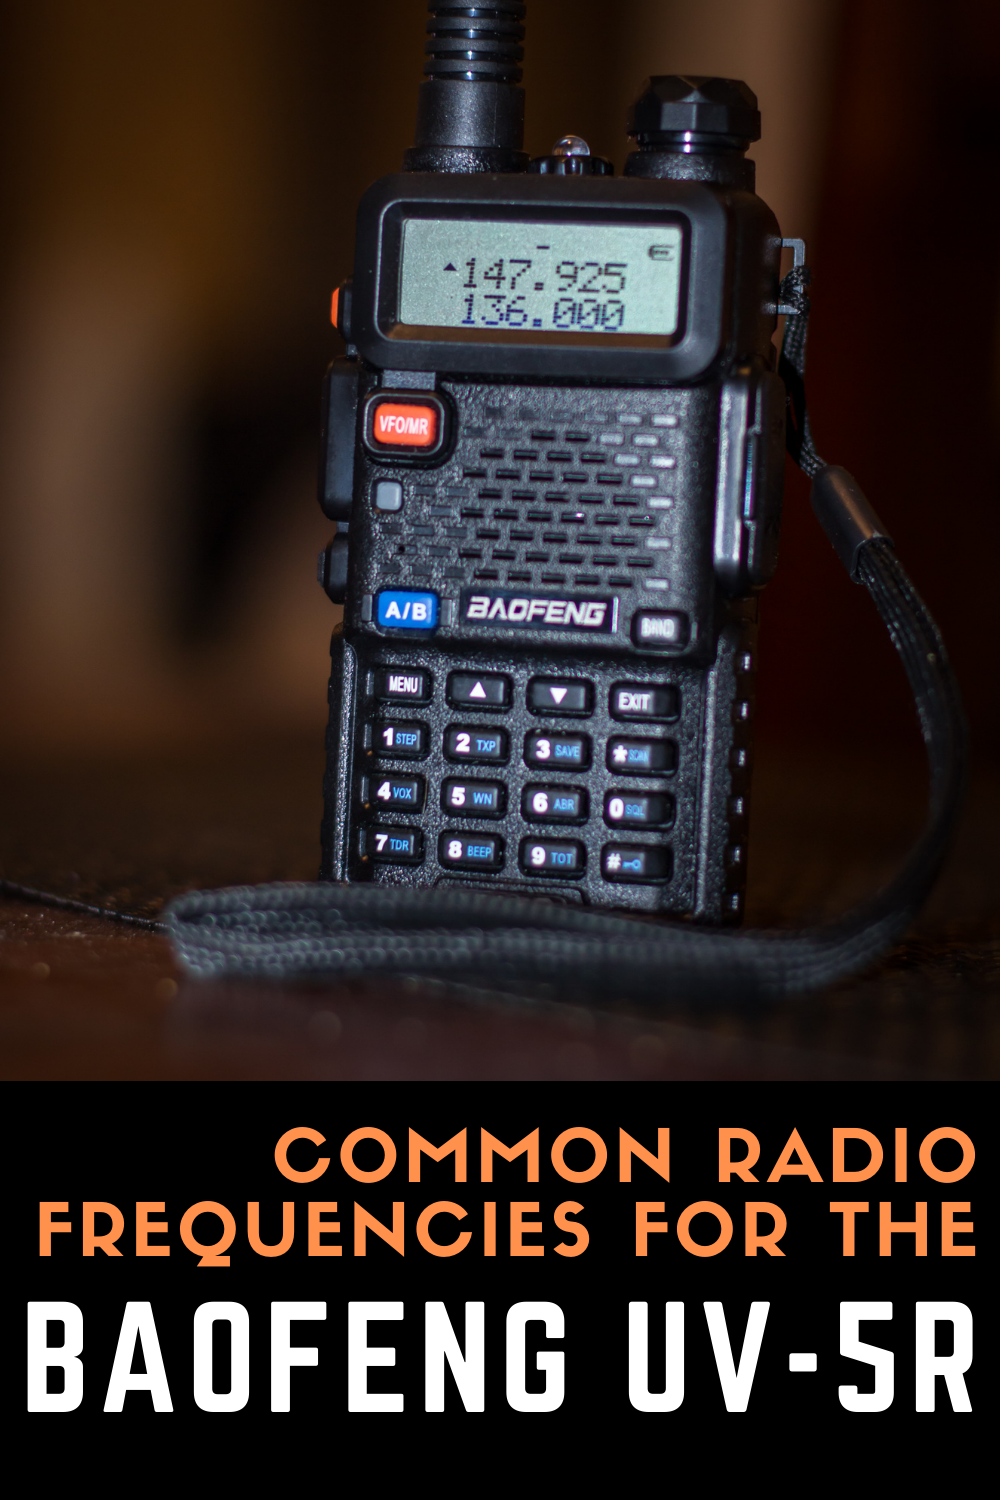
  • List of Common Radio Frequencies for the Baofeng UV-5R

    List of Common Radio Frequencies for the Baofeng UV-5R

    Communication at the retreat, off the grid, or on the farm is essential and does not have to be extremely expensive or overly complicated.

    For less than the cost of a decent dinner out for two people a full-featured short to medium distance communication tool – the Baofeng UV-5R – can be purchased. Extremely popular, the Baofeng is a compact, handheld radio capable of transmitting with 4 watts of power across 136-174 MHz and 400-480 MHz frequencies. It can be programmed with up to 128 channels.

    The Baofeng is a ham radio. Transmitting on this radio requires a license in order to do so legally. There are lots of places on the ‘net to get more information on that. The purpose of this post is to provide an assortment of useful frequencies the Baofeng can be programmed for.

    Did you know the Baofeng also receives FM radio? Pretty cool and useful.

    Did you know the Baofeng has a built-in flashlight? Yeah – pretty neat.

    For the money, the Baofeng UV-5R and similar models are a great deal.


    FRS/GMRS Frequencies 

    frs, gmrs, 2017, frequencies, baofeng,


    MURS Radio Frequencies

    151.820 Mhz
    151.880 Mhz
    151.940 Mhz
    154.570 Mhz
    154.600 Mhz


    NOAA Weather Radio Frequencies

     WX1         --     162.550   
     WX2         --     162.400
     WX3         --     162.475
     WX4         --     162.425
     WX5         --     162.450
     WX6         --     162.500
     WX7         --     162.525


    Commercial “DOT” Frequencies

    151.625 Red Dot
    154.570 Blue Dot
    154.600 Green Dot
    151.955 Purple Dot
    464.550 Yellow Dot
    464.500 Brown Dot
    467.7625 J Dot
    467.8125 KDot
    467.8500 Silver Star
    467.8750 Gold Star
    467.9000 Red Star
    467.9250 Blue Star


    Marine VHF Designated Frequencies
    Channel Number Ship Transmit
    MHz
    Ship Receive
    MHz
    Intended And Designated Use
    01A 156.050 156.050 Port Operations and Commercial, VTS.  Available only in New Orleans / Lower Mississippi area.
    05A 156.250 156.250 Port Operations or VTS in the Houston, New Orleans and Seattle areas.
    06 156.300 156.300 Intership Safety
    07A 156.350 156.350 Commercial
    08 156.400 156.400 Commercial (Intership only)
    09 156.450 156.450 Boater Calling.  Commercial and Non-Commercial.
    10 156.500 156.500 Commercial
    11 156.550 156.550 Commercial.  VTS in selected areas.
    12 156.600 156.600 Port Operations.  VTS in selected areas.
    13 156.650 156.650 Intership Navigation Safety (Bridge-to-bridge).  Ships >20m length maintain a listening watch on this channel in US waters.
    14 156.700 156.700 Port Operations.  VTS in selected areas.
    15 156.750 Environmental (Receive only).  Used by Class C EPIRBs.
    16 156.800 156.800 International Distress, Safety and Calling.  Ships required to carry radio, USCG, and most coast stations maintain a listening watch on this channel.
    17 156.850 156.850 State Control
    18A 156.900 156.900 Commercial
    19A 156.950 156.950 Commercial
    20 157.000 161.600 Port Operations (duplex)
    20A 157.000 157.000 Port Operations
    21A 157.050 157.050 U.S. Coast Guard only
    22A 157.100 157.100 Coast Guard Liaison and Maritime Safety Information Broadcasts.   Broadcasts announced on channel 16.
    23A 157.150 157.150 U.S. Coast Guard only
    24 157.200 161.800 Public Correspondence (Marine Operator)
    25 157.250 161.850 Public Correspondence (Marine Operator)
    26 157.300 161.900 Public Correspondence (Marine Operator)
    27 157.350 161.950 Public Correspondence (Marine Operator)
    28 157.400 162.000 Public Correspondence (Marine Operator)
    63A 156.175 156.175 Port Operations and Commercial, VTS.  Available only in New Orleans / Lower Mississippi  area.
    65A 156.275 156.275 Port Operations
    66A 156.325 156.325 Port Operations
    67 156.375 156.375 Commercial.  Used for Bridge-to-bridge communications in lower Mississippi River.  Intership only.
    68 156.425 156.425 Non-Commercial
    69 156.475 156.475 Non-Commercial
    70 156.525 156.525 Digital Selective Calling (voice communications not allowed)
    71 156.575 156.575 Non-Commercial
    72 156.625 156.625 Non-Commercial (Intership only)
    73 156.675 156.675 Port Operations
    74 156.725 156.725 Port Operations
    77 156.875 156.875 Port Operations (Intership only)
    78A 156.925 156.925 Non-Commercial
    79A 156.975 156.975 Commercial.  Non-Commercial in Great Lakes only
    80A 157.025 157.025 Commercial.  Non-Commercial in Great Lakes only
    81A 157.075 157.075 U.S. Government only – Environmental protection operations.
    82A 157.125 157.125 U.S. Government only
    83A 157.175 157.175 U.S. Coast Guard only
    84 157.225 161.825 Public Correspondence (Marine Operator)
    85 157.275 161.875 Public Correspondence (Marine Operator)
    86 157.325 161.925 Public Correspondence (Marine Operator)
    87 157.375 161.975 Public Correspondence (Marine Operator)
    AIS 1 161.975 161.975 Automatic Identification System #1 (AIS) – Special equipment required!
    88 157.425 162.025 Public Correspondence only near Canadian border.
    AIS 2 162.025 162.025 Automatic Identification System #2 (AIS) – Special equipment required!
    88A 157.425 157.425 Commercial, Intership only.


    tactical, shooting, deals, save money, prepping, ammunition, firearms, daily deals


  • CanCooker Beef Stew

    CanCooker Beef Stew

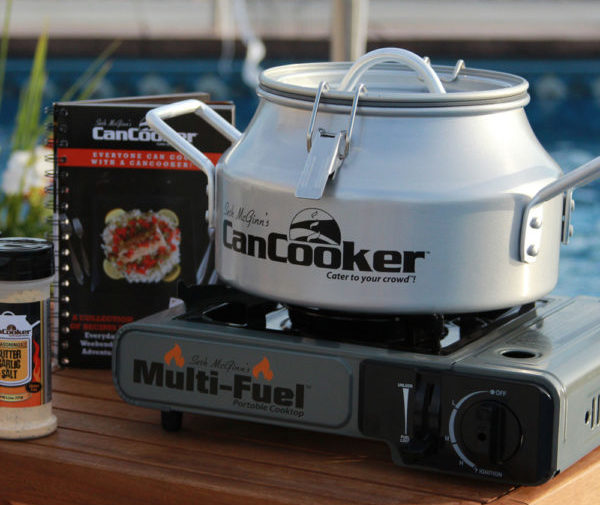
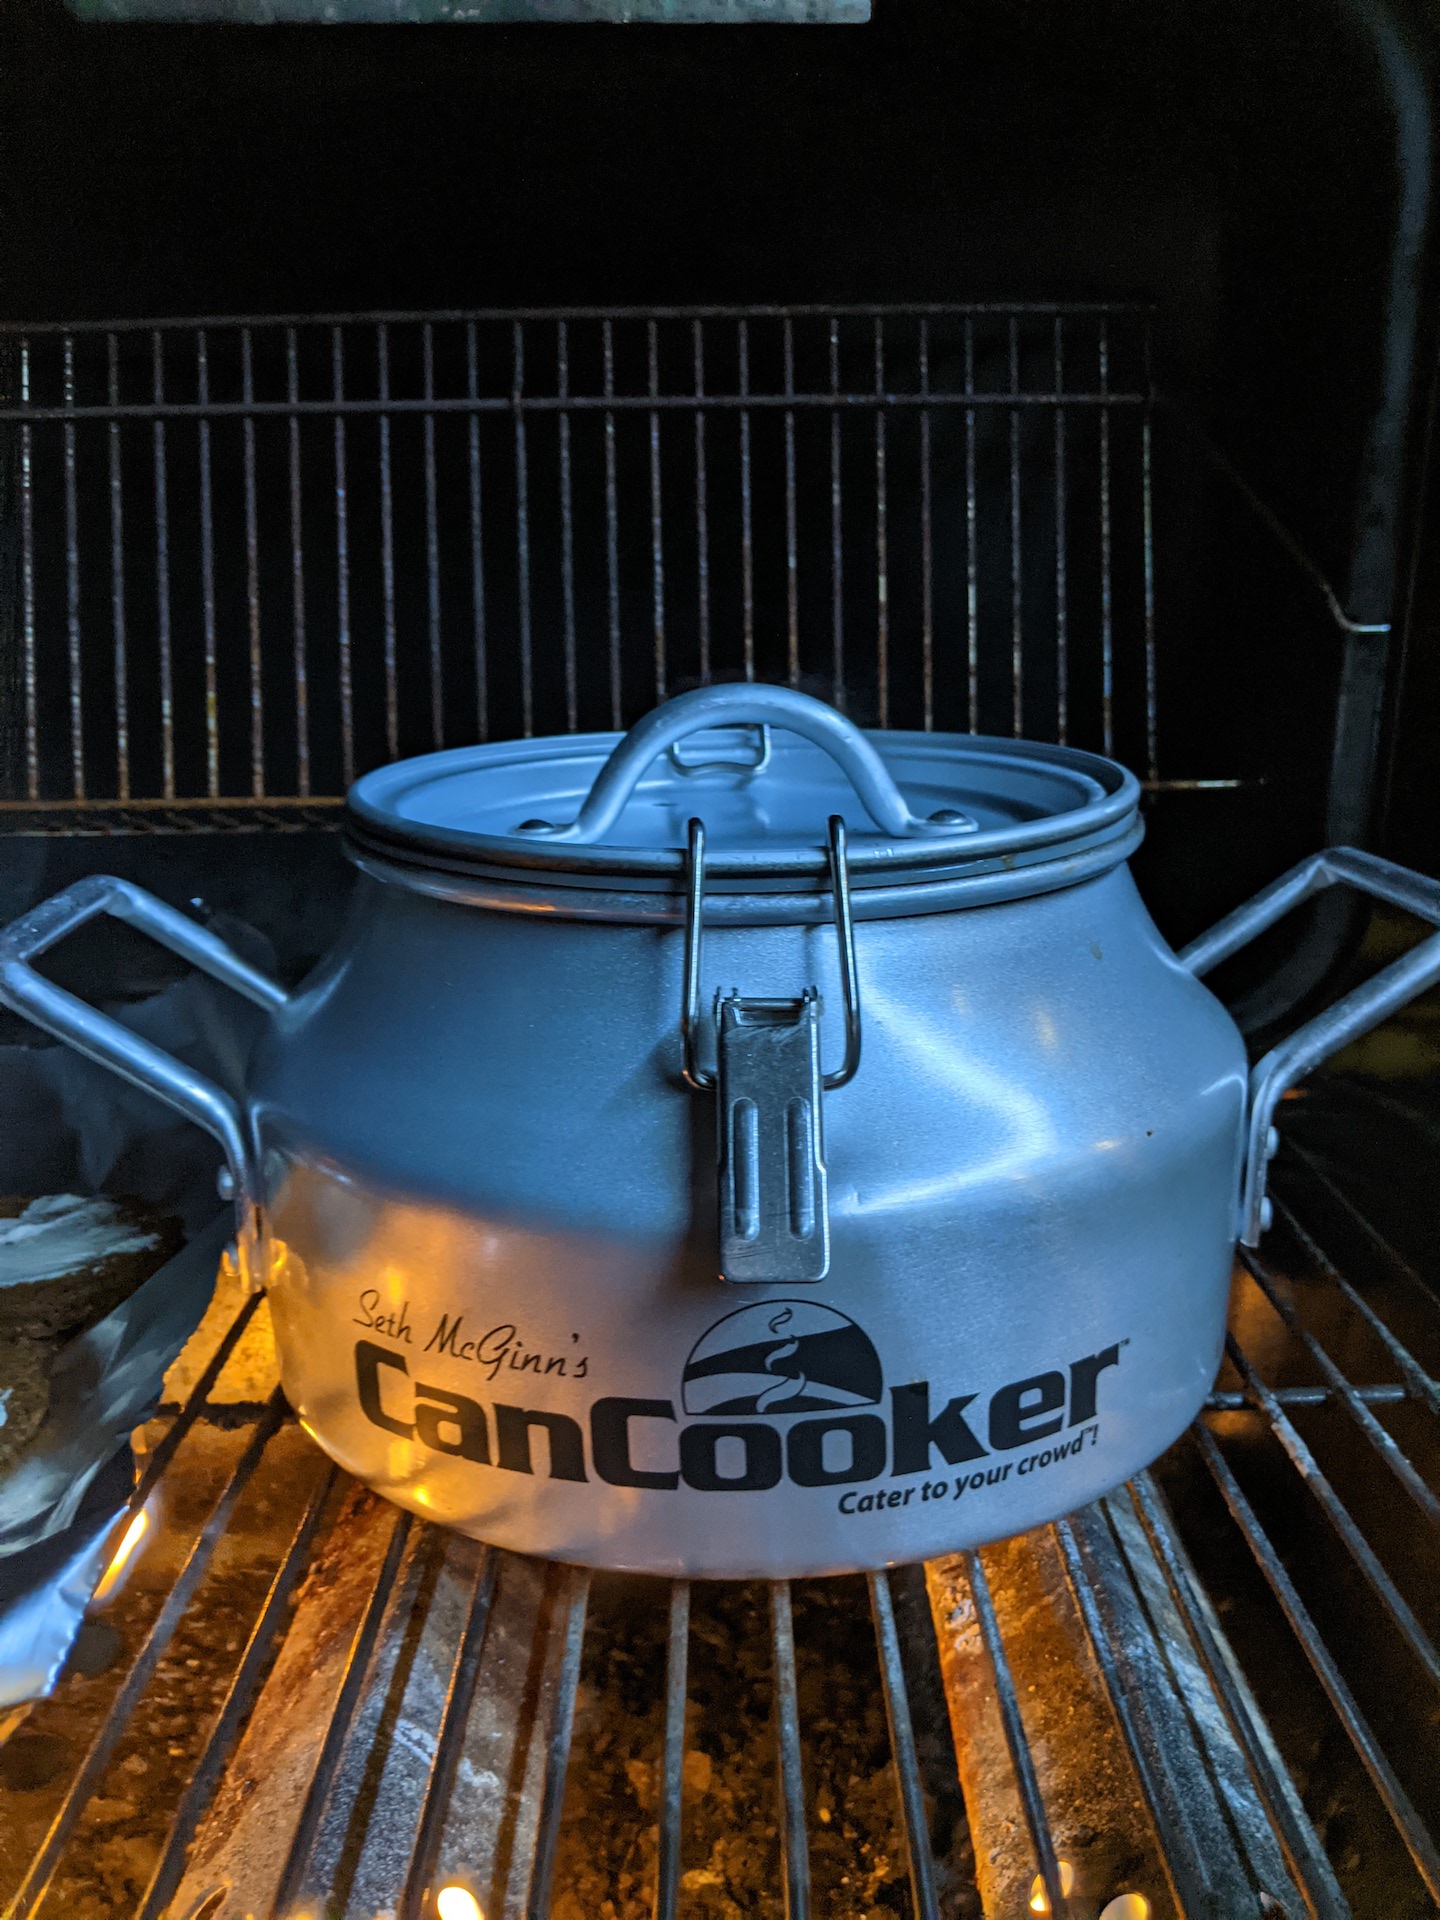
    I got a brand new CanCooker Companion for Christmas. I love to cook and especially love using a crockpot. Although this is not a crockpot in the sense that you can set it and forget it all day, it is however a way to throw everything in one pot with the added bonus of being able to use it on an open fire or grill. In the event of a power outage, it is definitely something you can use to feed your family. It is very similar to an Instapot except it is vented the entire time.

    There are 3 different sizes of the Can Cooker: The Companion which holds 1.5 gallons and feeds 6, the CanCooker Jr is 2 gallons and feeds 8, and the CanCooker Original holds up to 4 gallons and feeds up to 20. They all have a non-stick coating and have a variety of accessories that can be purchased separately. The rack that can be placed on the bottom is the next thing I would like so that I can bake things in my CanCooker. It would make a great Valentine’s Day gift (hint, hint)!

    For my first time using it I chose a fairly easy recipe from the CanCooker website.

    INGREDIENTS:

    • 2 lbs beef, cut into 1-inch pieces
    • 1 lb potatoes, cut into 1-inch pieces
    • 6 oz portobello mushrooms caps, cut into 1-inch pieces
    • 2 medium onions, cut into wedges
    • 2 cups fresh baby carrots
    • 1 (14-oz) can beef broth
    • 1 (14-oz) can diced tomatoes with Italian herbs
    • 1 cup Burgundy or Pinot Noir wine
    • ½ tsp pepper

    DIRECTIONS:

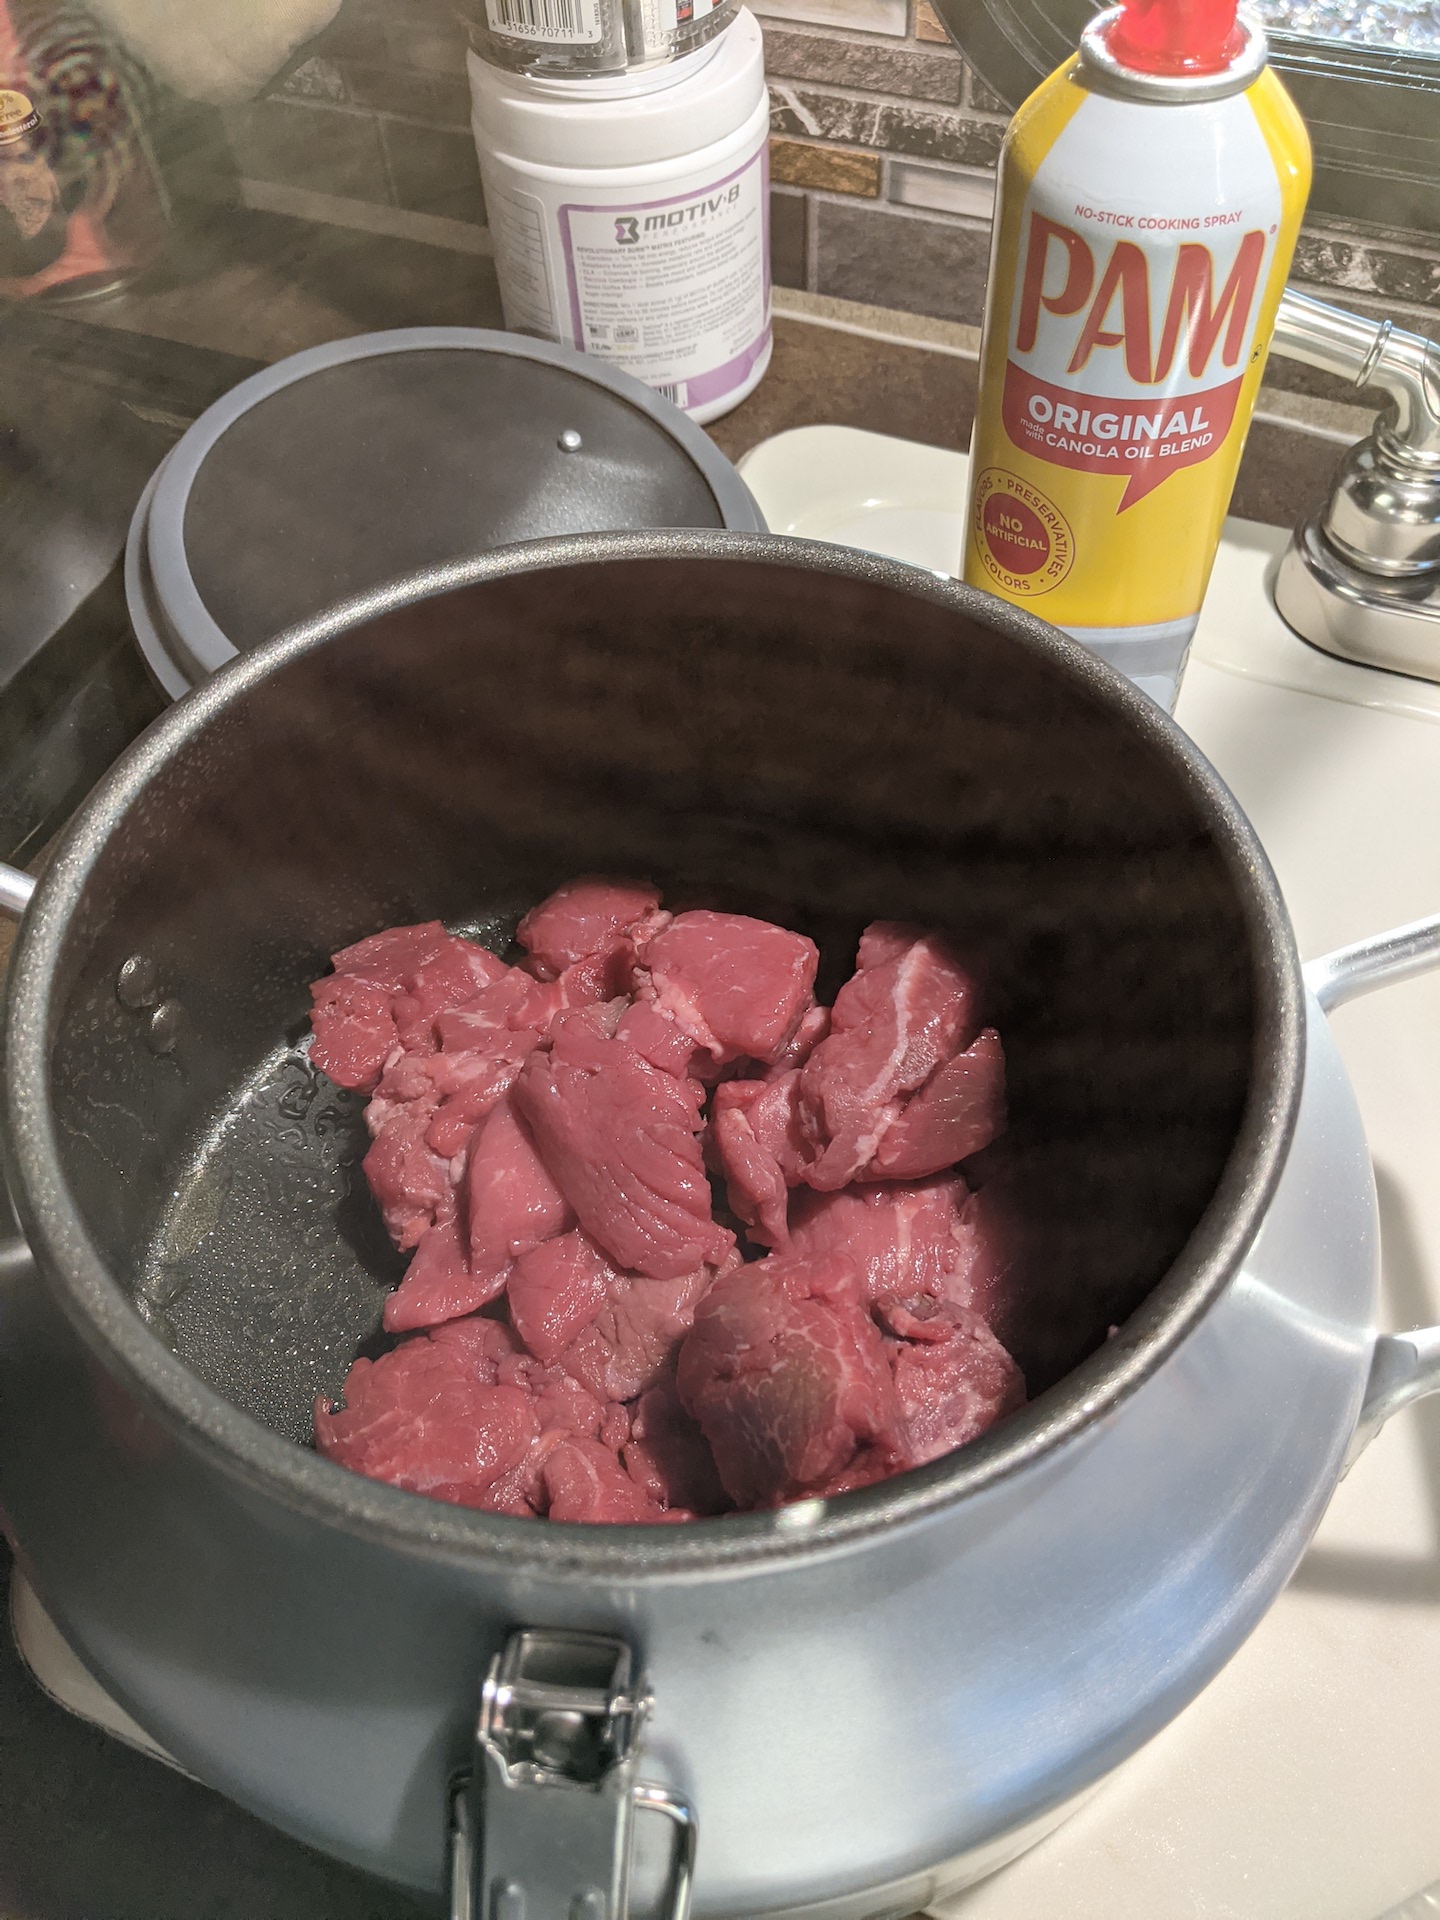
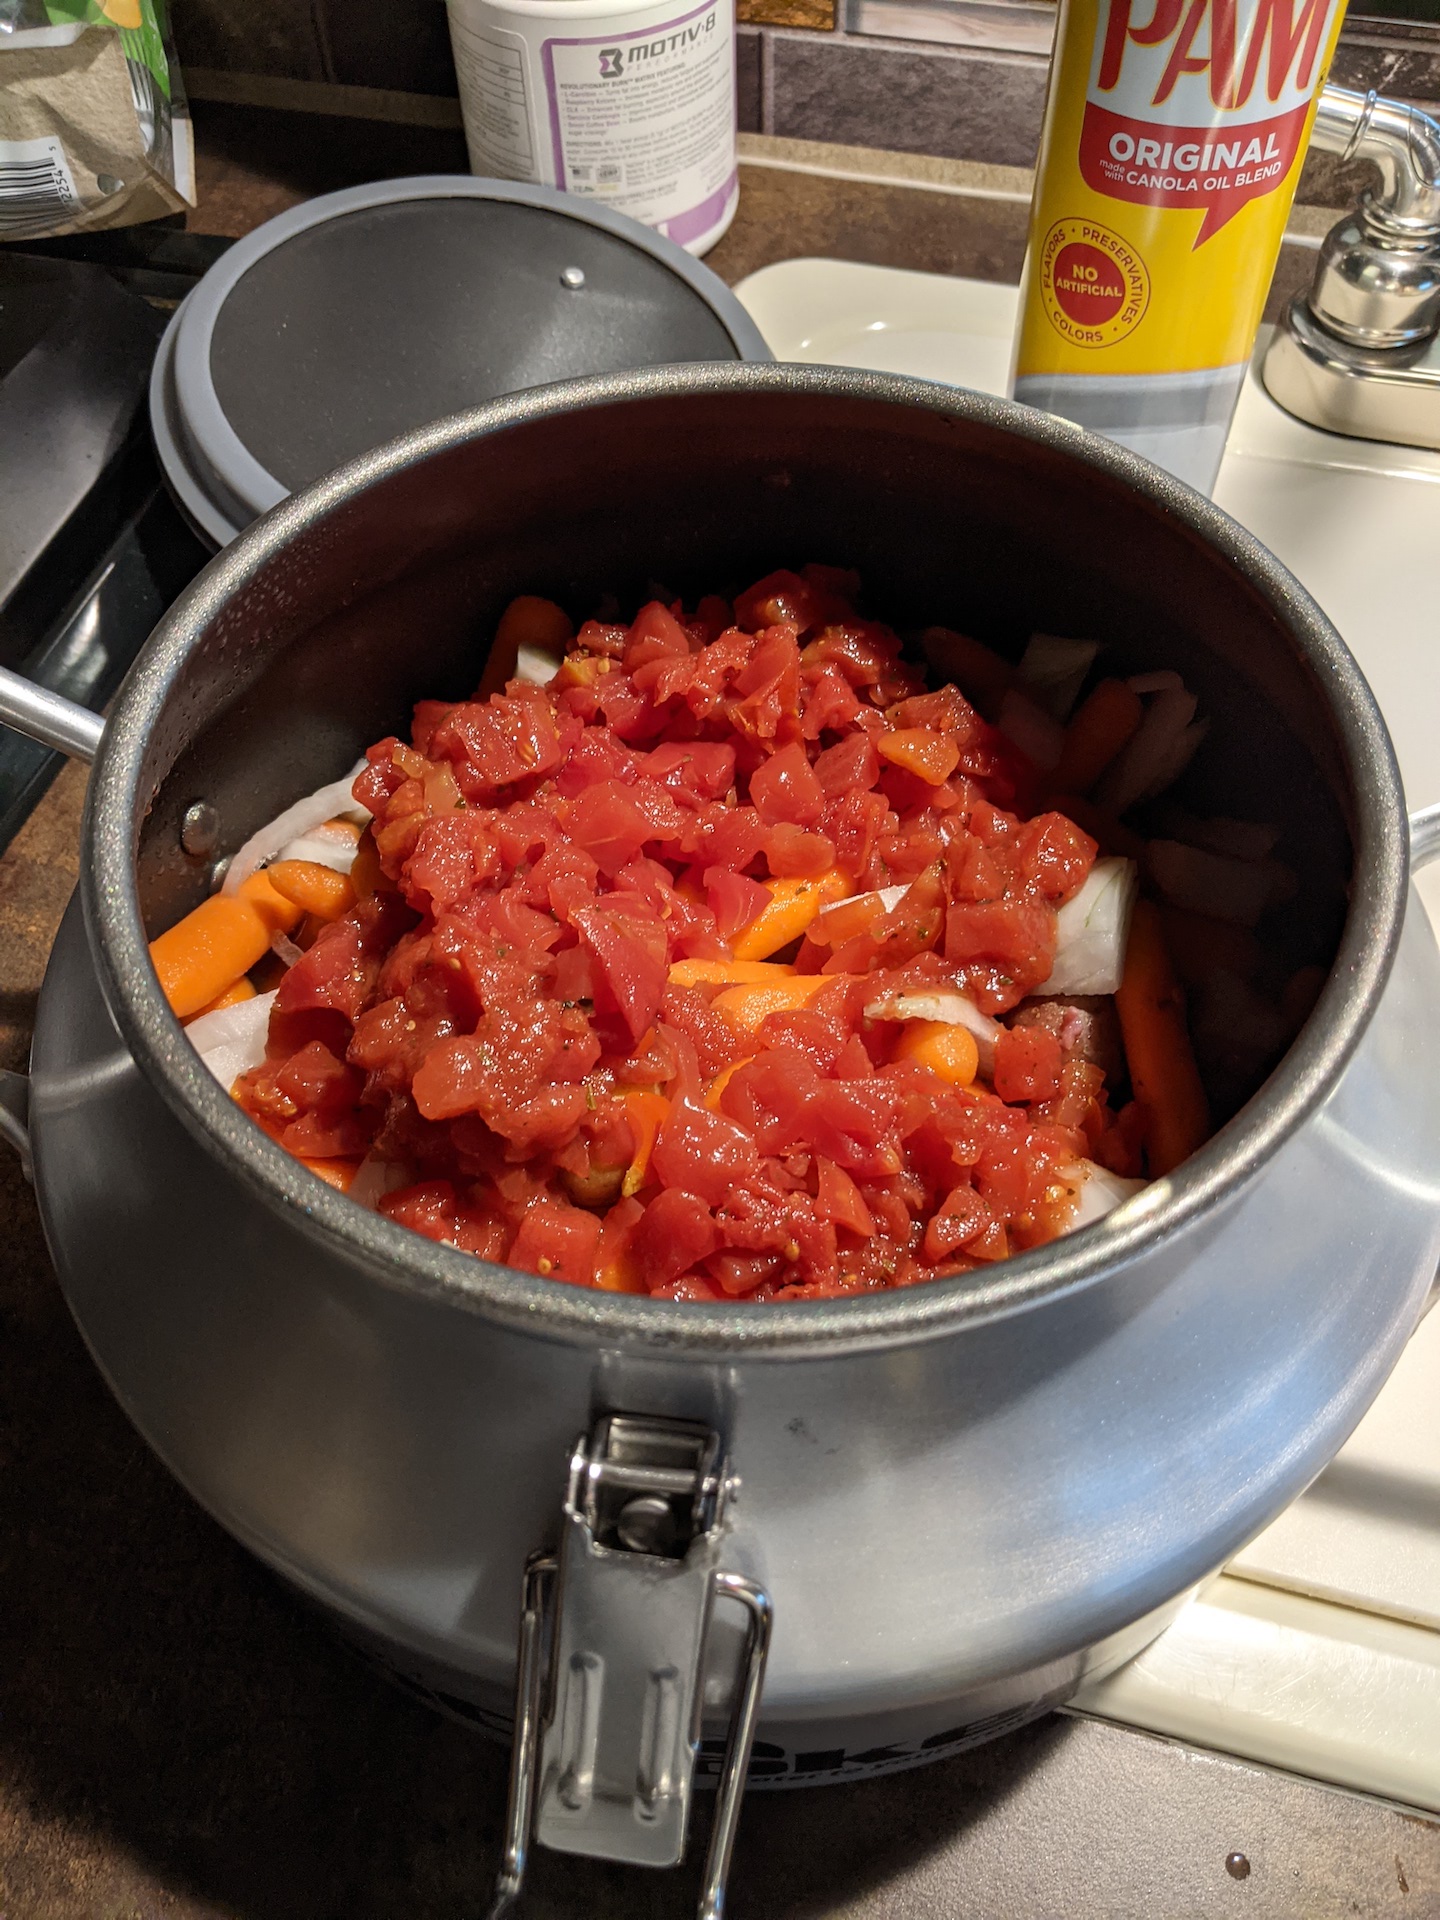
    Spray non-stick cooking spray inside the CanCooker. Add the beef, then the remaining ingredients. Latch lid and cook on medium / low heat for 45 minutes.

    Carefully remove the lid, and let stand for a minute. Stir in a mixture* of water and all-purpose flour to thicken the stew to desired consistency.

    Remove from heat and serve!

    *Mixture to thicken stew: 3 tbsp water and ¼ cup all-purpose flour. 

    Note: You can increase or decrease the amount of ingredients in this recipe but please make sure to use at least 12 oz. of liquid.

    I did not add the mushrooms ( I am not a picky eater, but those things I cannot stand no matter how many times I try them) and instead of thickening with flour I chose to add 1 cup of rice the last 20 minutes of cooking and it turned out great!

    This was so simple, throw everything in and then on to the grill!

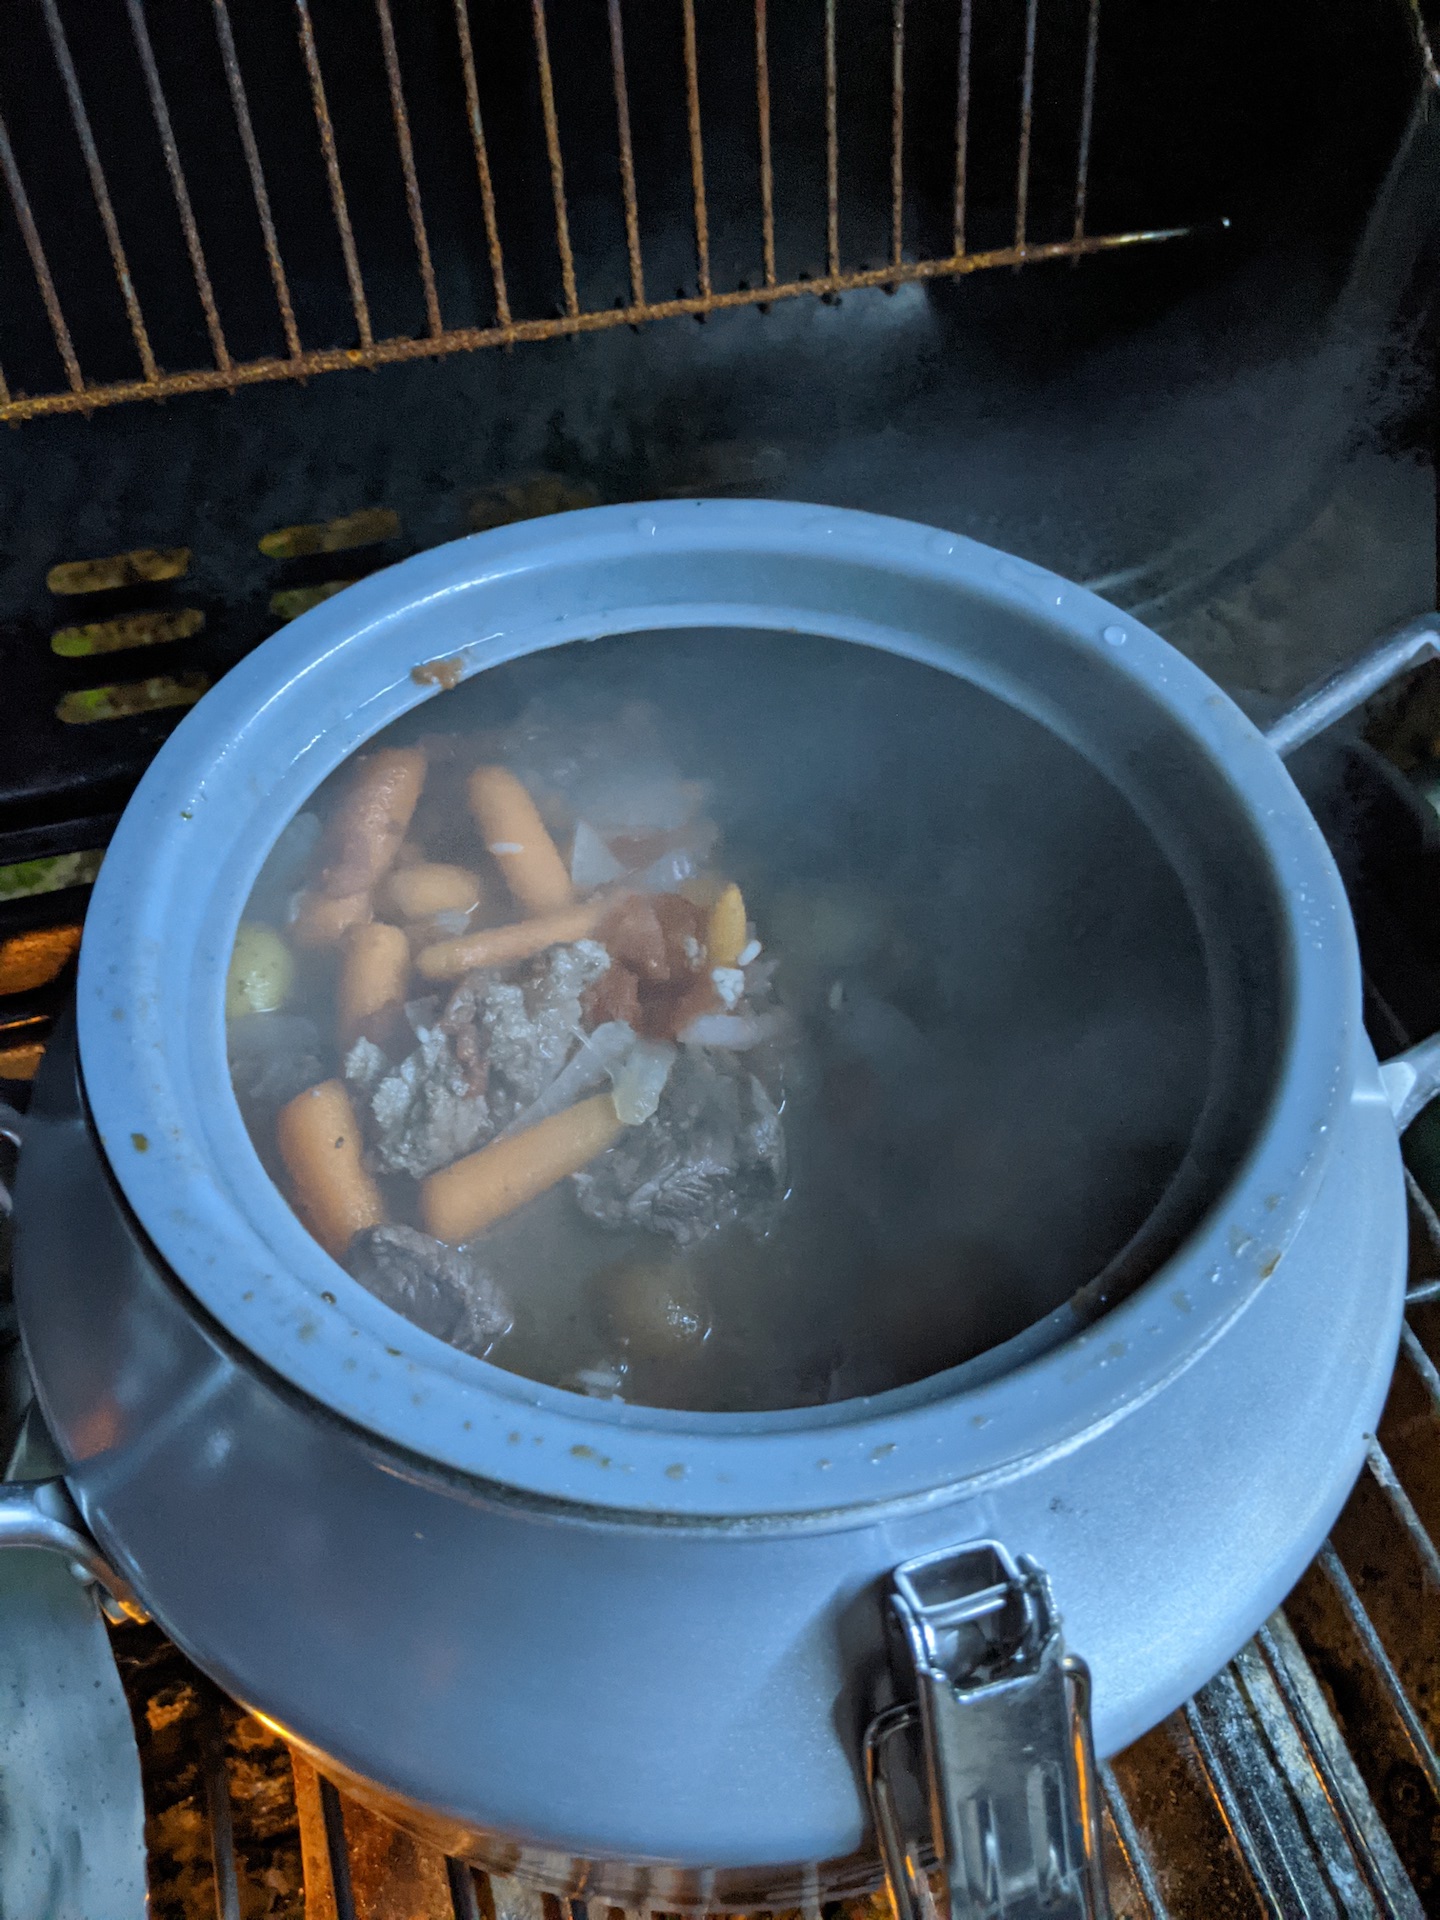
    I placed it on high heat at first then when it started to steam I turned it down so that I could no longer see the steam as per the instructions on the website. after about 25 -30 minutes I added the rice. This is how it looked when I lifted the cover.

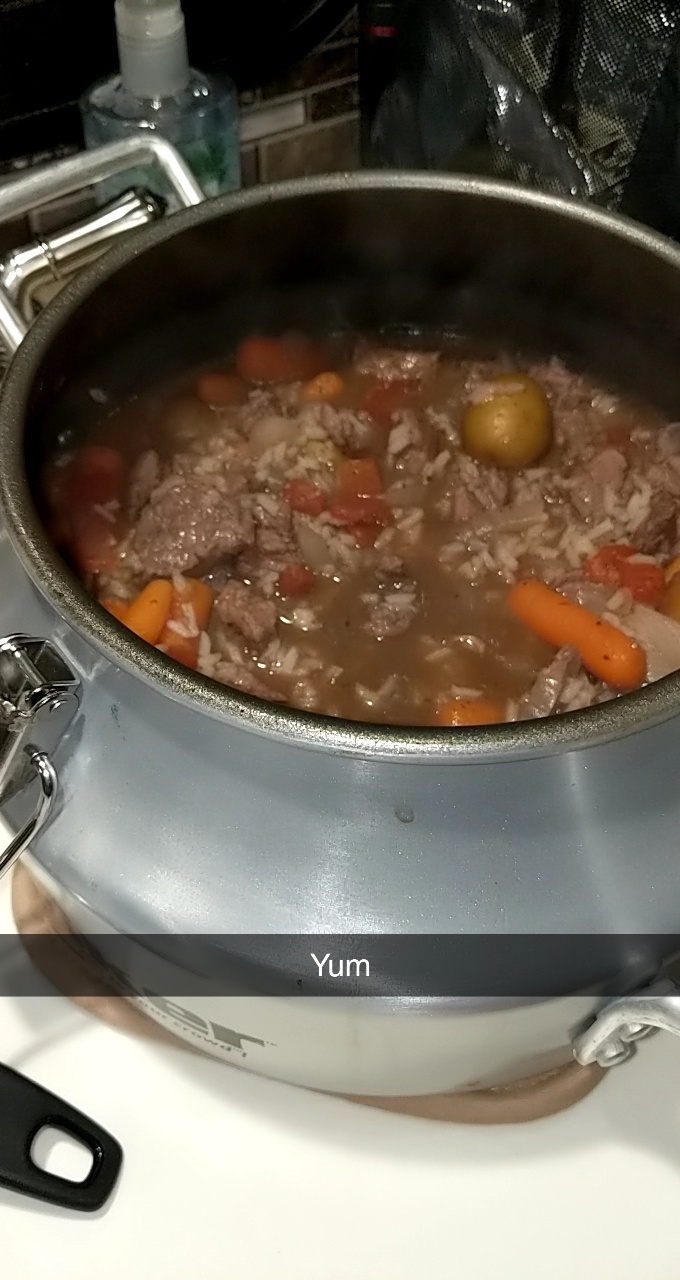
    The finished product….

    Needless to say, we are both stuffed and have a lot of leftovers for tomorrow. Cooking at home is not only healthier and cheaper than eating out it’s great practice. Being able to use the tools you have in the event of a SHTF situation is crucial and should be an important part of your prepping!

    Happy Prepping!

    Maine Prepper Girl

    tactical, shooting, deals, save money, prepping, ammunition, firearms, daily deals

    patreon, banner, logo, survival, preparedness, SHTF, prepper,

  • How to Can Bacon

    How to Can Bacon

    canning, bacon, how to, food storage, preparedness, prepper, SHTF

    NOTE: The following is NOT the recommended method for canning bacon by the USDA.

    line

    You will need a large (tall) pressure canner; a rack on feet OR 2 racks and jelly jars with caps and rings;  quart jars with caps and rings, preferably wide-mouth, thick-sliced bacon,  and parchment paper (or paper bags).

    Get lots of parchment paper; I buy mine in rolls at Sam’s – much cheaper this way.

    Get your jars ready –  quarts will work best for this project, and wide-mouth will be easier to fill than regular mouth jars.

    Remember that canning bacon works best with thick-sliced; most others will disintegrate or turn into a large blob of bacon.

    Cook your bacon in advance (trust me when I say this works better than packing raw bacon, although, you CAN do that, too!). I microwave ours; but, cook it until it’s “crispy” (or, however you like it cooked). You will have to cook it up again to crisp it when you open the jars, but, that won’t take much “cooking” when you pack it cooked.

    Tear off a strip of parchment paper to hold about 8 slices, rolled up; if you get it too short, it doesn’t matter; you’ll just pull off another piece of parchment and keep going. Parchment paper cans just fine; don’t use wax paper – it does not. You CAN use paper bags, if necessary, but, parchment paper works best.

    bacon-is-the-answer-4

    Roll your bacon, one cooked strip at a time, in parchment, making sure each strip is rolled and protected from the next strip by paper; if the bacon is wrapped meat-to-meat; it will all stick together after processing and cooling, and you will have one big lump of bacon. Good luck getting that out of the jar!

    When you have about 8 strips (you may be able to get more in there!); fold the strips of wrapped bacon in “half”; trim the ends of the parchment, leaving about one (1) inch at either end of the bacon (one inch parchment paper hangover on each end).

    GENTLY stuff the folded strips down inside your jars. This is where you will understand why I tell you wide-mouth is best here. You CAN use regular mouth, but, GENTLY work it down, using a spatula, or some such tool. And try not to mutter to yourself too much while stuffing regular mouth jars!

    When the jar is filled (it’s o.k. if it’s not “full-full”, as in there are air spaces – that’s normal for this project), wipe jar openings with hot water. Each jar opening needs to be wiped down with VERY hot water and a fresh paper towel; fat is very easy to transfer. Wear protective insulated rubber gloves for handling the hot paper towels, but use one fresh paper towel per jar.

    Sterilize your caps and place them; sterilize your rings and place them.

    Now, you can process these down in the water, and the result will be “o.k.”. What I find works much better is to DRY CAN THE BACON. This is not running your canner dry – that will ruin your canner; what it means is the jars need to be held ABOVE the water line while processing. (BTW: you can use this method to sterilize tools and instruments, but, that’s another story for another day).

    This is where the height of your canner is important, and thus, a bigger canner works better for this project  – make sure you have three (3) inches of clearance between the top of your bacon jars and the top of your canner, when it is sealed. So, when you put in all your racks and your jelly jars of water, or whatever, then your next rack and the jars of bacon, you need 3 inches of clearance at the top.

    Make sure you have about three (3) inches of water in your canner; you don’t want to run out of water.

    Use a rack with legs that hold the jars above the waterline (good luck finding THAT!), or – do this:

    1.  Place one rack in the bottom of the canner, as you always do.

    2.  Fill at least four (4) jelly jars with water and add lids and rings; you can either process good, clean water (not municipal, fluoride, nano-particle drug water!) and store it as sterile water (an excellent prep item – use for cleaning out wounds, etc.), or, just sacrifice a few caps for the sake of the project without saving the water – you can use the same jelly jars of water as many times as you need. Let them cool a little between loads. You’re going to use the jelly jars to build up the height for processing bacon; YOU CAN NOT DO THIS WITH EMPTY JARS – THEY WILL ‘FLOAT”, AND CRACK DURING PROCESSING. You can not process other food in the jelly jars at the same time, as jelly jars are much smaller than quarts; food processed in a jelly jar for that length of time will turn to mush.

    3.  Place jelly jars of water atop the first rack that is protecting them from bottom of canner.

    4.  Place a second rack on top of jelly jars – this rack can literally lay across them
    5. Set your quarts of bacon atop this SECOND rack. Check your water in canner – you need three (3) inches of water; if water laps bottom of jars, o.k., but you don’t want them immersed in water.

    6.  Seal your canner and fire her up!

    7. On high heat, build your steam; steam it out for 10 minutes, as always (10-minute tornado from the vent pipe);

    8.  Place your counterweight on the vent pipe; bring to 10 lbs. pressure and process @ 10 lbs. for 90 minutes because we’re doing quarts. After 90 minutes at 10 lbs. pressure, turn off heat if gas, remove from heat if electric.

    9.  Allow to cool naturally; remove jars; if wide-mouth, remember, they don’t make the noise regular mouth make when sealing, and they don’t make the same sound when tapped. NEVER TAP THE CENTER OF THE CAP TO TEST – TAP AROUND THE EDGES.

    10.  When thoroughly cooled, wash your jars of bacon in hot, soapy water (fat everywhere!), rinse in hot water, allow jars to thoroughly dry; mark caps with contents and date and store away.

    To enjoy: it’s already cooked; you could just set it out in the sun and heat it up, or, eat it straight from the jar. But, Yes! It will be greasy (the paper does absorb a lot of the grease). I like to throw it in a pre-heated cast iron skillet and just “re-crisp” it. It doesn’t take long at all!

    This works out great for camping (even though it is in glass). That glass jar comes in handy for storing other leftovers, as well, so, you’ll get more than one use from the jar while traveling.

    It’s also convenient to have pre-cooked bacon at the ready for a quick breakfast, casserole, etc.

    How long is this good? 5-6 years, if you store it out of direct sunlight, and away from heat sources.

    And now you know how to dry can bacon! If you don’t want to dry can, just use the standard method of one rack sitting in the water; all other instructions do not change.

    Guest Post by S.
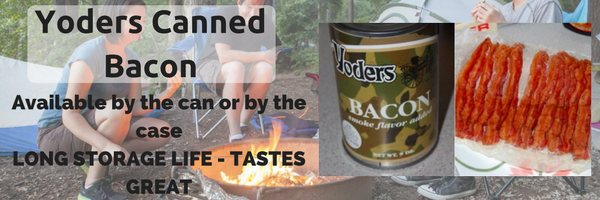
    yoders-canned-bacon

  • Canned Bread Yay or Nay?

    Canned Bread Yay or Nay?

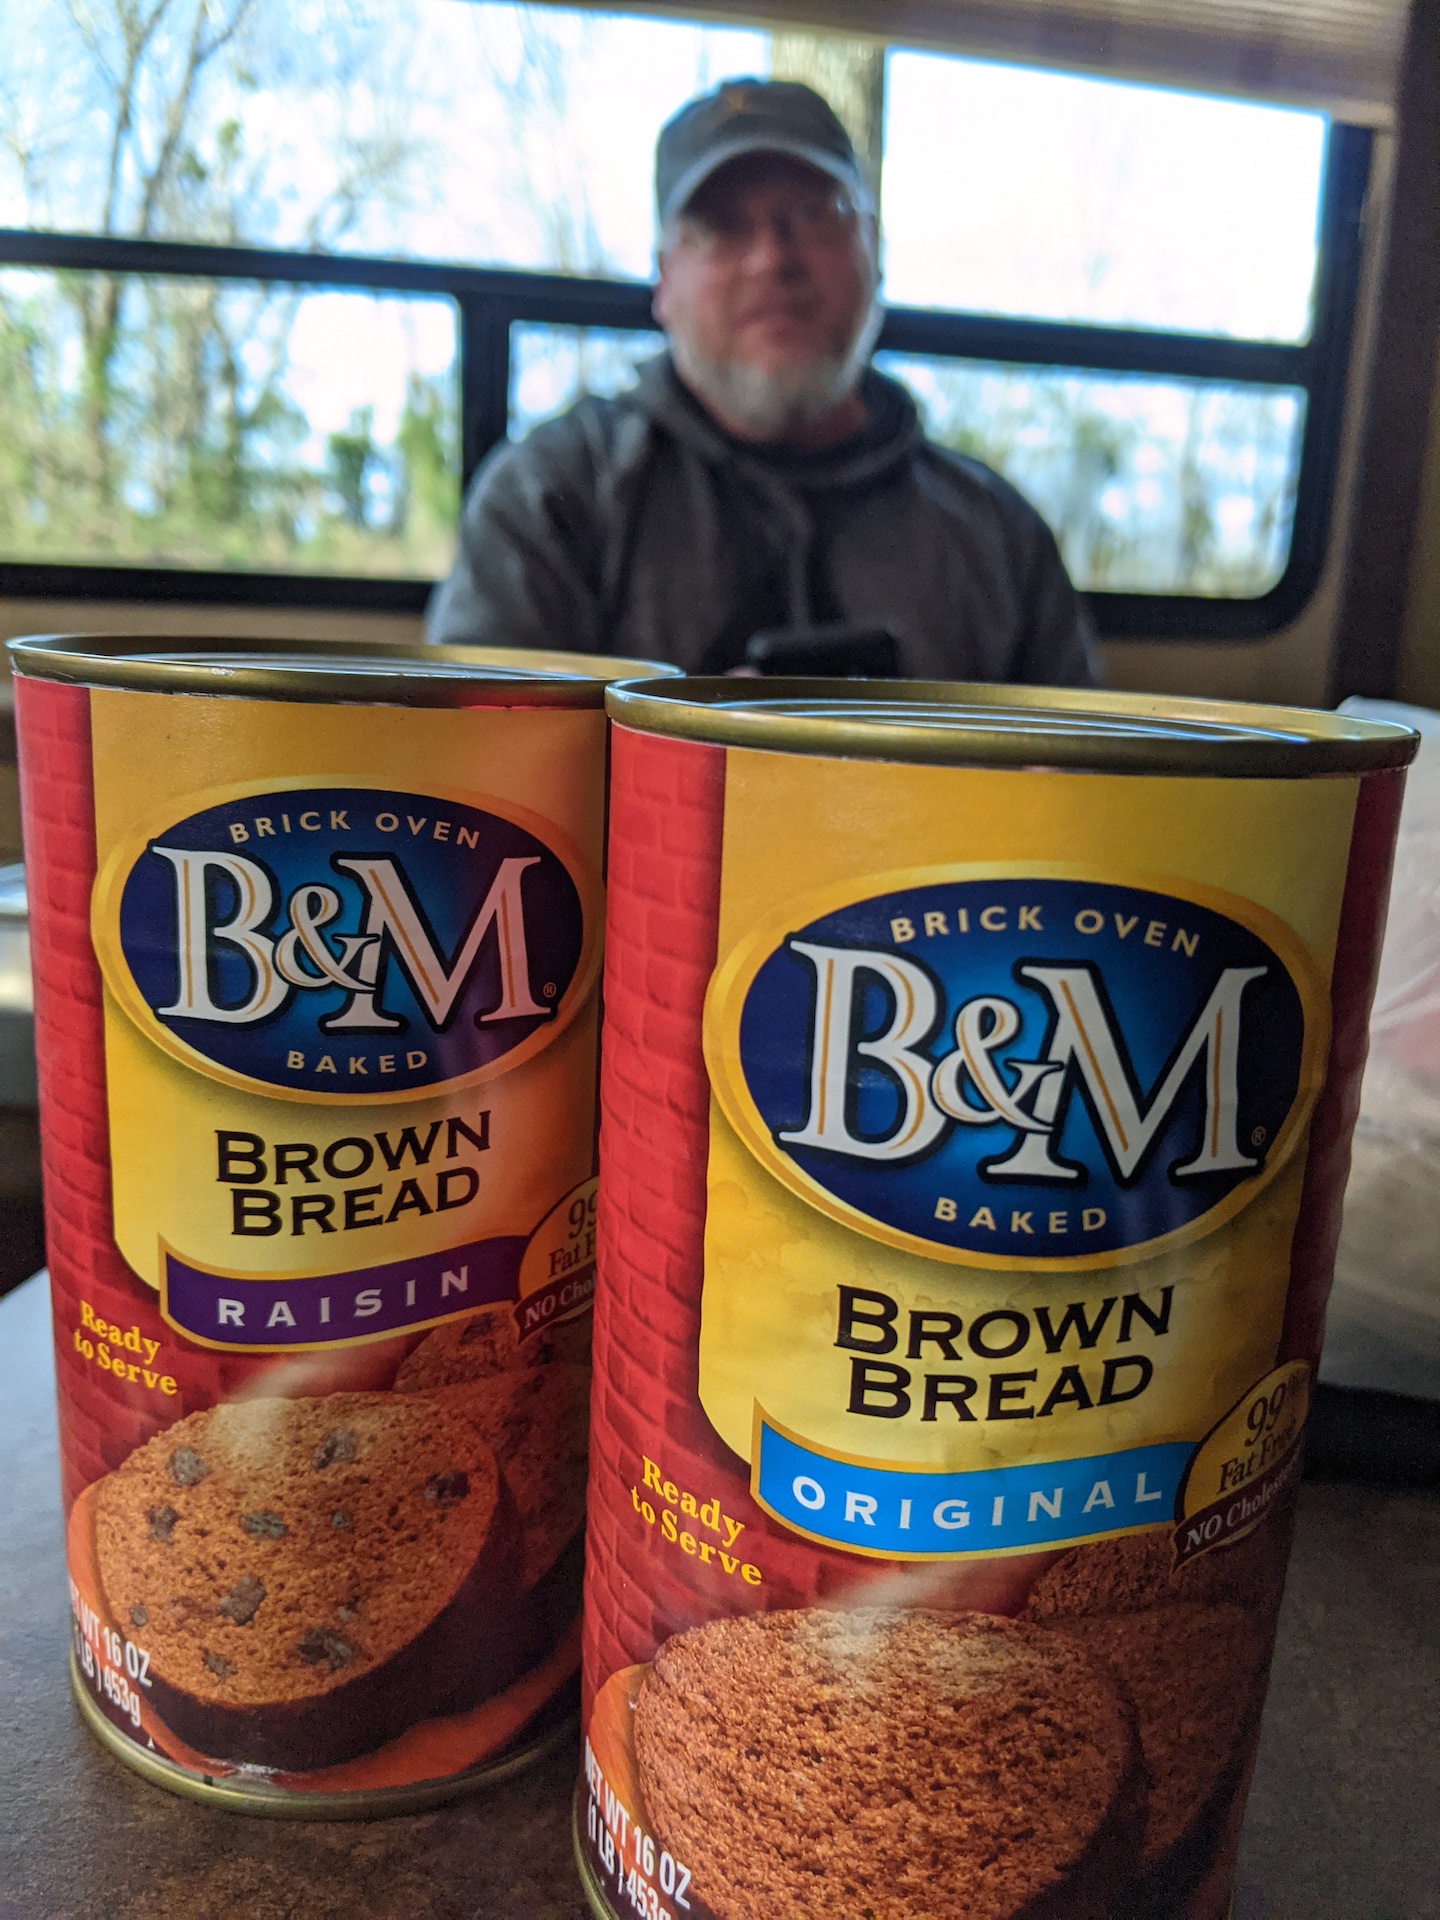
    Mr. Rourke gives this canned bread a big thumbs down. I did get him to like it when toasted with butter, added salt (yes, I added sea salt), and topped with a big slab of Jiff peanut butter. He says everything is better with peanut butter and I cannot disagree. I do, however, think that this bread has a place on the prepper’s pantry shelves. It stores well and for a canned item, it is very light.  The bread is also versatile as it can be a dessert or a meal and if you don’t have time to make bread then boom, you got bread.
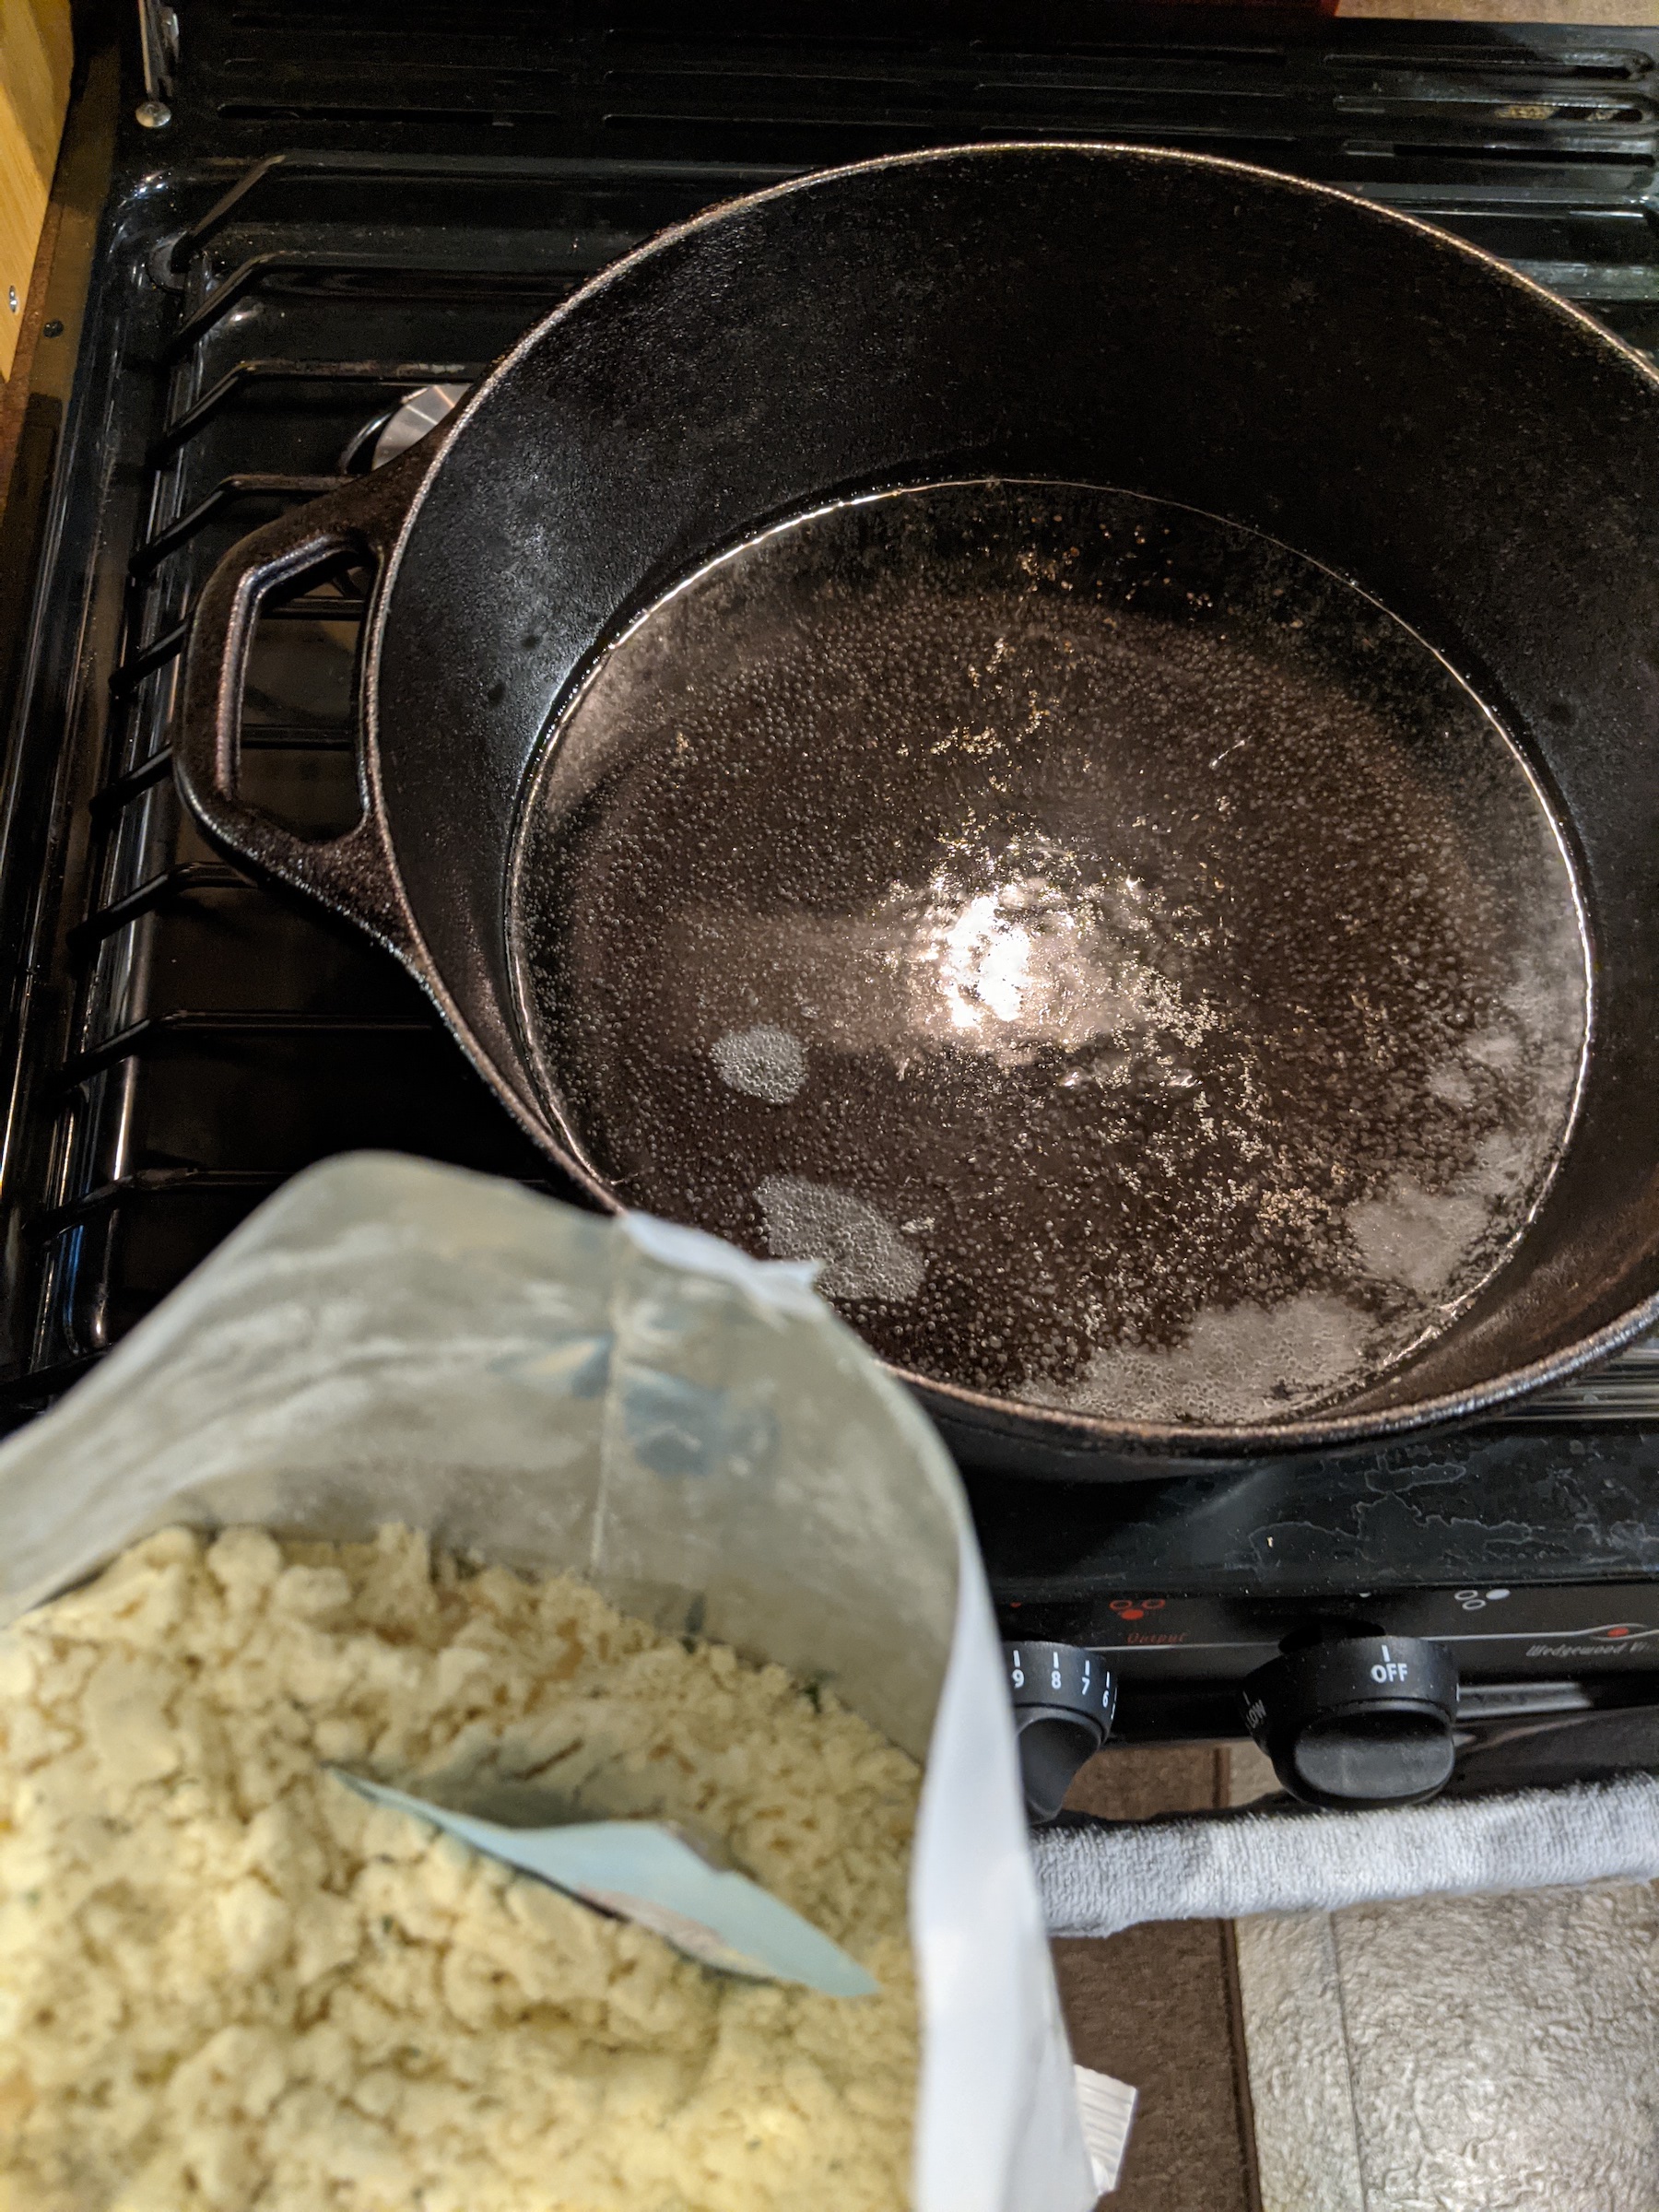
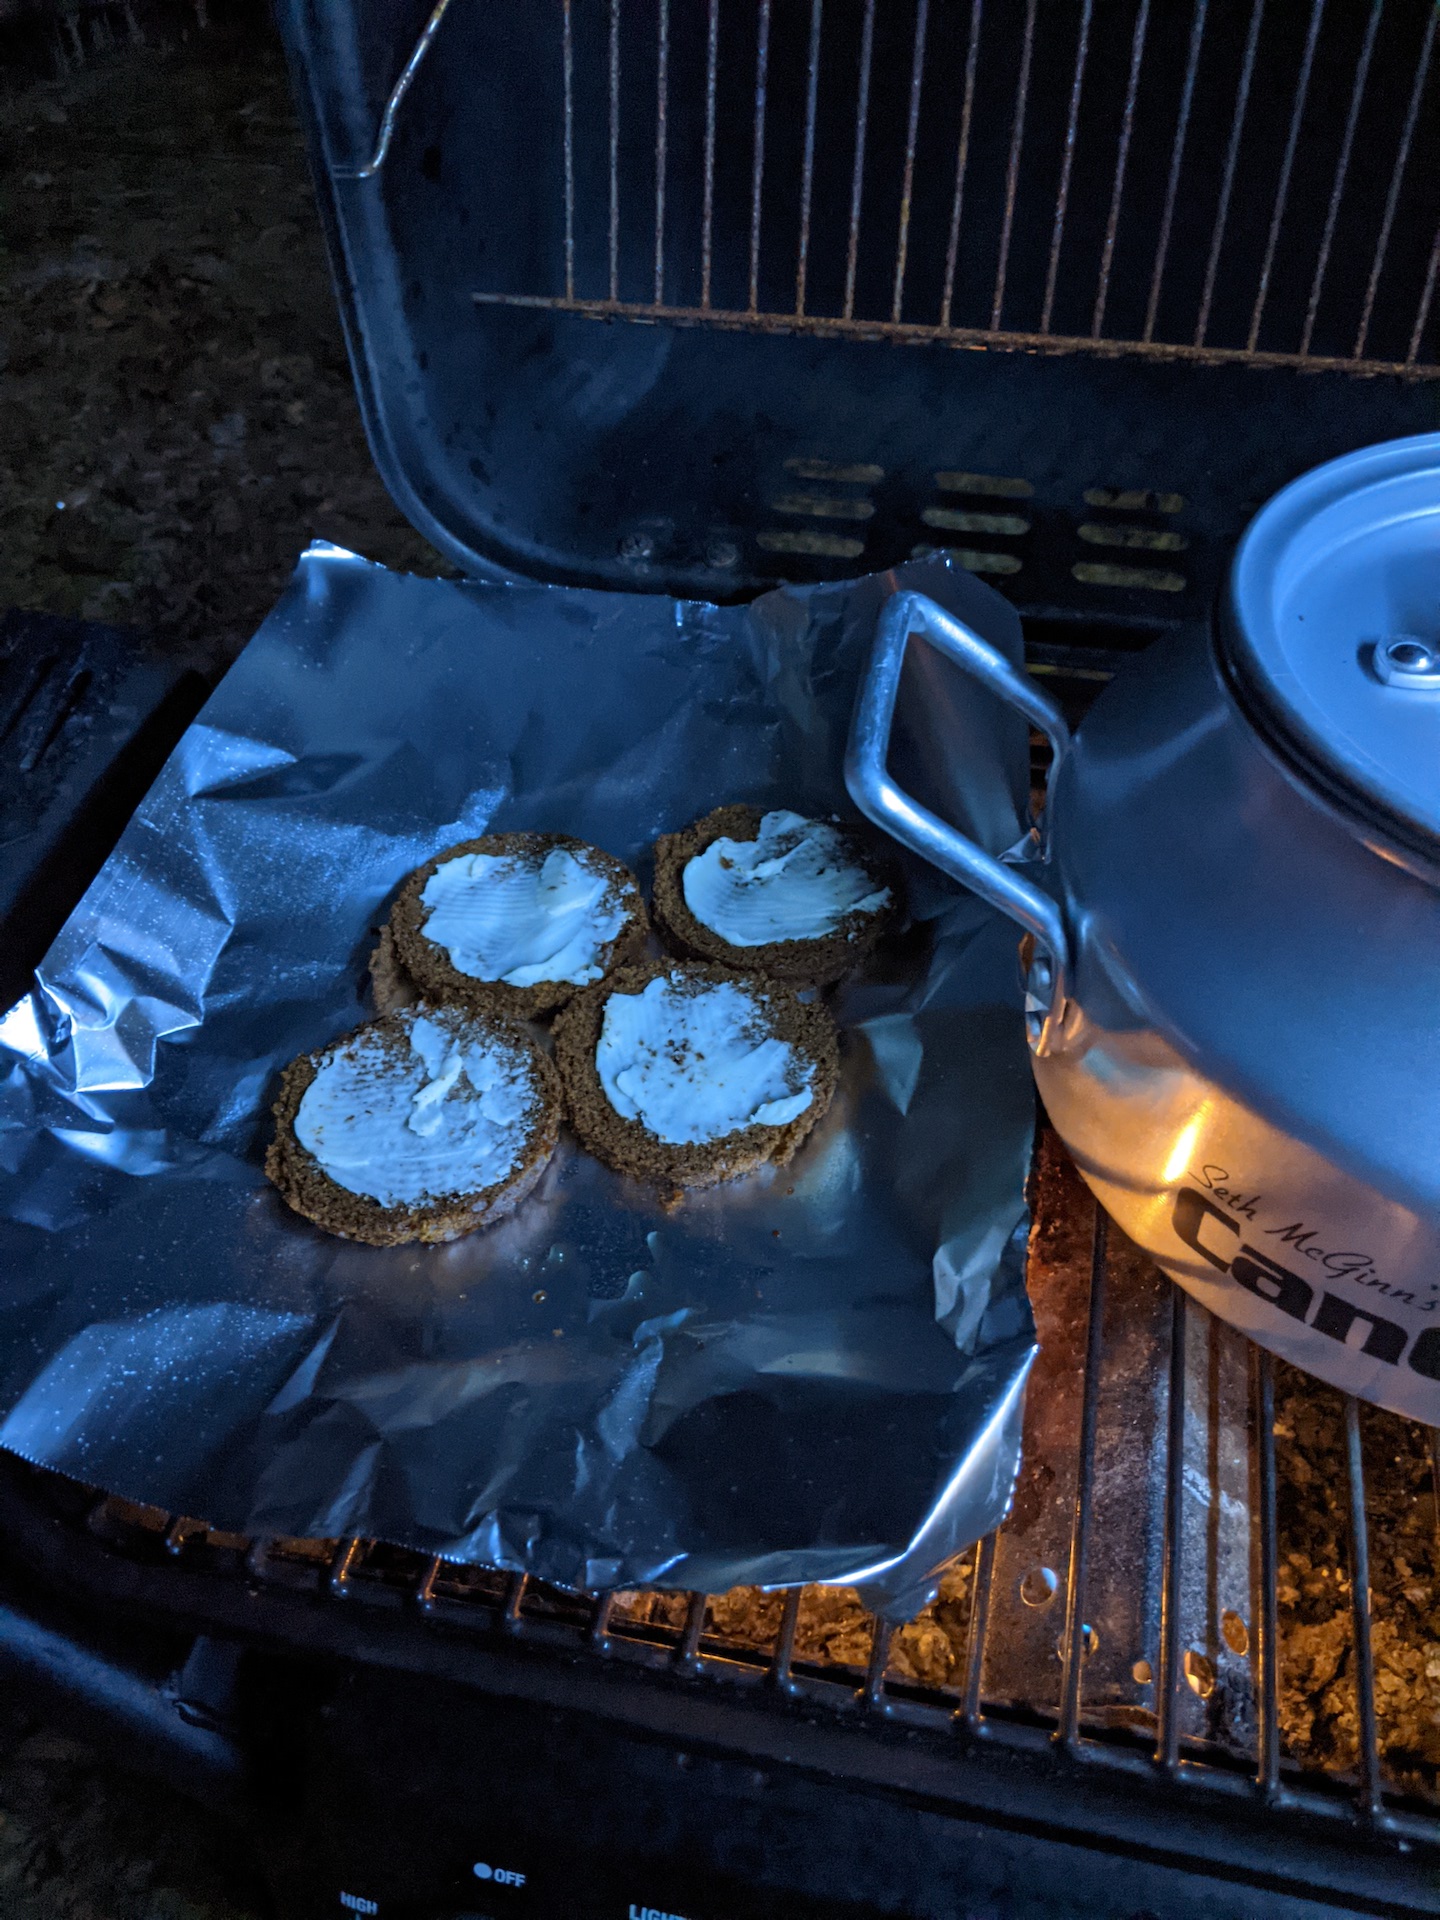
    I toasted the canned bread after slicing it the way you do a can of cranberry sauce at Thanksgiving. I added some butter and put it on the grill. What you see next to the bread is the beef stew I made in a CanCooker (article to follow soon)!

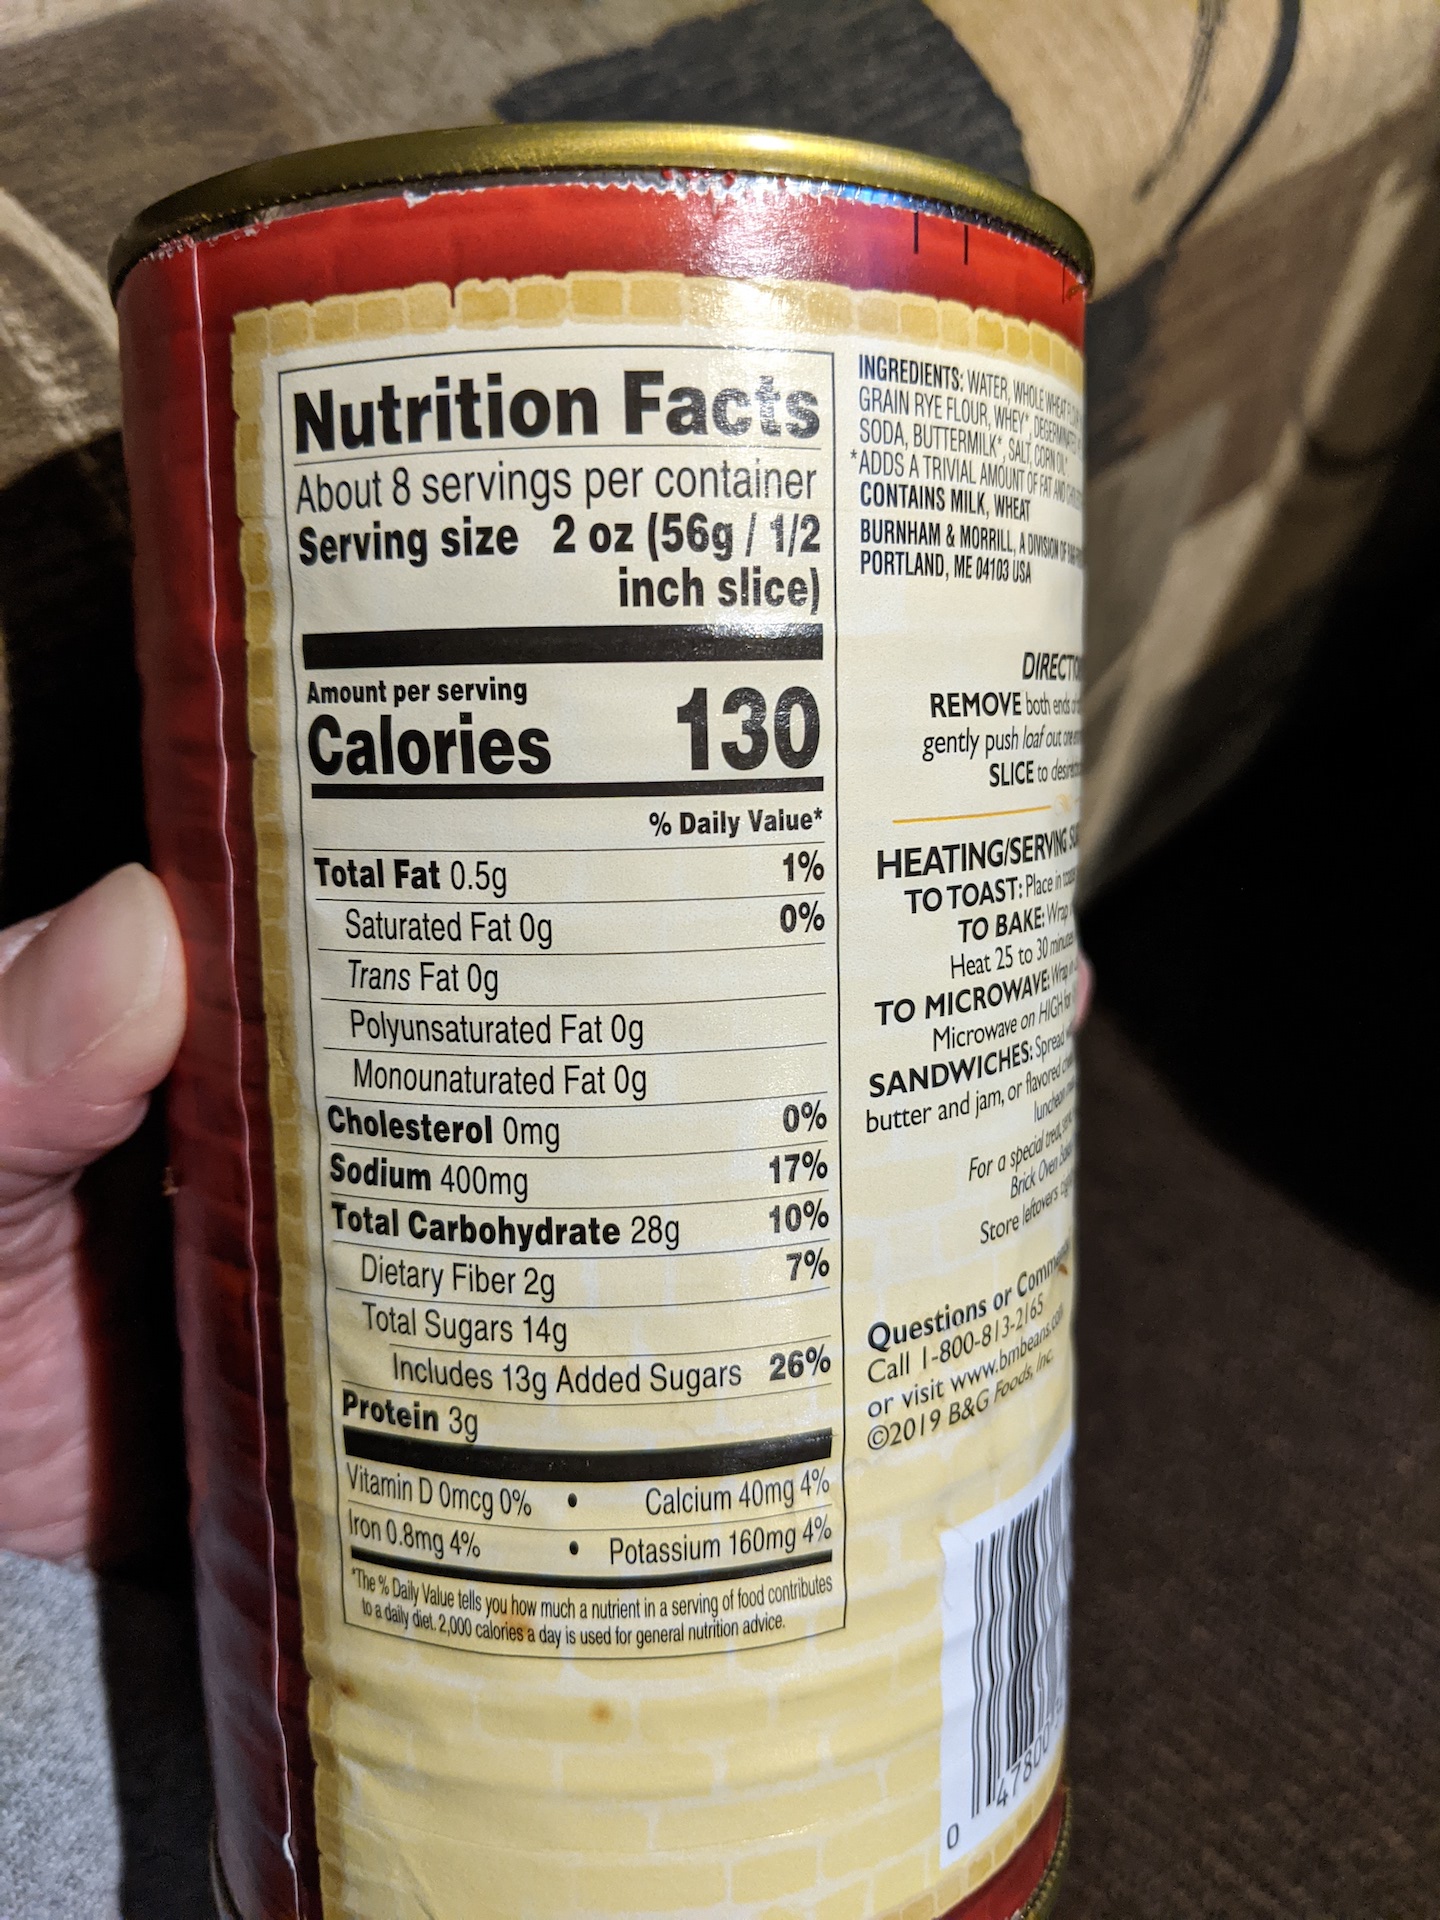
    For those of you who are keeping track of the calories in your pantry here is the nutritional information. The entire can is 1040 calories which I think provides a good amount of calories. The best price I found on Amazon is $2.69 a can if you buy 12 and a subscription. I am thinking you might be able to find them at WalMart too. I know that they have them in many Maine grocery stores if you ever find yourself up that way!

    B&M BROWN BREAD


    Happy Prepping!

    Maine Prepper Girl

  • Review of NEBO PAL

    Review of NEBO PAL

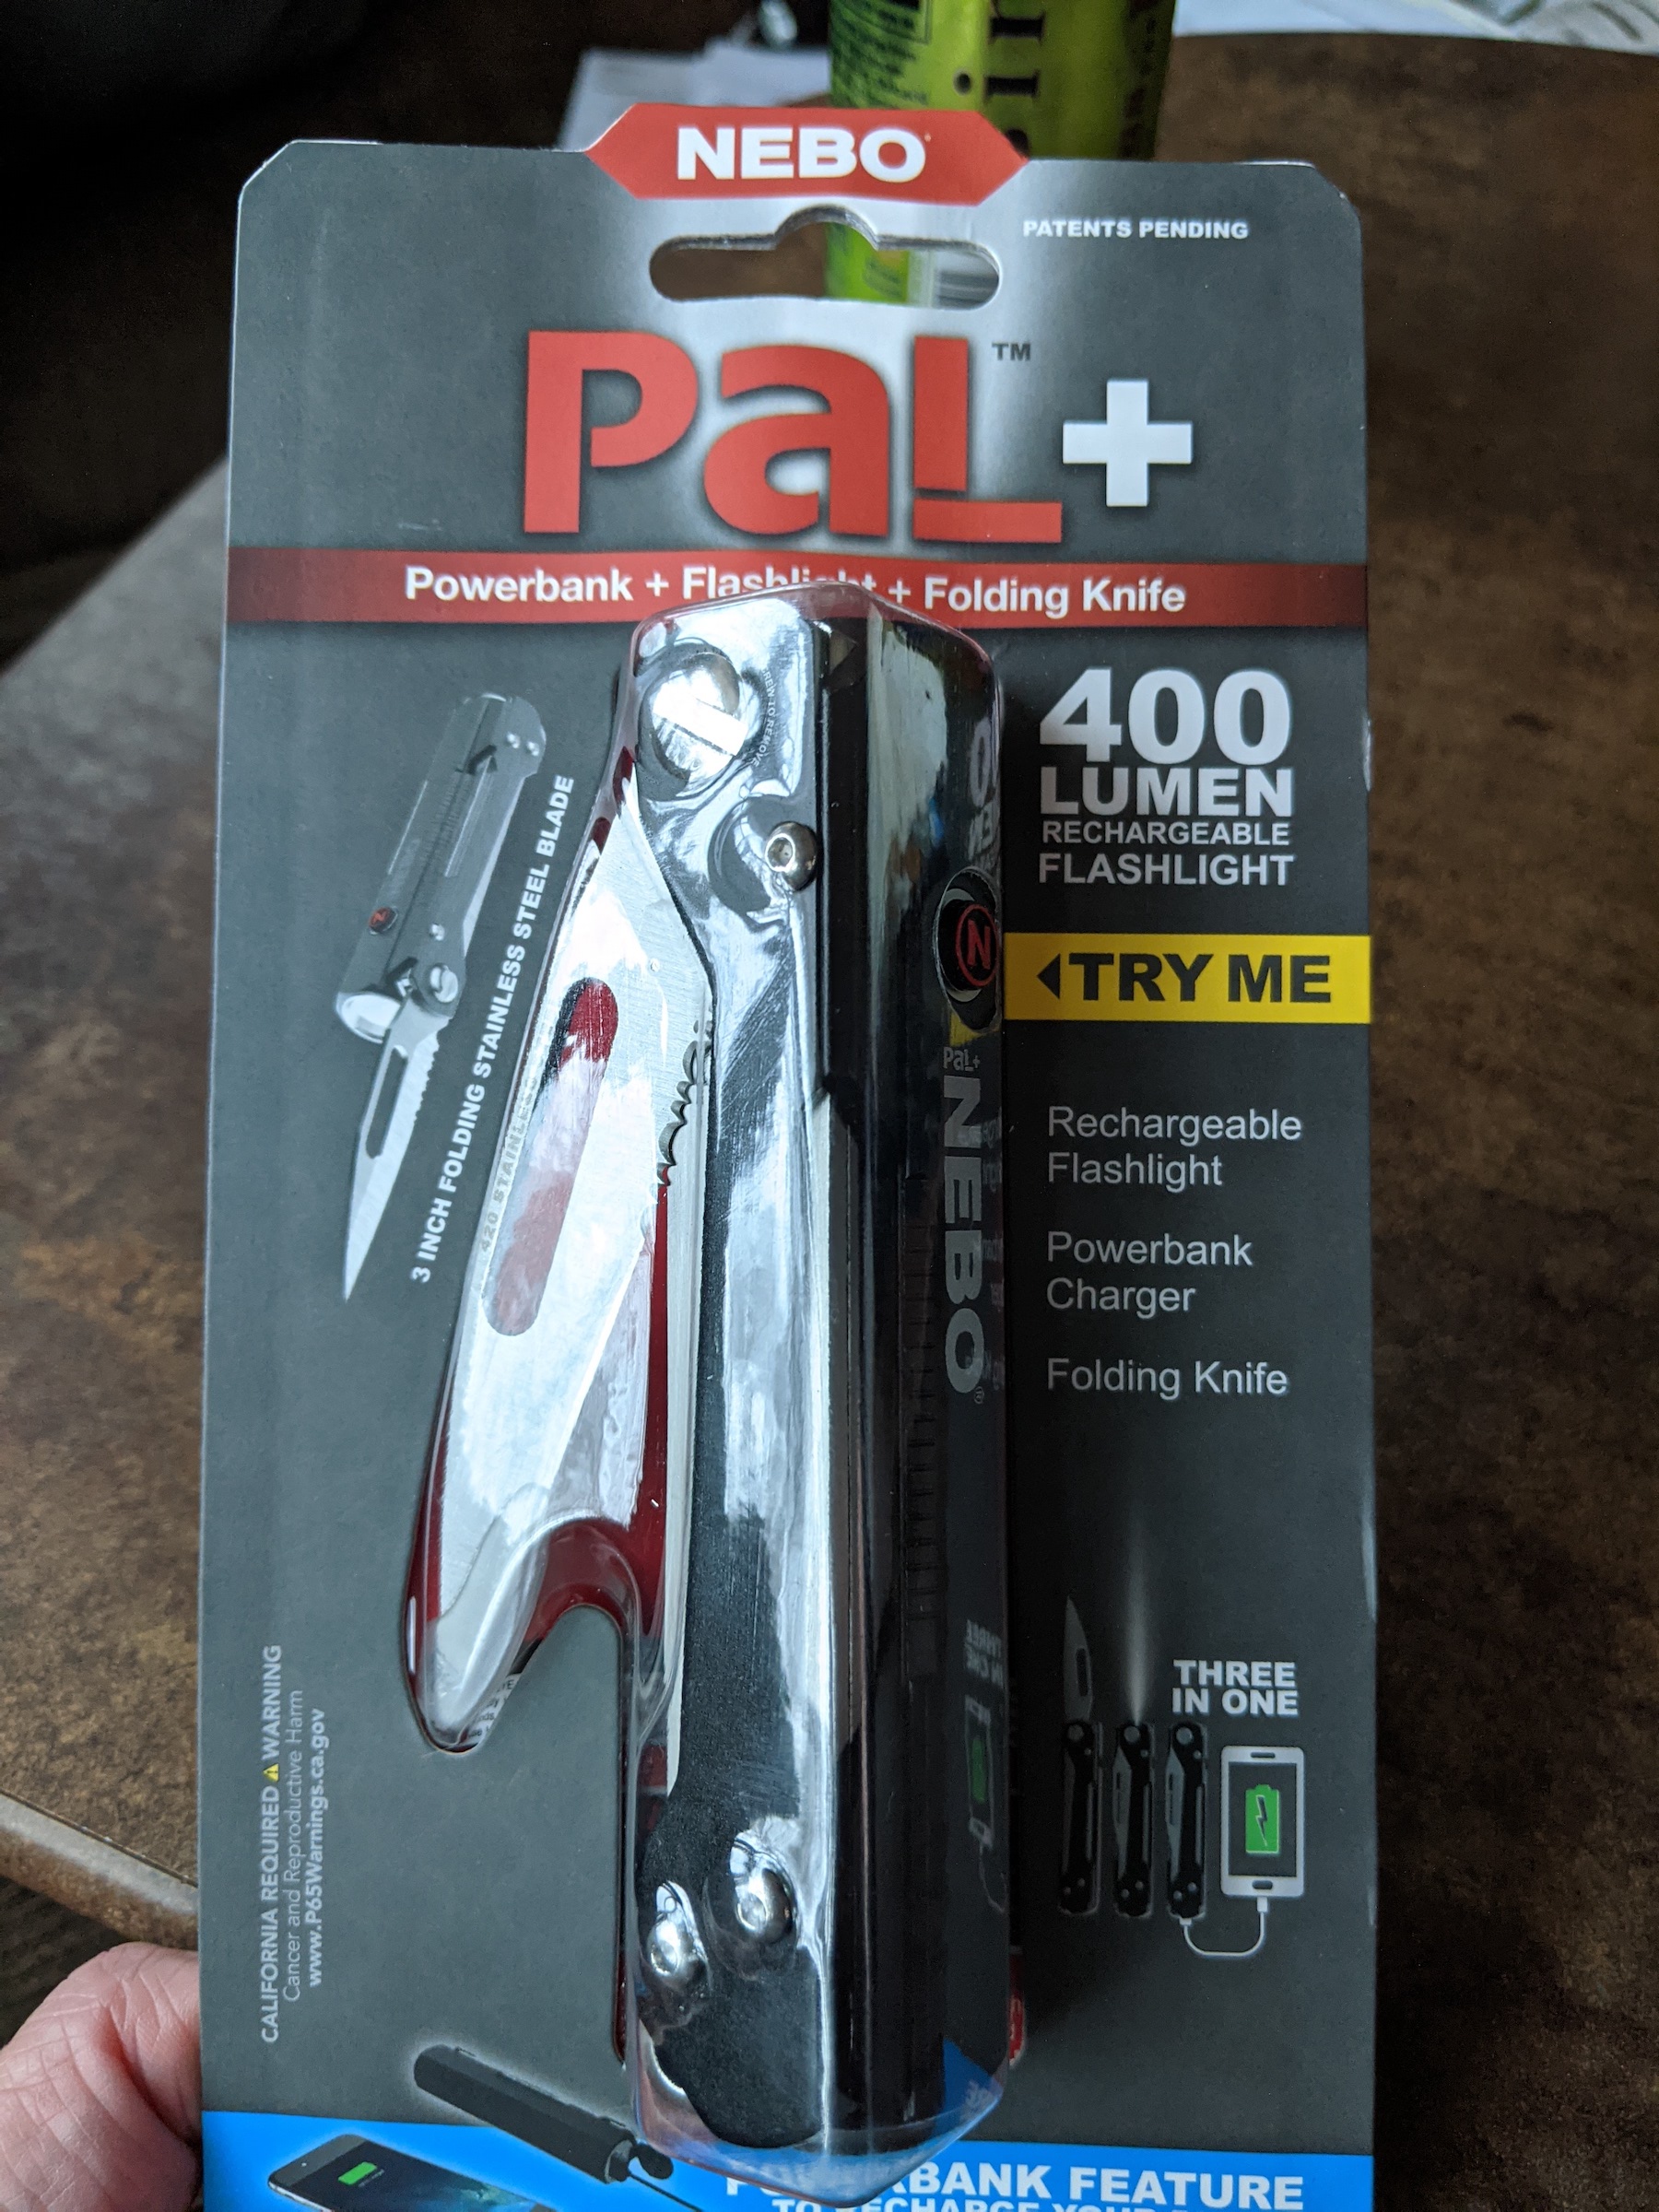
    I got the Nebo Pal in my Christmas stocking and didn’t give it much thought until I got back to South Carolina from Maine and got to really check it out. As I pulled it out of the packaging I thought that this tool could be really useful. It’s a tool that is a knife, a battery pack (with a short cord for charging), and a flashlight all in one. 

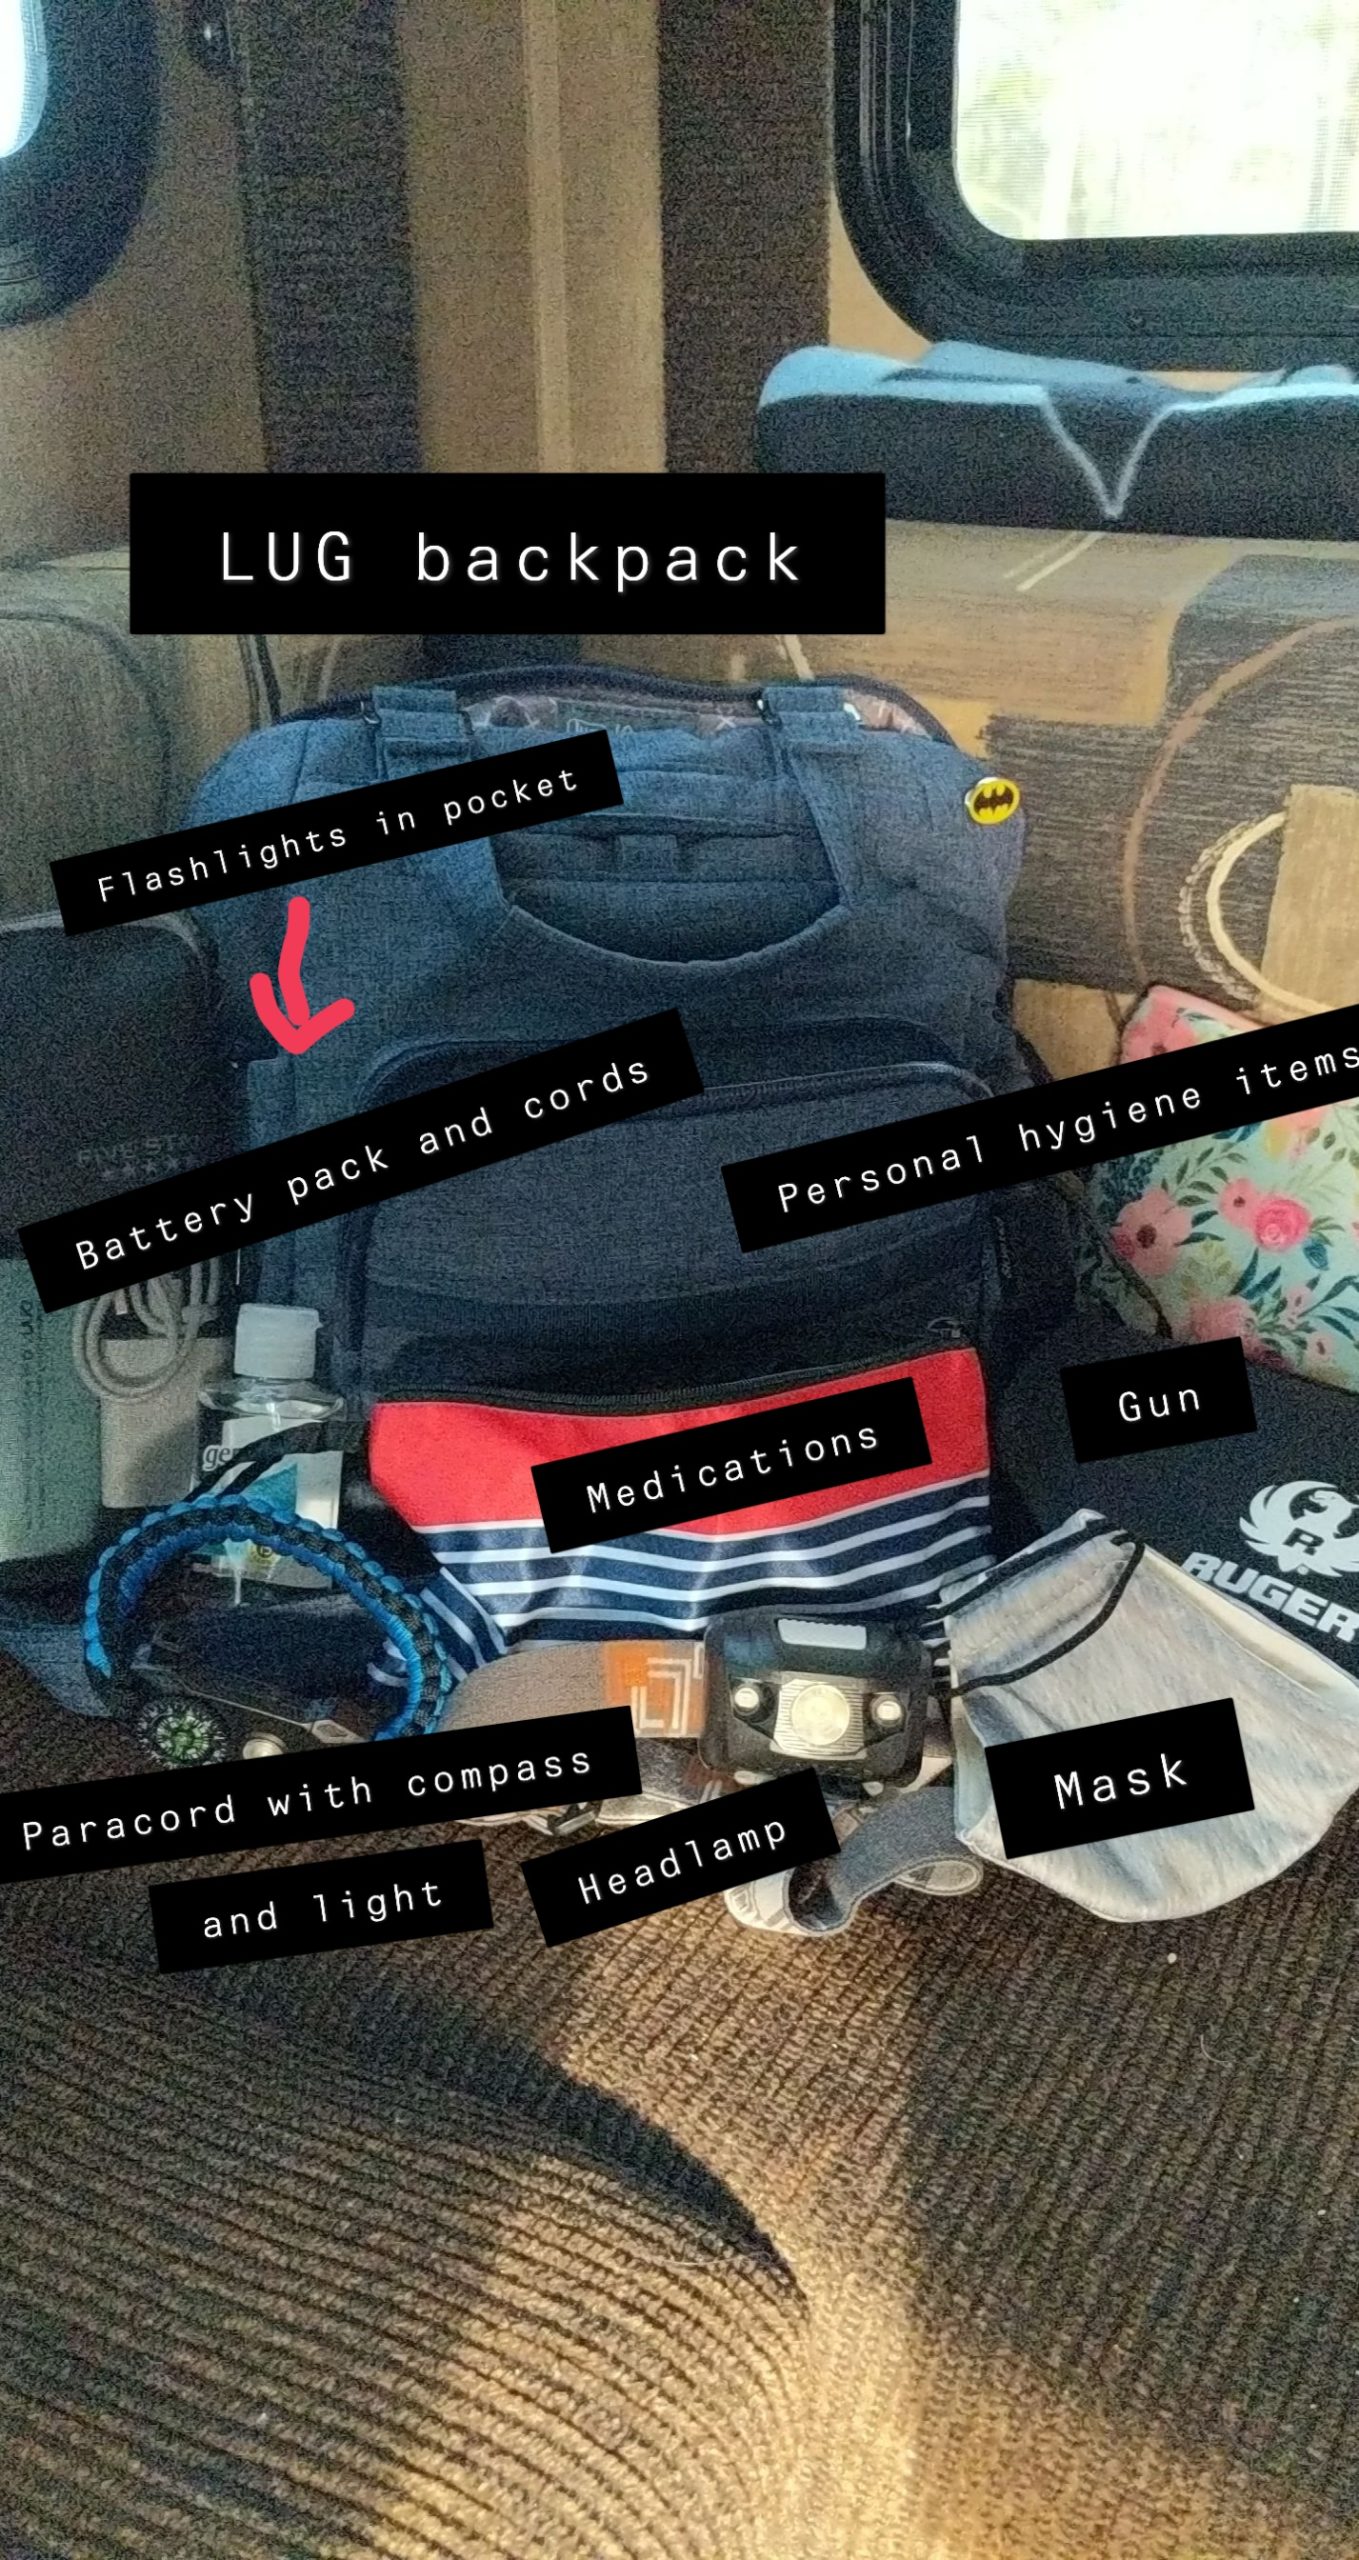
    I usually carry all these items and more separately in a bag that I keep in my vehicle. This compact tool will lighten the load I need to carry as it takes the place of several items. This can easily be something that I could carry in my smaller bag as well. 


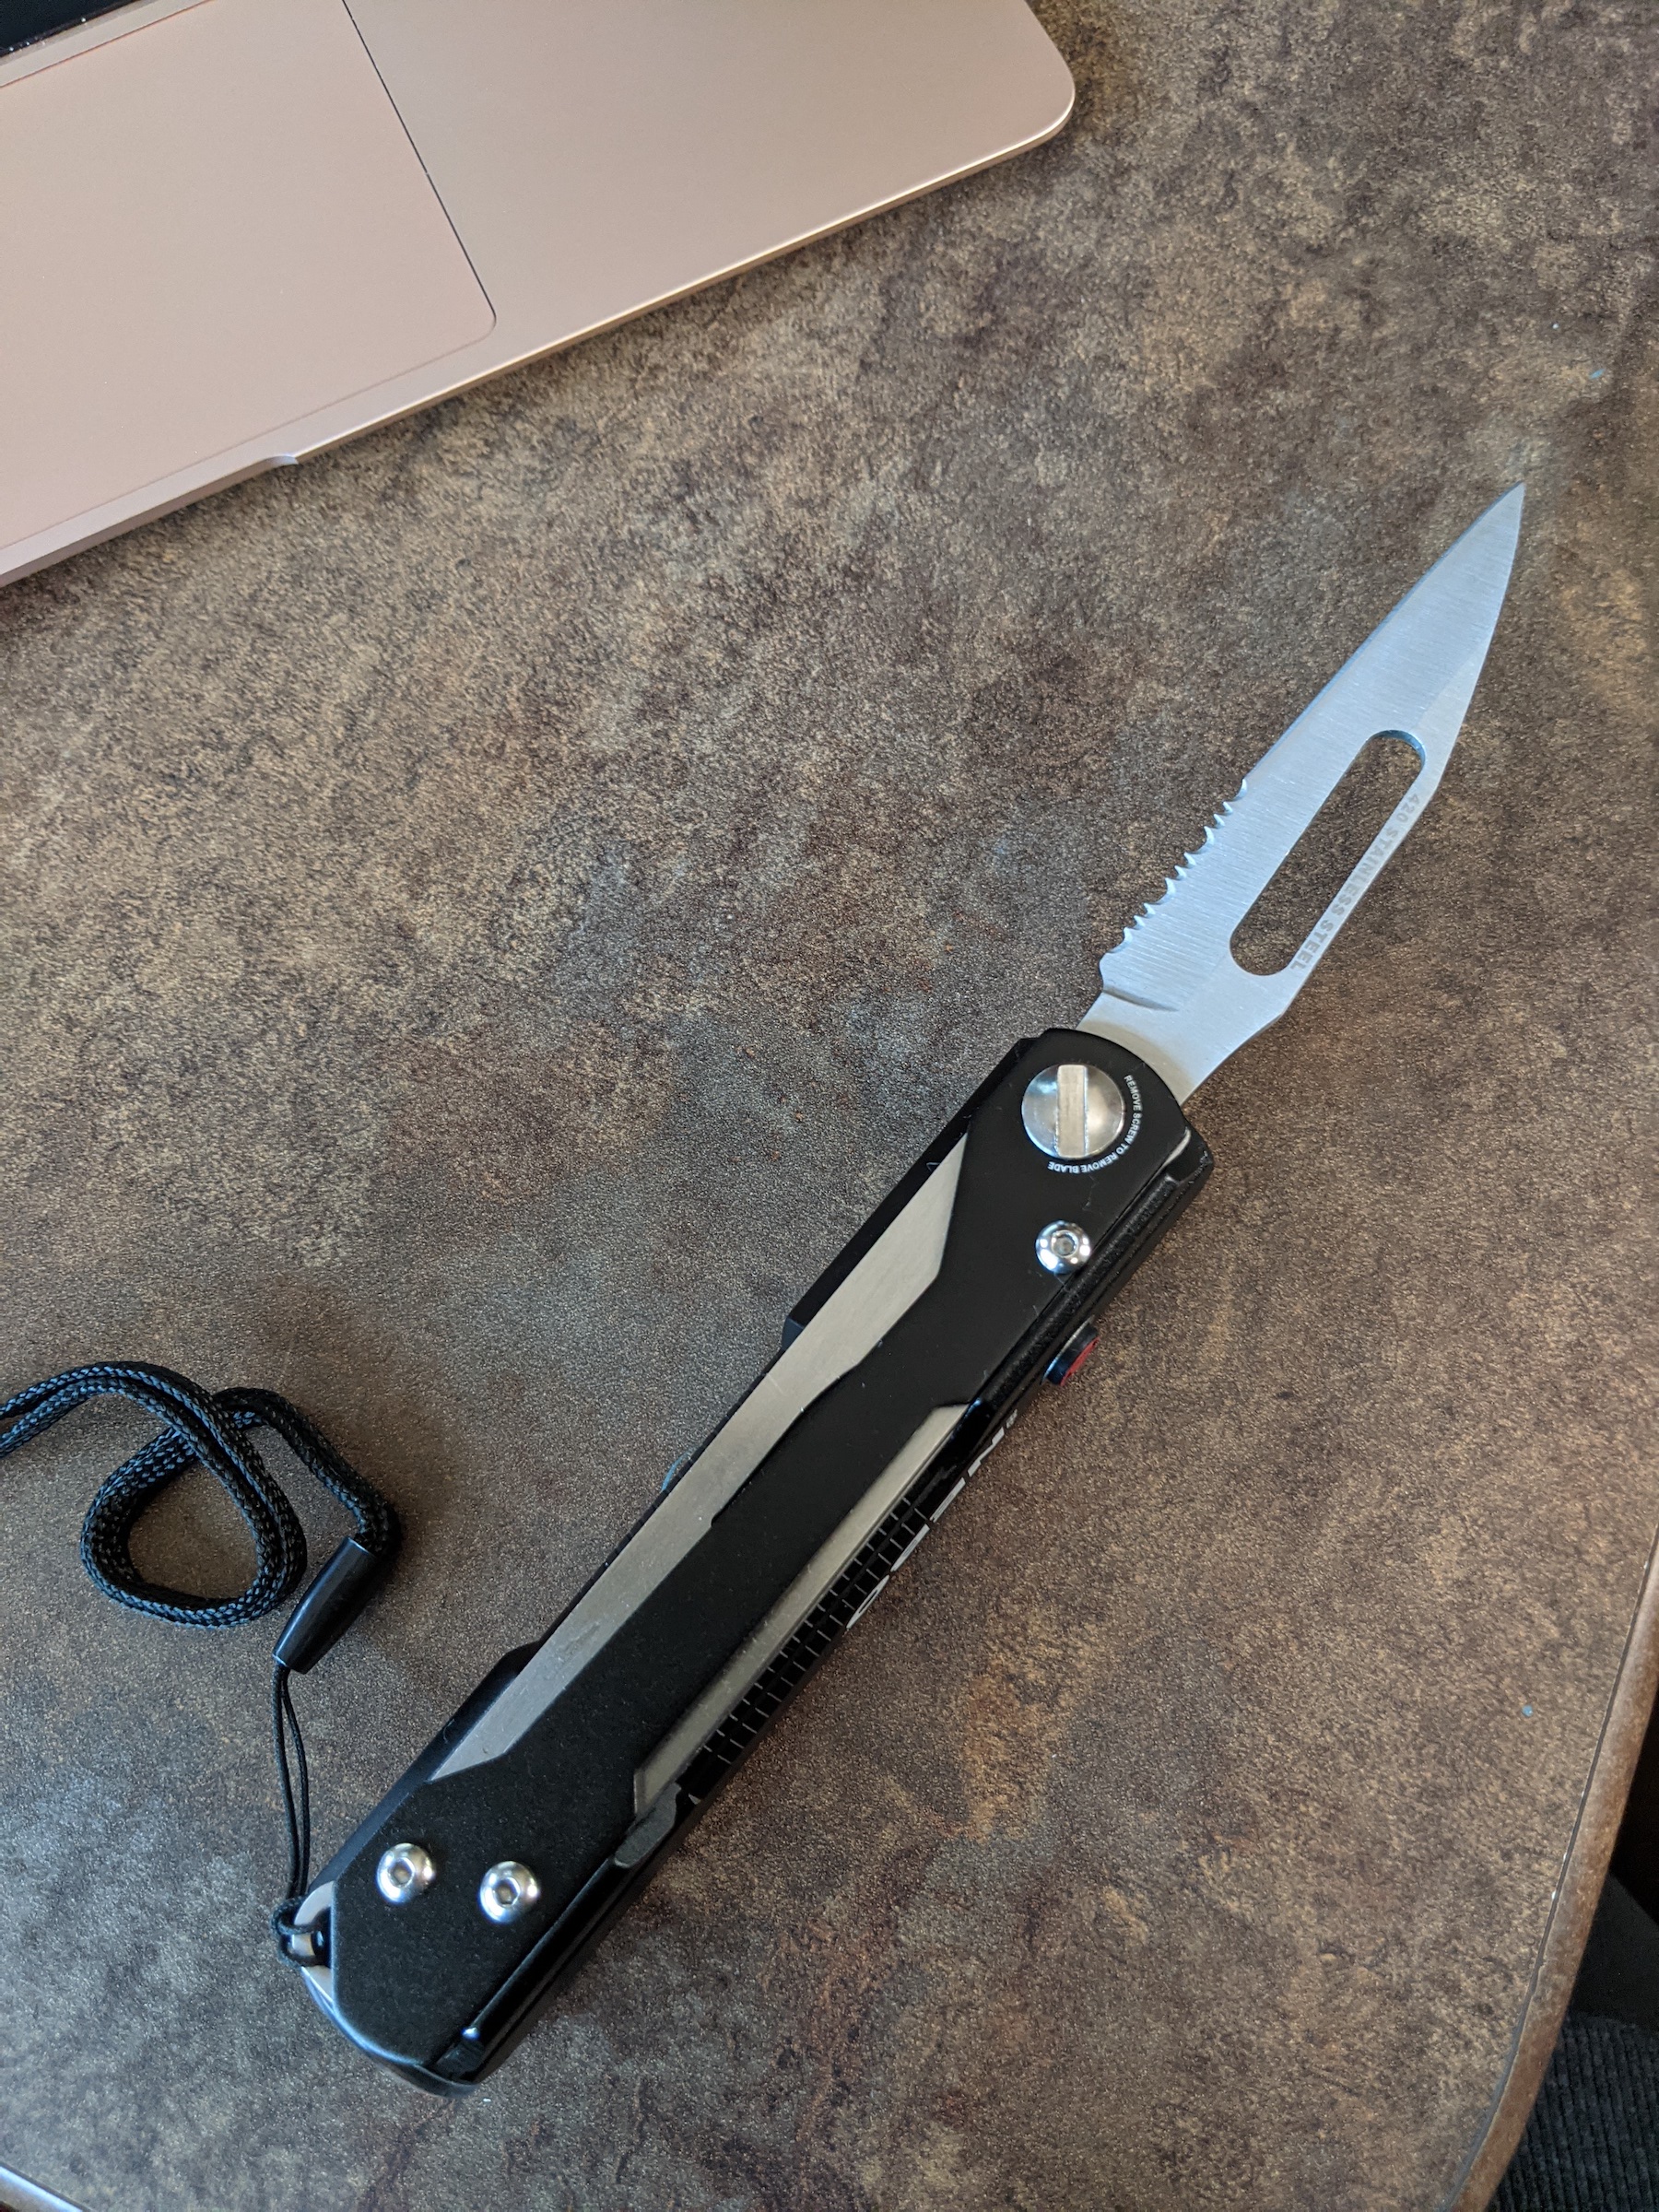
    The Nebo Pal has a 400 lumen light that increases and decreases in intensity as you hold down the power button. This system works really well to get just the brightness you want. Those 400-lumens is plenty bright to pierce the darkness of night and see very far. A quick blink lets you know it is either at its highest or lowest capacity. The 3-inch serrated knife is easy to open and locks open when fully extended. The battery pack charged quickly the first time and I was able to charge my phone from 8% to 41% in about an hour before the blue light that was on during charging started blinking then turned off. At this point, the phone stopped charging but the flashlight still worked. The Nebo itself shows a red flashing light while charging that turned to a solid red light when fully charged. The new model in the link has a green light when charged according to the details listed. Oh….the Nebo also comes with a nice lanyard which could be useful to hang it somewhere out of the way of attaching to a pack.

    I love gadgets and this one is great. I highly recommend it. 

    Here are a few links for more information and purchasing:

    Amazon – LINK

    Walmart – LINK


    Happy Prepping!

    Maine Prepper Girl

    tactical, shooting, deals, save money, prepping, ammunition, firearms, daily deals

  • Rourke’s Recommendations

    Rourke’s Recommendations

    Every week JR recommends a few things such as articles, videos, movies, books, and an assortment of gear. Some of these are related to survival & preparedness while others are just interesting. As an Amazon affiliate, we earn a small commission on purchases made after clicking any link from this website at no additional cost to you. Those purchases and commissions help support what we do here. 

    Books:

    SURVIVAL FM 21-76

    Boobytraps Field Manual 5-31

    The Useful Knots Book: How to Tie the 25+ Most Practical Rope Knots


    Movies/TV:

    Longmire Season 1 – great series

    Justified: The Complete Series

    Rescue Me


    Gear:

    34 Quart 12V Vehicle Refridgerator/Freezer

    Auguson Farm 30-Day Food Storage Bucket

    SOS Personal Alarm – perfect for creating perimeter alarms

    line

    Patreon, survival, preparedness, civil war, CW2

  • 30-Day Food Storage Deal Found – – > $77.98 Free Shipping

    30-Day Food Storage Deal Found – – > $77.98 Free Shipping

    Hey – just came across this deal and wanted to pass it on.

    This is the Auguson Farm’s 30-Day Food Storage Bucket. These have been popular in the past, however, over the past several months skyrocketed in price and sold out in many places. Right now they are available online for only $77.98 with Free Shipping.

    Details:

    • 200 Total Servings and 37,080 Total Calories
    • 1,236 Calories Per Day
    • 24 Pouches and 11 Total Varieties
    • Convenient 30-Day Meal Planner included
    • Shelf life up to 25 years

    If interested – click HERE.

    Rourke

  • Rourke’s Recommendations

    Rourke’s Recommendations

    Every week JR recommends a few things such as articles, videos, movies, books, and an assortment of gear. Some of these are related to survival & preparedness while others are just interesting. As an Amazon affiliate, we earn a small commission on purchases made after clicking any link from this website at no additional cost to you. Those purchases and commissions help support what we do here. 

    Books:

    The Coming Civil War

    Someone Has to Say It: The Hidden History of How America Was Lost

    End the Con: A Plan to Take Back Our America


    Movies/TV:

    Fringe Complete Series

    Heroes: The Complete Series

    Falling Skies: The Complete Series


    Gear:

    Atwood Rope MFG Micro Cord Dispenser. 125ft black 100lb test. Mini TRD

    2-Pack Gun Magnet Mount, 55 lb Rating, Magnetic Gun

    Fresnel Lens 2-Pack Fire Starters – $9.99 free shipping

    line

    Patreon, survival, preparedness, civil war, CW2

  • Review: 1,200 Lumen Flashlight For Less Than $20

    Review: 1,200 Lumen Flashlight For Less Than $20

    Flashlights over the last ten years have improved tremendously in not just brightness, but battery life. Many companies such as Surefire, Streamlight, and Olight have lead the industry pushing the limits of performance while maintaining consistent pricing. Type in “flashlight” in the search bar on Amazon and you will see an endless list of complete crap flashlights claiming high lumen counts while in reality delivering mediocre brightness.

    While supplying my company’s maintenance department with flashlights I decided to order some “no-name” brand lights with great reviews off of Amazon. Advertised as providing 1,200 lumens and having a simple on/off mode I was intrigued. I clicked the Buy Now and a few days later they were delivered.

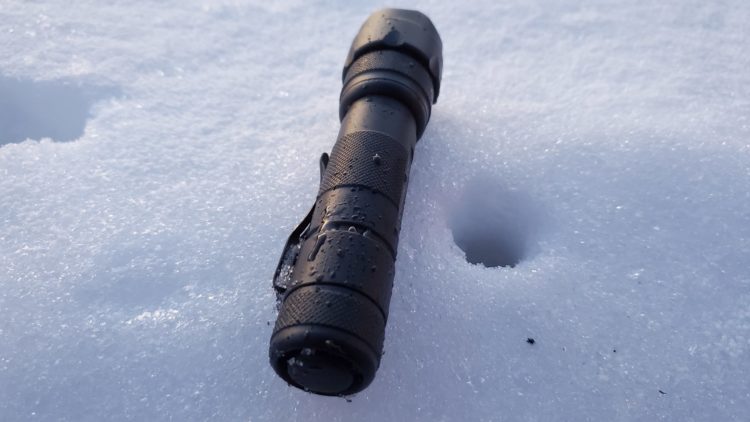
    A quick summary: These lights had heft to them the thin aluminum cheap lights did not have. They felt like they were rugged and were built to be used. I threw in two CR123 batteries, clicked the button on the end cap – and BAM!!! I was impressed!!

    Good first impression.

    After seeing the light was indeed extremely bright I ventured outside in the dark. The throw was fantastic with a very focussed beam(which I prefer). Lighting up the side of a house well over 100 yards away was easy. I pulled out my Odin Mini(review coming soon) and did a comparison. The Odin blasts 1250 lumens downrange and when placed side by side with my inexpensive find they were very comparable. The Odin’s light was more white while the other slightly yellowed. Hey  – I’m comparing a $16 flashlight with one that costs $140.

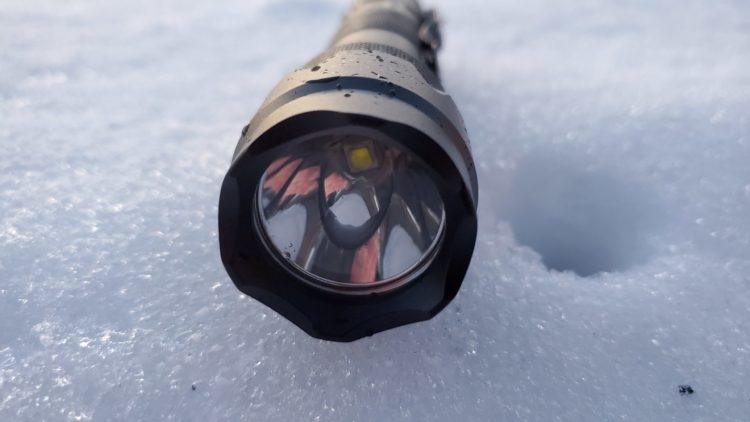
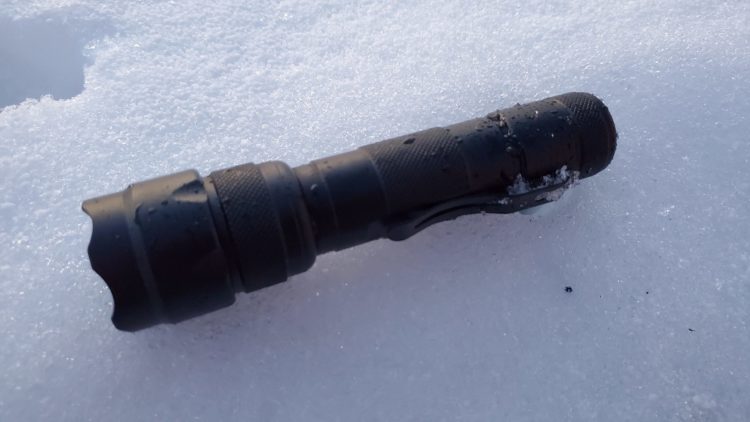
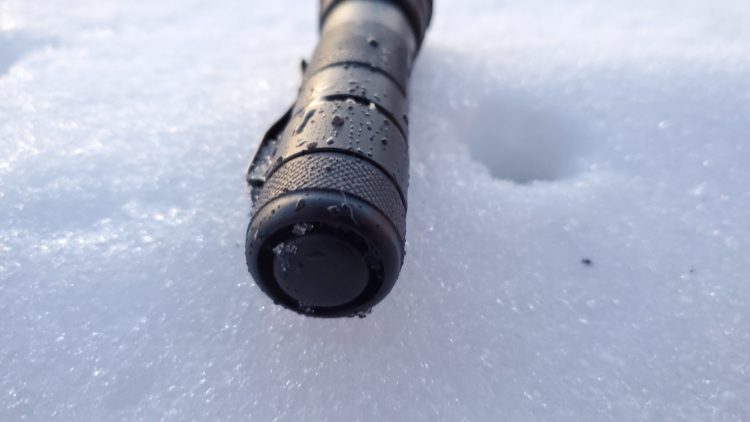
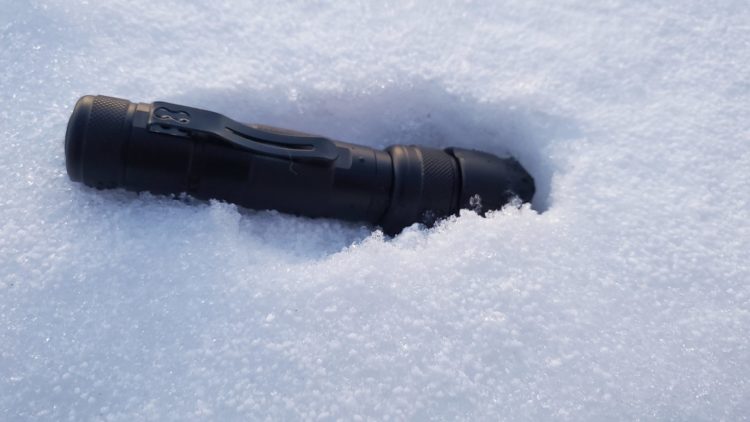
    Below are a few pictures I took after placing the light outside in the snow(left all day into the night).


    Picture above shows brightness in complete darkness. The photo really doesn’t do it justice.


    SUMMARY

    I left this gem in the snow all day until dark. The weather warmed and much of the snow melted and soaked the flashlight. No issues.

    This is a flashlight at publishing time sells for $15.99. From the construction to the simple on/off operation, to the incredible brightness this is one of the highest value preparedness items I have ever run across. At my plant, the maintenance guys have been using these lights for over a month with no issues.

    I have not mounted this light to a weapon and have no idea about its ability to handle recoil. My Odin Mini can fill that role just fine. For the pack, pocket, and pocketbook? Absolutely.

    For more information CLICK HERE.

    Rourke

    line

  • Rourke’s Recommendations

    Rourke’s Recommendations

    Every week JR recommends a few things such as articles, videos, movies, books, and an assortment of gear. Some of these are related to survival & preparedness while others are just interesting. As an Amazon affiliate, we earn a small commission on purchases made after clicking any link from this website at no additional cost to you. Those purchases and commissions help support what we do here. 

    Books:

    SHTF Survival Boot Camp: A Course for Urban and Wilderness Survival during Violent, Off-Grid, & Worst Case Scenarios

    Last Days Survival Guide: A Scriptural Handbook to Prepare You for These Perilous Times

    Tactical Manual: Small Unit Tactics


    Movies/TV:

    Magic of Belle Island

    Memorial Day

    The Dirty Dozen


    Gear:

    NOCO GC017 12-Volt Adapter Plug Socket With Battery Clamps

    Atwood Rope MFG Micro Cord Dispenser. 125ft black 100lb test. Mini TRD

    EMP Sheild – inexpensive protection for vehicles, campers, homes, and communication systems

    *****Use PROMO COEE “1776” and get $50 off

    line

    Patreon, survival, preparedness, civil war, CW2

  • REVIEW: Civil Defense Manual by Jack Lawson

    REVIEW: Civil Defense Manual by Jack Lawson

    Jack Lawson is one of the co-authors of the now out-of-print but still much sought after book A Failure of Civility. He has now published Civil Defense Manual, Vol. I & II: How to Prepare and Protect Your Neighborhood from Disaster, Riot, and Civil Unrest.

    Information on preparing for the complete and udder calamity which any of us feel awaits around the corner is not easy to find. Yes, I’m referring to a true WROL(without rule of law). Anyone heard that we are in the early stages of a 2nd civil war? Yeah – this book set is packed with valuable information for some pretty sh#$$y times.

    This book set takes you through the steps to prepare your town and neighborhood for a worst-case scenario(SHTF). Whether it’s a zombie apocalypse, civil unrest, or all-out economic collapse this book has the suggestions, the steps, the checklists to get you prepared.

    This is THE book which is a must-have in a preparedness library.

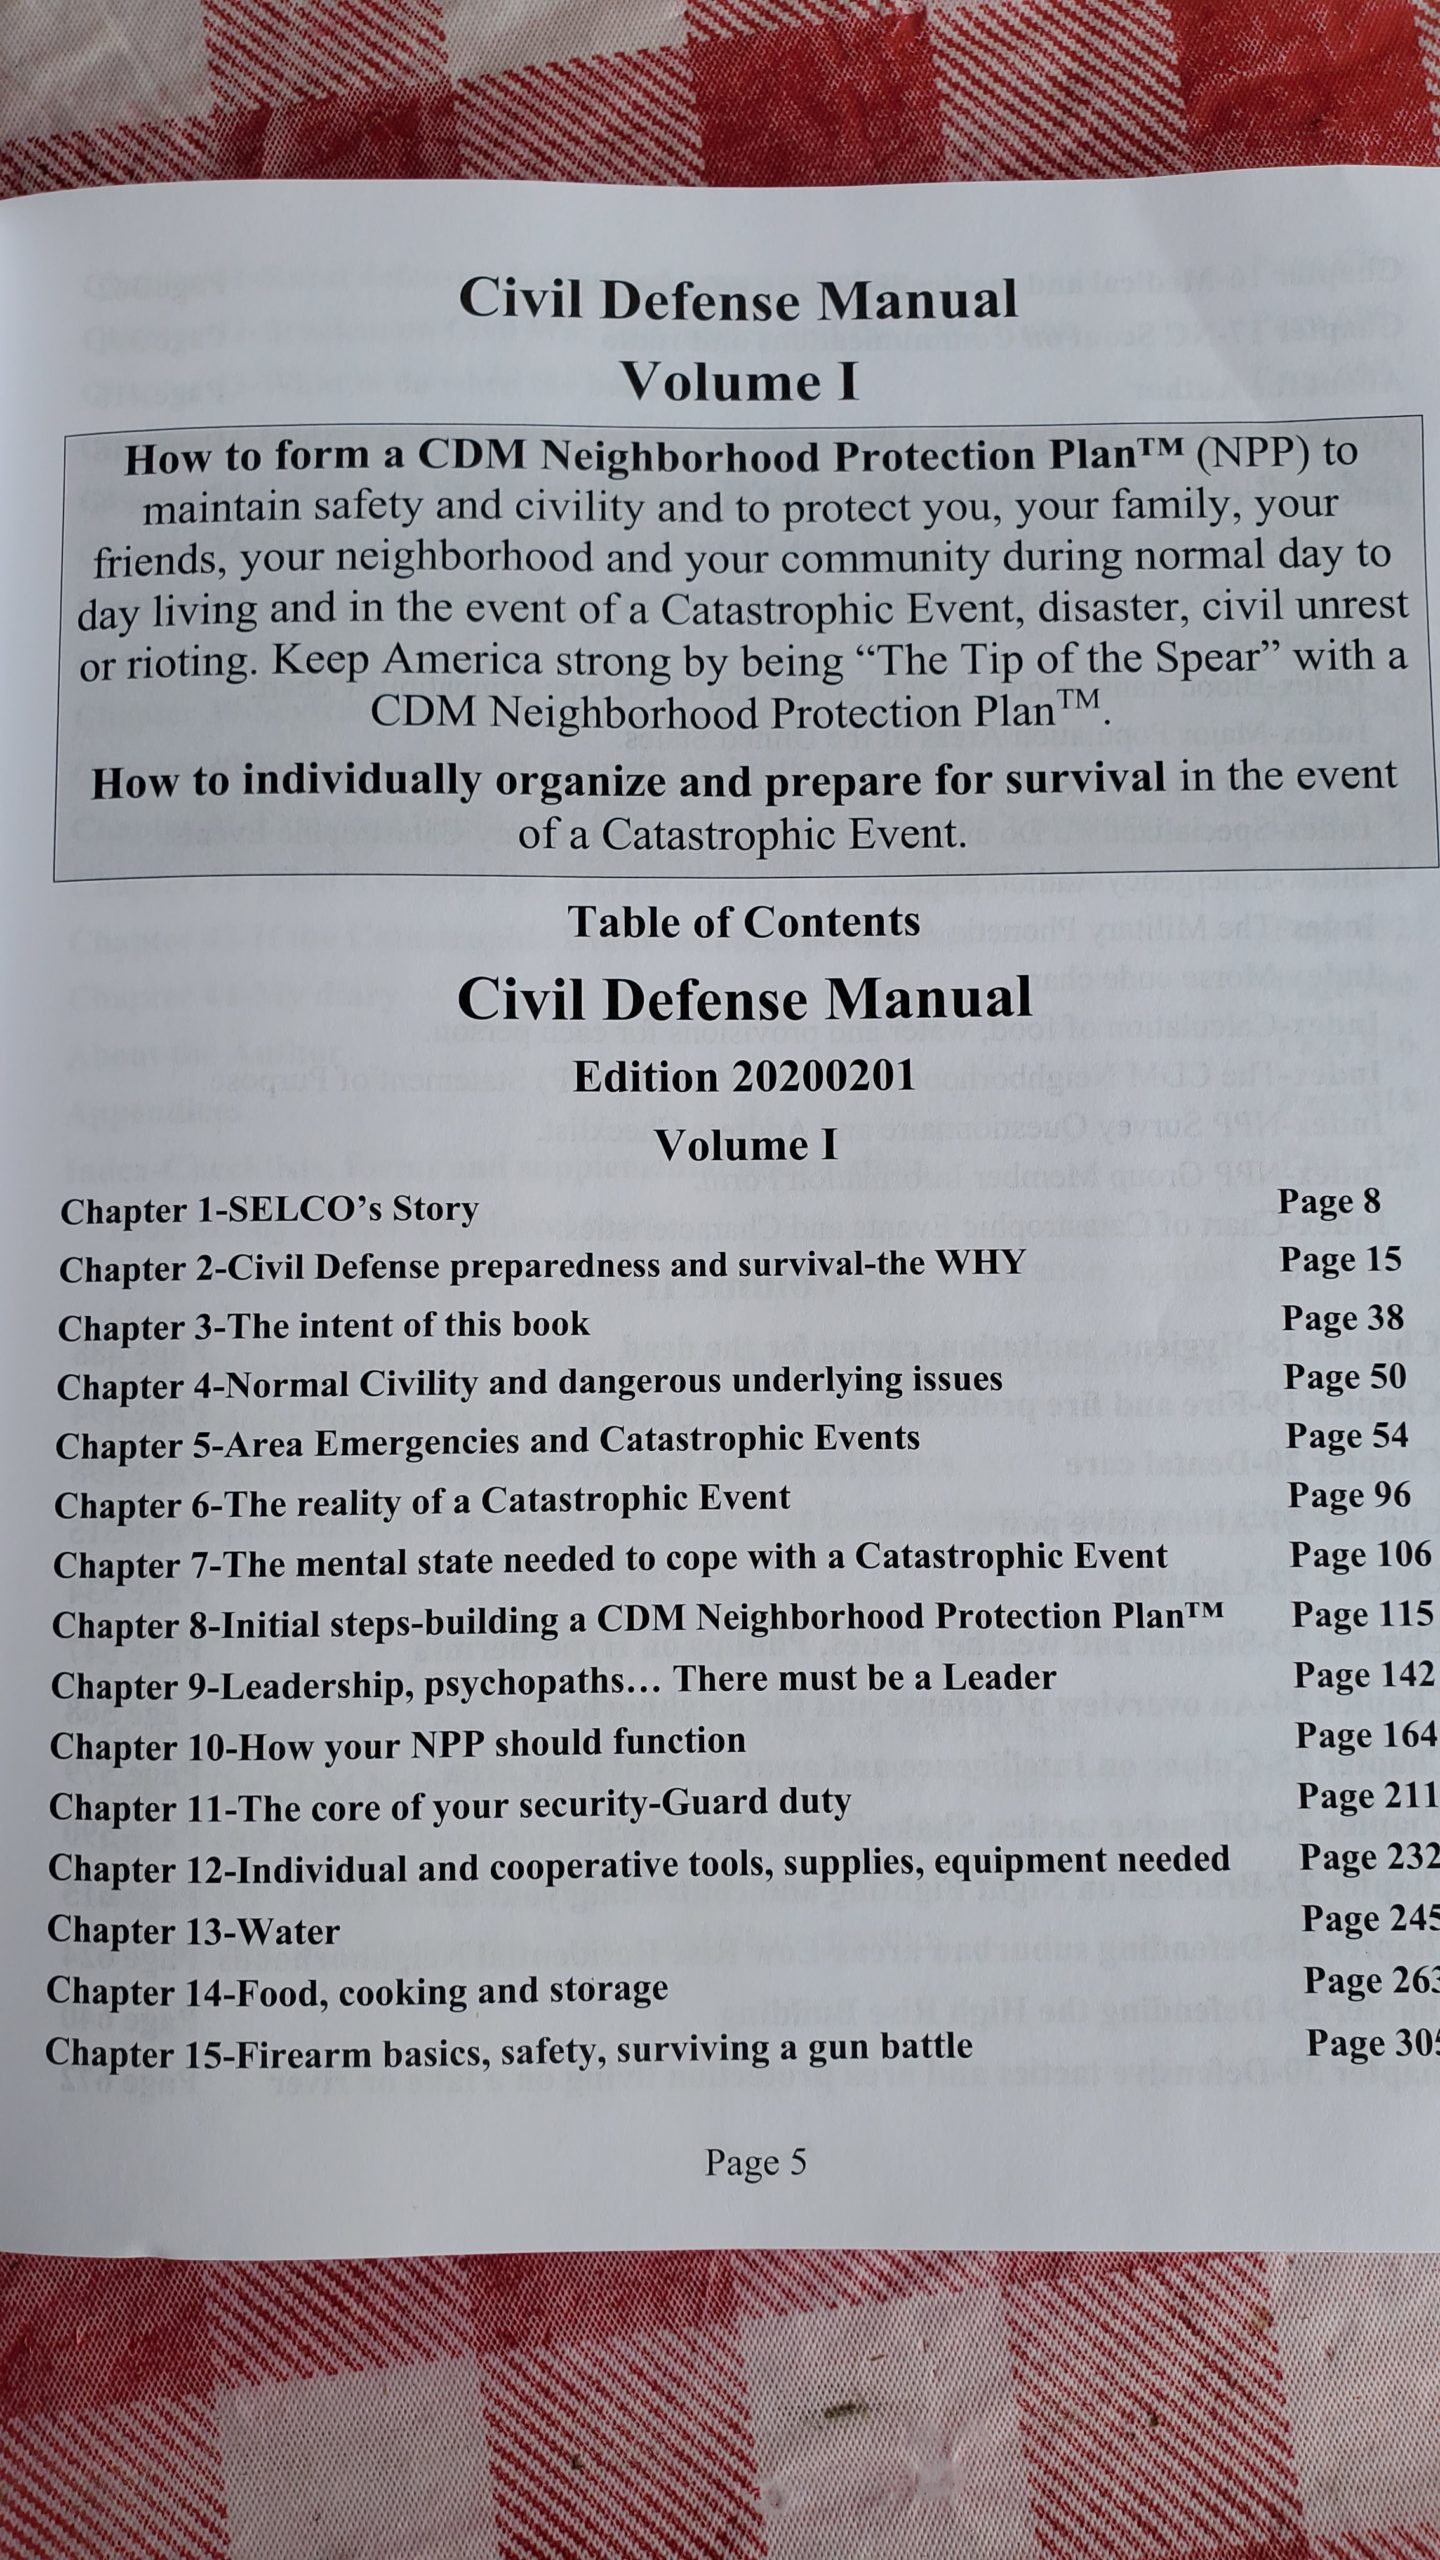
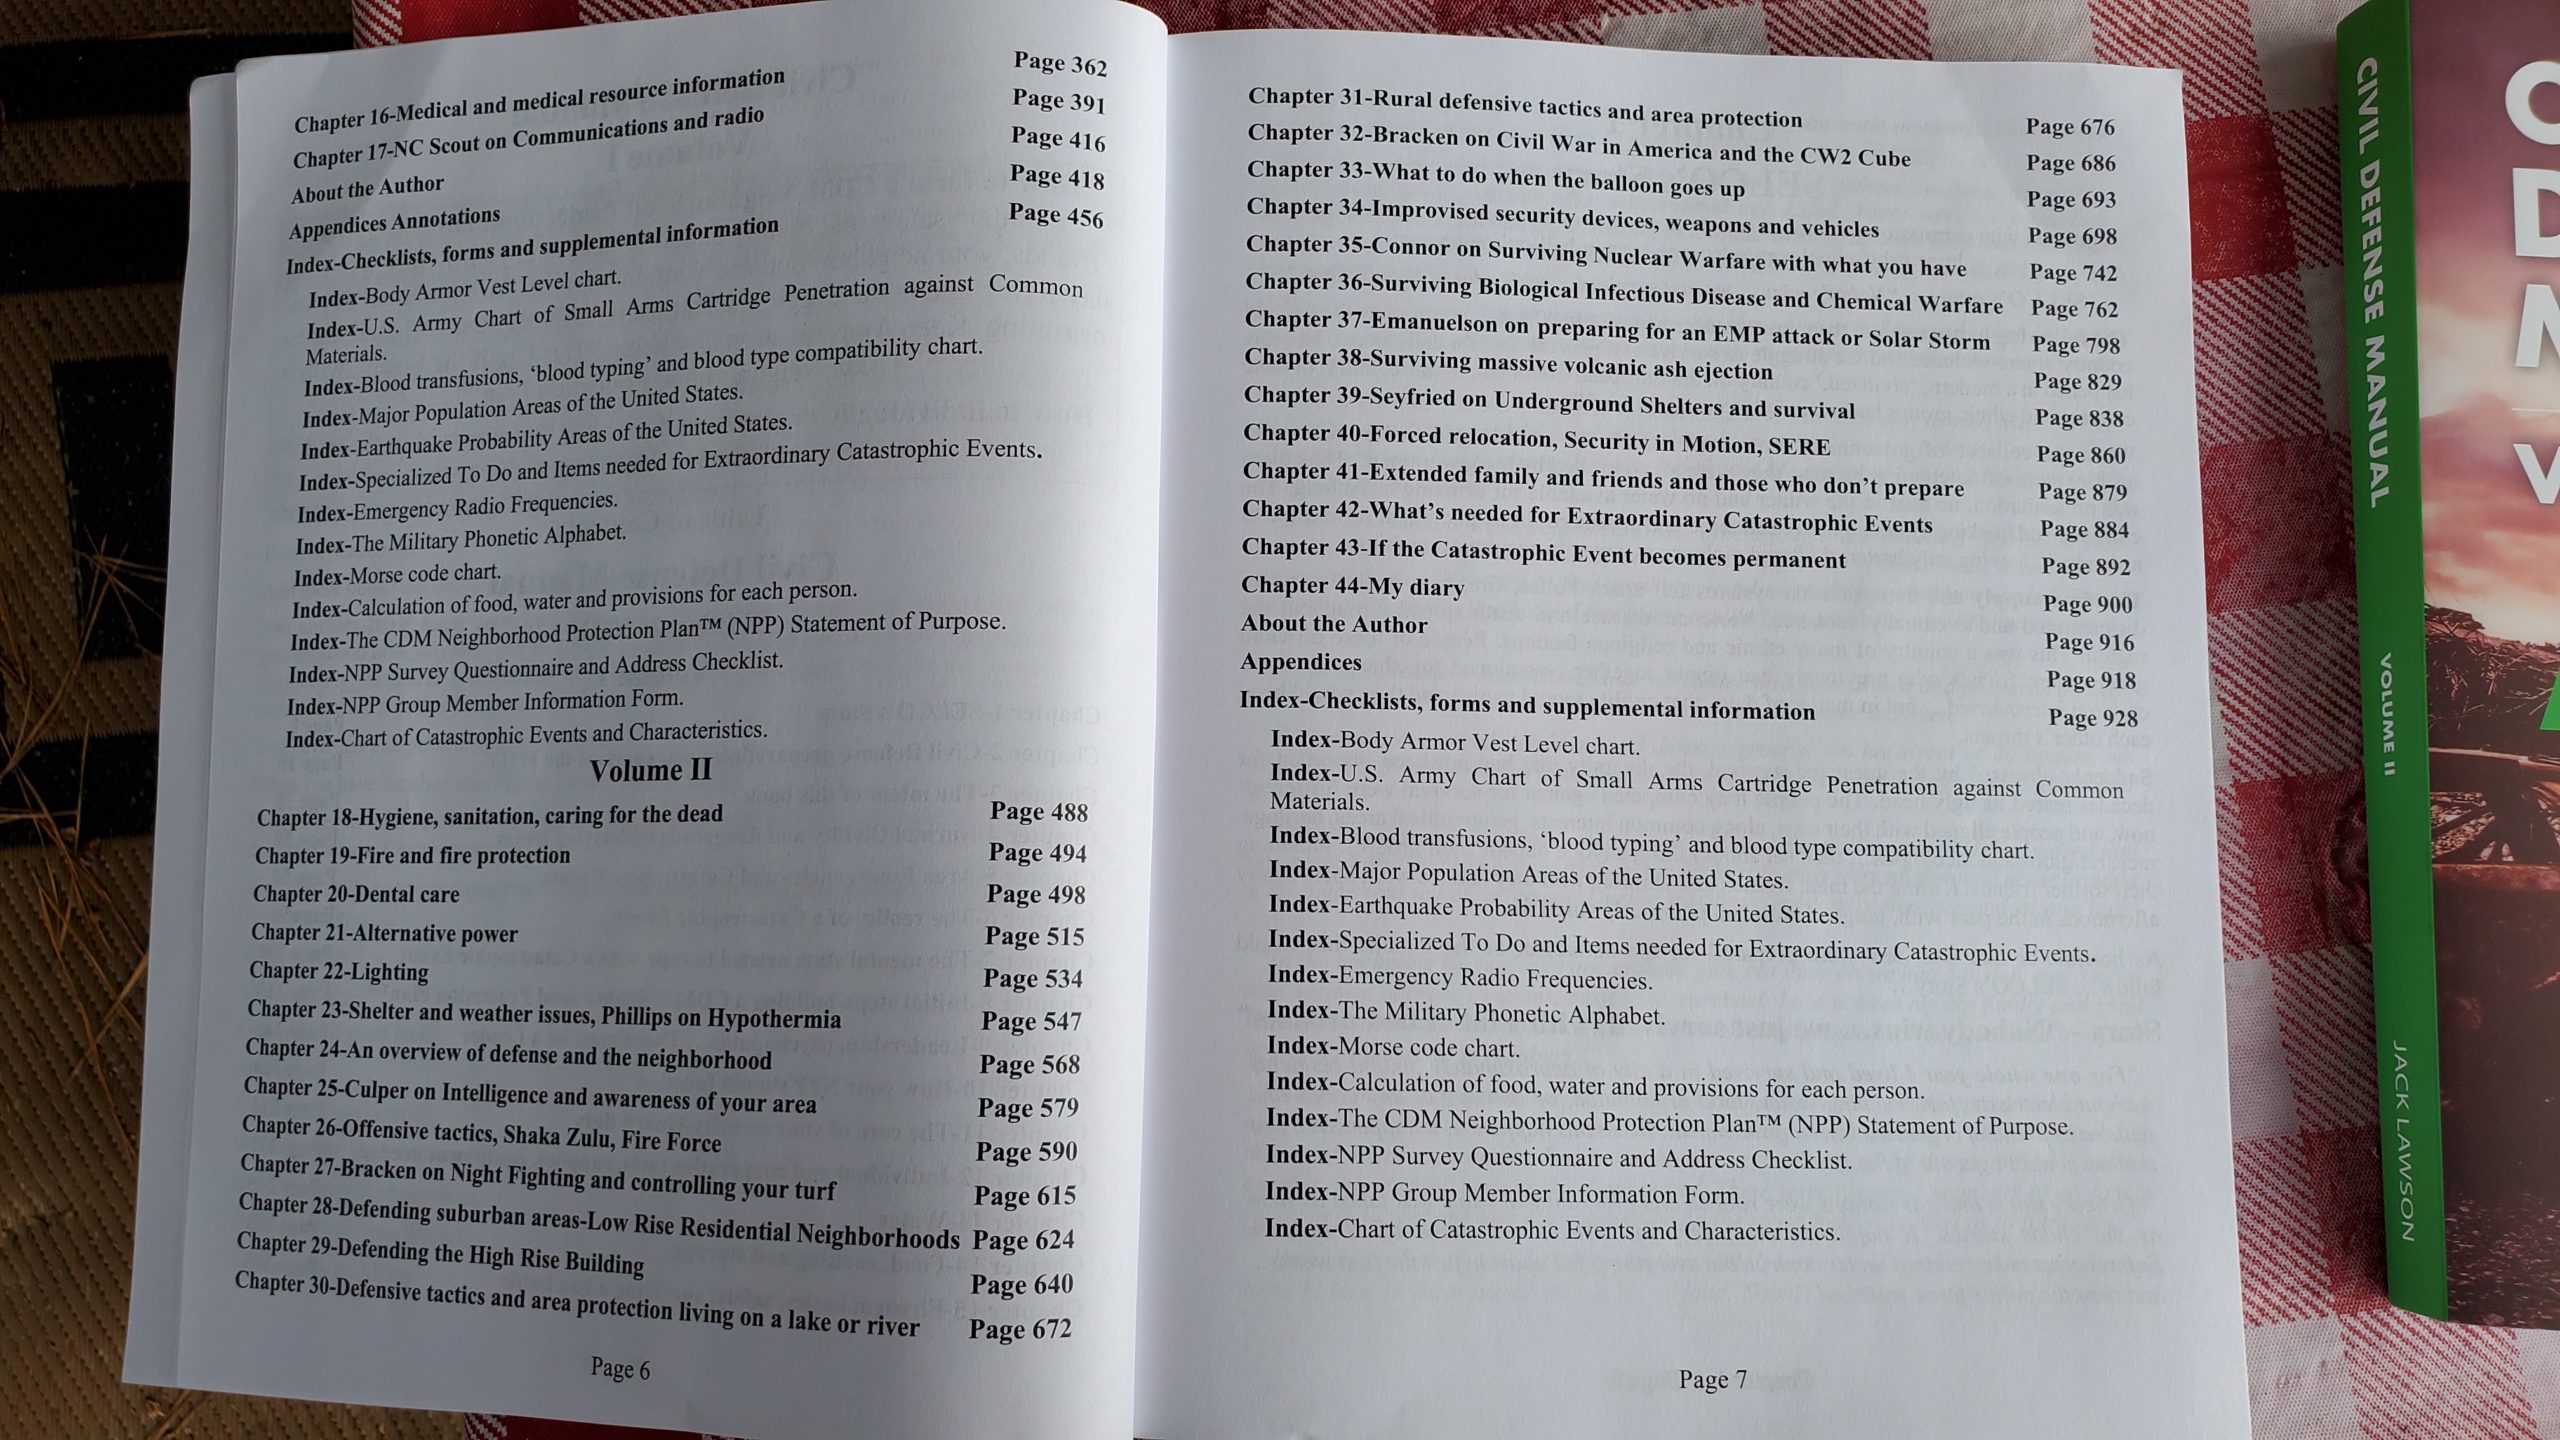
    Below are a few pictures showing the Table of Contents:

    When you are looking at the table of contents you see typical preparedness information such as food storage and water filtration. With this book, there is information on body armor, EMP, leadership, tools, intelligence, defense, night fighting, and so much more!

    This is not an inexpensive book set. Is it worth it? How much is your life worth? If you will spend thousands of dollars on firearms and ammunition but won’t fork out $100 on a set of manuals on how to survive the “bed stuff” coming – then priorities need to be in order.

    Reality Check: Information is the most underated and undervalued tangible asset in preparedness.

    Check out the Civil Defense Manual: How To Prepare and Protect Your Neighborhood from Disaster, Riot, and Civil Unrest by foillowing THIS LINK.

    This is a book set that I’ll be going through with a yellow highlighter. It’s that good.

    Rourke

    Paladin Press, download, USB, library, books,

  • Hydroxychloroquine via Telemedicine

    Hydroxychloroquine via Telemedicine

    I was just sent this information and wanted to pass it on. The website provides 5 steps to obtain a supply of HCQ. I know of one person who has utilized the service successfully. 

    Follow the link below to access an inexpensive telemedicine service which the end result is a supply of hydroxychloroquine.

    https://www.americasfrontlinedoctors.com/how-do-i-get-hcq/

    I have not tried it yet myself.

    Rourke

  • Practice and Learn- What I Learned From Preparing Auguson Farm Food

    Practice and Learn- What I Learned From Preparing Auguson Farm Food

    Augason Farms Creamy Chicken Flavored Rice 

    I consider myself a prepper in training. I can remember back in the early 2000’s wanting to be prepared for winter time in Northern Maine. The year after that my awareness for the need to be prepared for other situations grew. It was a sixth sense of sorts that is hard to explain.  Wanting to keep my family safe, I thought about potential situations that I could face and need to be prepared for. Each fall time, without fail, I would feel the need to prepare for the winter ahead.

    Planning for the winter ahead included, stocking up the extra freezer I had in the basement with half of a beef from the local butcher. Furnishing the basement with shelves to put extra canned goods to keep was another. I had a camp stove with some small cans of propane to prepare food. Having extra coolers to keep my food cold and safe outside in a snowbank was also an option for food storage if needed.

    Knowing there was a big hole in my plans because I had no secondary source of heat I needed another plan. Without heat, I would have to go to relatives if that was needed. In retrospect, I would have put in a wood stove in the event of a power outage. I had plenty of wood on my 12 acres and would have kept seasoned wood in the basement for emergencies. 

    Many people in Maine put in secondary sources of heat in their homes but both relied on electricity which made no sense to me. Others had generators which was probably what I would have gone with if I had not sold and moved. I ofter saw generators used to keep the heat on if nothing else during a power outage in winter. My next home will have a wood stove for sure! 

    Anyway, back to the creamy chicken rice, my point is that being accurately prepared takes a lot more than just buying stuff. Figuring out what works for you in your environment while considering the needs of those around you and other possible needs BEFORE you need them is crucial. I thought Mr. Rourke was silly for wanting to try some of the freeze dried food. Why would we want to waste good food that can be stored long-term? Well, I am glad that in this instance he was correct.

    I learned a few things that I will consider when buying more freeze dried food.

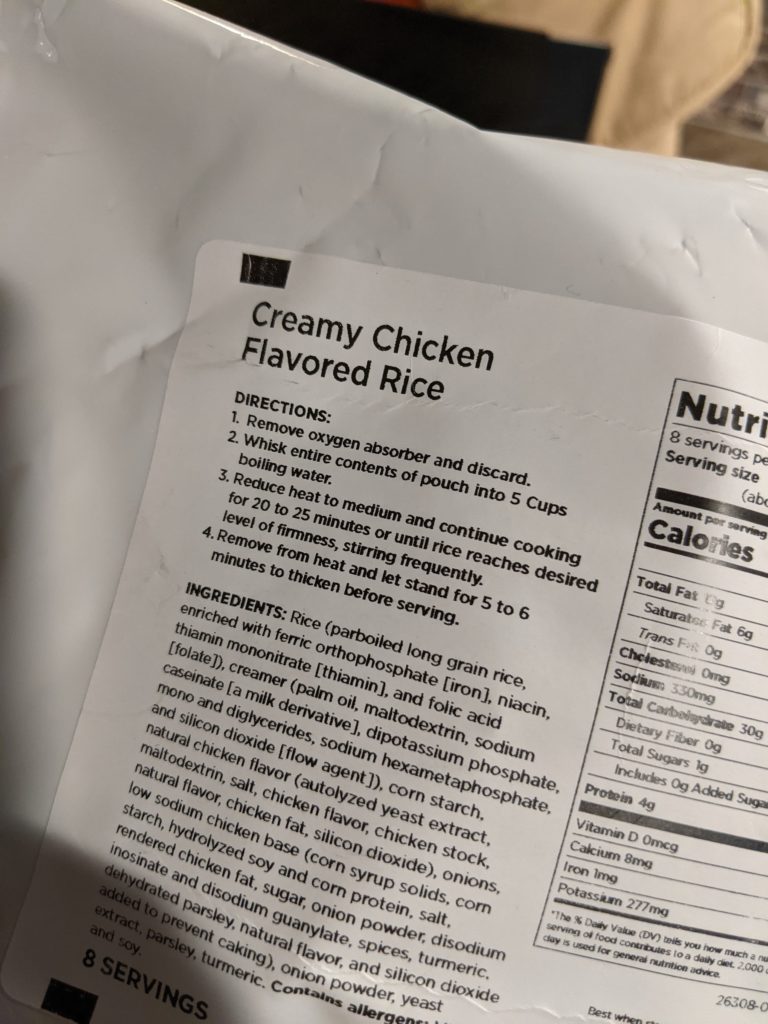
    1. The first thing I learned was how much water you need to make the meals that come in this kit. The creamy chicken flavored rice needed 5 cups of water and a couple of the other meals needed 8 cups and 10 cups.
    2. Another thing I learned when making this side dish was that it could have easily been made into a main dish by adding a can of chicken and/or a can of veggies. The container says it is 8 servings so adding more would either feed more or let you have a bigger portion.
    3. Also worth noting was that a little garlic salt really made a difference in the taste.
    4. The last thing I learned was that although this kit was for 1 person for 72 hours unless I planned on eating just chicken flavored rice all day I would need a way of storing the prepared food. You could just make half but you would still need a way of storing the packet of dried ingredients for another day.  Containers and plastic storage bags would make things easier when trying to store the leftovers.  

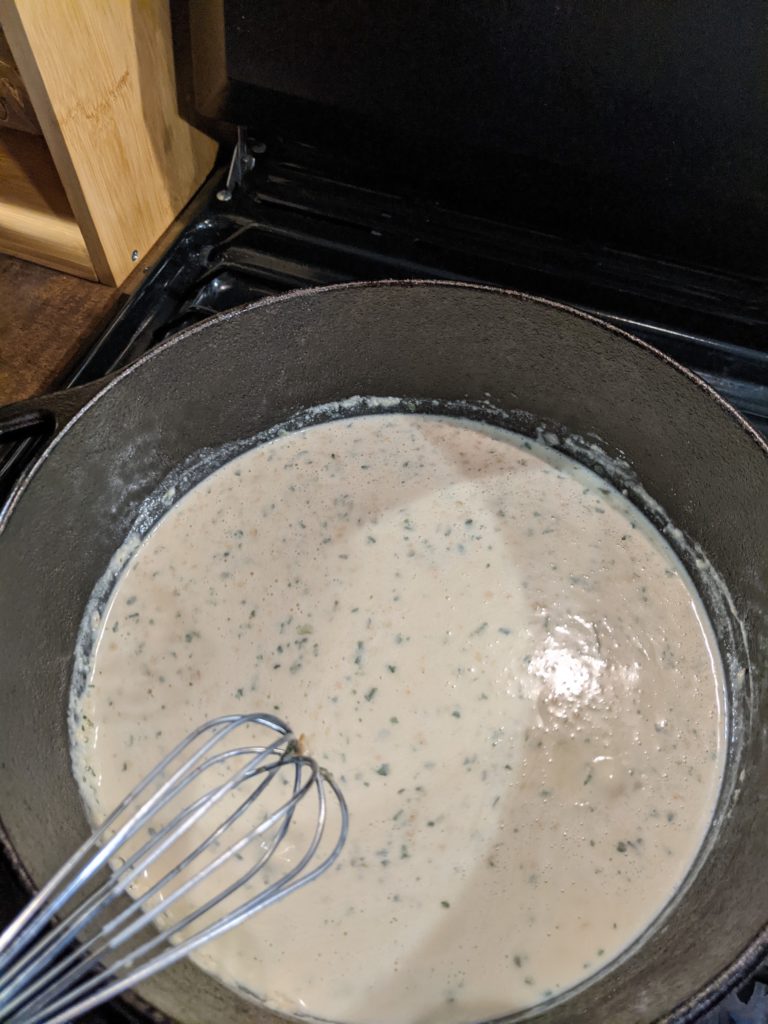
    The Creamy Chicken Flavored Rice was very simple to make. I did have to stand there and stir quite often to prevent clumping but other than that you only need a few things. You will need a pot, measuring cup, 5 cups of water, and a whisk.

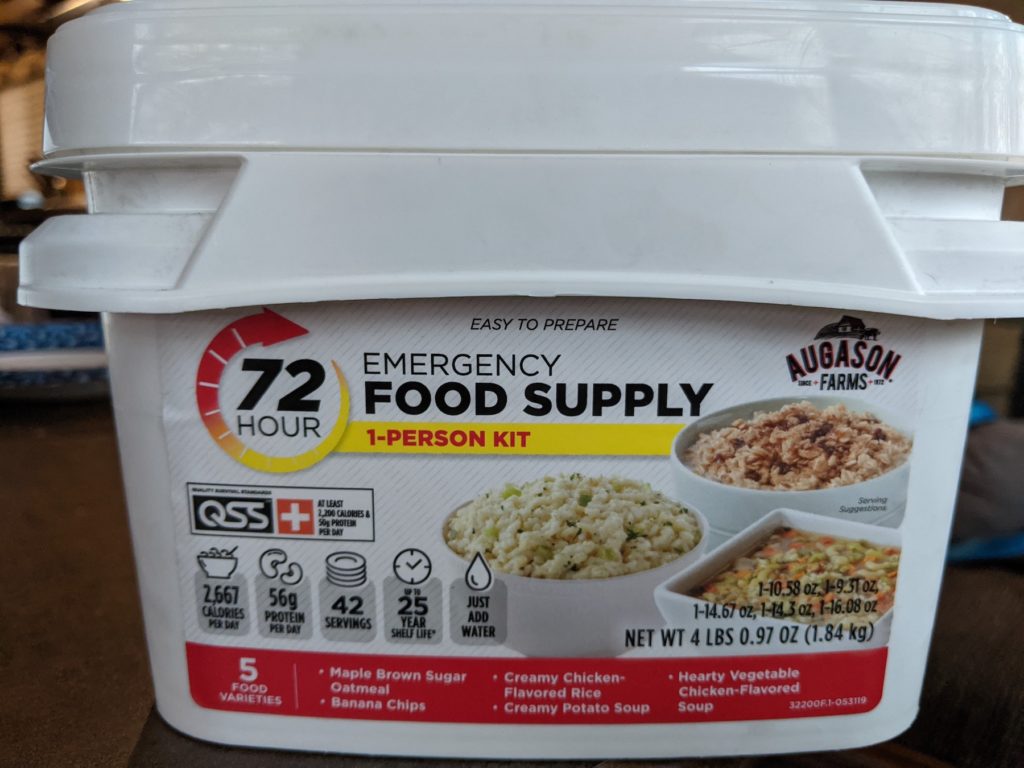
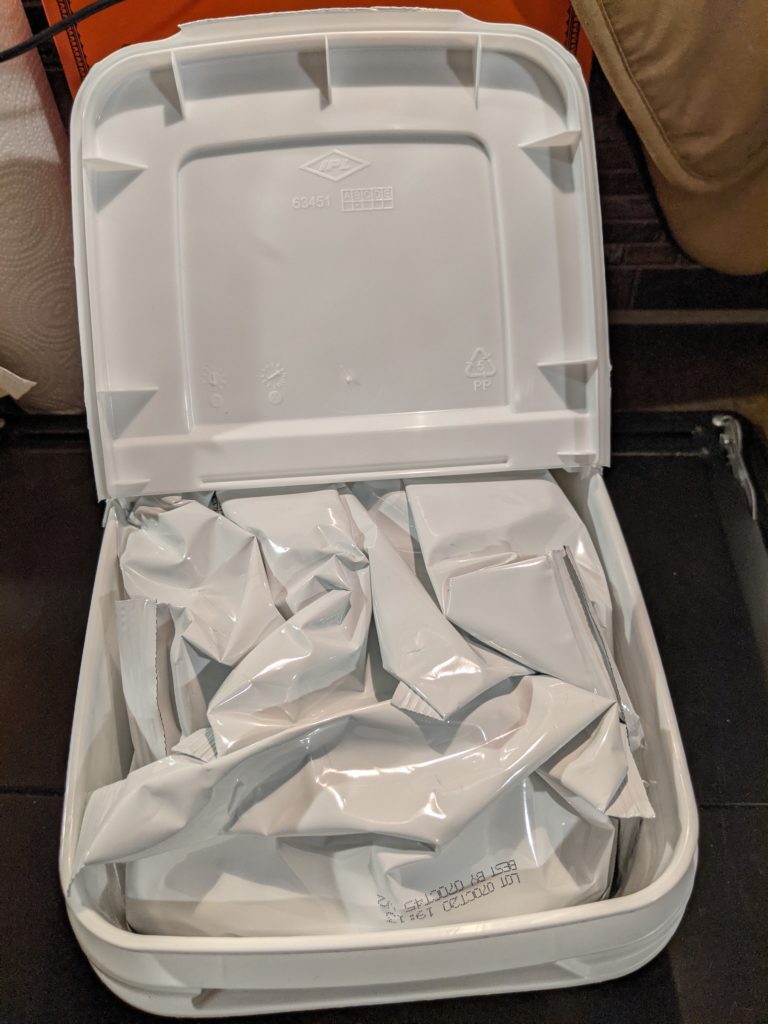
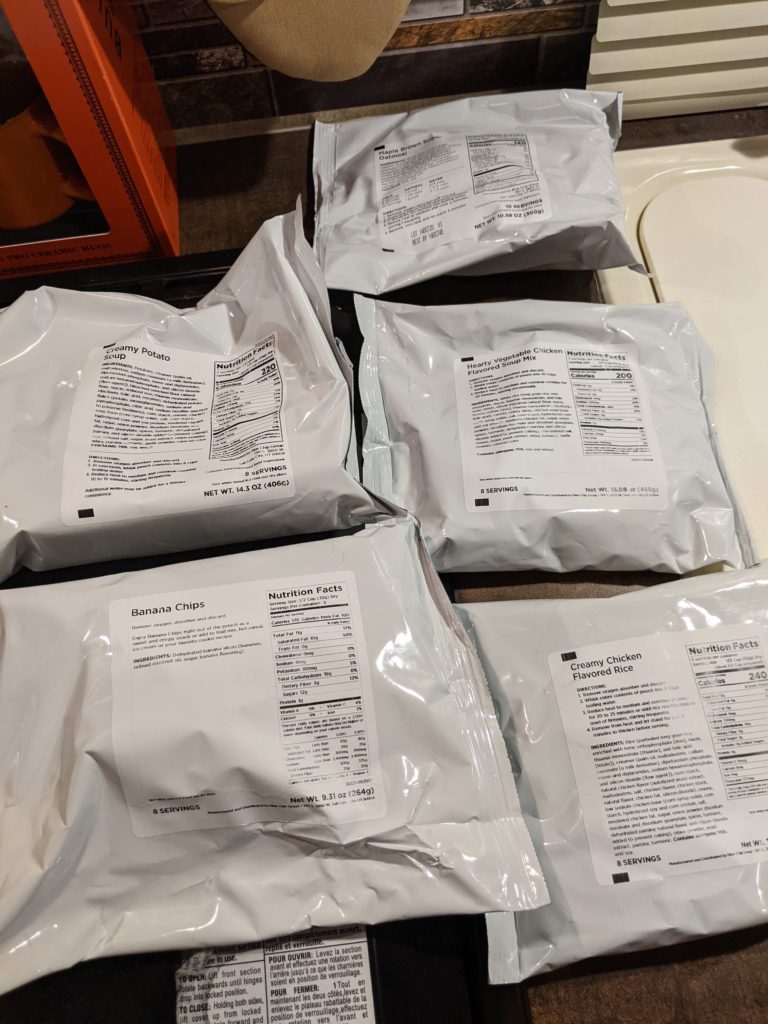
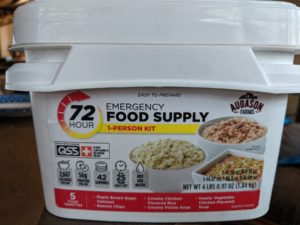
    Here is the container of food, how it looked when we opened it, and all the individual bags that come in it.


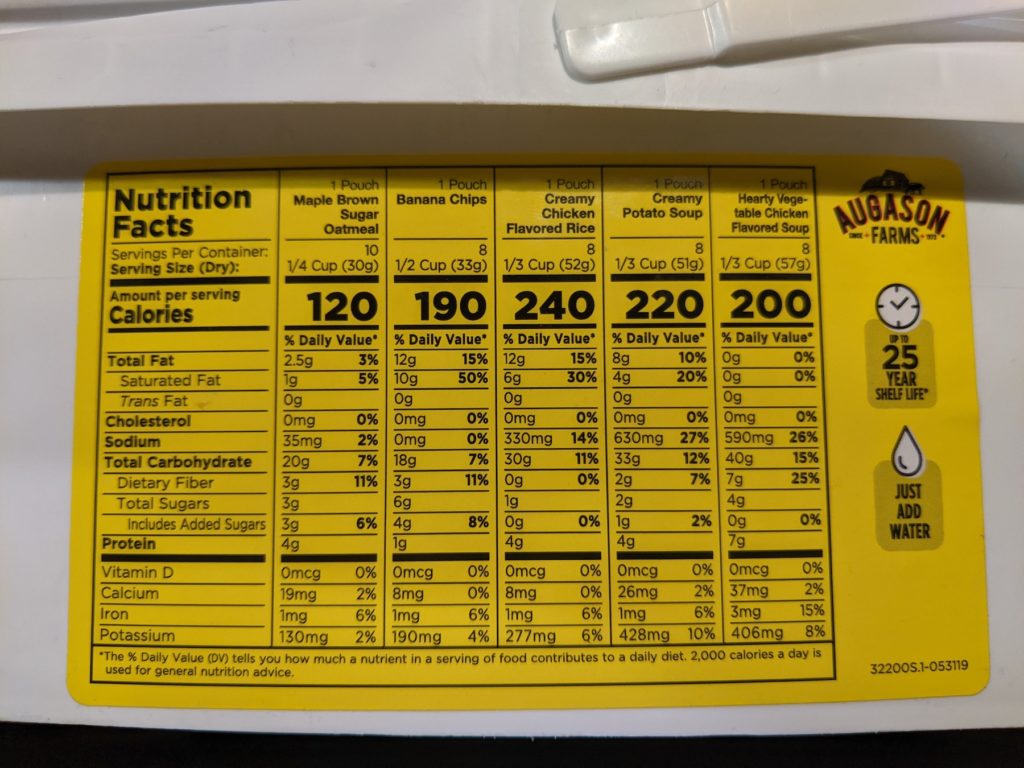
    Here is the nutrition information of all the packages in the 72-hour food supply. We chose to have the Creamy Chicken Flavored Rice. It has 240 calories for 1/3 cup and says it is 8 servings.

    The only thing we had to do was boil five cups of boiling water and add the contents. 


    As stated previously I had to tend to the dish by stirring occasionally to prevent any clumping.

    The final product was very good alone, however, we did add some garlic salt and pepper for a little more flavor. The consistency was a little thicker than what you would expect from a rice dish, but again very good.


    Anyone have any experience with freeze dried or dehydrated food that you could share? I would love to hear about them!

    To purchase the Auguson Farm 72-Hr Emergency Food Kit mentioned in this article follow THIS LINK. Current price is less than $25 with Free Shipping.

    Maine Prepper Girl

  • TASTE TEST: Mountain House Grilled Chicken & Mashed Potato’s

    TASTE TEST: Mountain House Grilled Chicken & Mashed Potato’s

    Mountain House is the most popular long term food storage provider for a reason: Great taste and 25+ year shelf life. Mountain House is so popular now their products can be commonly found at local stores such as Wal-Mart and Academy.

    I’ve eaten plenty of Mountain House freeze-dried food and so far have not found a flavor I have disliked. Last week picked up a pouch of MH Chicken Breasts & Mashed Potatoes. In my food storage efforts, I’ve stocked up on quite a bit of freeze-dried food to add variety.

    Mountain House freeze dried food, grilled chicken, survival, SHTF, prepper, preparedness

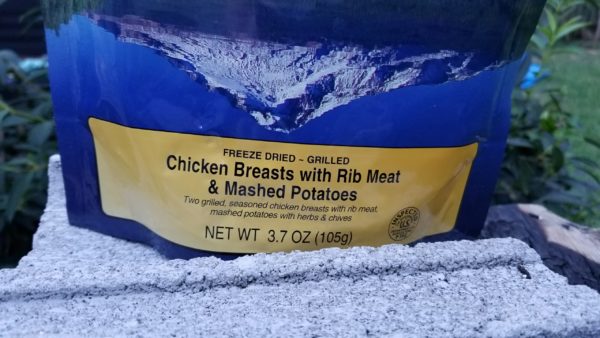
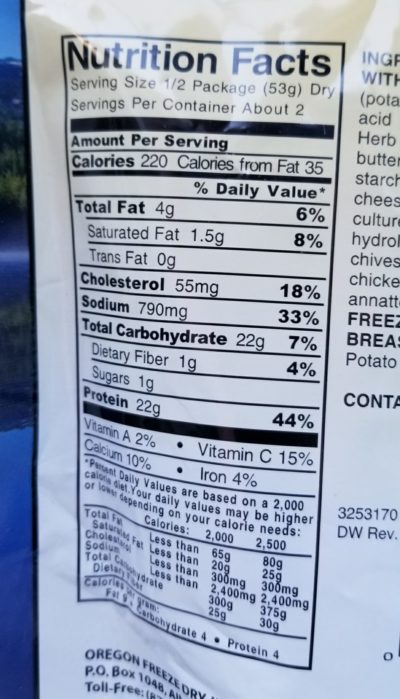
    The package states “Two grilled, seasoned chicken breasts with rib meat, mashed potatoes with herbs & chives”. Total weight is 3.7 ounces which may seem like very little until you remember water needs to be added.

    Mountain House freeze dried food, grilled chicken, survival, SHTF, prepper, preparedness

    There are 440 calories in the pouch which is stated to equal two servings. This particular selection – Grilled Chicken & Mashed Potatoes – is very high in protein and carbs. Especially good for energy.

    Mountain House freeze dried food, grilled chicken, survival, SHTF, prepper, preparedness

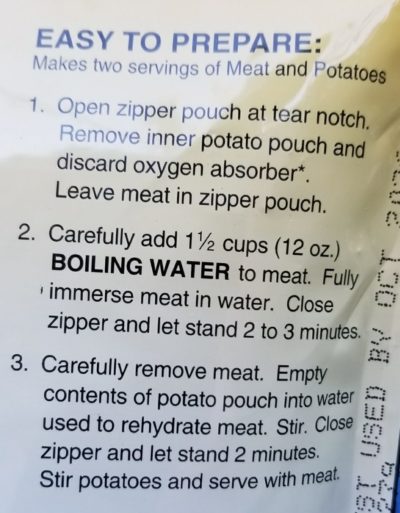
    Instructions above are fairly simple. I usually go over slightly on the recommended water for Mountain House offerings.  I have found in the past that using the recommended amounts would sometimes come up short thus I would need to add a bit.

    Mountain House freeze dried food, grilled chicken, survival, SHTF, prepper, preparedness

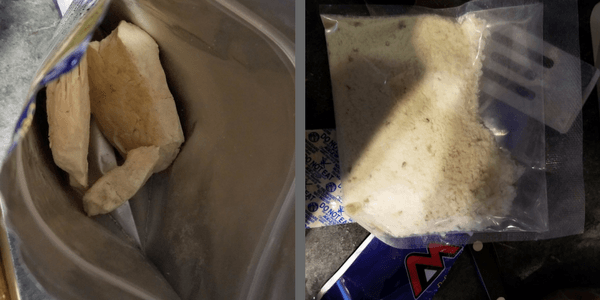
    As seen in the picture above the chicken breasts(left) are dry and broken into a few pieces.  The boiling water is poured directly into the pouch and then sealed to “cook” the chicken. Of course, the chicken is actually pre-cooked.

    After 2-3 minutes, the mashed potato powder is poured in and stirred. While stirring the chicken breaks up into smaller pieces. My impression of the smell was very positive. There is little doubt herbs and seasonings are added for flavor.

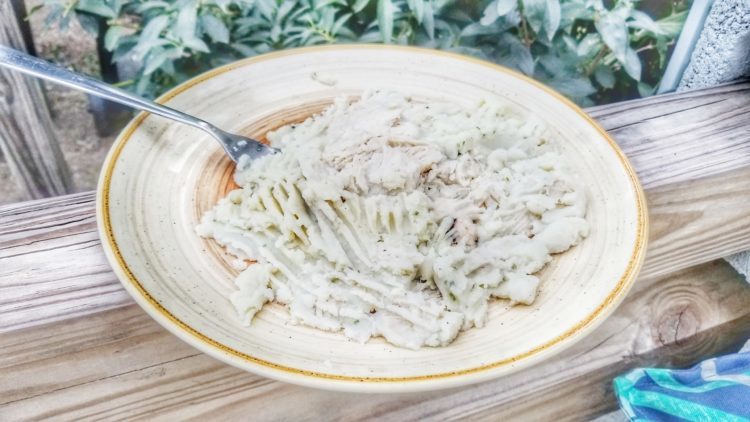
    The Final Result:

    Mountain House, freeze dried food, review, taste test,

    The Mountain House Grilled Chicken & Mashed Potatoes turned out very good. The chicken was so tender and the mashed potatoes had a very good texture to them.

    I attempted to eat the entire plate myself for supper and couldn’t get it all down. It was very filling.

    RECOMMENDED.

    Rourke

  • How to Use a CAT Tourniquet

    How to Use a CAT Tourniquet

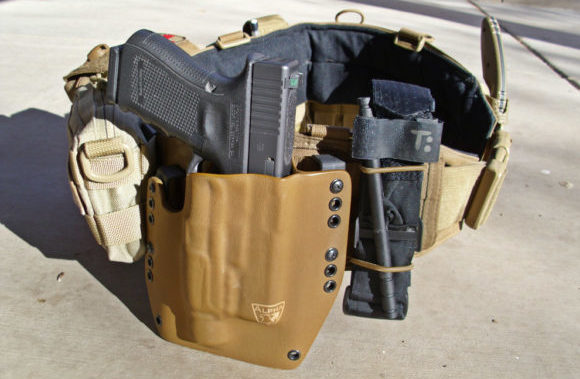
    A tourniquet is one of the most important items to have in any IFAK(individual first aid kit) or on a Kit(tactical loadout). For that matter inclusion in a vehicle is a great idea as you never know when an auto accident may occur and someone needs help.

    This video shows how to use a CAT Tourniquet (Combat Application Tourniquet).

    Please Note: If you are under fire, use the “high and tight” method (over clothes and very high on the extremity). When safe, apply TQ above and closer to the wound (usually 2-3″). Apply a back-up tourniquet above the first one if rebleeding is noted or retighten 1st TQ if no backup available.

    Need a tourniquet? Check out this link.

  • Bugging Out: Thoughts on Tires

    Bugging Out: Thoughts on Tires

    I have a new truck(new to me) and looking at putting a set of tires on it. This is a 2019 RAM 1500 Classic Warlock 4×4. I’m living in a camper near my work right now and purchased the truck as I needed a reliable method of pulling the camper if things go FUBAR. I’ve been covering this over on Patreon BTW.

    Back to the tires. As part of my bugout plan not only do I need to get a set of good tires – I need extra tires. No – not simply a spare. I feel the need to have at least two full-size tires is important. Right now I have a full-size spare but it is still a low mileage, low-speed temporary tire. I want a full-size dependable tire as a spare. Tires are so critical to a vehicle that losing a couple tires once the excrement hits the air distribution device would be catastrophic. My plan? Two full-size spares for the truck, and two for the camper.

    Right now I’m looking at Goodyear Wrangler Duratrac’s for the truck.

    Just a thought. Tires are not considered nearly enough as important as they are.

    Rourke

  • Video: Projects With a Purpose – Flashlight Lanyards

    Video: Projects With a Purpose – Flashlight Lanyards

    A longtime reader of my old website as well as 1776 just recently started his own YouTube channel and he has a wealth of knowledge to share.

    The following video shows just how a simple survival “hack” can be both inexpensive as well as effective/valuable.

    Paracord – such a valuable prepper item to have around.

    Go check out this YouTube video and don’t forget to subscribe to his channel.

    Take care all.

    Rourke