Tag: shooting

  • Video: US MARINE –  The Truth About Thumb Over Bore!

    Video: US MARINE – The Truth About Thumb Over Bore!

    There’s not much that will create an argument more than asking “What is the best firing stance and grip?” in a forum of AR shooters. While everyone has an opinion and many feel theirs is the only one that counts. I’ll give you my quick answer – “The one that you are comfortable with and allows rounds to be sent down range – accurately.”

    Pretty simple.

    Several years ago I heard of this method competition shooters were using to control recoil and shoot very accurately – called the “C-Clamp”. I tried and hated it. It felt so uncomfortable. I preferred to hold the magazine well, however, I just could not control recoil well and get multiple rounds on target quickly. This is a popular way of holding a gun while playing paintball. I had signed up for a defensive carbine and pistol course from Wolf-Fire Firearms Training and decided to try the C-Clamp again. I used it throughout the class and it really grew on me. This is now the primary method I use for shooting the AR and have done so for years.

    The video below gives some perspective on the “thumb over bore” and explains my position on it well. I agree with this guy 100%.

    line

    survival, shtf, prepper, notebook, planner, journal, planning, John Rourke

  • This is so cool!!!

    This is so cool!!!

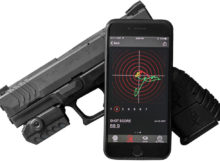
    On a recent vacation to Leesburg Florida to attend the Leesburg Bikefest I picked up a Mantis X2 Shooting Performance System. I haven’t had a chance to try it out but I’m looking to try it out this weekend.

    Here are some details on the Mantis X2:

    The main reason I bought this is to improve my shooting with a pistol. Collecting thousands of data points per second, the X2 analyzes your shooting in real-time.  For both pistols and rifles, the X2 works with dry fire on your actual firearm. I tried one while in Florida and it was amazing how it would tell you if you were slapping the trigger, or too little trigger finger. 

    If interested in the Mantis X2 or similar systems check out http://www.2ag.fun and use promo code “1776patriot” to get 10% off.

    Shoot straight and true, my friends…..

    Rourke

    Use Coupon Code 1776 to get 10% Off the Offical John Rourke Survival Store

    [ecwid_product id=”242168717″ display=”picture title price options addtobag” version=”2″ show_border=”1″ show_price_on_button=”1″ center_align=”1″][ecwid_product id=”361908918″ display=”picture title price options addtobag” version=”2″ show_border=”1″ show_price_on_button=”1″ center_align=”1″][ecwid_product id=”381953032″ display=”picture title price options addtobag” version=”2″ show_border=”1″ show_price_on_button=”1″ center_align=”1″]


  • Review:  Lightnin’ Grip Loader for .22LR Magazines

    Review: Lightnin’ Grip Loader for .22LR Magazines

    The .22lr is by far my favorite caliber. The reasons are simple – very inexpensive and super fun to shoot. The drawback of shooting the .22lr – especially in higher capacity semi-auto’s – is the constant loading after blowing through 15-30 rounds.

    ENTER: The Lightnin’ Grip Loader

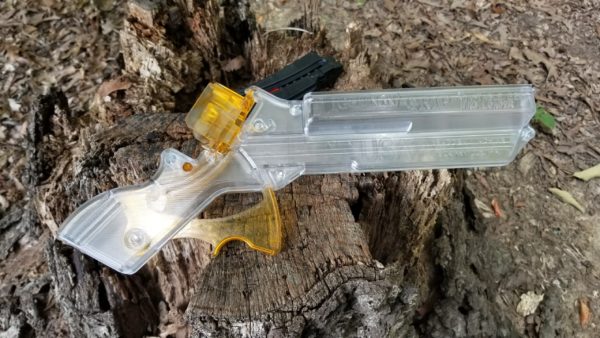
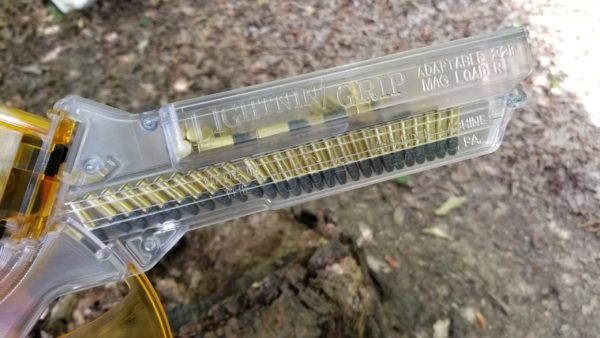
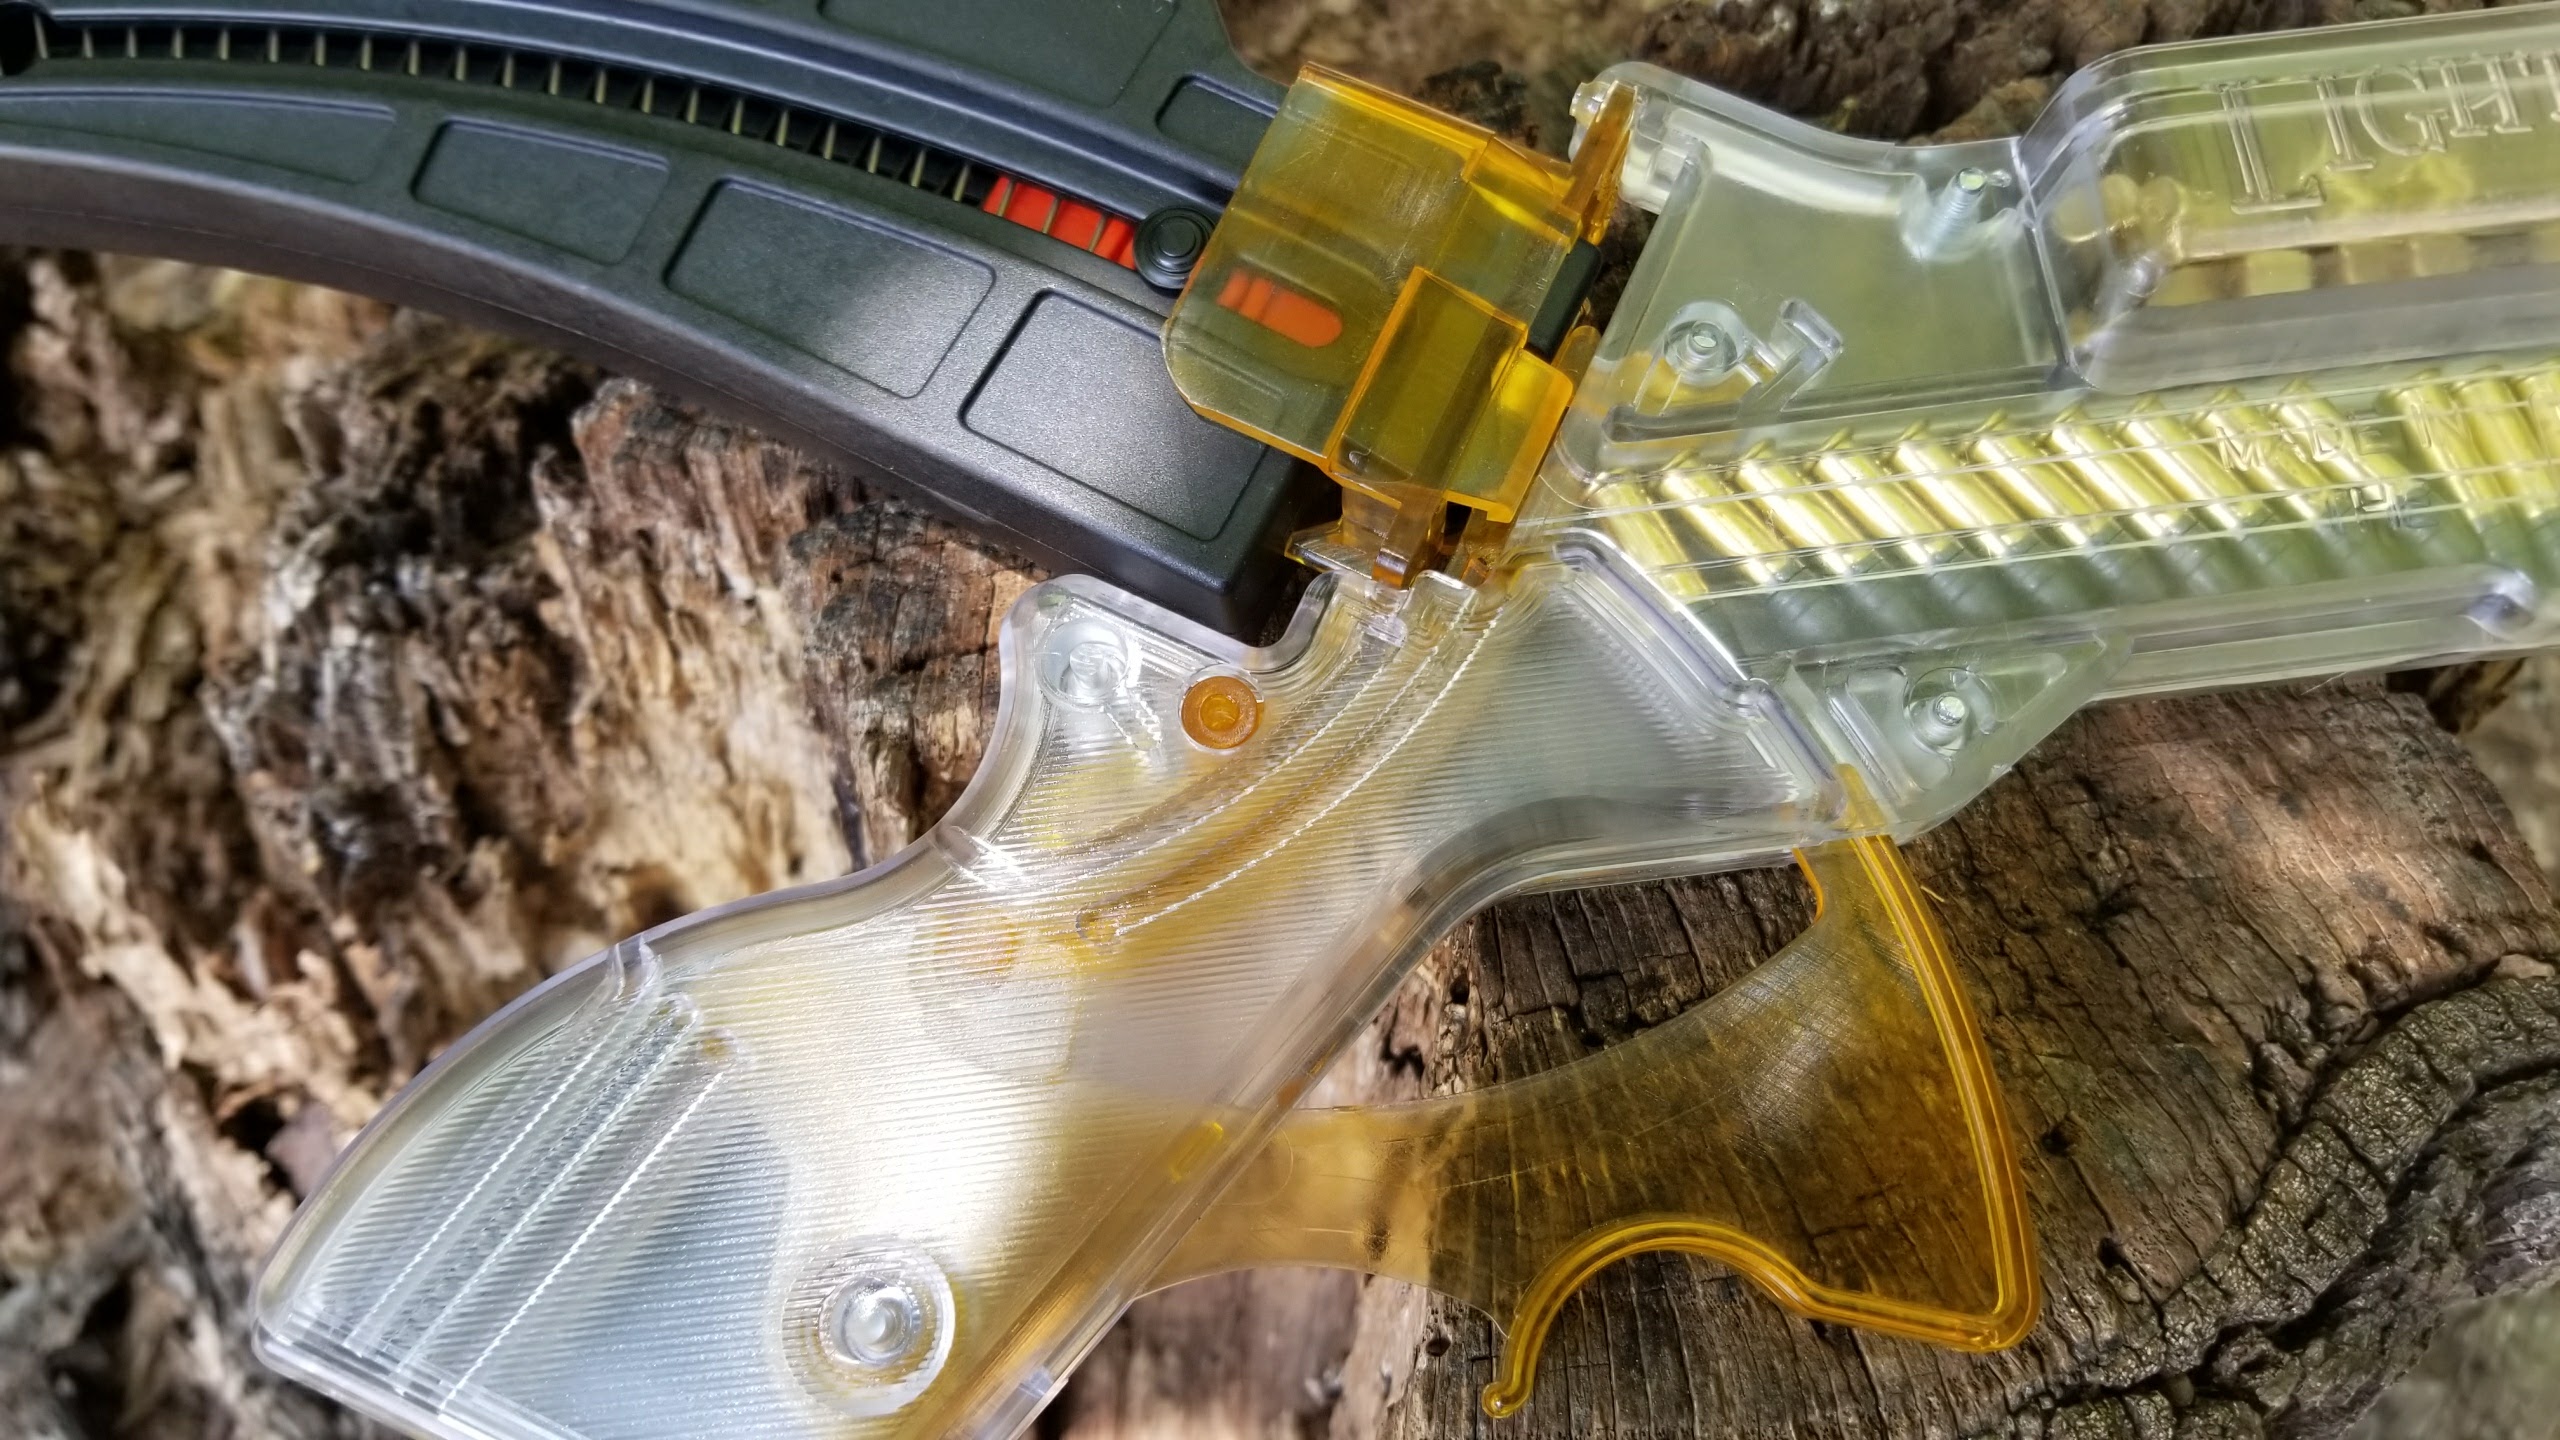
    The Lightnin’ Grip Loader is a device used to rapidly load a variety of magazines with .22lr ammunition. Supported firearms include the Ruger 10/22 and S&W M&P15-22(and many more). The main device can be used with different adapters(currently 24 available) so that one loader can be used to fill more than one model of the magazine.


    How Does the Lightnin’ Grip Loader Work?


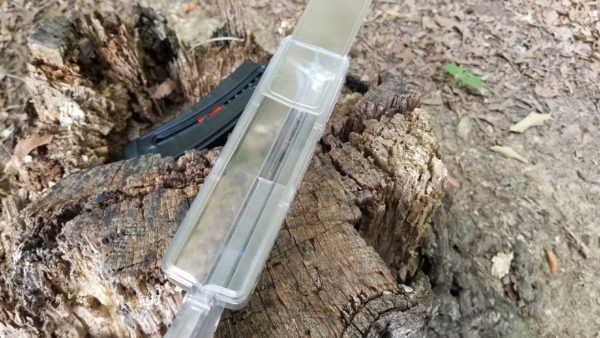
    After attaching the correct magazine adapter, open the top door by sliding it rearward.


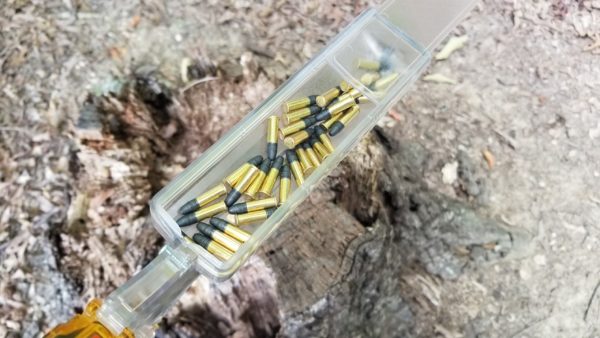
    Next – dump 50 or so rounds of .22lr into the loader.


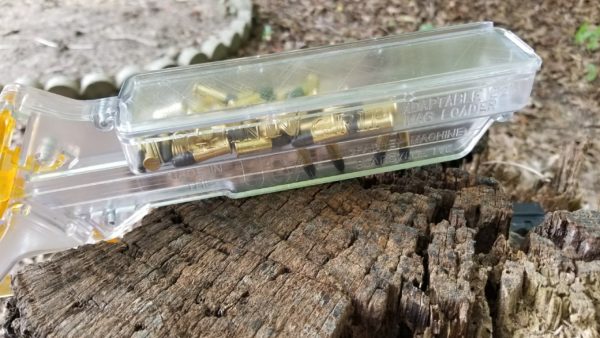
    Now – slide the top door on the loader closed.


    At this point, the loader needs to be shaken which will cause the .22lr rounds to drop into the feed slot and align themselves. Only a few shakes are necessary and they line up quickly.


    Next – the magazine is attached. At this point, the loader is tilted up to keep the rounds aligned towards the magazine.


    Last – the “trigger” on the Lightnin’ Grip Loader is actuated. Every squeeze of the trigger will load one round. See video below:


    While I squeezed the trigger in the video slowly to show how it works – the rounds can be loaded into the magazine extremely fast.


    Bottomline:

    The Lightnin’ Grip Loader is fantastic. It is rare that I come across something that provides this much value. The loader costs only $32.50 and each magazine adapter costs $13.95.  Having this device increases the fun factor big time allowing more shooting – less loading.

    To get more information on the loader and/or to order – click HERE.

    To get more information on the adapter for your particular forearms – click HERE.

    HAVE FUN!!!

    Recommended

  • Project: Ruger 10/22 X-Hunter

    Project: Ruger 10/22 X-Hunter

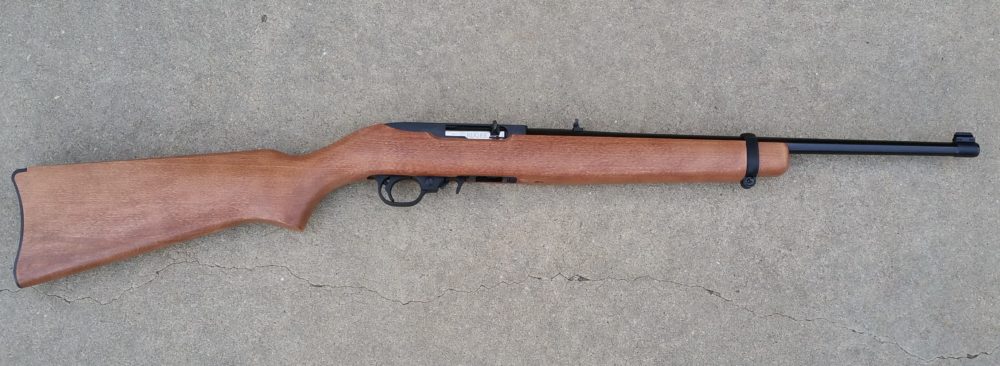
    The Ruger 10/22 is the most popular .22 long gun sold in the United States and for some very good reasons. The Ruger is inexpensive, accurate, extremely reliable, and highly customizable. The aftermarket support for the 10/22 is second to no other gun.

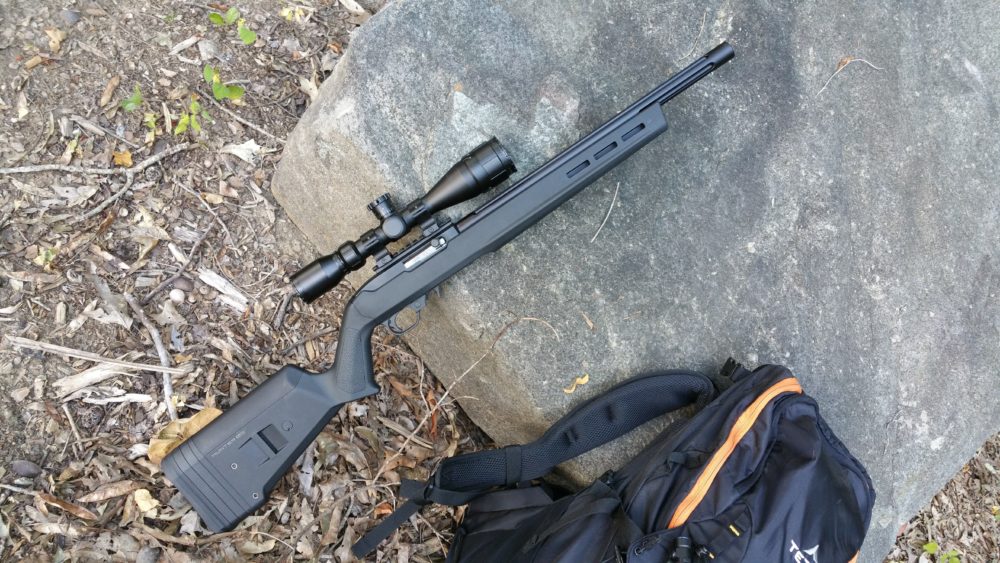
    Project: Ruger 10/22 was created from the concept of building a compact but highly accurate rimfire carbine with an awesome, modern appearance. More of an assembly than a build, this project gun has little in common with the stock factory Ruger 10/22.

    I present…..Project: Ruger 10/22.

        *     *     *     *     *     *     *     *     *     *     *     *     *

    20160110_161813

    I started with a standard, run-of-the-mill Ruger 10/22. Nothing special but highly capable. This particular gun was purchased locally for $209.00.

    Project Total: $209.00

    20160110_161918

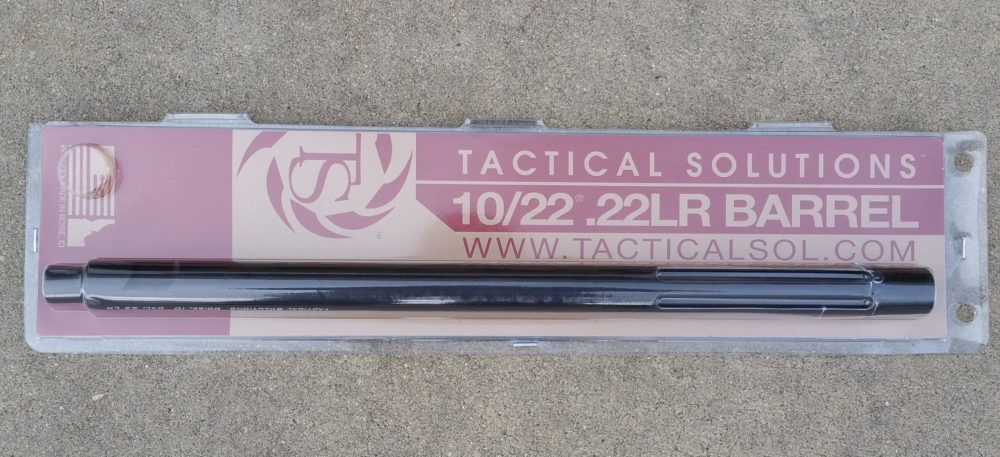
    Next up I settled on a Tactical Solutions 16″ fluted barrel. I chose the Tactical Solutions due to cost as well as overall reputation. I read a few reviews online that were negative, however, by far they were positive. I was not expecting a tremendous gain in accuracy with the barrel as in stock condition the 10/22 does quite well. To complete the project as envisioned the Tactical Solutions barrel fit perfectly. I paid $179.99 on sale at a local Cabela’s. No doubt better pricing can be found elsewhere.

    Project Total: $388.99

    stock

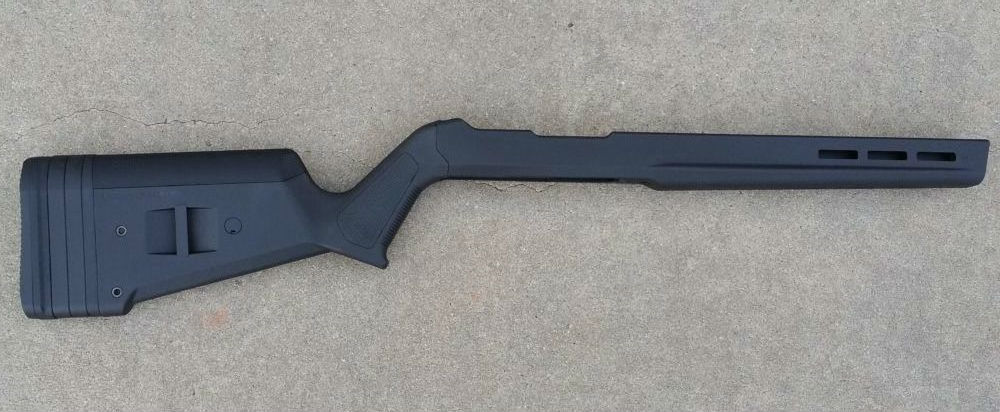
    Right from the start I knew I wanted the Magpul X-Hunter Stock for this project. Having seen and handled it previously it was a must have. I love the way it handles and its ergonomics. Unique with this stock is its compatibility with either the stock barrel or a standard bull barrel. Ordered from Amazon for $126.97.

    Project Total: $515.96

    20160107_175605

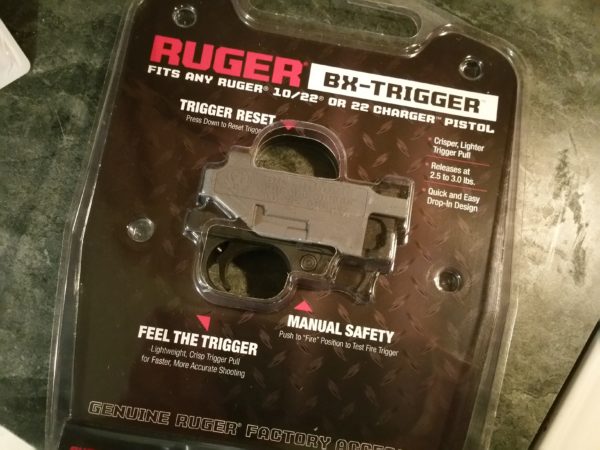
    Accuracy is the result of numerous specific conditions from cartridge, barrel, wind conditions, temperature, lubrication, trigger, and more. The new Ruger BX-Trigger drops the trigger pull down to around 2.5 pounds and making it extremely crisp. Instant accuracy improvement.  Purchased at Cabela’s on sale for $59.99.

    Project Total: $575.95

    20160110_155714

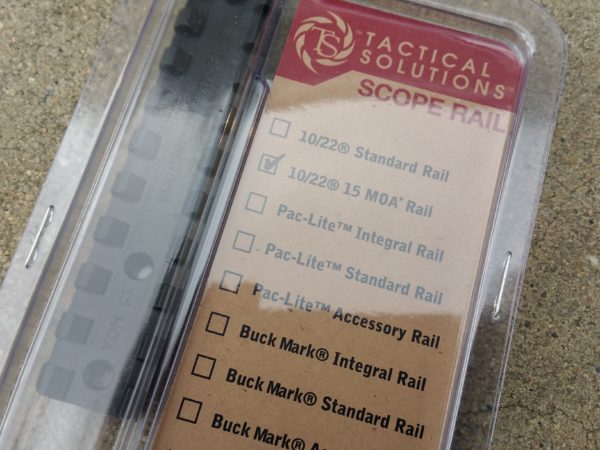
    Next up was to install a scope mount atop the Ruger’s receiver. I went with the Tactical Solutions 15 MOA Rail. What makes this rail unique is it actually angles the scope slightly in an upwards direction thus reducing the amount of scope elevation adjustment needed for shooting longer ranges with the .22LR. May not have needed the 15 MOA raise but I have it.  Purchased at Cabela’s for $29.99.

    Project Total: $605.94

    20160117_141903

    To maximize accuracy I installed a BSA Sweet .22 3-9 x 40mm scope. The BSA comes with different turrets depending on your rimfire ammunition. I have not utilized the turrets but understand the concept. I am pleased with the level of clarity, however, would like to have a higher level of magnification. Possible upgrade in the future. Purchased from Amazon for $69.99.

    Project Total: $675.93

    Lastly, an extended charging handle was purchased off eBay. I have no idea of the brand. Took a look and found something cool and bought it. Works great. A charging handle isn’t rocket science. The factory one works fine, however, I wanted a more secure grip and add to the look.

    *     *     *     *     *     *     *     *     *     *     *     *     *

    20160731_173556

    Final Results:

    $675 for a Ruger 10/22 is a lot of money and with that level of funding I could have bought a variety of firearms or other supplies. This was a project I wanted to do, so I did it.

    So – how accurate is it?

    I have yet to test the true capability of this project gun and will update as I get more results. Close to 1″ 3 shot groups at 50 yards so far using CCI Mini-Mags. Every gun I have will shoot better than me and this is no exception. I have shot standard carbines close to 1″ groups at 50 so the increase in accuracy is minimal however it exists.

    It has been 100% reliable with no jams, failures to eject, misfires – nothing. The trigger is sweet.

    Shooting this gun is a pleasure.  It’s highly accurate, lightweight and very compact. Handles like a dream and its ergonomics fits me extremely well.

    NOTE: This was a project gun I put together a few years ago. Unfortunately “life happens” and I was forced to sell it. Once I am in a position to do so I have every intention to recreate in a very similar fashion.

    Rourke

  • 5 Tips for Improving Your Shooting Accuracy

    5 Tips for Improving Your Shooting Accuracy


    It happens to every shooter, whether you are a novice or an experienced shooter. You get to a point where you miss targets that you know you should hit. Sometimes you may be new to shooting, but you seem to have plateaued in your shooting skills. Or maybe you are just trying to improve your skills to become a better shooter. Either way, it is important you develop discipline and use these tips to improve your accuracy


    Slow Down

    Everyone wants to shoot well and shoot fast. However, speed always comes at the expense of accurate shots. If you are unable to group your shots, the first step you need to take is to slow down. Once you manage to group the shots, you can then start picking up the pace. To learn how to slow down, here is an important tip, which can work great for you.

    Put an aiming point at close range; when using a handgun, this can be at five yards, for a rifle, start at 25 yards. Aim at the center of mass and fire around. Now take as much time as possible to empty the rest of the clip without enlarging the initial bullet hole. That is impossible for any shooter to achieve.

    However, that will help you to focus on the basic of shooting. These are breath control, trigger control, and sight picture. This slow-fire drill helps to reinforce muscle memory needed for accuracy. Now double the distance and repeat the drill. It is also a great way for you to get rid of a flinch.


    Squeeze Trigger Don’t Pull

    The trigger challenge can be divided into two. These are the mental and physical aspect of squeezing the trigger. The mental aspect is the hardwired response in our mind, which causes us to flinch when squeezing the trigger. This will cause the bullet to miss whatever you were targeting. To avoid this, ear protection and practice can really help.

    Since the trigger is below a short barrel in a handgun, unlike a rifle, it is quite easy to tip the barrel if the trigger is pulled too fast. Thus, instead of yanking at it in anticipation of the bang, try to slide it along the same axis as the barrel. This will only work if the index finger is in the right position.

    Avoid having the index finger pressing sideways on it. Press on it straight back like you would when you click on a pen. Besides that, you need to be holding the gun in the correct position. You also need to take your focus away from the loud bang and focus on the trigger. If you do not get used to focusing on the trigger, your mind will always try to pull you away each time. You will find that you flinch quite often when trying to make a shot.


    Alignment is Important

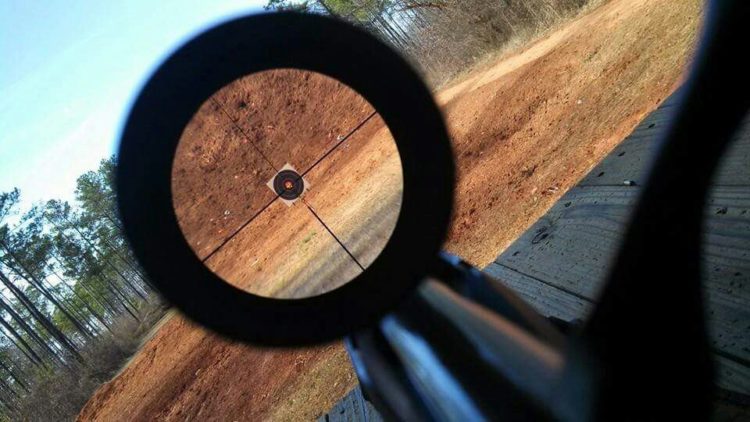
    At the most basic, you need to learn how to align the sights while you focus on the front sight. When you do that, the rear sights should be blurry as should be the target. The front sight should be clear.


    Practice Shooting Drills

    Another important aspect of being good at shooting is practice. After you learn all the skills, you will quickly forge unless you practice often. If you want to become a professional, that will mean hitting the shooting range as often as possible. If possible, look for good drill online, such as this resource that you can use. Try them often until you get that your skills are good.


    Muscle Memory

    The instantaneous and intuitive manipulation of a firearm is one of the most important skills you can learn at a shooting range. However, there is both bad and good muscle memory. For instance, you do not want to pick up bad habits that could affect your accuracy during a competition or when hunting.

    Such situations are stressful, and you want to make the most of them in the least amount of time possible. That will mean you practice as often as possible. Besides that, it will mean you have to use weapons and ammunition that are close to the real thing that you use in hunting or during a competition.

    Additionally, if you use any gear, ensure that it is similar to what you would use in a real-life situation. In short, muscle memory is about learning all the right skills and practicing them as often as possible.


    Alex Briggs is a contributing writer and media specialist for Galco Gunleather. He regularly produces content for a variety of gun and personal safety blogs.


  • BUDGET PRECISION: THE HUNT FOR A RIFLE

    BUDGET PRECISION: THE HUNT FOR A RIFLE

    The following was originally published over at PrepperRalph.com

    Back when I was first looking into a good bolt action, I was searching for something that would fulfill two important roles. One being mid to long range precision shooting and the other being an accurate hunting weapon.

    Inspiration

    Four years ago I had seen an article about building a budget “sniper” rifle. The cost of the actual rifle was supposed to be less than $500 with a total complete cost less than $1000. Now for most people back then, that was almost unheard of unless you went with something similar to a Mosin-Nagant or a heavily used “Pawn Shop Special”. There were several choices I could have gone with when it came to a well-used weapon, but I decided to go the new route. So then began my search.

    The Line-Up

    There were several rifles I had in mind already when I went into the search. They are listed:

    Savage Axis
    Ruger American
    Remington 783
    Marlin XL7
    Mossberg Patriot

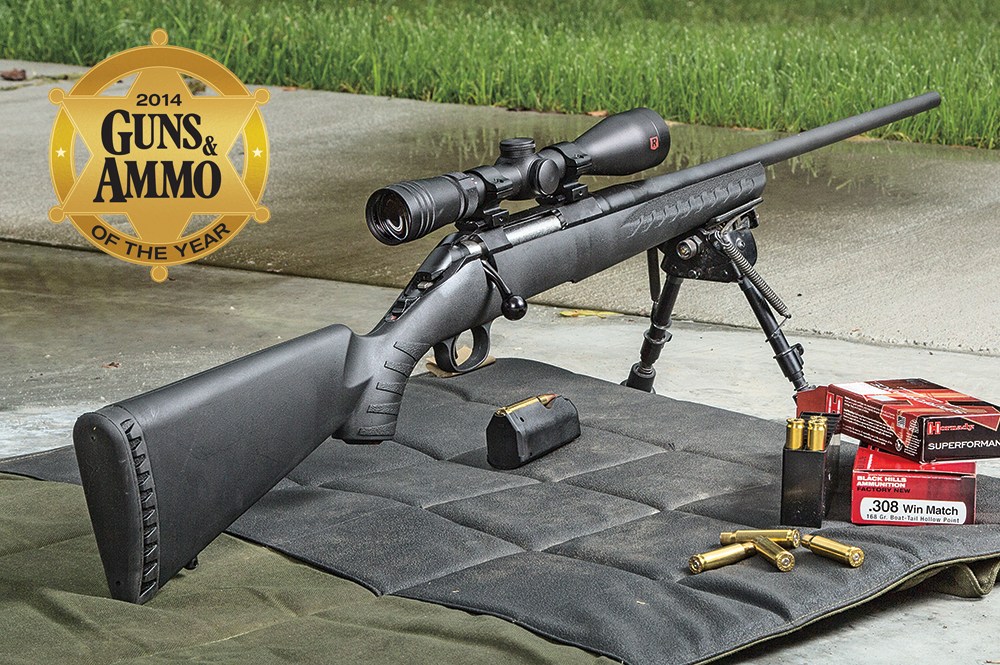
    All five rifles that I listed were available from the $350-$550 range in pretty much any shop you happened to find them. The Savage Axis had been the first true budget bolt action to go on the market and the rest seemed to follow. Features tended to include a paddle style safety trigger, adjustable trigger pull weight, a polymer style stock, and a barrel that was secured to the receiver using a barrel nut instead of a direct threaded type. All of the rifles were accurate. The 783 was known for being a good shooting rifle, as was the Savage. I had recently owned a Mossberg MVP in 5.56 and found that at that time, my version wasn’t the most accurate. And finally the XL7. To this day almost five years later I’ve only seen one on a rifle rack for sale. I don’t know if that is a good thing or a bad thing. Then my neighbor at the time bought a Ruger American in .243 Win and I got to shoot it. I liked how smooth the bolt was, the fit and feel of the rifle, how lightweight it was, and I definitely liked how accurate the .243 was. I decided I would go with a Ruger, especially since it was the 2014 Guns and Ammo Rifle of the Year.

    Caliber Choice

    During this period of time, then President Obama was leading the world in civilian gun sales. It seemed that everytime someone burped a word about gun control there was a mass buyout of anything gun related. Mass shootings, the threat of terrorism, and many other threats sent the gun community into panicked buying mode. Going to the local gun shops yielded high-priced weapons and scarce ammunition since no manufacturer was able to keep up with the demand. If you remember, even the stupidly cheap .22LR had gone the way of the do-do, and when it was found, was so expensive to make it unrealistic to buy. Calibers such as 5.56/.223, 9mm, .38 Special, .308 Win, and .22LR were so hard to find, that many people quit shooting altogether. What was on the shelves were the out of vogue calibers – .243 and .270 Win, .30-06 Springfield, and a spattering of other less popular rounds. With this in mind, I went with .30-06 Springfield. It had fought two World Wars, Korea, and was still one of the most popular hunting rounds in the world. Even today in 2017, the .30-06 remains a favorite amongst shooters. Surely it was good enough to do whatever I might ask it to.

    The Purchase

    Black Friday was coming up now… I had spent the better part of 6 months looking and researching rifles and finally shooting them. A trip to Walmart found me a Ruger in .30-06. It was on sale for $400 at the time so I was well within my projected budget. To layaway it went. Here in SC on Black Friday it’s a sales tax-free day so no matter what you buy it’s not taxed. So began an ordeal of trying to get my rifle. I went back to the Walmart to pick it up and the manager had misplaced it. To say I was angry was an understatement. Two hours later with me finally threatening to call the DM, he brings out my rifle. I asked about a discount for the trouble and He knocked $50 off of the price since the other’s in the cabinet were now on sale. Since all he did was bring it down to the sale price that wasn’t good enough. After some coaxing he gave a “manager’s special” and I picked up my .30-06 for $280!!! After all the BS and all the waiting and the run around I finally had my Ruger.

    Scope

    During the same time, I had been researching good rifle scopes that would fit in the $200 or less range. Nikon, Leupold, and Vortex all had great choices. Vortex was still relatively new on the scene So it came down to the Nikon Prostaff and a Leupold Rifleman. Both could be had in the range of $150-$180. When it came to features, I wanted a 3-9×40 variable zoom, positive click adjustments and a fast focus in case of other shooters. I decided to go with the Nikon. $180 after tax brought the total package of the Budget Sniper project to $480 after adding a set of Weaver medium height rings to mount the scope…

    Completing the Project

    A rifle is a fine instrument for someone seeking to put food on the table or to protect the homestead. The only problem is carrying around an 8+ pound rifle all day gets tiring so I opted on a Blackhawk! sling at $20. Realizing that I would probably end up shooting from prone at the range or in certain hunting applications, another $40 got me a Harris type bipod. My rifle was now fully assembled with a total cost of less than $550 complete.

    Shooting

    The shooting was easy and smooth. With the Ruger’s light trigger pull, lack of creep, and the steadiness of my Harris style bipod, I was making good consistent shots every time as long as my marksmanship stayed on point. I’ve tried the three main bullet weights available for the .30-06 from 150-180 grain rounds. I found the bullet weights from 165-168 grains were the most accurate for my particular gun. Seeing as this was a budget build, I wanted budget ammunition. I went again to the local Walmart and picked up a box of Remington 165gr Core-Lokts and a box of Winchester 165gr Power Points. Both rounds shot great and were very consistent. The only difference I saw in performance was that the Winchesters printed about 1/4″ higher than the Remingtons. The cause I could only determine to be was due to a slightly higher velocity. There were no misfeeds or ejection issues.

    Long Term…

    I’ve had this rifle build now for over 4 years. It has remained my go to hunting platform and has continued to be highly accurate and extremely reliable. The bolt has a glass-like smoothness to it when cycled. The trigger has actually improved over the years of shooting it. All of that I guess should be expected considering the round count in the rifle. To my closest estimation, I’ve fired the Ruger almost 600 times. I practice with it often and typically shoot 40+ rounds every time I go to the range. Since purchasing the gun, I’ve since spray painted it a desert brown color. It was just the hardware store special rattle can treatment. After all…. It’s a budget rifle build.


  • Video: US MARINE –  The Truth About Thumb Over Bore!

    Video: US MARINE – The Truth About Thumb Over Bore!

    There’s not much that will create an argument more than asking “What is the best firing stance and grip?” in a forum of AR shooters. While everyone has an opinion and many feel their’s is the only one that counts I’ll give you my quick answer – “The one that you are comfortable with and allows rounds to be sent down range – accurately.”

    Pretty simple.

    Several years ago I heard of this method competition shooters were using to control recoil and shoot very accurately – called the “C-Clamp”. I tried and hated it. Man – it felt so uncomfortable. I preferred to hold the magazine well however I just could not control recoil well and get multiple rounds on target quickly. I had signed up for a defensive carbine and pistol course from Wolf-Fire Firearms Training and decided to try the C-Clamp again. I used it throughout the class and it really grew on me. Now, this is the primary method I use for shooting the AR.

    The video below gives some perspective on the “thumb over bore” and explains my position on it well. I agree with this guy 100%.


  • The Four Rules of Gun Safety

    The Four Rules of Gun Safety

    Over the past two months, I’ve worked with several new shooters and have gone over the four rules of gun safety – over and over and over again. I ended up seeing one couple at the range recently and witnessed safety infractions happening and had to speak up and say something. That was not at all what I taught them.

    If you are new to shooting or maybe just never received the proper training read the following – and not just practice it but remember…and learn it.

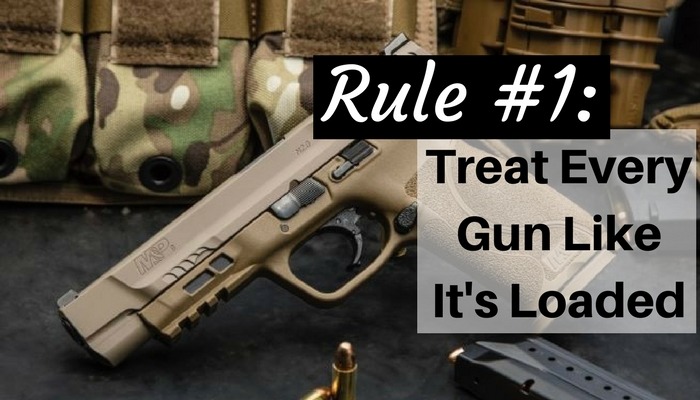
    GUN SAFETY RULE #1:

    Gun Safety, safety, Rule, loaded, shooting, preparedness, SHTF, firearms

    Every gun should be treated like its loaded. Complacency and carelessness has cost far too many lives and it’s totally preventable. Positive a gun is empty? Treat it likes it’s not.


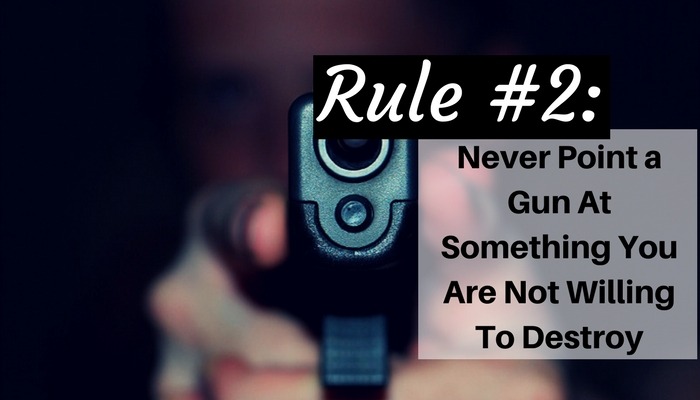
    GUN SAFETY RULE #2:

    shooting, firearm, safety, gun, pistol, pointing, rule, gun safety

    Handling a firearm comes with an awesome responsibility. Do not EVER point a firearm at something you are not willing to destroy – aka kill. This should be common sense but far too often it’s not. See someone break this rule accidently? Let them know. It may be your life you end up saving.

    A question that often comes up is – “Well, where should I point the gun?” This depends on where you are and where everyone else is. Bottomline is the gun should never point at any person. Many shooting ranges have rules stating all firearms must point down range at all times. When carrying firearms – both pistols and long guns – I prefer to keep barrels pointing downward.


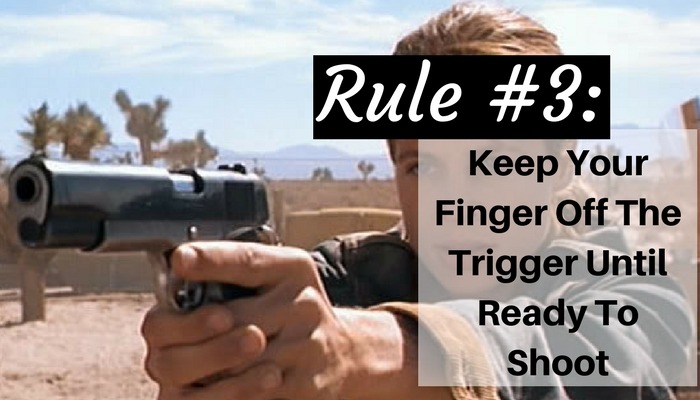
    GUN SAFETY RULE #3:

    Accidental discharges are more often than not caused by a finger pulling a trigger when the shooter was NOT ready to shoot. This is a simple fix by keeping your finger off the trigger until ready to shoot.


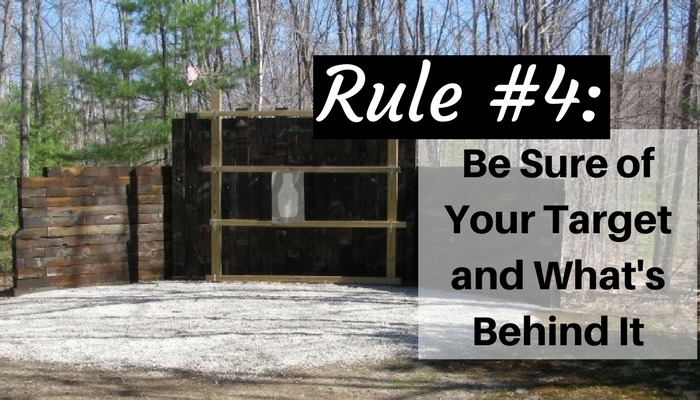
    GUN SAFETY RULE #4:

    guns, shooting, safety, rules, pistol, backstop, firearms, training, gun safety,

    Never shoot at anything you have not absolutely identified AND know what is behind it.  Targets are often missed and you are accountable for every round exiting your gun. Bullets can travel great distances so you must know exactly where every shot will end up.

    *     *     *     *     *

    As a gun owner, you are responsible for handling all firearms in a safe manner. As a responsible advocate for the 2nd Amendment, I would go further to say you are also responsible for watching out for others to prevent accidents and help educate.

    Be safe out there!

    Rourke

  • From the Desk of John Rourke – March 21st, 2017

    From the Desk of John Rourke – March 21st, 2017


    I’m probably preaching to the choir here but the increase in violence and threats since Trump’s election is telling. The level of incivility and pure hate has reached a level I have never seen. Every passing day it seems to grow to new extremes. I’m not saying anything you haven’t heard or probably have seen yourself. It just confirms to me that an American Reformation – a new Civil War – is unavoidable. The Progressives are digging in and becoming very unified. That my friends is dangerous. Very dangerous.

    10 years from now what will this country look like?

    ◊ ◊ ◊ ◊ ◊

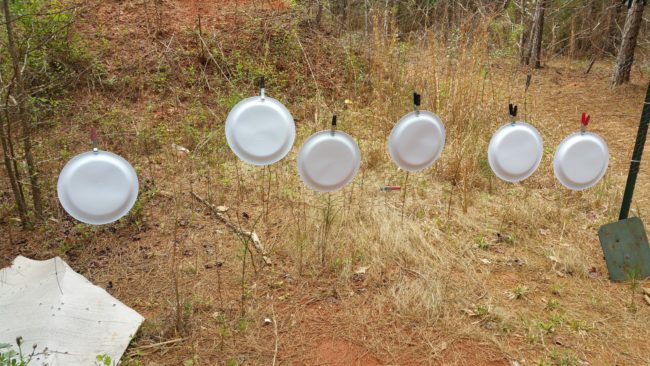
    SAVE SOME MONEY, SHOOT SOME MORE TIP: Paper plates. Yes – use paper plates as targets. Think about it. You can buy paper plates of different sizes CHEAP! Of course, a ream of paper is the ultimate but paper plates hold up better and are round.

    shooting, target, paper plates, AR-15, firearms. Tannerite, prepper, preparedness, SHTF, target, practice, training

    ◊ ◊ ◊ ◊ ◊

    The FreePrepperEbooks.com Facebook Page is up. If you are interested head over there and Like and Share the page. Don’t forget to go over to the main site(FreePrepperEbooks.com) and subscribe to receive updates on the upcoming launch.

    ◊ ◊ ◊ ◊ ◊

    Has anyone performed any tests with Tannerite to see how long it is good once mixed?

    ◊ ◊ ◊ ◊ ◊

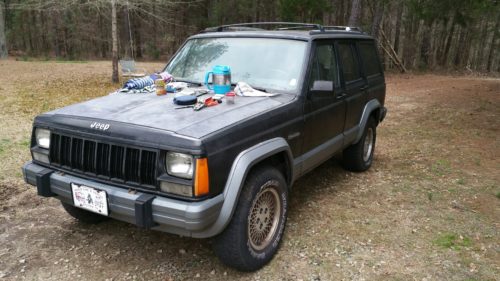
    Mentioned that I had a project vehicle I was buying – a 1994 Jeep Cherokee. I finally took possession of it. Now to start putting together a list of what needs to be done and get started. It’s rough but has potential.

    There are many reasons why so many love their Kindle and Amazon Fire tablets. One huge advantage is you could literally go years without every buying a book to read as there are tons of free eBooks available. Don’t have a Kindle or Fire? No problem. There are apps that can be installed on most any cell phone or computer for free. No excuses!

    Today’s Freebies

    Preparedness Gardening

    Healthy, Happy, and Prepared

    Our End of the Lake

    A Prepper’s Perspective

    Paracord for Beginners

    NOTE: If you see a free preparedness eBook that you’re interested in get it now. Prices change often and there is no way to tell how long the book will remain free. Before purchasing a free preparedness Kindle book on Amazon make certain the book is still free by making sure the price is $0.00. If it lists a price or says “read for free” or has a price for prime members the book is not free anymore.

  • From the Desk of John Rourke – March 20th, 2017

    From the Desk of John Rourke – March 20th, 2017


    North Korea continues their threats now saying if a single bullet is fired they will nuke the United States. The capabilities of North Korea while limited are often understated. They DO have nuclear capabilities and methods of delivery. When you have a crazy man as the leader of a nuclear-armed country all bets are off.

    Below Secretary of State Tillerson calls for a different approach to dealing with North Korea on March 17th.

    ◊ ◊ ◊ ◊ ◊

    Spent the weekend at my brothers in Georgia and did a good amount of shooting. My latest AR build – the “Patriot” Rifle – performed extremely well. Several shooters took the opportunity to use it on some Tannerite. One shooter had never shot an AR before. Five shots equaled 5 hits at various distances. Fun!!!!

    ◊ ◊ ◊ ◊ ◊

    Quote:

    “I’m willing to throw my body in front of the bus to stop bad ideas.”

    Elizabeth Warren

    We’re waiting…….

    ◊ ◊ ◊ ◊ ◊

    Have a great week everyone. If you are reading this you already have a great advantage over those who failed to wake up. Take advantage.

    There are many reasons why so many love their Kindle and Amazon Fire tablets. One huge advantage is you could literally go years without every buying a book to read as there are tons of free eBooks available. Don’t have a Kindle or Fire? No problem. There are apps that can be installed on most any cell phone or computer for free. No excuses!

    Today’s Freebies

    The Work of the Dead: Book One

    The Solitary Man’s Refuge

    Billy’s Outdoor Survival Adventure

    The No, I’m Not a Fanatical Ghillie Suit Wearing, Kill a Moose with My Bare Hands Prepper, Book of Realistic Preparedness: Or There’s Got to be a Better Way to Prepare for the Unexpected

    Minimalist Living: Living In a Van and Get Off The Grid

    NOTE: If you see a free preparedness eBook that you’re interested in get it now. Prices change often and there is no way to tell how long the book will remain free. Before purchasing a free Kindle book on Amazon make certain the book is still free by making sure the price is $0.00. If it lists a price or says “read for free” or has a price for prime members the book is not free anymore.


  • DO NOT dry fire practice…..EVER!!!

    DO NOT dry fire practice…..EVER!!!


    This may come as a surprise that someone would actually suggest NOT to dry fire practice. After all it is a widely used technique to improve shooting skills and save money. I was not always of the belief that dry firing was a safety issue. Panhandle Rancher convinced me otherwise. While I’m not going to get into the level of detail he provided me as to the explanation against dry firing – I’ll mention a couple things:
    1. A kid is found dead left in car while their parents work all day,
    2. Unintended discharges

    Every year you hear about a father who normally doesn’t take their kid to day care forgetting to drop them off. They drive to work as normal and the kid bakes in the sun all day while dad is inside working. So sad.

    Every year there are many unintended shots fired in living rooms, ranges, and many other places. Every single time a finger is placed on the trigger – with a found in the chamber.
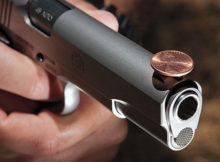

    Here’s the deal – we humans are creatures of habit. When you pick up a firearm in the house and dry fire practice you’re pulling the trigger over and over again. A habit is being developed that pulling the trigger without the gun going off is OK – and normal. It is just a matter of time before it goes BANG – unintentionally. If you had a rule that you NEVER pull the trigger unless aiming at a target or conducting a live fire exercise the complacency that dry fire practice developed will be much less.

    That father drives to work day after day, week after week – never having to drop the child off at the day care. It’s a habit that is embedded in him. One day his routine is disrupted and the wife places junior in the back seat. He pulls out and soon thereafter he is back in his routine. The thought of his son in the backseat never enters his mind.

    We can say it would never happen to us. We can say that 10,000 dry fire trigger pulls year after year will not increase the chance of an unintentional discharge. We can say that with all those dry fire shots pulling out a concealed carry gun – with a round in the chamber – that there is no possibility that habit will come into play and the trigger pulled at some point. I will say that is just not logical.

    I say keep your finger off the trigger until aiming at something you are willing to destroy.

    Stay safe my friends.

    Rourke

    line

    From the Supply Depot: RECOMMENDED SUPPLIES

    GorillaDrive 64gb USB Rugged Drive

    Ultrafire Mini Cree LED Flashlight with Rechargeable Batteries / Charger

    Streamlight CR123 Batteries/12-Pack

    Koolatron 12V Portable Cooler

    Gerber Warrant Fixed Blade Knife

    *    *    *    *    *    *    *    *    *    *    *

    Looking for Preparedness Supplies? Check out the Fantastic Monthly Sale at Emergency Essentials.

    Emergency Essentials has been an industry leader for over 25 years. Excellent service and prices have kept them leader of the pack.

    728x90june2016 (1)

    From food storage products to camping supplies Emergency Essentials carries it all.

    *    *    *    *    *    *    *    *    *    *    *

    Recommended reading for every Patriot? 

    Untitled design (8)


  • Video: ATN X-Sight Day/Night Riflescope

    Video: ATN X-Sight Day/Night Riflescope

    The following video showcases the ATN X-Sight Day/Night Vision Optic. The X-Sight is a high tech digital optic that is capable of shooting(and recording) both at night – and during the day. I own this optic and am very impressed with its capabilities. The X-Sight runs between $550-$680 depending on exact model and where purchased.

    I’ll be doing my own review once a dedicated firearm for the X-Sight is purchased. Until then this video provides some good info:

    line


  • AR-10 experience?

    AR-10 experience?


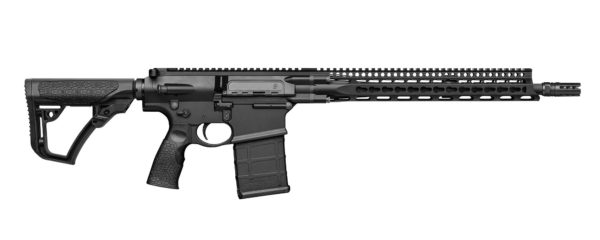
    I’m interested in expanding into the realm of AR-10 ownership in 2017. I have zero experience with these and have performed little research as of yet. If any of you out there have experience and first hand knowledge I would be very interested.

    dd5_r

    Prices today are getting more attractive with the DPMS Oracle rifle running around $800. The advantages to a semi-automatic .308/7.62 are obvious.

    Rourke

  • From the Desk of John Rourke – November 14th, 2016

    From the Desk of John Rourke – November 14th, 2016


    The recent earthquake in New Zealand offers a reminder that it doesn’t take an economic collapse, EMP, or alien invasion to find yourself in a survival situation.

    ◊ ◊ ◊ ◊ ◊

    I just saw Carol Burnett is still alive. Holy crap she must be like 130. I remember watching her when I was just a little tike.

    ◊ ◊ ◊ ◊ ◊

    Here is the latest video of Jake and Bella:


    ◊ ◊ ◊ ◊ ◊

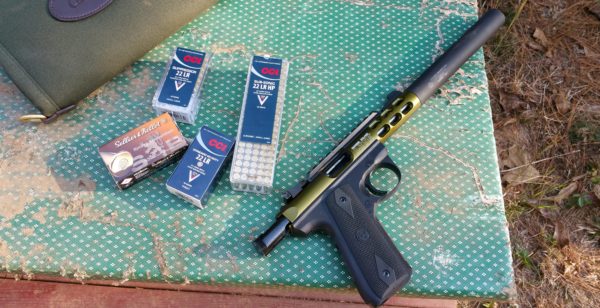
    I have really been enjoying my Ruger 22/45 Lite with AAC AVIATOR 2 suppressor. Due to recent events I am definitely interested in getting more. Next up will likely be a 45ACP suppressor(which can be used for 9mm as well). For rifle I like the idea of the .300 Blackout however I have avoided that cartridge due to the possibility of getting magazines, guns and ammo confused with each other. Possibly a 45ACP/9mm carbine.

    20161105_162608

    ◊ ◊ ◊ ◊ ◊

    Took the family to the range this past weekend. I really need to get them out to where we can do some serious training. They are not close to being adequate.

  • Panhandle Rancher: Reloading Basics and Equipment Recommendations

    Panhandle Rancher: Reloading Basics and Equipment Recommendations


    Why reload your own ammunition? Two reasons: reloaded ammunition may be much cheaper than factory and reloaded ammunition has the potential to greatly increase the accuracy of your rifle or pistol.


    I have reloaded rifle, pistol, and shotgun ammunition, and cast pistol bullets and big heavy bullets for the old black powder rifle cartridges such as the .45-70 for more than half a century. I also cast 0, 00, and 000 buckshot and 12 gauge slugs and sabot rounds. Much of my reloading equipment was purchased back in the 1960s and still in use.


    Otis developed the first safe elevator with automatic braking. A favorite quote from this inventor is ‘safety first, gentlemen, safety first.’ I can think of no more fitting appellation for reloading ammunition. Please don’t smoke when using either black or smokeless powder and remember black powder is more static sensitive than smokeless. There’s a reason many black powder mills were on barges anchored in a river. I don’t like distractions and once set upon the task of reloading, that process proceeds without interruption.


    Some basic nomenclature: a cartridge consists of primer, case, powder, and bullet, sometimes called a round; a fired cartridge consists of a spent primer and the powder container often called ‘brass, fired round, or case’ that may be steel, brass, plastic, aluminum, or a combination of brass and paper.


    Over the decades, I’ve developed certain procedures in the repetitive process of reloading ammunition with the intent of reducing errors. If using a powder measure (more about these later), the name of the powder and charge is written with a magic marker on a low adhesive tape and affixed to the dispenser. This tape is typically green or blue and removes much easier than the cream colored masking tape of old. Upon completion of the loading process, I match the powder label on the dispenser with the factory powder container, peel this tape off of the dispenser, and dump any excess back into the bulk container. http://www.uline.com/BL_6141/3M-2090-Masking-Tape


    MISIDENTIFICATION of powder charge, brand, year of manufacture, or type can have LETHAL RESULTS. Older Hodgen 4831 and DuPont IMR 4831 are not the same. Read and understand current reloading manuals. I try to choose loads based upon specific commercial bullet manufacturer’s reloading handbooks (when reloading Hornady XTP bullets, I use the Hornady manual). http://www.hornady.com/store/9th-Edition-Reloading-Manual3. Speer, Sierra https://www.sierrabullets.com/store/product.cfm/sn/0507/Sierra-5th-Edition-Reloading-Manual-Printed-version-and-Infinity-7-Exterior-Ballistic-Software-Program-CD-Rom, Lyman, Barnes, RCBS, Nosler and others produce reloading manuals. I often consult several from different sources as insurance against misprint https://www.amazon.com/s/ref=nb_sb_noss_1?url=search-alias%3Daps&field-keywords=reloading+manuals

    [slideshow_deploy id=’2663′]

    I carefully note the powder brand and type for the cartridge for bullet weight and type being reloaded. I remove that particular bulk powder container from my powder locker (green metal lockable cabinet adjacent to loading bench in photos). I verify this again when writing the powder and charge weight on the removable masking tape affixed to the powder measure dispenser hopper, and then again upon completion when removing the annotated tape from the measure before discharging back into the bulk container. This repetition is intentional.


    Bullet weight and type is matched against that bullet manufacture’s published loading data. Before actually loading the bullet into a primed and charged case, I weigh a sample bullet to preclude any misidentification by the manufacturer. Depending upon the bullet, I may even measure its diameter and length with vernier calipers for comparison against published specifications https://en.wikipedia.org/wiki/Calipers.


    Every reloader should have a stainless steel vernier caliper capable of measuring to the 0.001” along with a selection of inside and outside calipers mentioned in the beginning of the wiki article. Some calipers may have an easier to read circular analog dial (dial caliper) or the older linear vernier scale. Digital calipers are easiest to read but of course rely on batteries which mechanical calipers and micrometers never need. Vernier calipers are useful for measuring resized case length (cases ‘grow’ longer with each shooting and must be shortened to factory dimensions periodically) as well as case overall length inclusive of the loaded bullet. Exceeding case length and cartridge length specifications can drastically increase pressure resulting in LETHAL INJURY.


    If you intend to build your own weapons or engage in gunsmithing, a good set of inside and outside micrometers capable of measuring 0.0001” are also useful.


    From my primer locker (another of those lockable green cabinets adjacent to the reloading bench), I select the proper primer for the cartridge being reloaded. Primers come in three basic diameters and are further distinguished as being intended for rifle or pistol, as well as for magnum calibers. So a primer may be either small or large (diameter) or even bigger for the .50BMG cartridge http://www.midwayusa.com/product/1301713135/cci-50-bmg-primers-35; magnum or not; and for rifle or pistol. Pistol primers typically have thinner cups intended for less robust striker mechanisms and lower pressures found in pistols and if inadvertently used in a high pressure rifle cartridge, may explosively breach allowing both gases and debris to strike the shooter and/or bystanders. Magnum cartridges, both pistol and rifle, typically have a greater case volume than traditional cartridges and may require higher energy primers to optimally ignite the larger powder charge. Use of a magnum primer in a cartridge not so designated may cause excessive pressures resulting an explosive breach of the primer or cartridge along with possible destruction of the weapon and injury of the shooter and/or bystander.


    I review the appropriate loading data for proper primer selection and remove a box (or boxes – primers are typically packed 100/discrete box) of the proper primers from the primer locker. Not necessary but expedient and time saving, I then charge a RCBS universal priming tool http://www.rcbs.com/Products/Priming/Tools/Universal-Hand-Priming-Tool.aspx with 100 primers. Next I label another strip of that masking tape with the primer manufacturer and type designators and affix to the hand-priming device. This tool is a convenience and time saving device and not essential to the reloading process as the press I use and recommend has its own priming device that unfortunately is much slower. Before actually priming decapped (a cartridge with spent primer removed) cartridges, I once again compare the specified primer with the primer box and primer label on the hand priming tool. Upon completion of the priming operation with all brass now primed, I repeat this process and return any unused primers left in the tool to the factory box and replace this box in the primer locker.


    Grease from fingers (natural or lubricant related) can deactivate primers. Clean your mitts before handling primers and then strive to minimize contact. This is but one reason why I like the hand priming tool, I never touch the primers when using it and dump a box of 100 directly into the primer hopper that feeds the tool. I also tend to reload in groups of 100 so seldom am left with primers to return to the factory box.


    Regardless of whether you use a hand priming tool or that with the press (which by the way requires handling individual primers), the primer should be seated completely against the bottom of the cartridge primer pocket. I feel the back of each cartridge with a thumb or finger to ensure the primer cup is slightly below flush with the back of the cartridge. A slam fire in a semi-automatic weapon or unexpected discharge may result when chambering any cartridge with primer cup extending even a smidgen beyond the cartridge base. Such is a dangerous condition and to be avoided. I seal primer pockets (not a required process) with a waterproofing agent (clear fingernail polish works well) and re-check each primer for proper seating during this process. By all means, avoid crushing the primer during the seating process or it might fire. A prudent person will also avoid putting eyes or other body parts over the open end of the cartridge when priming (which is easy to do with the hand priming tool).


    Military cartridges are typically identified by the arsenal and year of production. The base of a 7.62×51 NATO (7.62 is the caliber and 51 the length in millimeters) might be annotated “LC 02’ designating a cartridge manufactured in 2002 by the Lake City Arsenal. Such brass often has a green or red rim around the primer cup. This colored agent is a waterproofing compound. Readers are likely interested in reloading 5.56x45NATO or 7.62x51NATO ammunition, or alternatively but not the same, .223 Rem or .308 Win. These pairs of cartridges are not completely interchangeable and both as a shooter and as a reloader. it is incumbent upon you to know and understand the difference.


    Military cartridges are often fired in belt fed automatic weapons whose self loading and extracting process tends to be more robust than encountered with sporting rifles and handguns. To ensure primers do not back out, the primer pocket in the casing is often crimped around the primer. Decapping force required is slightly greater and the crimp ridge must be removed before re-priming. Lyman makes both primer pocket reamers (to remove that crimp ridge) and primer pocket cleaners (to remove firing residue). The reamers come in three sizes, small, large, and arsenal (for the .50BMG). The first two are essential for reloading most military cartridges. http://www.lymanproducts.com/lyman/case-prep/primer-pocket-reamer.php


    The proper designator for the US caliber.30 main combat rifle cartridge is 7.62x51NATO. Specifics are important and even more for the reloader. There are a host 7.62 cartridges (7.62 Argentine, 7.62x54r (Russian), 7.62×39, etc.), and of course the popular 7.62x51NATO. I’ll repeat once more, 7.62x51NATO is not the same as .308 Win. The performance is different, the cases are different, and the bullets are different. Likewise there is a .38 S&W and a .38 Special, two different cartridges. 5.56x41NATO is different than .223 Remington.


    Reloading begins with case inspection. Please do not try to reload Berdan primed brass or steel cases. When in contact with leather and a host of other materials, brass will corrode. Leather turns brass an ugly green (residual acids from the tanning process leaches copper from brass) and weakens the case. Some brass cases are nickel plated and usually shiny. Nickel is more corrosion resistant than brass and plated cases are highly reloadable. Steel cases are usually dull in color and may have a lacquer or shellac coating that reduces extraction friction. Non-US manufactured military ammunition is likely Berdan primed, steel, and will not have a central flash hole so conducive to decapping. Berdan primers differ from Boxer primers (the US standard) in that there is no integral primer anvil. I am convinced repressive governments limit civilian access to potential ammunition supplies by using Berdan primers. Picking up fired brass is illegal in some countries.


    Examine the base of the fired cartridge and primer carefully. The primer cup often reveals over pressure issues. Primers are slightly rounded at the edges. Excessive pressure eliminates this slight radius so that the primer completely fills the primer pocket. Even more pressure causes a ridge around the circumference of the firing pin caused depression in the primer. That circumferential ridge is the primer flowing into the hole in the bolt that the firing pin passes through. This is a certain sign of incipient primer failure due to excessive pressure.


    If a primer fails obturation (https://en.wikipedia.org/wiki/Obturation) and breaches, gasses and debris both powder and metal under very high pressure (60,000 pounds per square inch or more in the case of some rifle cartridges), blow back into the bolt and may strike the shooter. The barrel may even burst with disastrous effect to the shooter and bystanders. Always wear eye protection when shooting and insist on the same for all onlookers.


    I next examine the case ending with the neck area, looking for swelling and splitting. Shooting expands the brass cartridge casing causing momentary obturation at the chamber. Brass is ductile and upon release of pressure (the bang), relaxes toward (but not reaching) its original diameter. This very relaxation makes case extraction possible. Resizing fired brass to factory diameter is a component step in the reloading process. Repetitive expansion and contraction (following firing and in resizing) both weakens and lengthens the case actually causing work hardening. Splitting around the case neck is the first sign a case may have been reloaded too many times. Annealing (softening the work hardened brass – https://en.wikipedia.org/wiki/Annealing_%28metallurgy%29) the case mouth may rehabilitate a group of brass cases when one exhibits characteristic splitting. Never reload a case with splitting around the opening. I crush such in a vice and discard.


    A die is used in the reloading press to resize the cartridge to factory dimensions http://www.rcbs.com/Products/Dies-by-Category/Group-A-E-Dies/Group-A-Popular-Rifle-Cartridges/Full-Length-Die-Set-Group-A-Popular-Rifle-Cartridg.aspx. This die often decaps the case, removing the spent primer and then expands the neck to proper internal dimension. Should I mention that the dies being used in the reloading processes must match the cartridge being reloaded? There are exceptions, for instance .357 Magnum dies can be used to reload .38 Special, .44 Magnum dies can be used to reload .44 Special but such tends to be the exception rather than the rule and generally apply to certain straight walled cases. On the other hand, a neck sizing die for 7.62x51NATO and .308 Win are interchangeable and may be used with the .30-‘06; shell holders for .30-‘06 can be used for 7.62x51NATO, .308 Win, and .45acp and other cartridges based upon the .30-‘06 rim base dimensions. Loading manuals publish factory dimensions for both bullets and cases as well as trim to length dimensions. Be sure you understand all limitations and restrictions before making any substitution of die/cartridge/shell holder. Errors in application can cause the case to not achieve obturation and/or produce excess pressures resulting in catastrophic weapon failure. An error in the shell holder application may result in a case stuck in the resizing die. This is not a die ending event (a pun) and the stuck case can be extracted but at the expense of lost time and measure of frustration.


    Bench loaders striving for ultimate accuracy and reloading ammunition for a specific weapon only, may just neck size fired brass. Most however desire their ammunition to function in any weapon so full length resizing is most often used. Reloading dies most commonly come in three diameters with 7/8×14 thread the most common. Rifle calibers often require only two dies, full-length resizing/decapping/neck expanding and bullet seating. Pistol calibers are typically straight wall cases and may require three or four dies. Dies are made of hardened tool steel, some with a carbide steel insert. The latter are more expensive but preferable as no resizing lubricant is required. http://www.rcbs.com/Products/Dies-by-Category/Group-A-E-Dies/Group-E-Straight-Walled-Cartridges/3-Die-Carbide-Taper-Crimp-Set-Group-E-Straight-Wal.aspx.


    Reloading presses secure the brass case and provide a method for forcing it into and removal from the various reloading dies. The simplest of presses is the single stage RCBS Rock Chucker Supreme http://www.rcbs.com/Products/Presses-and-Kits/Single-Stage/Rock-Chucker-Supreme-Press.aspx. I’ve used the predecessor Rock Chucker press for more than a half century and are available for about $100 used. http://www.ebay.com/itm/RCBS-RC-Rock-Chucker-Reloading-Press-w-Primer-Punch-Lee-Lyman-Hornady-/191925134037.

    Volume reloaders may desire a progressive or turret press to speed the loading process http://www.rcbs.com/Products/Presses-and-Kits/Turret/Turret-Press.aspx or a real high speed progressive press made by Dilllon http://www.dillonprecision.com/super-1050_8_1_23877.html.


    The Lyman 310 tool is a time proven cheap entry to the reloading world http://www.lymanproducts.com/lyman/dies/lyman-310-tool.php. Its portability and simplicity make it a good item for deep stores. Lee also makes a hand reloading tool http://leeprecision.com/lee-loader-9mm-luger.html. I have a now obsolete Lyman Tru Line Jr. turret press that I use for small pistol cartridges. This press uses the same dies as the Lyman 310 tool (5/8×30 dies).


    THE MECHANICS

    After inspection, fired brass is lubricated if necessary, decapped and resized.  http://www.cabelas.com/product/RCBS-reg-Case-Lube/741087.uts?productVariantId=1324051&WT.tsrc=PPC&WT.mc_id=GoogleProductAds&WT.z_mc_id1=25794311&rid=20&gclid=CK_U_a65_c0CFZaMaQodrjQE1Q&gclsrc=aw.ds.


    Primer pockets are cleaned and reamed if necessary. The length of the resized cartridge is measured using the vernier caliper and compared with published specification. If too long, I trim to published length using the RCBS Trim Pro #2 cutter http://www.rcbs.com/Products/Case-Preparation/Case-Trimming/Trim-Pro-2-Manual-Case-Trimmer-Kit.aspx equipped with three way cutting head http://www.rcbs.com/Products/Case-Preparation/Case-Trimming/Trim-Pro-3-Way-Cutter.aspx.


    The brass is then cleaned and/or polished (not necessary except for maximum pressure loads but makes for a nice end product) using an ultrasonic cleaner http://www.rcbs.com/Products/Case-Preparation/Case-Cleaning/Ultrasonic-Case-Cleaner-120-VAC.aspx and /or vibratory polisher http://www.rcbs.com/Products/Case-Preparation/Case-Cleaning/Vibratory-Case-Cleaner-120-VAC.aspx.


    At this point the brass casings have been inspected, decapped, trimmed to length, and cleaned. If the brass is straight wall design (.357 Magnum, .44 Magnum, 9mm, .45acp, .45-70, etc.), the case mouth must be very slightly belled to facilitate bullet seating. This is done with an expander die. Some pistol rounds headspace on the case rim (9mm, .45acp, etc.). Caution must be used not to excessively bell nor crimp the case mouth of those type brass cases. Any residual belling after seating the bullet should be removed by adjusting the die to set a slight crimp resulting in straight case shoulder.


    After resizing and before priming (or re-capping), I always measure case length and trim as necessary. The chamfering tool http://www.lymanproducts.com/lyman/case-prep/carbide-case-prep.php eases bullet starting, especially for non-boat tail bullets and can be used to bring overall case length into specification. If you intend to reload more than casually, I recommend the RCBS high capacity case trimmer or better, the Trim Pro 2 http://www.rcbs.com/Products/Case-Preparation/Case-Trimming/Trim-Pro-2-Manual-Case-Trimmer-Kit.aspx that both trims and chamfers in one operation.


    The case is now ready to be primed using either the hand tool or reloading press.


    An essential safety (and convenience item) is a reloading block http://www.rcbs.com/Products/Case-Preparation/Accessories/Universal-Case-Loading-Block.aspx. Some are made from plastic, some from wood, and others aluminum. All are different. A company long out of business produced mine. The loading block holds cases upright after charging with powder. Once all cases are so charged, one can visually cross inspect the powder level for all brass. Take your time with this. Ensure all cases have powder and all powder levels are the same. 1/10 of a grain makes a huge difference in pressure with maximum loadings and may be the difference between a ruptured barrel and an otherwise satisfying bang. Always weigh individual powder charges when loading near or at maximum pressures and work up to them gradually.


    So you may ask, how is powder weighed? Very carefully, I quip. US powder measure is by the grain (an average weight of a grain of cereal such as wheat or barley). By established convention, there are 7000 grains to the pound.


    Almost 60 years ago, I purchased a Redding #2 powder scale. http://www.midwayusa.com/product/658771/redding-2-master-magnetic-powder-scale-505-grain-capacity. It works as well today as when purchased. This is a magnetically dampened all metal balance beam type scale. More modern scales use plastics and at least one manufacturer had problems with static charges on plastic scales. Static charge is of concern in two ways, a spark igniting the powder, and worse affecting dampening causing erratic readings. Buy the Redding #2 and you won’t go wrong. When using a manual scale, a powder trickler is helpful for adding small amounts of powder to the scale pan http://www.rcbs.com/Products/Powder-Measures-and-Scales/Powder-Measures/Tricklers/Powder-Trickler-2.aspx and the Redding trickler is even better https://www.amazon.com/Redding-Reloading-Powder-Trickler-05000/dp/B000PW7KE2/ref=sr_1_3/000-9968453-7225914?ie=UTF8&qid=1468875980&sr=8-3&keywords=redding+scale.


    Along with the trickler, a useful item is the powder measure. A powder measure dispenses an adjustable volume of powder. I like the Lyman #55 powder measure for discharging smaller charges such as for pistol or small rifle cases such as the 5.56x41NATO http://www.lymanproducts.com/lyman/scales-measures/55-std-baffle-stand.php.


    For anything bigger than .30-’06, consistency requires a powder tube of more capacity such as the RCBS charger for .50BMG. If I only had one powder measure it would be the Lyman because of its better design (a 7000 grain charge tube is available as an option). Be sure and measure every 5th or 10th powder charge if using a powder measure. As the powder level in the tube decreases, the level of compaction in the measuring chamber does likewise. From time to time measure volume may need adjusting to compensate for changing density.


    Volume reloaders striving for peak accuracy should consider the combination electronic scales and dispenser made by RCBS, the Chargemaster Pro http://www.rcbs.com/Products/Powder-Measures-and-Scales/Powder-Measures/Electronic/ChargeMaster-Combo-120-VAC.aspx. Users of this fine scale and powder measure desiring grid independence should still purchase a manual scale such as the Redding #2.


    Weigh individual charges when loading near design pressure limit!


    So now we have a block of 50 to 100 carefully inspected, trimmed, polished, primed, and charged cases. All have powder and all powder is at the same level in each case (use a flashlight for inspecting bottle neck cartridges) and any straight walled cases are very slightly belled at the mouth.


    The bullet-seating die is installed in the press. I take a sample factory round and carefully adjust this die until it just contacts the nose of the bullet. That round is then removed and a charged case is installed in the press. A bullet is then started into the bell and this assembly is gently run up into the seating die. Overall cartridge (case + bullet) length is measured and compared to specification and the seating die readjusted as necessary until the bullet is properly seated, any bell at the case mouth is removed, and proper cartridge overall length is achieved.


    The end product is a high quality round of ammunition as good as or better than produced by the factory and at a cheaper cost. By judiciously comparing different powders and charges and different bullets and bullet designs, one can usually develop a custom cartridge for each rifle or pistol whose accuracy far exceeds that possible with factory ammunition.


    Serious shooters often add a chronograph to their reloading apparatus, as the ability to measure muzzle velocity for a particular load is worthwhile in developing trajectory curves for discrete loads. When I was young, pressure was measured by use of a universal bond receiver equipped with a copper crusher gauge. Strain gauges are now commonplace and are much more accurate. While once in the purview of commercial ammunition manufacturers, these tools are increasingly within the cost range of the serious shooter.


    A summary of favorite equipment/manufacturers are as follows:

    Presses: RCBS Rock Chucker

    Volume reloading progressive presses: Dillon

    Powder measure: Lyman #55

    Powder scale (manual): Redding #2

    Powder trickler: Redding

    Case prep tools: Lyman

    Case trimming tools: RCBS

    Shotgun presses (not covered here): MEC Jr. These are available cheap. http://www.ebay.com/itm/MEC-12ga-600-JR-Shot-Shell-Reloading-Press-Vintage-1972-with-Lyman-Handbook-/131875958650

    Bullet casting moulds, pots: Lyman http://www.lymanproducts.com/lyman/bullet-casting/mould-details.php?entryID=28

    Bullet sizing: Lyman 4500 Lube sizer (will seat gas checks) http://www.lymanproducts.com/lyman/bullet-casting/4500-lube-sizer.php

    Shotgun buckshot and slug moulds: Lee https://www.amazon.com/Lee-Precision-Buck-Shot-18-Mold/dp/B005Y50H5O; http://leeprecision.com/1-oz-slug-mold.html


    Pistol shooters in particular can greatly reduce the cost of reloaded ammunition by casting their own bullets from automotive wheel weights. Another more complicated process for producing higher quality rifle and pistol bullets is called swaging. Casting and swaging are rightfully topics of an additional post and if interested let me know.


    Reloading has many discrete steps and appropriate caution must be applied at each stage of the process. If you are uncertain, don’t do it. I began reloading as a pre-teen and shot competitively for some years afterward. Reloading is a very useful and cost saving process for the active shooter.


    The Lyman Reloading introduction guide is available at: http://www.lymanproducts.com/lyman/presses-and-kits/pdf/IntroToReloading.pdf


    In all things, follow the motto of Davy Crockett, ‘be sure you’re right and then go ahead.’ Marksmanship is a perishable skill set and reloading offers more bang for the buck.


    Hope this helps someone.


    Panhandle Rancher