Tag: survival kit

  • The Ultimate Bug Out Food Bar

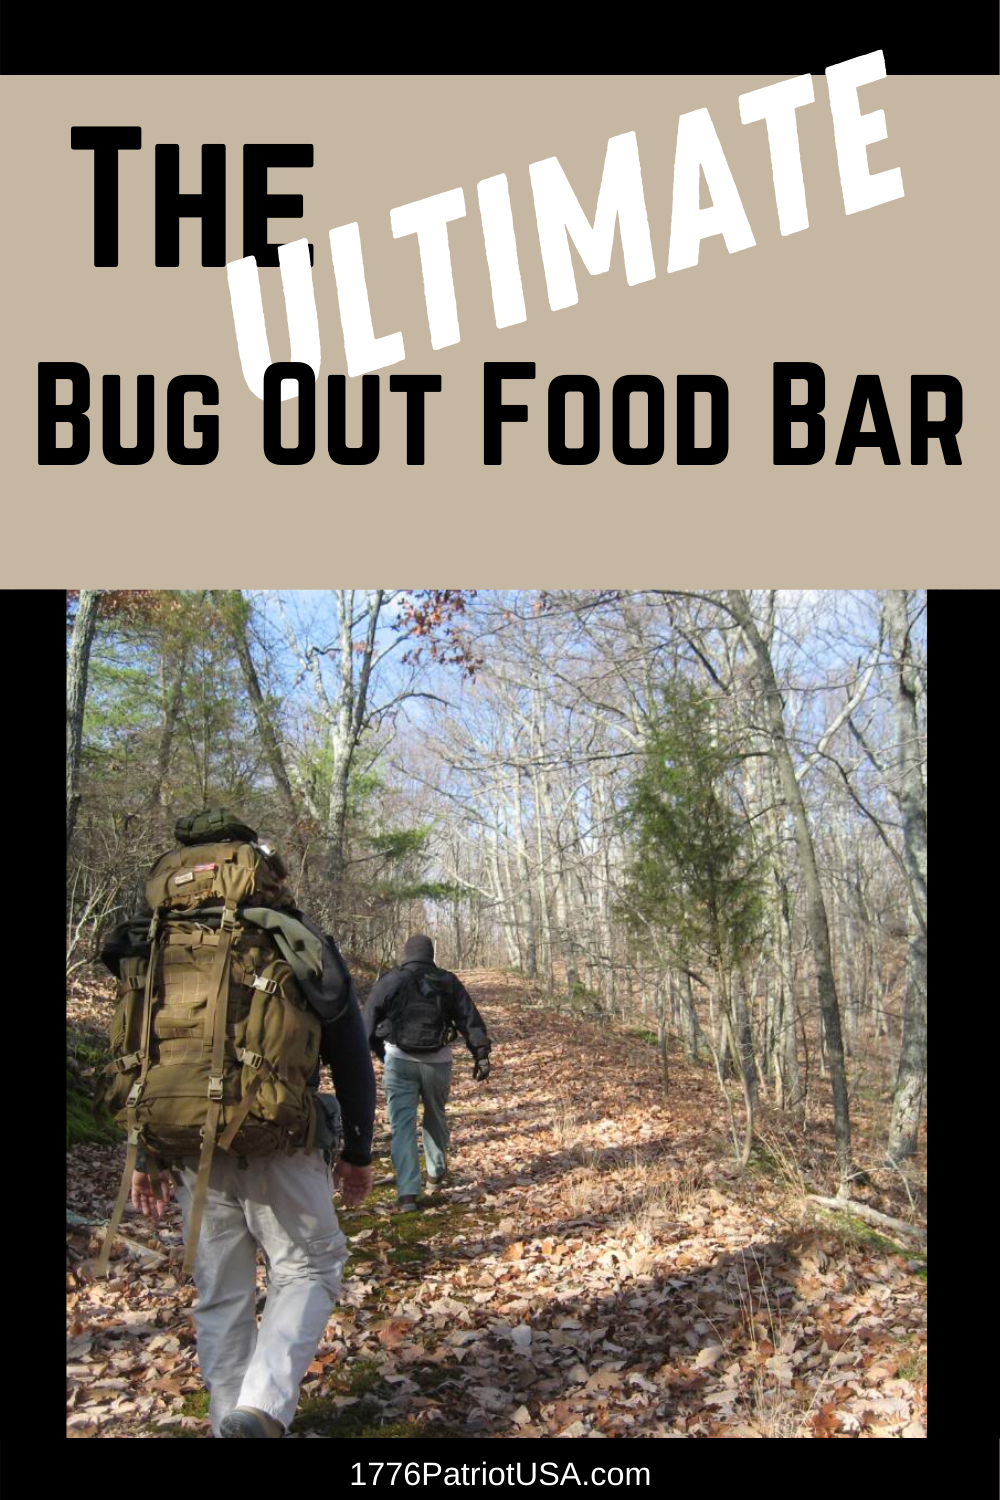
    The Ultimate Bug Out Food Bar

    bugging out, food, food bar, survival, prepper, preparedness

    There is a huge market for specialty prepper food bars made just for survival kits and bug-out bags. I’m not talking about those 3,600-calorie bricks of cardboard that will enable you to try out your emergency dental kit. I’m talking high calorie, high protein energy bars that were developed by some “Navy Seal” and due to the “precise ingredient mix” allows them to attain a “tactical” level of existence. Yes – a bit of sarcasm thrown in.

    While many of these survival bars are great – they are also expensive and often difficult to find. There are alternatives right around the corner and down the street at the checkout of your local grocery store and corner market. That’s right – the candy bar.

    After taste-testing close to a dozen of the top-selling candy bars(it’s a tough job but someone has to do it) and evaluating the nutritional and environmental ruggedness of each I came to one conclusion:

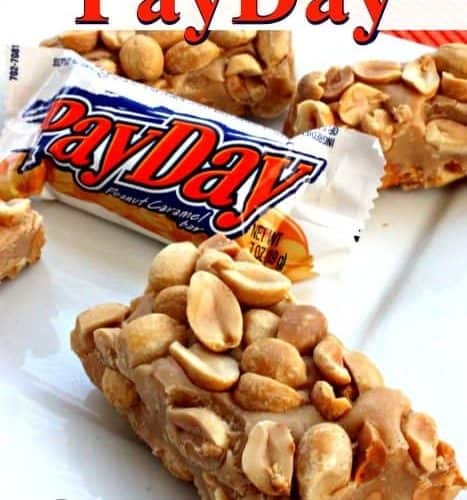
    The Payday Peanut Caramel Bar is the ULTIMATE bug-out bag food bar.

    So – why does the Payday rank so high?

    While a Snickers bar combines that ultimate combination of chocolate, caramel, nougat, and peanuts the extreme heat sitting in a vehicle trunk will leave that Snickers looking like something created after eating at Taco Bell.

    By the way – what the hell is nougat?

    Anyways – while the Payday will soften inside a hot car it doesn’t become a disaster like any chocolate confection. The combination of peanuts and caramel taste great and provide a very high-calorie protein boost.

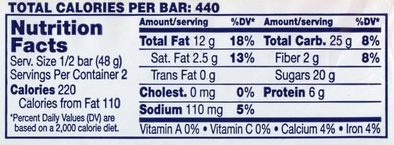
    Here is the nutrient breakdown for the KING SIZE Payday bar:

    In the King Size format, there are two smaller bars in one pack. For the entire 2 bar pack, there are 440 calories, 50 grams of carbs, 24 grams of fat, and 12 grams of protein. For someone expending a lot of energy via walking, running, or physical labor this is some serious fuel.

    Shelf life pales in comparison to many of the more expensive cardboard survival bars. 6-12 months or so is a good estimate depending on storage conditions. Running less than $3.00 per Payday bar they are extremely affordable.

    So – when the asteroids are pummeling through the Earth’s atmosphere and zombies are crossing the railroad tracks to eat your brain and you need some quick energy – make it a Payday.

    Rourke

    tactical, shooting, deals, save money, prepping, ammunition, firearms, daily deals

    [ecwid_product id=”381953032″ display=”picture title price options addtobag” version=”2″ show_border=”1″ show_price_on_button=”1″ center_align=”0″][ecwid_product id=”469631828″ display=”picture title price options addtobag” version=”2″ show_border=”1″ show_price_on_button=”1″ center_align=”0″]

  • Let’s Build a Survival Kit(Part 12) – COMPLETE

    Let’s Build a Survival Kit(Part 12) – COMPLETE

    We’ve had some fun designing and building this survival kit together. Here is Part 12 in the series where each week we have voted on a new item(s) to add to the kit and see the results from the previous week. Well – the kit is now complete.

    Back when I first got involved in preparedness there were lots of discussions about “survival kits.” Nowadays, there are INCH bags, Bug Out bags, Get Home bags, and many more. I may be a bit old school but I’m going back to my roots and survival kit it is.

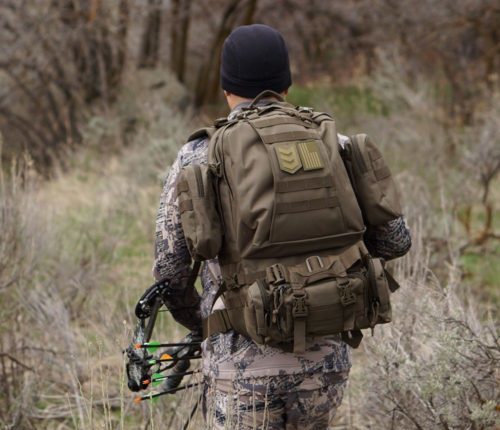
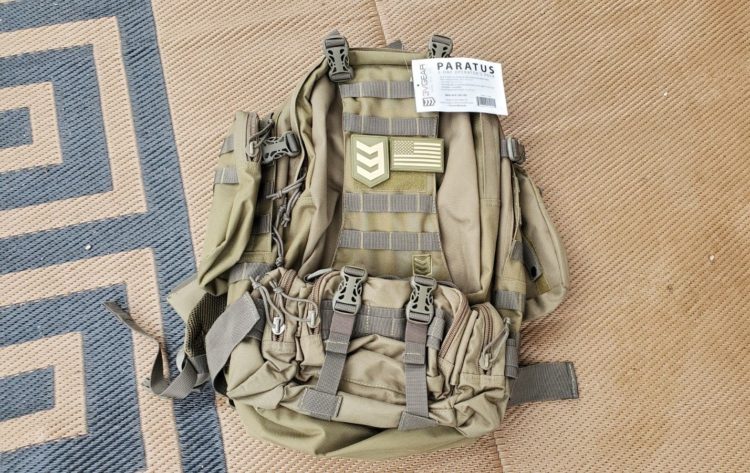
    Here’s the bag we started with: The Paratus 3-Day Operator’s Pack. The Paratus is a popular pack and often considered the “Prepper’s Backpack” as it is high quality, rugged, extremely versatile, and budget-friendly. Cost is phenomenal at well under $100.

    There’s no survival kit that will fit the bill for everyone. There are far too many factors that cannot be considered to make one kit for everyone. Over the past few months, we’ve selected a variety of items covering shelter, food, cooking, defense, etc. I’ve rounded out the kit with a few more commonsense items. I’ve got them listed below and many of which were mentioned in the comments from Part 11.

    Hey – this is the kit at this point. Have no doubt there will be additions, subtractions, and adjustments. Seasonal changes will also be made due to temperature and weather changes.

    It’s been fun!!

    Take care all.

    Rourke


    Here’s the survival kit:

    Paratus 3-Day Operator’s Pack

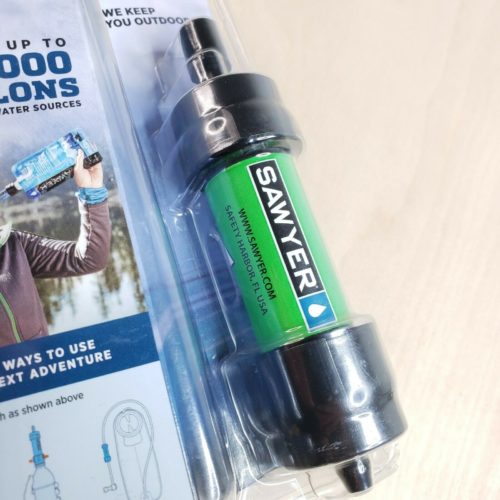
    Sawyer Mini Water Filter

    Mora Survival Knife

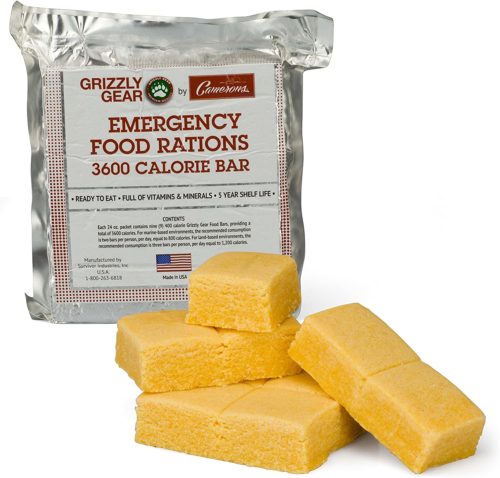
    Mountain House Chili Mac and a pack of Emergency 3600-Calorie Ration Bars

    Mountain House Breakfast Skillet

    Mountain House Rice & Chicken

    Mountain House Lasagna and Meat Sauce

    Payday Candy Bars

    First Aid Supplies

    Skysted 1200 Lumen Flashlight

    CANAWAY Backpacking Stove

    Stanley Adventure Camp Cook Set

    YODO Lightweight Two Person Tent

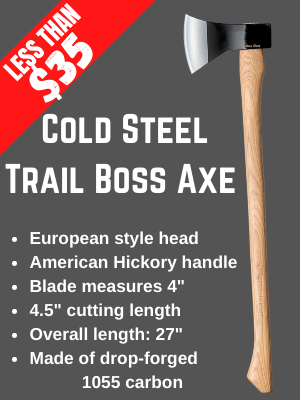
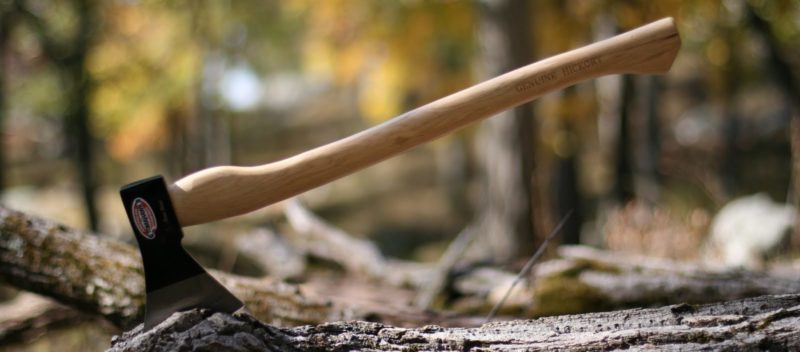
    Cold Steel Trail Boss Axe

    Wet Wipes

    Toilet Paper

    Hand Sanitizer

    Toothbrush and Toothpaste

    Hand Towel, small

    Mechanix Wear Durahide FastFit Gloves/gloves

    Map of Area

    Firestarting Kit: Bic lighters, matches, cotton balls & vaseline, charcloth, ferro rod

    Camping Spork

    3V Scout 2 Liter Water Bladder

    Defensive Tools

    Petzl 250-lumen Headlamp

    125-ft. Microline w/Dispenser – fantastic cordage. Paracord is often overkill for many jobs

    Heavy Duty Ziploc Bag filled with:

    Misc foods such as oatmeal, Ramen Noddles, a bit of hard candy, granola, jerky

    Seasonings – salt & pepper packets, multiuse seasonings

    Smaller Ziploc bags of rice

    Honey in a small squeeze bottle

    Vegetable oil in a small squeeze container(for cooking)

    Chicken bullion cubes

    Plastic Utensil Set

    Frogg Toggs Poncho

    Repel Insect Repellent

    Baofeng UV5R with Extended Antenna

    Backup Baofeng Battery

    Cold Steel, axe, Trail Boss, survival, preparedness, emergency

  • Let’s Build a Survival Kit(Part 11) – More Food!

    Let’s Build a Survival Kit(Part 11) – More Food!

    We’re going to have some fun designing and building this survival kit together and we are well on our way. Here is Part 11 in the series where each week we will vote on a new item(s) to add to the kit and see the results from the previous week. Well – sorta. This week we will discuss defense items, but, no voting. Be patient – you’ll see below.

    Back when I first got involved in preparedness there were lots of discussions about “survival kits.” Nowadays, there are INCH bags, Bug Out bags, Get Home bags, and many more. I may be a bit old school but I’m going back to my roots and survival kit it is.

    Here’s the bag we started with: The Paratus 3-Day Operator’s Pack. The Paratus is a popular pack and often considered the “Prepper’s Backpack” as it is high quality, rugged, extremely versatile, and budget-friendly. Cost is phenomenal at well under $100.

    Here’s what we’re going to do. Every week(or so) I’ll post a category of products along with several choices to choose from. Everyone will vote on which items to put in the bag. When the voting is over I’ll buy the selected item and add it to the bag. With each new week, I’ll update what we’ve put in the bag until the kit is completed.

    LAST INSTALLMENT: We discussed defensive tools related to a survival kit and situations where a survival kit might be needed.

    THIS WEEK: We’ve got the bag, a water filter, a knife, a bit of food, some first aid supplies, a flashlight, a cookstove, an ax, cook set, and a tent, various supplies, the 3V water bladder, and a method to defend ourselves – – Let’s discuss food once again.

    FOOD

    Without food, we simply do not have the energy to perform much-needed tasks even in normal modern times let alone when the feces hit the oscillating blades. While we cannot accurately predict how exactly this survival kit might come into play – I can make some assumptions that caloric expenditures will be much higher than normal.

    Food.

    We’ve already added some emergency food bars and freeze-dried food to the kit. It’s not enough. What’s next?

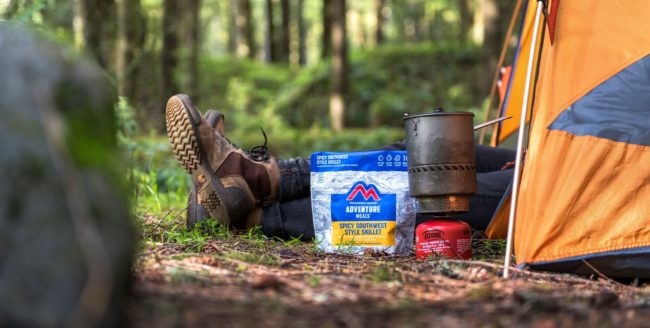
    More. To me, freeze-dried food is ideal for a survival kit due to its low weight and easy preparation. There are some other shorter shelf-life foods that also work well.

    So….here’s the selection for this round. Vote for THREE selections:

    [poll id=”12″]

    Here are links to the items in the poll – – >

    Mountain House Breakfast Skillet

    Payday Candy Bar – local store

    Mountain House Rice & Chicken

    Mountain House Lasagna and Meat Sauce

    Mountain House Scrambled Eggs and Bacon

    The kit is nearing completion.

    Stay tuned!

    Rourke


    What else would you recommend for the kit? Comment below!!!


    Here’s the survival kit so far:

    Paratus 3-Day Operator’s Pack

    Sawyer Mini Water Filter

    Mora Survival Knife

    Mountain House Chili Mac and a pack of Emergency 3600-Calorie Ration Bars

    First Aid Supplies

    Skysted 1200 Lumen Flashlight

    CANAWAY Backpacking Stove

    Stanley Adventure Camp Cook Set

    YODO Lightweight Two Person Tent

    Cold Steel Trail Boss Axe

    Wet Wipes

    Toilet Paper

    Hand Sanitizer

    Toothbrush and Toothpaste

    Hand Towel, small

    Mechanix Wear Durahide FastFit Gloves/gloves

    Map of Area

    Firestarting Kit: Bic lighters, matches, cotton balls & vaseline, charcloth, ferro rod

    Camping Spork

    3V Scout 2 Liter Water Bladder

    Defensive Tools

    Cold Steel, axe, Trail Boss, survival, preparedness, emergency

  • Let’s Build a Survival Kit(Part 10) – THOUGHTS ON DEFENSE

    Let’s Build a Survival Kit(Part 10) – THOUGHTS ON DEFENSE

    We’re going to have some fun designing and building a survival kit together and we are well on our way. Here is Part 10 in the series where each week we will vote on a new item(s) to add to the kit and see the results from the previous week. Well – sorta. This week we will discuss defense items, but, no voting. Be patient – you’ll see below.

    Back when I first got involved in preparedness there were lots of discussions about “survival kits.” Nowadays, there are INCH bags, Bug Out bags, Get Home bags, and many more. I may be a bit old school but I’m going back to my roots and survival kit it is.

    Here’s the bag we started with: The Paratus 3-Day Operator’s Pack. The Paratus is a popular pack and often considered the “Prepper’s Backpack” as it is high quality, rugged, extremely versatile, and budget-friendly. Cost is phenomenal at well under $100.


    Here’s what we’re going to do. Every week(or so) I’ll post a category of products along with several choices to choose from. Everyone will vote on which items to put in the bag. When the voting is over I’ll buy the selected item and add it to the bag. With each new week, I’ll update what we’ve put in the bag until the kit is completed.

    LAST INSTALLMENT: Last we looked at ways of carrying water:

    The 3V Scout Water Bladder won out which is perfect as it is made for the Paratus backpack. The bladder was ordered and has been received.

    THIS WEEK: We’ve got the bag, a water filter, a knife, a bit of food, some first aid supplies, a flashlight, a cookstove, an ax, cook set, and a tent, various supplies, and the 3V water bladder- – Let’s discuss defensive tools.

    DEFENSE

    People that put together survival kits live in numerous geographical regions, with a vast array of cultures, climates, and gun laws. With that said listing a few firearms and defensive tools here and voting on them simply won’t make sense for most people.

    What works for one may not work for another ten. I’ll tell you what works for me(and it could change at any time).

    My EDC consists of a Sheild 9mm pistol, with a couple of extra mags. Within my transport is a kit consisting of my SHTF weapon and a complete battle belt. At this time I see no need to include any additional pistol or rifle.

    OPTIONS

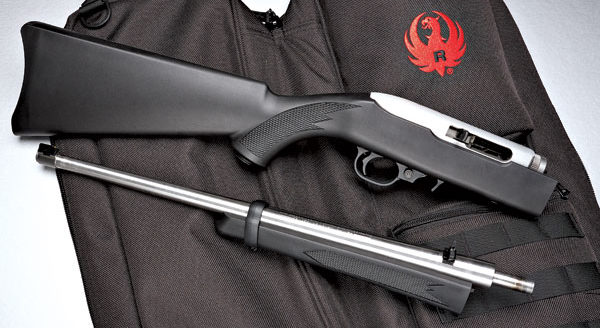
    .22LR: I could certainly see a time when I may want a .22LR pistol or rifle. A takedown Ruger 10/22 with a few BX-25 magazines and 300 rounds of CCI Mini-Mags would be light and extremely versatile. It would excel at taking small game and from a defensive perspective is certainly much better than bad language.

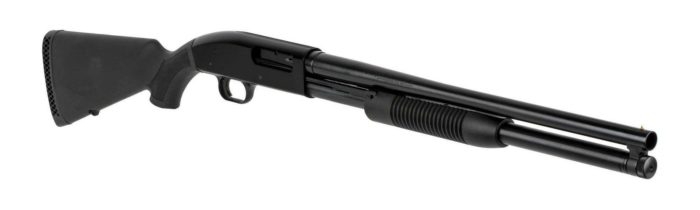
    Shotgun: I’m not a huge fan of the shotgun but it is probably the most versatile firearm out there. A standard pump-action can be used to take deer at distance, and birds close up. Motorcycle-riding evil brigands will soil their pants seeing a 12 gauge pointed in their direction.

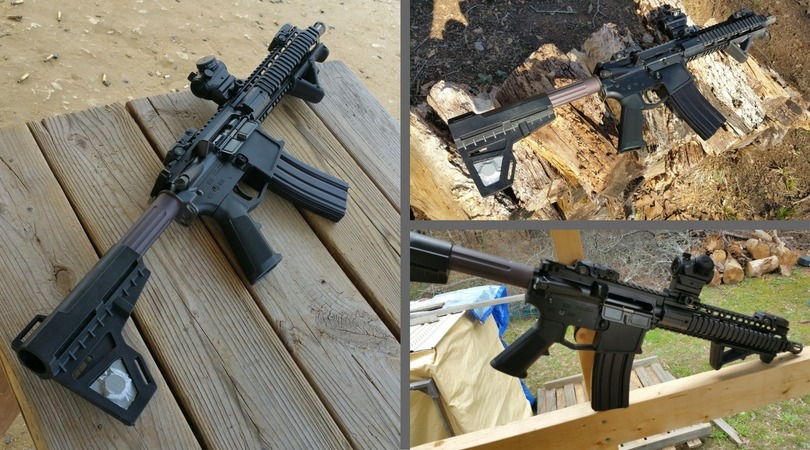
    Beyond a .22LR and a shotgun I do not see many alternatives to a standard duty pistol and an AR. Remember – we are talking defensive firearms that could also serve other functions as well. Your mileage may vary.

    FINAL THOUGHTS

    If by some unfortunate set of circumstances I am having to rely on this survival kit, “defense” will start with avoidance. I would avoid trouble at all costs.

    The kit is nearing completion.

    Stay tuned!

    Rourke


    What else would you recommend for the kit? Comment below!!!


    Here’s the survival kit so far:

    Paratus 3-Day Operator’s Pack

    Sawyer Mini Water Filter

    Mora Survival Knife

    Mountain House Chili Mac and a pack of Emergency 3600-Calorie Ration Bars

    First Aid Supplies

    Skysted 1200 Lumen Flashlight

    CANAWAY Backpacking Stove

    Stanley Adventure Camp Cook Set

    YODO Lightweight Two Person Tent

    Cold Steel Trail Boss Axe

    Wet Wipes

    Toilet Paper

    Hand Sanitizer

    Toothbrush and Toothpaste

    Hand Towel, small

    Mechanix Wear Durahide FastFit Gloves/gloves

    Map of Area

    Firestarting Kit: Bic lighters, matches, cotton balls & vaseline, charcloth, ferro rod

    Camping Spork

    3V Scout 2 Liter Water Bladder

    Cold Steel, axe, Trail Boss, survival, preparedness, emergency

    tactical, shooting, deals, save money, prepping, ammunition, firearms, daily deals

  • Let’s Build a Survival Kit(Part 9) – CARRYING WATER

    Let’s Build a Survival Kit(Part 9) – CARRYING WATER

    We’re going to have some fun designing and building a survival kit together and we are well on our way. Here is Part 9 in the series where each week we will vote on a new item(s) to add to the kit and see the results from the previous week.

    Back when I first got involved in preparedness there were lots of discussions about “survival kits.” Nowadays, there are INCH bags, Bug Out bags, Get Home bags, and many more. I may be a bit old school but I’m going back to my roots and survival kit it is.

    Here’s the bag we started with: The Paratus 3-Day Operator’s Pack. The Paratus is a popular pack and often considered the “Prepper’s Backpack” as it is high quality, rugged, extremely versatile, and budget-friendly. Cost is phenomenal at well under $100.


    Here’s what we’re going to do. Every week(or so) I’ll post a category of products along with several choices to choose from. Everyone will vote on which items to put in the bag. When the voting is over I’ll buy the selected item and add it to the bag. With each new week, I’ll update what we’ve put in the bag until the kit is completed.

    LAST INSTALLMENT: Last we looked at added some common supplies, including:

    These are fairly universal additions so not voting on them.

    THIS WEEK: We’ve got the bag, a water filter, a knife, a bit of food, some first aid supplies, a flashlight, a cookstove, an ax, cook set, and a tent, and various supplies – – Let’s take a look at how we can carry water.

    Let’s pick TWO methods for carrying water:

    [poll id=”11″]


    Here are links for more information on this week’s choices……

    What else would you recommend for the kit? Comment below!!!

    Putting this kit together weekly(or so) like this is going to take a while. I may throw up a few different items within the same article.

    Also – we may explore why a kit such as this may be needed, or come in handy at some point. Time will tell.

    Take care all –

    Rourke

    Here’s the survival kit so far:

    Paratus 3-Day Operator’s Pack

    Sawyer Mini Water Filter

    Mora Survival Knife

    Mountain House Chili Mac and a pack of Emergency 3600-Calorie Ration Bars

    First Aid Supplies

    Skysted 1200 Lumen Flashlight

    CANAWAY Backpacking Stove

    Stanley Adventure Camp Cook Set

    YODO Lightweight Two Person Tent

    Cold Steel Trail Boss Axe

    Wet Wipes

    Toilet Paper

    Hand Sanitizer

    Toothbrush and Toothpaste

    Hand Towel, small

    Mechanix Wear Durahide FastFit Gloves/gloves

    Map of Area

    Firestarting Kit: Bic lighters, matches, cotton balls & vaseline, charcloth, ferro rod

    Camping Spork

    Cold Steel, axe, Trail Boss, survival, preparedness, emergency

    tactical, shooting, deals, save money, prepping, ammunition, firearms, daily deals

  • Let’s Build a Survival Kit(Part 8) – STUFF!!!!!

    Let’s Build a Survival Kit(Part 8) – STUFF!!!!!

    We’re going to have some fun designing and building a survival kit together. Here is Part 8 in the series where each week we will vote on a new item(s) to add to the kit and see the results from the previous week.

    Back when I first got involved in preparedness there were lots of discussions about “survival kits.” Nowadays, there are INCH bags, Bug Out bags, Get Home bags, and many more. I may be a bit old school but I’m going back to my roots and survival kit it is.

    Here’s the bag we started with: The Paratus 3-Day Operator’s Pack. The Paratus is a popular pack and often considered the “Prepper’s Backpack” as it is high quality, rugged, extremely versatile, and budget-friendly. Cost is phenomenal at well under $100.


    Here’s what we’re going to do. Every week(or so) I’ll post a category of products along with several choices to choose from. Everyone will vote on which items to put in the bag. When the voting is over I’ll buy the selected item and add it to the bag. With each new week, I’ll update what we’ve put in the bag until the kit is completed.

    LAST WEEK: Last week we looked at adding a cook set, shelter, and tools. The winners were as follows:

    Stanley Adventure Camp Cook Set

    YODO Lightweight Two Person Tent

    Cold Steel Trail Boss Axe

    Good choices. I just received the YODO tent and I’m looking forward to checking it out. I’ll definitely give it a good spray of rain protectant.

    THIS WEEK: We’ve got the bag, a water filter, a knife, a bit of food, some first aid supplies, a flashlight, a cookstove, an ax, cook set, and a tent – – so now I’ll list a few basic supply items most everyone would agree with to add.

    Common survival kit items adding this week:

    What else would you recommend for the kit? Comment below!!!

    Putting this kit together weekly(or so) like this is going to take a while. I may throw up a few different items within the same article.

    Also – we may explore why a kit such as this may be needed, or come in handy at some point. Time will tell.

    Take care all –

    Rourke

    Here’s the survival kit so far:

    Paratus 3-Day Operator’s Pack

    Sawyer Mini Water Filter

    Mora Survival Knife

    Mountain House Chili Mac and a pack of Emergency 3600-Calorie Ration Bars

    First Aid Supplies

    Skysted 1200 Lumen Flashlight

    CANAWAY Backpacking Stove

    Stanley Adventure Camp Cook Set

    YODO Lightweight Two Person Tent

    Cold Steel Trail Boss Axe

    Wet Wipes

    Toilet Paper

    Hand Sanitizer

    Toothbrush and Toothpaste

    Hand Towel, small

    Mechanix Wear Durahide FastFit Gloves/gloves

    Map of Area

    Firestarting Kit: Bic lighters, matches, cotton balls & vaseline, charcloth, ferro rod

    Camping Spork

    Cold Steel, axe, Trail Boss, survival, preparedness, emergency

    tactical, shooting, deals, save money, prepping, ammunition, firearms, daily deals

  • Let’s Build a Survival Kit(Part 7) – Food Prep, Shelter, and Tools

    Let’s Build a Survival Kit(Part 7) – Food Prep, Shelter, and Tools

    We’re going to have some fun designing and building a survival kit together. Here is Part 7 in the series where each week we will vote on a new item(s) to add to the kit and see the results from the previous week.

    Back when I first got involved in preparedness there were lots of discussions about “survival kits.” Nowadays, there are INCH bags, Bug Out bags, Get Home bags, and many more. I may be a bit old school but I’m going back to my roots and survival kit it is.

    Here’s the bag we started with: The Paratus 3-Day Operator’s Pack. The Paratus is a popular pack and often considered the “Prepper’s Backpack” as it is high quality, rugged, extremely versatile, and budget-friendly. Cost is phenomenal at well under $100.


    Here’s what we’re going to do. Every week(or so) I’ll post a category of products along with several choices to choose from. Everyone will vote on which items to put in the bag. When the voting is over I’ll buy the selected item and add it to the bag. With each new week, I’ll update what we’ve put in the bag until the kit is completed.

    LAST WEEK: Last week we looked at adding a cooking method. The options were as follows:

    Esbit Ultralight Portable Stove with Fuel

    Camping Portable Backpacking Gas Cook Stove

    Solo Stove Lite

    CANWAY Camp Stove

    The CANAWAY led the pack and has been ordered. I’m really looking forward to getting it.

    THIS WEEK: We’ve got the bag, a water filter, a knife, a bit of food, some first aid supplies, a flashlight, a cookstove – – so now let’s take a look at a few misc categories of survival gear: Food Prep, Shelter, and Tools.

    Vote below(links underneath the polls):

    [poll id=”8″]


    [poll id=”9″]


    [poll id=”10″]

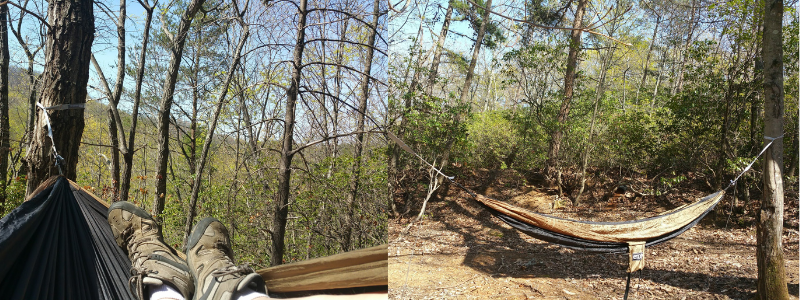
    ****NOTE: If a hammock is selected a tarp will be added later for rain protection

    hammock, camping, camp, sleep system, survival, SHTF, prepper, survival kit, preparedness

    Here are the links if interested:

    Stanley Adventure Camp Cook Set

    MallowMe Camping Cookware & Mess Gear Set

    RedCamp 12-pc Camp Cookware

    ENO SingleNest Hammock

    Wise Owl Outfitters SingleNest Hammock

    SOL UltraLight Outdoor Survival Bivvy

    YODO Lightweight Two Person Tent

    Stansport 2-Person A-Frame Lightweight Tent

    Cold Steel Trail Boss Axe

    Gerber Suspension Multipliers

    REXBETI 11″ Folding Saw


    Putting this kit together weekly(or so) like this is going to take a while. I may throw up a few different items within the same article.

    Also – we may explore why a kit such as this may be needed, or come in handy at some point. Time will tell.

    Take care all –

    Rourke

    Here’s the survival kit so far:

    Paratus 3-Day Operator’s Pack

    Sawyer Mini Water Filter

    Mora Survival Knife

    Mountain House Chili Mac and a pack of Emergency 3600-Calorie Ration Bars

    First Aid Supplies

    Skysted 1200 Lumen Flashlight

    CANAWAY Backpacking Stove

    Cold Steel, axe, Trail Boss, survival, preparedness, emergency

    tactical, shooting, deals, save money, prepping, ammunition, firearms, daily deals

  • Let’s Build a Survival Kit(Part 6) – Cooking

    Let’s Build a Survival Kit(Part 6) – Cooking

    We’re going to have some fun designing and building a survival kit together. Here is Part 6 in the series where each week we will vote on a new item to add to the kit and see the results from the previous week.

    Back when I first got involved in preparedness there were lots of discussions about “survival kits.” Nowadays, there are INCH bags, Bug Out bags, Get Home bags, and many more. I may be a bit old school but I’m going back to my roots and survival kit it is.

    Here’s the bag we started with: The Paratus 3-Day Operator’s Pack. The Paratus is a popular pack and often considered the “Prepper’s Backpack” as it is high quality, rugged, extremely versatile, and budget-friendly. Cost is phenomenal at well under $100.


    Here’s what we’re going to do. Every week(or so) I’ll post a category of products along with several choices to choose from. Everyone will vote on which items to put in the bag. When the voting is over I’ll buy the selected item and add it to the bag. With each new week, I’ll update what we’ve put in the bag until the kit is completed.

    LAST WEEK: Last week we looked at adding a flashlight. The top 4 vote-getters were as follows:

    #1 – Skysted WF-502B CREE XM-L2 LED Single Mode 1200 Lumen Flashlight

    #2 – GearLight LED Headlamp Flashlight S500 [2 Pack]

    #3 – Streamlight 66118 Stylus Pro LED PenLight with Holster, Black

    #4 – Foxelli Headlamp Flashlight GearLight LED Headlamp Flashlight S500 [2 Pack]

    The Skysted is a great light and fantastic value for the price.

    THIS WEEK: We’ve got the bag, a water filter, a knife, a bit of food, some first aid supplies, and a flashlight – – so now let’s take a look at another category of survival gear: COOKING!

    Vote below to chose which cooking set/equipment should go in the bag. This week we are focused on cooking methods rather than preparation equipment.

    [poll id=”7″]

    Here are the links if interested:

    Esbit Ultralight Portable Stove with Fuel

    Camping Portable Backpacking Gas Cook Stove

    Solo Stove Lite

    CANWAY Camp Stove

    Putting this kit together weekly like this is going to take a while. I may throw up a few different items within the same article.

    Also – we may explore why a kit such as this may be needed, or come in handy at some point. Time will tell.

    Take care all –

    Rourke

    Here’s the survival kit so far:

    Paratus 3-Day Operator’s Pack

    Sawyer Mini Water Filter

    Mora Survival Knife

    Mountain House Chili Mac and a pack of Emergency 3600-Calorie Ration Bars

    First Aid Supplies

    Skysted 1200 Lumen Flashlight

    Cold Steel, axe, Trail Boss, survival, preparedness, emergency

    tactical, shooting, deals, save money, prepping, ammunition, firearms, daily deals

  • Let’s Build a Survival Kit(Part 5) – LIGHT

    Let’s Build a Survival Kit(Part 5) – LIGHT

    We’re going to have some fun designing and building a survival kit together. Here is Part 5 in the series where each week we will vote on a new item to add to the kit and see the results from the previous week.

    Back when I first got involved in preparedness there were lots of discussions about “survival kits.” Nowadays, there are INCH bags, Bug Out bags, Get Home bags, and many more. I may be a bit old school but I’m going back to my roots and survival kit it is.

    Here’s the bag we started with: The Paratus 3-Day Operator’s Pack. The Paratus is a popular pack and often considered the “Prepper’s Backpack” as it is high quality, rugged, extremely versatile, and budget-friendly. Cost is phenomenal at well under $100.


    Here’s what we’re going to do. Every week(or so) I’ll post a category of products along with several choices to choose from. Everyone will vote on which items to put in the bag. When the voting is over I’ll buy the selected item and add it to the bag. With each new week, I’ll update what we’ve put in the bag until the kit is completed.

    LAST WEEK: Last week we looked at adding first aid supplies. The top 5 vote-getters were as follows:

    Reminder – this initial entry into the world of first aid was just that – in initial. We will revisit and likely get the rest of last week’s list and then some. Stay tuned as the 1776 Minuteman IFAK will be coming out soon.

    THIS WEEK: We’ve got the bag, a water filter, a knife, a bit of food, and some first aid supplies – – so now let’s take a look at another category of survival gear: LIGHT

    Vote below to chose which flashlight or headlamp should go in the bag. Now we will likely revisit light at least one more time.

    [poll id=”6″]

    When it comes to flashlights I like ON-OFF, that’s it. For a headlamp no issue with red modes, different lumination levels, etc. For a “tactical” flashlight I want ON – and then AS BRIGHT AS FRIGG’N POSSIBLE.

    Something to keep in mind.

    Here are the links if interested:

    Skysted WF-502B CREE XM-L2 LED Single Mode 1200 Lumen Flashlight

    Foxelli Headlamp Flashlight

    GearLight LED Headlamp Flashlight S500 [2 Pack]

    Streamlight 66118 Stylus Pro LED PenLight with Holster, Black

    Putting this kit together weekly like this may take a while. I may throw up a few different items within the same article.

    Also – we may explore why a kit such as this may be needed, or come in handy at some point. Time will tell.

    Take care all –

    Rourke

    Here’s the survival kit so far:

    Paratus 3-Day Operator’s Pack

    Sawyer Mini Water Filter

    Mora Survival Knife

    Mountain House Chili Mac and a pack of Emergency 3600-Calorie Ration Bars

    First Aid Supplies

    Next week I’ll throw some pictures up to show how the kit is coming along.

    tactical, shooting, deals, save money, prepping, ammunition, firearms, daily deals

  • Let’s Build a Survival Kit(Part 4) – First Aid

    Let’s Build a Survival Kit(Part 4) – First Aid

    We’re going to have some fun designing and building a survival kit together. Here is Part 4 in the series where each week we will vote on a new item to add to the kit and see the results from the previous week.

    Back when I first got involved in preparedness there were lots of discussions about “survival kits.” Nowadays, there are INCH bags, Bug Out bags, Get Home bags, and many more. I may be a bit old school but I’m going back to my roots and survival kit it is.

    Here’s the bag we started with: The Paratus 3-Day Operator’s Pack. The Paratus is a popular pack and often considered the “Prepper’s Backpack” as it is high quality, rugged, extremely versatile, and budget-friendly. Cost is phenomenal at well under $100.


    Here’s what we’re going to do. Every week(or so) I’ll post a category of products along with several choices to choose from. Everyone will vote on which items to put in the bag. When the voting is over I’ll buy the selected item and add it to the bag. With each new week, I’ll update what we’ve put in the bag until the kit is completed.

    LAST WEEK: Last week we looked at adding some food. Two items were selected including a pouch of Mountain House Chili Mac and a pack of Emergency 3600-Calorie Ration Bars.

    THIS WEEK: We’ve got the bag, a water filter, a knife, a bit of food – so now let’s take a look at another category of survival gear: First Aid

    Vote below to chose which FIVE first aid items need to go in the bag. Now – I am in development with a couple companies to put together a 1776 Minuteman IFAK(individual first aid kit) and offer it in my survival store. Until released – we will vote on and put a few items in this survival kit.

    [poll id=”5″]

    Take care all –

    Rourke

    Here’s the survival kit so far:

    Paratus 3-Day Operator’s Pack

    Sawyer Mini Water Filter

    Mora Survival Knife

    Mountain House Chili Mac and a pack of Emergency 3600-Calorie Ration Bars

    Next week I’ll throw some pictures up to show how the kit is coming along.

    tactical, shooting, deals, save money, prepping, ammunition, firearms, daily deals

  • Let’s Build a Survival Kit(Part 3) – Food

    Let’s Build a Survival Kit(Part 3) – Food

    We’re going to have some fun designing and building a survival kit together. Here is Part 3 in the series where each week we will vote on a new item to add to the kit and see the results from the previous week.

    Back when I first got involved in preparedness there were lots of discussions about “survival kits.” Nowadays, there are INCH bags, Bug Out bags, Get Home bags, and many more. I may be a bit old school but I’m going back to my roots and survival kit it is.

    Here’s the bag we started with: The Paratus 3-Day Operator’s Pack. The Paratus is a popular pack and often considered the “Prepper’s Backpack” as it is high quality, rugged, extremely versatile, and budget-friendly. Cost is phenomenal at well under $100.


    Here’s what we’re going to do. Every week(or so) I’ll post a category of products along with several choices to choose from. Everyone will vote on which items to put in the bag. When the voting is over I’ll buy the selected item and add it to the bag. With each new week, I’ll update what we’ve put in the bag until the kit is completed.

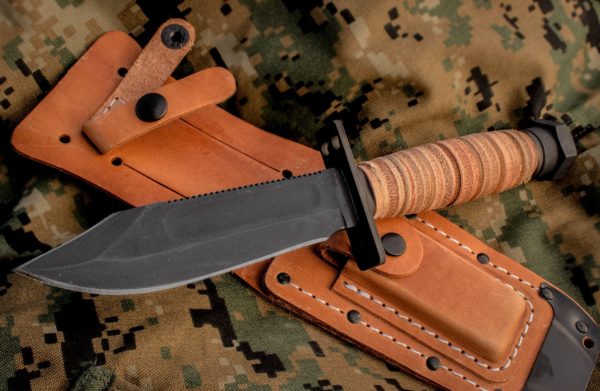
    LAST WEEK: Last week we looked at adding a knife to the kit and it was a close vote. The Ontario Air Force Survival Knife came out on top with the Mora a close second. I have a feeling the Mora may make another appearance. The classic Ontario AF Survival Knife has been ordered and will be added to the bag as soon as it arrives.

    THIS WEEK: We’ve got the bag, a water filter, a knife, so now let’s take a look at another category of survival gear: FOOD

    Vote below to chose which TWO food items needs to go in the bag.

    [poll id=”4″]

    Food will be looked at multiple times. This is merely the first.

    Interested in any of these food options?

    Mountain House Scrambled Eggs & Bacon

    Mountain House Spaghetti with Meat Sauce

    Emergency Ration Bar – 3600 Calories

    Mountain House Gramola with Milk & Blueberries

    Mountain House Chili Mac

    Take care all –

    Rourke

    Here’s the survival kit so far:

    Paratus 3-Day Operator’s Pack

    Sawyer Mini Water Filter

    Ontario Air Force Survival Knife

    Next week I’ll throw some pictures up to show how the kit is coming along.

    tactical, shooting, deals, save money, prepping, ammunition, firearms, daily deals

  • Let’s Build a Survival Kit(Part 2) – Knife

    Let’s Build a Survival Kit(Part 2) – Knife

    We’re going to have some fun designing and building a survival kit together. Here is Part 2 in the series where each week we will vote on a new item to add to the kit and see the results from the previous week.

    Back when I first got involved in preparedness there were lots of discussions about “survival kits.” Nowadays, there are INCH bags, Bug Out bags, Get Home bags, and many more. I may be a bit old school but I’m going back to my roots and survival kit it is.

    Here’s the bag we started with: The Paratus 3-Day Operator’s Pack. The Paratus is a popular pack and often considered the “Prepper’s Backpack” as it is high quality, rugged, extremely versatile, and budget-friendly. Cost is phenomenal at well under $100.


    Here’s what we’re going to do. Every week(or so) I’ll post a category of products along with several choices to choose from. Everyone will vote on which items to put in the bag. When the voting is over I’ll buy the selected item and add it to the bag. With each new week, I’ll update what we’ve put in the bag until the kit is completed.

    LAST WEEK: Last week we looked at water filtration and voted on three different portable filters. The Sawyer Mini Water Filter came out on top, has been ordered, and will be added to the bag as soon as it comes in.

    Sawyer Mini Water Filter, SHTF, preparedness, survival kit, survival,

    THIS WEEK: We’ve got the bag, a water filter, so now let’s take a look at another category of survival gear: KNIVES

    Vote below to chose which knife needs to go in the bag.

    [poll id=”3″]

    Understand that each category – such as water filters, may be represented more than once as redundancy with some items is necessary.

    Interested in any of these knives?

    CIMA-1 Survival Knife – LINK

    Mora Outdoors Knife – LINK

    Schrade SCHF59 Outdoor Knife – LINK

    Ontario Air Force Survival Knife – LINK

    Take care all –

    Rourke

    tactical, shooting, deals, save money, prepping, ammunition, firearms, daily deals

  • Let’s Build a Survival Kit

    Let’s Build a Survival Kit

    We’re going to have some fun designing and building a survival kit together.

    Back when I first got involved in preparedness there were lots of discussions about “survival kits.” Nowadays, there are INCH bags, Bug Out bags, Get Home bags, and many more. I may be a bit old school but I’m going back to my roots and survival kit it is.

    I recently picked up a Paratus 3-Day Operator’s Pack. The Paratus is a popular pack and often considered the “Prepper’s Backpack” as it is high quality, rugged, extremely versatile, and budget-friendly. Cost is phenomenal at well under $100.

    Parratus, backpack, survival kit, bug out, bag, SHTF, prepper, preparedness, building


    Here’s what we’re going to do. Every week(or so) I’ll post a category of products along with several choices to choose from. Everyone will vote on which items to put in the bag. When the voting is over I’ll buy the selected item and add it to the bag. With each new week, I’ll update what we’ve put in the bag until the kit is completed.

    Cool!!

    We’ve got the bag – now let’s take a look at our first category of survival gear: WATER FILTRATION

    Vote below to chose which water filter needs to go in the bag.

    [poll id=”2″]


    Understand that each category – such as water filters, may be represented more than once as redundancy with some items is necessary.

    Interested in the Paratus backpack?

    3V Gear Purchase Link – CLICK HERE

    Amazon Purchase Link – CLICK HERE

    Take care all –

    Rourke

    tactical, shooting, deals, save money, prepping, ammunition, firearms, daily deals

  • Ferro Rod & Tool Sharpener = FIRE

    Ferro Rod & Tool Sharpener = FIRE

    Lately, I’ve been playing around with some different fire starting methods including Ferro rods. With the right tinder, I have been really impressed with the results. While I still enjoy the simplicity and ease of use of a Bic lighter – I see the wisdom in more primitive fire starting methods as well.

    A good friend turned me on to a set of large 1/2″ x 6″ ferrocerium rods. They include a lanyard hole and due to their size are easy to hold. Their sheer mass provides a lot of material for starting hundreds of fires.

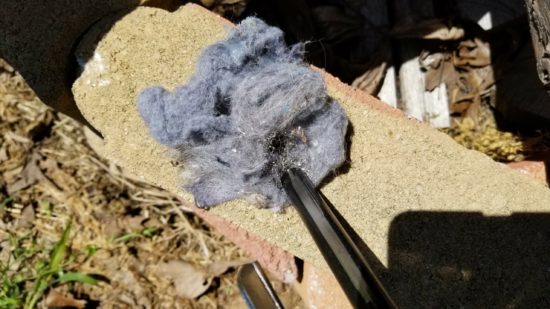
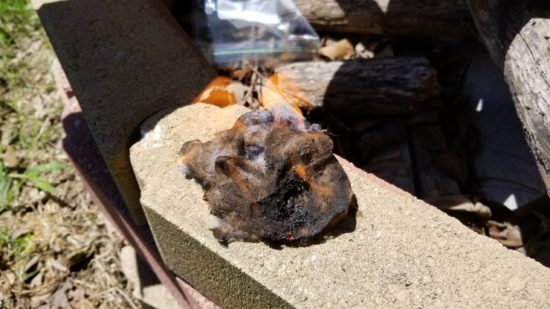
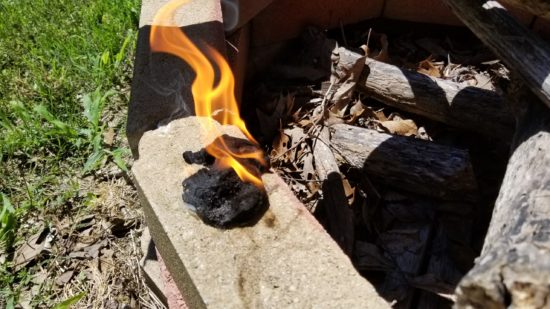
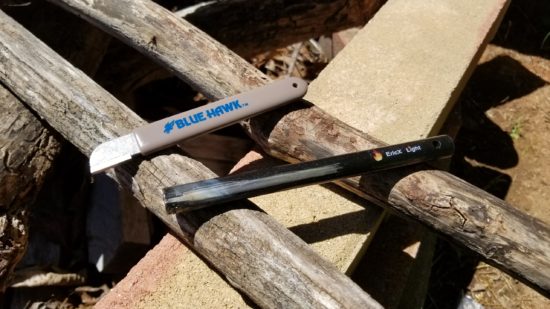
    Here are a few pictures demonstrating the use of the Ferro rod along with a Blue Hawk Tool Sharpener. For a tinder medium, I have dryer lint soaked in some petroleum jelly which is my favorite for fire starting kits.

    ferro rod, fire starting, dryer lint, SHTF, primitive, survival, prepper, preparedness

    Blue Hawk Tool Sharpener / EricX 1/2″ Ferro Rod

     ferro rod, fire starting, dryer lint, SHTF, primitive, survival, prepper, preparedness

    Dryer Lint with Petroleum Jelly


    ferro rod, fire starting, dryer lint, SHTF, primitive, survival, prepper, preparedness

    Using tool sharpener to scrape some shavings onto the dryer lint. The shavings are not necessarily needed.


    ferro rod, fire starting, dryer lint, SHTF, primitive, survival, prepper, preparedness

    Here is a close of the shavings which burn extremely hot.


    ferro rod, fire starting, dryer lint, SHTF, primitive, survival, prepper, preparedness

    A quick strike of the tool sharpener sends a shower of sparks onto the lint – FLAMES!!!!


    ferro rod, fire starting, dryer lint, SHTF, primitive, survival, prepper, preparedness

    The dryer lint/petroleum jelly combo burns for several minutes which is excellent for getting a fire going when needed.

    animated fire, fire starting, survival

    line

    These EricX Ferro rods combined with a good tool sharpener work excellent. At $14.95 with free shipping for two rods, they should fit within almost any budget. Putting together a few fire starting kits? Check these out – you won’t regret it.

    Rourke


    NOTE: Items featured in this article:

    Tool Sharpener – LINK

    EricX Ferro Rod – LINK

  • The Ultimate Bug Out Food Bar

    The Ultimate Bug Out Food Bar

    bugging out, food, food bar, survival, prepper, preparedness

    There is a huge market for specialty food bars made just for survival kits and bug out bags. I’m not talking about those 3,600 calorie bricks of cardboard that will enable you to try out your emergency dental kit. I’m talking high calorie, high protein energy bars that were developed by some “Navy Seal” and due to the “precise ingredient mix” allows them to attain a “tactical” level of existence. Yes – a bit of sarcasm.

    While many of these survival bars are great – they are also expensive and often difficult to find. There are alternatives right around the corner and down the street at the checkout of your local grocery store and corner market. That’s right – the candy bar.

    After taste-testing close to a dozen of the top-selling candy bars(it’s a tough job but someone has to do it) and evaluating the nutritional and environmental ruggedness of each I came to one conclusion:

    The Payday Peanut Caramel Bar is the ULTIMATE bug out bag food bar.

    So – why does the Payday rank so high?

    While a Snickers bar combines that ultimate combination of chocolate, caramel, nougat, and peanuts the extreme heat sitting in a vehicle trunk will leave that Snickers looking like something created after eating at Taco Bell.

    By the way – what the hell is nougat?

    Anyways – while the Payday will soften inside a hot car it doesn’t become a disaster like any chocolate confection. The combination of peanuts and caramel taste great and provide a very high-calorie protein boost.

    Here is the nutrient breakdown for the KING SIZE Payday bar:

    In the King Size format, there are two smaller bars in one pack. For the entire 2 bar pack, there are 440 calories, 50 grams of carbs, 24 grams of fat, and 12 grams of protein. For someone expending a lot of energy via walking, running, or physical labor this is some serious fuel.

    Shelf life pales in comparison to many of the more expensive cardboard survival bars. 6-12 months or so is a good estimate depending on storage conditions. Running less than $2.00 per Payday bar they extremely affordable.

    So – when the asteroids are pummeling through the Earth’s atmosphere and zombies are crossing the railroad tracks to eat your brain and you need some quick energy – make it a Payday.

    Rourke

    tactical, shooting, deals, save money, prepping, ammunition, firearms, daily deals

  • Review: Condor T&T EDC Pouch Kit [2020]

    Review: Condor T&T EDC Pouch Kit [2020]

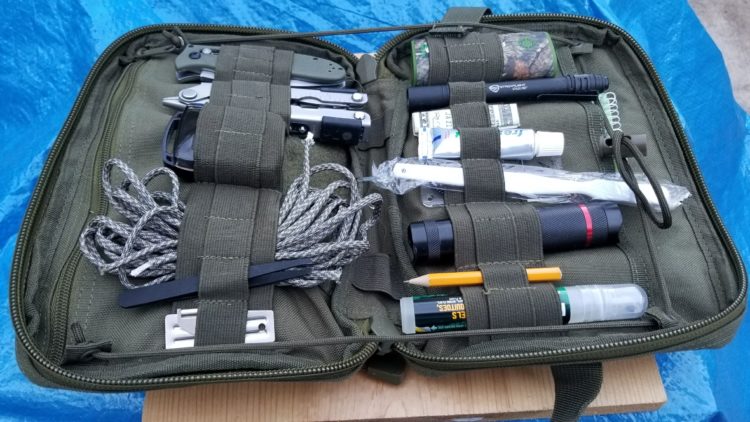
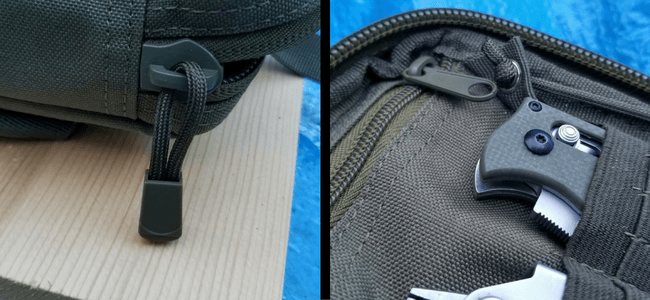
    Something I have been slack in is my EDC. I have a few things in my Jeep but as far as an organized EDC kit that has been absent. I picked up a Condor T&T pouch a few months ago and finally got around to throwing some stuff in it. My intended purpose for the EDC kit is purely to organize a variety of items not commonly found in a vehicle but could prove very useful. The Condor T&T functions well in this regard as it has a variety of pockets and stretchy loops which to place things.Condor T&T, EDC, pouch, kit, EDC, review, survival, bug out

    While the Condor can be thrown in a bug out bag or survival kit, mine rests in the back of the Jeep.

    Contents:


    Condor Materials & Construction

    The construction of the Condor is excellent. The material is something similar to Cordura. Stitching is tight and all seams are double-stitched everywhere. The zipper appears to be oversized for the application which is just fine for me. Seems rugged enough to last years riding in my Jeep or inside a pack.

    Condor T&T, review, EDC, prepper, SHTF

    Features

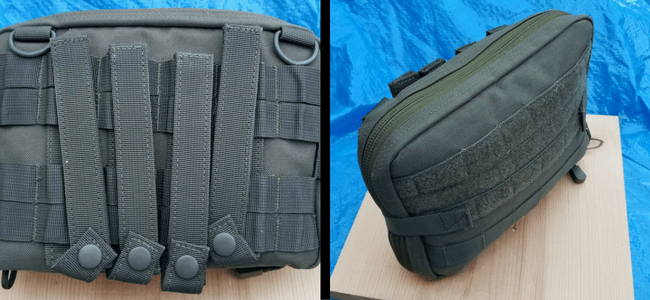
    Size of the pack is 10″ x 7″ x 1.5″. While accurate the thickness of 1.5″ is when empty. Once loaded it expands out and mine is between 3″ and 4″ thick. Weight is just under one pound.

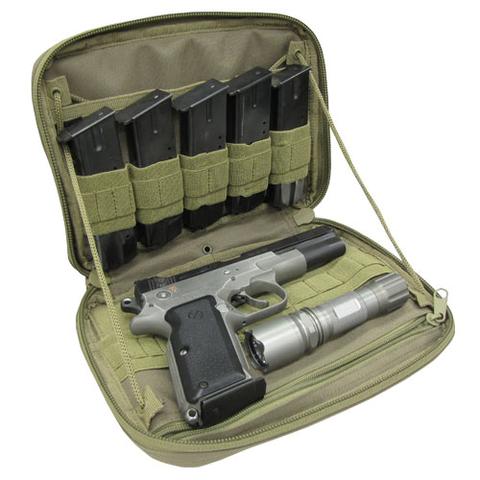
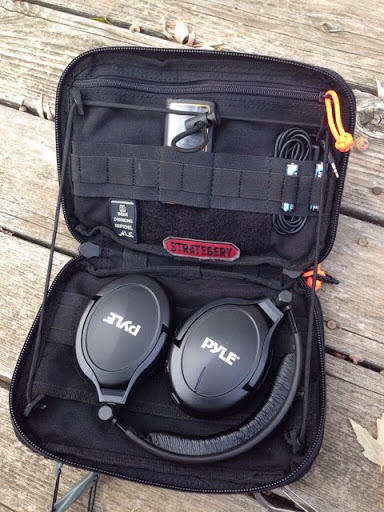
    For organizing supplies, the pouch has one internal sleeve, one zipper pocket, and numerous elastic loops of different sizes on both halves. The elastic pockets are sized to hold things like AA batteries up to multi-tools. A lot of gear can be stored for easy access.

    The Condor T&T can be mounted via 4 Molle straps or left independent. There are two D-rings on each top corner. These can be used to hang the pouch or attach it using a variety of means.

    Condor, EDC, review, T&T pouch, survival kit,

    Versatile

    Beyond survival & preparedness type items there are a lot of uses for the Condor pouch. Some examples include organizing charging cables, battery packs, and chargers. The T&T pouch can make a great first aid kit. The pouch can also be used to hold small tools for electronics or bike repairs. The sky’s the limit!!!

    Summary

    At around $25 the Condor T&T pouch is well worth it. Its build quality is excellent and its versatility lends itself to many roles. I can see owning 3-4 of these and use them for things like tools, electronics, and first aid.

    RECOMMENDED.

    Rourke

  • DIY: Making Waterproof Matches In Two Simple Steps

    DIY: Making Waterproof Matches In Two Simple Steps


    While my “Go To” firestarter is a Bic lighter, matches are super cheap and widely available. One problem is they are very susceptible to moisture. Ever try lighting a soggy match? Yeah. Kinda like trying to write on wet paper. Try as you might the outcome is not very desirable.

    Waterproof matches are available however they run a steep premium over standard wooden matches. Solution? You can buy inexpensive wooden matches and waterproof them yourself.


    Making Waterproof Matches

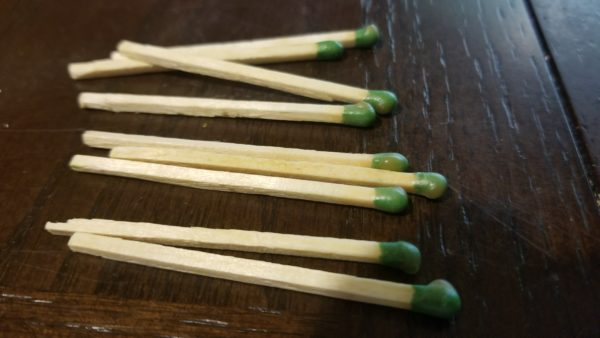
    STEP #1: Dip the ends of the wooden matches into melted candle wax. Set the matches with the waxed tips hanging off the edge of a table.


    STEP #2: Once the matches have cooled inspect to ensure that each match head is completely covered in wax.

    Gee…..that was hard. 

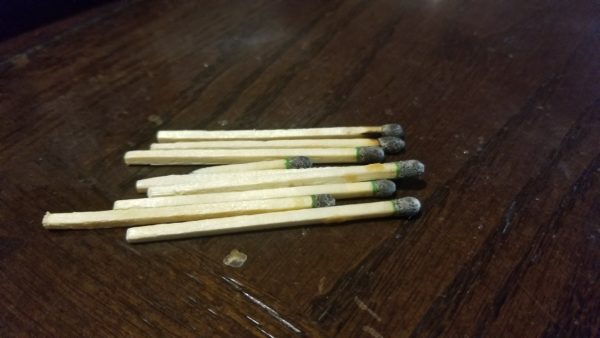
    To test the effectiveness of the waterproofing I dipped an assortment of matches made following the two steps above into a glass of water. I held them in the water for about 5 seconds.

     Below is a short video of one of the matches being lit. Interesting is the matches burn slightly hotter once it gets going due to the wax.


    All the matches in my initial batch successfully survived the dunk test.

    The Soak Test

    A final test was to actually soak the homemade waterproof matches directly in water for an extended period of time. I felt that what would happen is the stick section of the match would absorb water and carry it up underneath the wax thus ruining any chance of ignition. I dropped several matches into a glass of water and let sit for 30 minutes.

    Results

    75% lit and burned pretty much as normal AS LONG AS I dried the tip prior to trying to striking. If any water droplets were still on the match head although it would light the flame would fizzle out quickly.

    I have to admit I was pretty impressed. The main reason I have waterproof matches is not to survive a three-mile trip down the river but to protect them from moisture/humidity. So far these are working out well.

    There are other methods of “DIY” waterproofing matches such as coating with fingernail polish. Might try that at some point.

  • CIMA Knife Table Top Review

    CIMA Knife Table Top Review

    This was originally published August 23rd, 2016. My CIMA knives continue to do extremely well today.

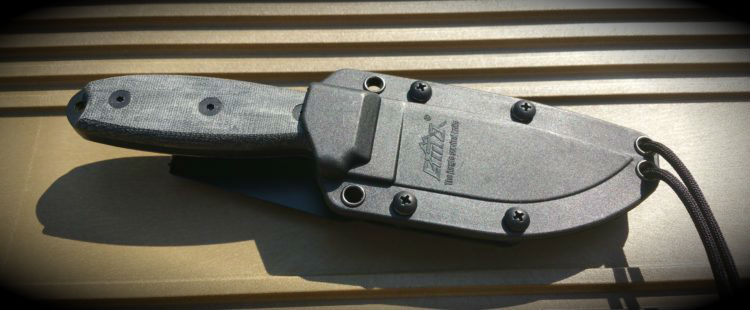
    I ordered this CIMA fixed blade knife a couple months ago when it was on sale for less than $20 and was shipped free. I really wasn’t expecting much. This is Chinese-made and at that price point how good could it be? As usual, when ordering from GearBest a package was waiting for me when I arrived home approx 3 weeks later.

    CIMA-3

    This review is going to be a short one and a true “table top” rather than “testing & evaluation”.  I love this knife. I have not taken it out in the woods and feathered sticks, stabbed it into dead carcasses, or zombie eye sockets. No – it has remained in the box in mint condition. I have since ordered two more which at least one will come under regular use.

    Here are a few specs:

    • Blade Material: 7Cr17MOV stainless steel
    • Hardness: 58 HRC
    • Blade Length: Almost 3.5″
    • Handle Length: 4.5″
    • Overall: 8.5″
    • Color: Black
    • Handle Material: Flax/Linen

    Quick Summary: This is a smaller knife that feels great in the hand. Balance is towards the handle which doesn’t lend well to batoning but let’s be realistic – the blade is less than 3.5″ long. Full tang thickness is 4.5mm which is acceptable for a knife this size. The sheath is great and the knife retainment is excellent via an audible “snap” when the knife is interested. No straps needed.

    Check out the pictures below that will scroll across the screen. They are a combination of photo’s I took and ones used for advertisements.

    Oh – did I mention that the CIMA fixed blade knife is a clone of the respected ESEE 3 which cost around $100? No? Well, it is and a very close clone at that.

    Recommended. For more information click HERE.

    Rourke

    [slideshow_deploy id=’2901′]

  • The Ultimate Bug Out Food Bar

    The Ultimate Bug Out Food Bar


    There is a huge market for specialty food bars made just for survival kits and bug out bags. I’m not talking about those 3,600 calorie bricks of cardboard that will enable you to try out your emergency dental kit. I’m talking high calorie, high protein energy bars that were developed by a Navy Seal and somehow due to the precise ingredient mix allows them to attain a “tactical” level of existence.

    While many of these survival bars are great – they are also expensive and often difficult to find. There are alternatives right around the corner and down the street at the checkout of your local grocery store and corner market. That’s right – the candy bar.

    After taste testing close to a dozen of the top selling candy bars(it’s a tough job but someone has to do it) and evaluating the nutritional and environmental ruggedness of each I came to one conclusion:

    The Payday Peanut Caramel Bar is the ULTIMATE bug out bag food bar.

    So – why does the Payday rank so high?

    While a Snickers bar combines that ultimate combination of chocolate, caramel, nougat, and peanuts the extreme heat sitting in a vehicle trunk will leave that Snickers looking like something created after eating at Taco Bell.

    By the way – what the hell is nougat?

    Anyways – while the Payday will soften inside a hot car it doesn’t become a disaster like any chocolate confection. The combination of peanuts and caramel taste great and provide a very high-calorie protein boost.

    Here is the nutrient breakdown for the KING SIZE Payday bar:

    In the King Size format, there are two smaller bars in one pack. For the entire 2 bar pack, there are 440 calories, 50 grams of carbs, 24 grams of fat, and 12 grams of protein. For someone expending a lot of energy via walking, running, or physical labor this is some serious fuel.

    Shelf life pales in comparison to many of the more expensive cardboard survival bars. 6 months or so is a good estimate depending on storage conditions. Running less than $2.00 per Payday bar they extremely affordable.

    So – when the asteroids are pummeling through the Earth’s atmosphere and zombies are crossing the railroad tracks to eat your brain and you need some quick energy – make it a Payday.

    Rourke

  • Want an Ultra-Concealable Carbine? You probably already have one….

    Want an Ultra-Concealable Carbine? You probably already have one….


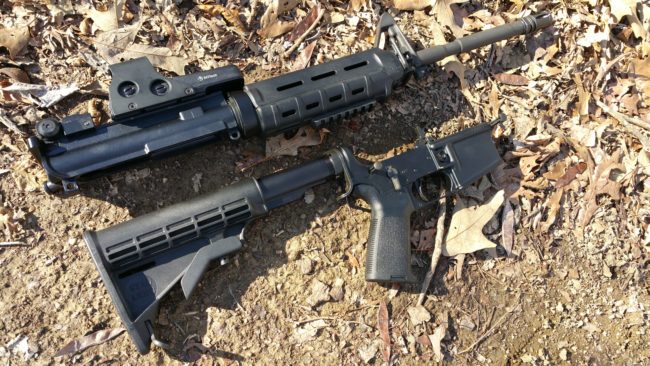
    Popular topic among those who have to travel any distance from home is being able to carry the firepower of a battle rifle – without it being seen. Most long guns are not known for their concealability thus pistols are often the firearm of choice. The AR pistol has become a popular “truck-gun” due to its large firepower and smaller size.

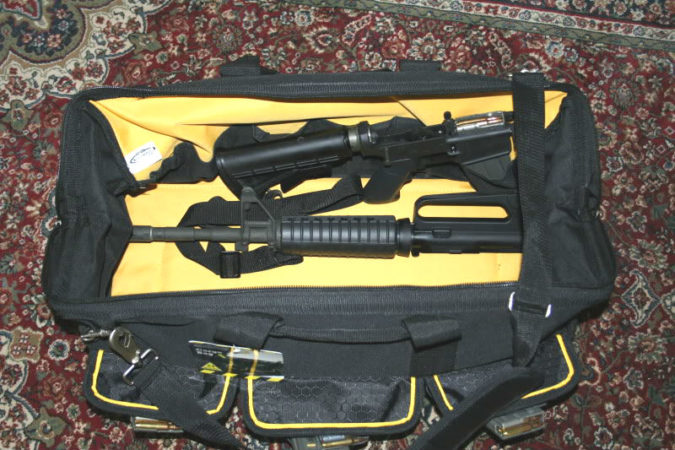
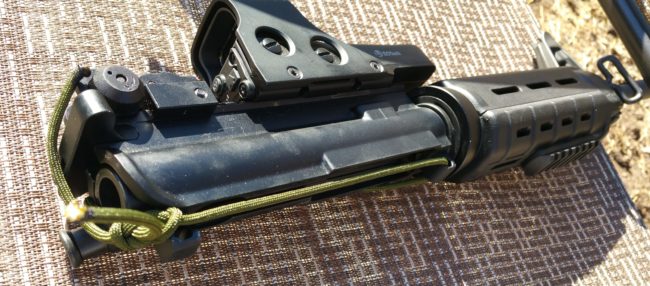
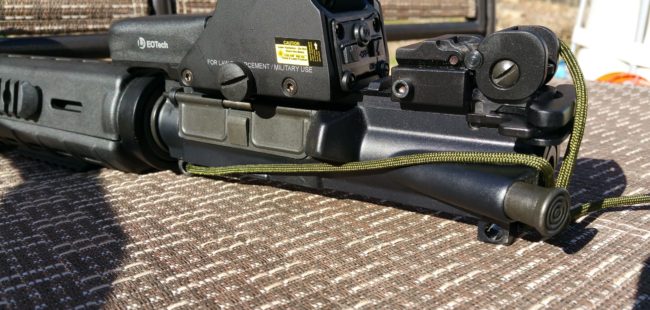
    One option that mostly goes unnoticed is the standard AR carbine. Although too large to fit in a backpack or standard duffel bag it can be separated into two pieces making it much more compact.  My AR carbine in the picture above breaks down to 24.5″. It takes literally seconds to put the two pieces together via two pins and “Abracadabra!!” – ready to rock and roll.

    One issue with this set up is the ability of the bolt to slide out of the upper while in the bag. This would prove just a bit frustrating should the need for the AR arise and speed was of the essence. Reaching around the bottom of the bag for parts would not be very encouraging.

    The simple fix is placing a loop of paracord through the pivot hole in the upper and wrapping it around the bolt carrier – and then securing it. In the included pictures a secure knot is presented through a secure but quick release knot would be preferable.

    Options are great, aren’t they? 

    Rourke

  • Rourke’s Get Home Bag

    Rourke’s Get Home Bag

    What follows is a list of the contents to my Get Home Bag. Always a work in progress feel free to comment and make suggestions. It was originally published in the Projects section.

    With my kit I am prioritizing light weight so I can move quickly. If I am on foot I need to travel as fast as possible to get home. This is a medium to short range kit.

    map-highlight

    Teton Sports Talus 2700 Backpack

    Sawyer Mini Water Filter

    Mountain House Freeze Dried Food – several pouches

    ENO Doublenest Hammock

    ENO Helios Suspension System

    Yukon Outfitters Hammock Rainfly with Stakes

    CIMA Fixed Blade Knife

    Plastic Camping Spoon(2)

    Mini 22 Lumen LED Area Lights(2)

    Israeli Battle Dressing

    Sanitation Kit – Wet Wipes, Toothbrush,

    Olight S1 Baton LED Flashlight with Extra Batteries

    Stanley Steel Cooker Camp Set w/Cup

    Camp Cup

    Hand Towel, small

    Frogg Toggs Poncho

    Cheap Emergency Poncho

    Fire Starting Kit

    Repel Insect Repellent

    Spare Glasses

    Baofeng UV5R with Extended Antenna

    Backup Baofeng Battery – AAA Battery Powered

    Ruger SR22 .22LR pistol w/ 3 magazines and 100 rounds CCI Mini Mags

    Mechanix Gloves

    Helotex Flashlight w/spare batteries(AA)

    ghome

  • Layering your Kits

    Layering your Kits

    When dressing for activities in the out of doors we often use layering so that we can add or remove layers as needed to meet our needs in changing temperatures or climates.  This same approach can be used when making our many different “KITS”.   Everyone has their EDC (Every Day Carry) items that they have on them at all times, so that one is hopefully a given.  On top of those items we usually consider having our “72 hour kit” ready to grab and go in an emergency, but that is where we start to see so many questions regarding what to put in them and the INNUMERABLE lists that are available online.  I would like to offer some very Basic Guidelines to help people create a kit that is perfect for THEM, not someone who lives in the Antarctic or the Sahara.

    tumblr_mdecgj6RCa1qfo8ieo1_1280

    First of all let’s take a look at your EDC.  Consider everything you have in your pockets or on your belt at all times.  These items would be your Every Day Carry items, and while some duplication can be great, when you have to carry a lot of stuff, weight matters.  So write down what your EDC is, and put that aside.

    EDC, 72 hour kit, survival kit, preparedness, prepper

    Next look at what you believe would be appropriate and applicable for you to include in your CORE Kit.  This kit would be your bug out bag (BOB) / “72 Hour Kit”.  It would have things you may need to survive outside of your home for a short period of time.  The term “72 Hour Kit” is a bit of a misnomer since even FEMA recommends 4 days of emergency supplies.  I always remember that it took FEMA 5 days to get water to the Superdome after Katrina, and they knew it was coming.  This kit would be able to be easily carried and would include the basic items you would need to live for 4-5 days.  Things like, basic clothes, personal hygiene, a small personal first aid kit, limited tools, and a few days your prescriptions as well as food and water.

    bob

    Lastly we come to the more extensive layers of our kit.  These would be specialty items that each person could have to fill their roll in a family / team setting.  These layers would include things like: Cold / Hot weather, Trauma / Medical, Personal Protection, and Extended duration or distance.  These layers are things that could be easily added, or attached, to your CORE layer and still allow you to be mobile.  They may be due to seasonal requirements, personal / medical needs, or based upon your education / training and things that you are proficient in the use of.  I know many people who spend over $1000.00 on a professional Trauma kit from one of the plethora of online stores, but they are neither trained, nor capable of using some of the specialized equipment in them.  I have seen people at the counter of the local gun store being sold the latest piece of civilianized military weaponry (sarcasm intended) that they will take home, and put in the safe with its 10rd magazine (that they will call a clip) and have no idea how to operate.  These things can make them dangerous.  Even someone who has never stayed overnight in a snowy winter environment can be a danger to themselves and others if they don’t know what they don’t know.

    camp by the lake at night


    So to finish up, I have not supplied another “LIST” for you to read through, because your needs are different from my needs, and you don’t live where I live.  If you are not willing to think out and investigate what you will need, then might I suggest that you go check on the latest lineup of arm chairs at the furniture store to be more comfortable watching reality shows.


    IF you are willing to do the work then here are the basic layers:

    • EDC
    • CORE
    • SPECIALTY


    Thank you,

    Brad M


  • Prepper Ralph on Bug Out Bags

    Prepper Ralph on Bug Out Bags

    Rourke: This post was originally published over at ThePatriotPodcast and written by my co-host Prepper Ralph.


    By Prepper Ralph

    So to begin with… Bug Out Bags(BOBs) are meant to let you leave on a moment’s notice with no questions asked and escape to a safe place or at least one less dangerous. Hopefully you’ll have a Bug Out Location(BOL) picked and you may even have considered hiding some supplies or a weapon w/ ammunition there. BOBs are meant to be lightweight, efficient in what their purpose is, and have as much equipment as is needed to see you through an initial SHTF/Unrest period. The Federal Gov’t through FEMA and also Red Cross states that 3 days of supplies should be enough to see you through whatever disaster there is until you can receive help. That help will typically be some sort of gov’t assistance(handout) and in the case of Katrina, took sometimes weeks or months to get to you. I personally recommend 1 week’s worth of supply, or the ability to procure it. So here is my list of the top things you would need in a BOB to keep you ready to go.

    1) The bag… do not go cheap. As you know, I use the Spec-Ops Brand UAP(Ultimate Assault Pack) for mine. I highly recommend either you get one of these, or a similar bag of similar quality. Maxpedition makes a good one, Condor has brought out a “Pro” line of gear, and there are many more. If nothing else, go surplus and get a US Marine’s ILBE pack.

    Spec Ops Ultimate Assault Pack

    2) A Full tang knife between 5-7 inches long in the blade. I like Ka-Bar, Ontario makes great ones, Benchmade… the list goes on and on. Do not go cheap on this as this will in many cases be your primary tool. Make sure it is a good quality steel that is at a minimum High Carbon Steel

    3) 7 strand mil-spec paracord. I suggest anywhere from 100-200 feet of it in a dark or earth tone color. Other’s like bankline, and that would work great as well, but consider this… With 1 foot of paracord, you get a total of 7 feet worth of 50# tensile strength cordage. It simply makes sense.

    4) Shelter options. G0 light weight with this. I prefer a tarp set up and keep 2 ready to go in the trunk of my car. There are literally hundreds of ways to use them, and several uses outside of shelter as well. Either way, it needs to be lightweight. I’d suggest a 6×8 minimum and no larger than 10×8. You could also use a hammock setup as well.

    5) Your cooking setup needs to be durable, but lightweight as well. I use a simple stainless steel pot and cup with a lid that fits both. My cookset cost less than $20 and is capable of being used directly in a fire.

    6) Fire making is pretty simple and a no brainer. Buy Bic lighters and buy a lot of em. I keep several in my pack, my car, and all over the place at home. Survival is all about making life easier on your trek, not just living through it. An instant flame is just common sense. Carry also a good quality medium sized ferrocerium rod, and matches as well. I would use the Bic until it died, then the ferro rod. The matches would be my last hope.

    7) Finally self defense. We are talking about survival, not a camping trip. Have yourself a good quality handgun in your pack or on your person, 2 extra mags at least, as well as another 100 rounds to replenish. I would suggest you have available at least 4 extra mags, other than the one in your weapon. Don’t use FMJ’s in your weapon since they provide the least amount of damage and transfer of injury. Use a quality HP round that you can test and insure that it work in your weapon. Remington, Federal, and Hornady are good ones, with Independence and some other’s being cheaper. A compact folding rifle in .22LR or 9mm would also be ideal, but it adds a lot more weight to your pack.

    20150704_142018

    8) Water… Have a few water bottles full, but don’t worry about toting water as it weighs about 8# per gallon. With everything in your BOB and on your person, you can filter or sanitize water easily. You could also try a Sawyer Mini filter, Lifestraw, or the water tablets to purify it. Either way, this is going to be lightweight and minimal.

    9) Food is pretty easy. Something dehydrated so that all you have to do is add hot water. Mountain House, Patriot Pantry, Thrive, Wise and several others make great food. Even something as simple as a flavored rice pack would be perfect. Have enough to last a week so 14 meals/servings will be perfect. Knowing what to forage along your route, as well as hunting/fishing can help you but food isn’t a main priority here – getting to your location is.

    10) Cash should be kept and I would recommend $100 in smalls. 1’s, 5’s and 10’s only. No silver and no gold.

    11) Pics of your family/loved ones. You may be able to provide a pic to the police or first responders if you can’t find your family.

    12) A secure, encrypted flash drive with your personal information on it. Photo copied ID cards, SS Card, Medical info, insurance info etc. goes on this.

    13) An extra phone charger… Duh! Add in an external battery power pack as well and you should be good. I would HIGHLY suggest you start using a smart phone. Android is the most popular system to use followed by the various Iphone models. If you have a new android, it can be encrypted and you can save hours of music, videos, GPS maps, pictures, and all the info on your flashdrive as well. It’s what I do. Plus you have internet, phone, text and voice messaging you can use, and in most cases a flashlight is built in.

    61a+2tb6CXL._SL1000_

    14) A compass with a quality and up to date street level map. I keep a book of the entire state, as well as a folding map of the region I live in.
    15) A good quality flashlight that is lightweight but very bright. Make it a simple one with off/on only. No need in a strobe effect. Streamlight, Olight, and many more would be perfect. Carry a pack of extra batteries as well.

    16) 3 pairs of socks, 3 pairs of underwear, and 1 package of sanitary wet wipes.

    17) Finally your medkit. It has dozens of uses and can be a whole other subject on it’s own. Should care for things from Major trauma, to boo boos and pain. If you want a good suggestion on what I carry, look up my posting on my personal IFAK.

    All in all, this pack and it’s contents together should weigh less than 30#. Hope this helps and if you need advice on what to get, let me know via commenting below.

    Thanks – Ralph

    Hey! Check out my new YouTube Channel….