Tag: SHTF

  • Is it looting – or surviving?

    Is it looting – or surviving?


    Watching the news a couple of weeks ago and they were reporting on Hurricane Dorian and the massive destruction in the Bahamas. Looting was a major topic discussed and they even had an interview with one of those “looters”. The news reporter asked the woman how she felt taking items that didn’t belong to her and what did she take during her looting. She explained that she did not feel comfortable taking things, but, felt she had no choice. She went on to say that she went to grocery stores and took food, water, and diapers. She said there are a lot of people that have no food, no water, and there are young children with no diapers.

    Here’s my question: Is this looting – or surviving?

    When I heard the reporter say that he had interviewed one of the admitted looters I expected they had taken TV’s, computers, shoes, etc. After the interview, I thought to myself – “That’s not looting. That’s surviving!”

    Am I wrong?

    From my perspective, there was a literal SHTF situation going on and what she did was called surviving.


  • Programming the Baofeng UV-5R for Common Frequencies

    Programming the Baofeng UV-5R for Common Frequencies


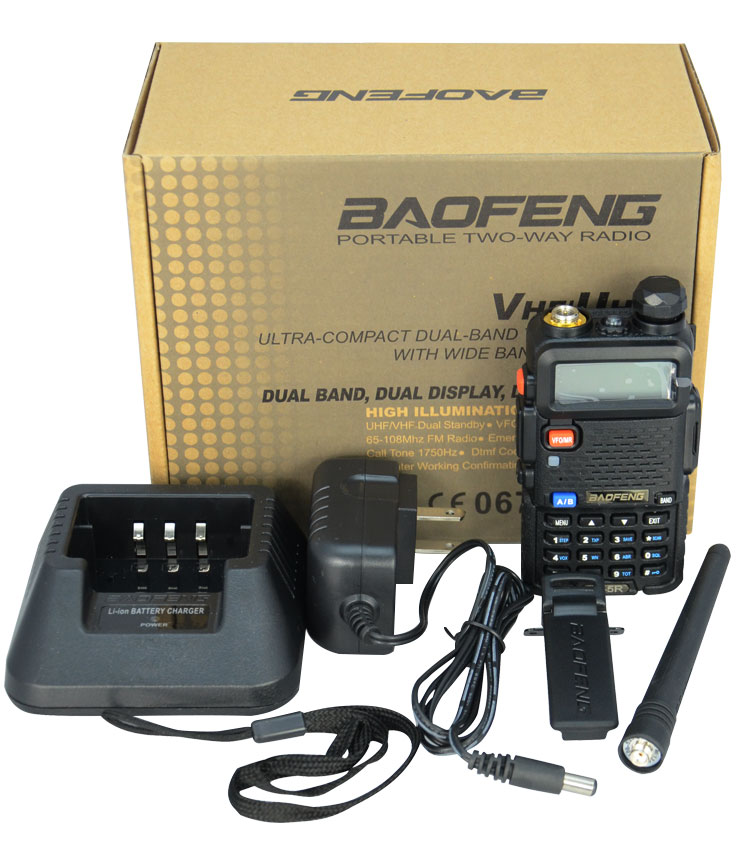
    The Baofeng UV-5R and similar radios are very useful tools. It’s a compact, handheld radio capable of transmitting with 4 watts of power across 136-174 MHz and 400-480 MHz frequencies. It can be programmed with up to 128 channels. They can receive and transmit a variety of frequencies including those used by weather radios and the often purchased walkie-talkies found at Wal-Mart. Their capability is actually much more and this article will provide instructions on how to manually program the popular Baofeng UV-5R for many common frequencies.

    [Disclaimer: You are required to obtain a license to transmit on these devices and punishment for doing so without a liscence can range from fines to having your bottom lip pulled over to the back of your head. You’ve been informed and warned.]

    Baofeng, survival, communications, prepper, preparedness

    While the frequency can be entered in the Baofeng UV-5R and similar radio’s by just punching in numbers it is also possible to save it as a channel for easy access at any time(see below).

    Manual Programming the Baofeng UV-5R

    • Step 1. Press [VFO/MR] and enter Frequency Mode.


    • Step 2. Press [A/B] and choose the A-Side (upper display).
      The A side must be used to program channels into the radio.


    • Step 3. Press [BAND] for the frequency band.
      Toggle [BAND] to choose 136 MHz (VHF) – or 400 Mhz(UHF). Choose the right band based on your desired channel frequency.
      If this is not performed correctly the radio will cancel the operation after entering the frequency in Step 5.


    • Step 4. Disable TDR (Dual Watch/Dual Standby).
      Press [MENU] 7 [MENU] [press up/down arrow keys] OFF [MENU] [EXIT]


    • Step 5. Enter the frequency.
      Using the keypad, enter the frequency into the radio.


    • Step 6. Assign the frequency to a channel.
      [MENU] 27 [MENU] [enter channel number XXX] [MENU] [EXIT]

    That’s it. Programming frequencies via software is easier and more flexible. That’s for another post at a later date.

    Now – go grab your Baofeng UV-5R and give it a shot…….


    Common Frequencies for the Baofeng UV-5R

    FRS/GMRS Frequencies 

    frs, gmrs, 2017, frequencies, baofeng,


    MURS Radio Frequencies

    151.820 Mhz
    151.880 Mhz
    151.940 Mhz
    154.570 Mhz
    154.600 Mhz


    NOAA Weather Radio Frequencies

     WX1         --     162.550   
     WX2         --     162.400
     WX3         --     162.475
     WX4         --     162.425
     WX5         --     162.450
     WX6         --     162.500
     WX7         --     162.525


    Commercial “DOT” Frequencies

    151.625 Red Dot
    154.570 Blue Dot
    154.600 Green Dot
    151.955 Purple Dot
    464.550 Yellow Dot
    464.500 Brown Dot
    467.7625 J Dot
    467.8125 KDot
    467.8500 Silver Star
    467.8750 Gold Star
    467.9000 Red Star
    467.9250 Blue Star


    Marine VHF Designated Frequencies
    Channel Number Ship Transmit
    MHz
    Ship Receive
    MHz
    Intended And Designated Use
    01A 156.050 156.050 Port Operations and Commercial, VTS.  Available only in New Orleans / Lower Mississippi area.
    05A 156.250 156.250 Port Operations or VTS in the Houston, New Orleans and Seattle areas.
    06 156.300 156.300 Intership Safety
    07A 156.350 156.350 Commercial
    08 156.400 156.400 Commercial (Intership only)
    09 156.450 156.450 Boater Calling.  Commercial and Non-Commercial.
    10 156.500 156.500 Commercial
    11 156.550 156.550 Commercial.  VTS in selected areas.
    12 156.600 156.600 Port Operations.  VTS in selected areas.
    13 156.650 156.650 Intership Navigation Safety (Bridge-to-bridge).  Ships >20m length maintain a listening watch on this channel in US waters.
    14 156.700 156.700 Port Operations.  VTS in selected areas.
    15 156.750 Environmental (Receive only).  Used by Class C EPIRBs.
    16 156.800 156.800 International Distress, Safety and Calling.  Ships required to carry radio, USCG, and most coast stations maintain a listening watch on this channel.
    17 156.850 156.850 State Control
    18A 156.900 156.900 Commercial
    19A 156.950 156.950 Commercial
    20 157.000 161.600 Port Operations (duplex)
    20A 157.000 157.000 Port Operations
    21A 157.050 157.050 U.S. Coast Guard only
    22A 157.100 157.100 Coast Guard Liaison and Maritime Safety Information Broadcasts.   Broadcasts announced on channel 16.
    23A 157.150 157.150 U.S. Coast Guard only
    24 157.200 161.800 Public Correspondence (Marine Operator)
    25 157.250 161.850 Public Correspondence (Marine Operator)
    26 157.300 161.900 Public Correspondence (Marine Operator)
    27 157.350 161.950 Public Correspondence (Marine Operator)
    28 157.400 162.000 Public Correspondence (Marine Operator)
    63A 156.175 156.175 Port Operations and Commercial, VTS.  Available only in New Orleans / Lower Mississippi  area.
    65A 156.275 156.275 Port Operations
    66A 156.325 156.325 Port Operations
    67 156.375 156.375 Commercial.  Used for Bridge-to-bridge communications in lower Mississippi River.  Intership only.
    68 156.425 156.425 Non-Commercial
    69 156.475 156.475 Non-Commercial
    70 156.525 156.525 Digital Selective Calling (voice communications not allowed)
    71 156.575 156.575 Non-Commercial
    72 156.625 156.625 Non-Commercial (Intership only)
    73 156.675 156.675 Port Operations
    74 156.725 156.725 Port Operations
    77 156.875 156.875 Port Operations (Intership only)
    78A 156.925 156.925 Non-Commercial
    79A 156.975 156.975 Commercial.  Non-Commercial in Great Lakes only
    80A 157.025 157.025 Commercial.  Non-Commercial in Great Lakes only
    81A 157.075 157.075 U.S. Government only – Environmental protection operations.
    82A 157.125 157.125 U.S. Government only
    83A 157.175 157.175 U.S. Coast Guard only
    84 157.225 161.825 Public Correspondence (Marine Operator)
    85 157.275 161.875 Public Correspondence (Marine Operator)
    86 157.325 161.925 Public Correspondence (Marine Operator)
    87 157.375 161.975 Public Correspondence (Marine Operator)
    AIS 1 161.975 161.975 Automatic Identification System #1 (AIS) – Special equipment required!
    88 157.425 162.025 Public Correspondence only near Canadian border.
    AIS 2 162.025 162.025 Automatic Identification System #2 (AIS) – Special equipment required!
    88A 157.425 157.425 Commercial, Intership only.


  • Review: Condor T&T EDC Pouch Kit

    Review: Condor T&T EDC Pouch Kit


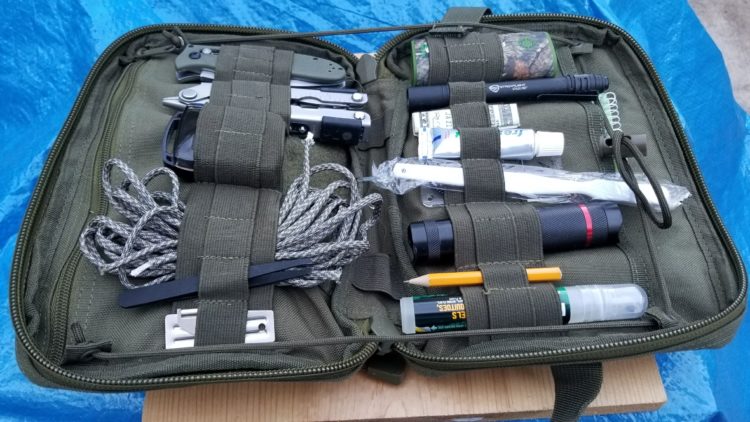
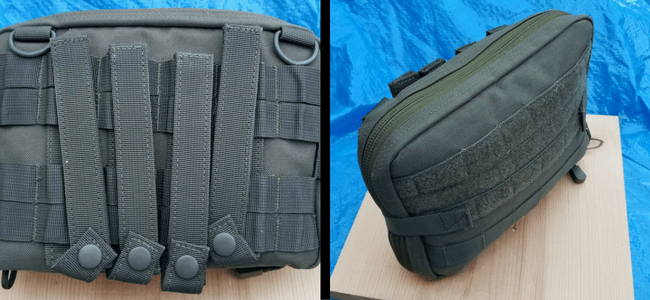
    Something I have been slack in is my EDC. I have a few things in my Jeep but as far as an organized EDC kit that has been absent. I picked up a Condor T&T pouch a few months ago and finally got around to throwing some stuff in it. My intended purpose for the EDC kit is purely to organize a variety of items not commonly found in a vehicle but could prove very useful. The Condor T&T functions well in this regard as it has a variety of pockets and stretchy loops which to place things.Condor T&T, EDC, pouch, kit, EDC, review, survival, bug out

    While the Condor can be thrown in a bug out bag or survival kit mine rest in the back of the Jeep.

    Contents:

    • Gerber multi-tool
    • ear plugs
    • Sharpie marker
    • P51 can opener
    • Repel insect repellent
    • Streamlight Stylus Pro flashlight
    • Coast G45 LED Flashlight
    • emergency poncho
    • extra charging cables – micro USB, Lightning, and USB Type-C
    • Mossy Oak 4000mAh Pocket Juice battery
    • memo pad, small
    • pencil
    • sewing kit
    • wire ties(8)
    • compass
    • Seek Thermal XR Imager – for iPhone
    • tooth brush
    • toothpaste
    • Ganzo G704 folding knife
    • Water Jel Burn Jel cream(3 packs)
    • Band-Aids(8, standard size)
    • Triple Antibiotic Ointment(4, .5 gram packs)
    • Tweezers
    • Paracord(20 feet)
    • $50 in assorted bills


    Condor Materials & Construction

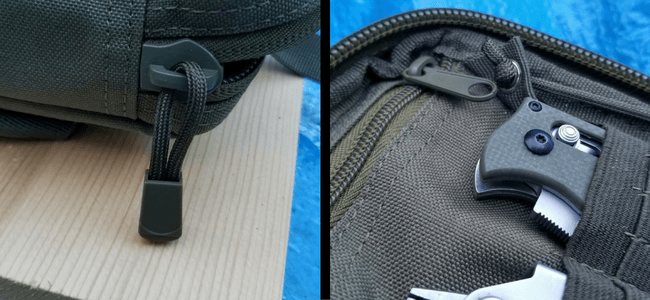
    The construction of the Condor is excellent. The material is something similar to Cordura. Stitching is tight and all seams are double-stitched everywhere. The zipper appears to be oversized for the application which is just fine for me. Seems rugged enough to last years riding in my Jeep or inside a pack.

    Condor T&T, review, EDC, prepper, SHTF

    Features

    Size of the pack is 10″ x 7″ x 1.5″. While accurate the thickness of 1.5″ is when empty. Once loaded it expands out and mine is between 3″ and 4″ thick. Weight is just under one pound.

    For organizing supplies, the pouch has one internal sleeve, one zipper pocket, and numerous elastic loops of different sizes on both halves. The elastic pockets are sized to hold things like AA batteries up to multi-tools. A lot of gear can be stored for easy access.

    The Condor T&T can be mounted via 4 Molle straps or left independent. There are two D-rings on each top corner. These can be used to hang the pouch or attach it using a variety of means.

    Condor, EDC, review, T&T pouch, survival kit,

    Summary

    At around $25 the Condor T&T is well worth it. Its build quality is excellent and its versatility lends itself to many roles. I can see owning 3-4 of these and use them for things like tools, electronics, and first aid.

    RECOMMENDED.

    Rourke


    Interested in more camping and outdoor gear reviews? Have a look at https://GearLobo.com

  • Analytical Survival on Basic Preparedness: Alternative Fuel Sources

    Analytical Survival on Basic Preparedness: Alternative Fuel Sources

    Analytical Survival brings forth another excellent video discussing alternative fuel sources.  He covers topics such as gasoline storage, electricity, and heating methods.

    A good point he makes is building preps for alternative fuel sources over time. This can get expensive especially if purchasing generators. I recommend concentrating early on with cooking and vehicle fuel sources. A good Coleman camp stove with extra fuel canister is a portable means for cooking. If you have a gas grill at home pick up several extra propane tanks. Purchase several 5-gallon metal gas cans and set up a rotation system.

    Here’s the video:


  • Video: US MARINE –  The Truth About Thumb Over Bore!

    Video: US MARINE – The Truth About Thumb Over Bore!


    There’s not much that will create an argument more than asking “What is the best firing stance and grip?” in a forum of AR shooters. While everyone has an opinion and many feel their’s is the only one that counts I’ll give you my quick answer – “The one that you are comfortable with and allows rounds to be sent down range – accurately.”

    Pretty simple.

    Several years ago I heard of this method competition shooters were using to control recoil and shoot very accurately – called the “C-Clamp”. I tried and hated it. Man – it felt so uncomfortable. I preferred to hold the magazine well however I just could not control recoil well and get multiple rounds on target quickly. I had signed up for a defensive carbine and pistol course from Wolf-Fire Firearms Training and decided to try the C-Clamp again. I used it throughout the class and it really grew on me. Now, this is the primary method I use for shooting the AR.

    The video below gives some perspective on the “thumb over bore” and explains my position on it well. I agree with this guy 100%.


  • 5 Morale Boosting Foods With a Long Shelf Life

    5 Morale Boosting Foods With a Long Shelf Life


    Any high-stress disastrous event will create a definite morale issue for most people. The absence of normal life comforts combined with potential life-altering conditions will wreak havoc on people – especially children. Having as part of any food storage system some specific foods to boost – even just a little – the morale of friends and family is simple and inexpensive.

    Here are 5 morale-boosting foods with a long shelf-life:

    Jelly Beans – Jelly Beans provide an explosive amount of flavors as well as a sugar rush. Shelf Life: 1-2 years.

    M&M’s – Chocolate is one of the most popular comfort foods. M&M’s themselves are a popular favorite. Shelf Life: 1 year

    Starburst – A fruity fix when times are tough? Starburst fit the bill perfectly. Shelf Life: 2-3 years.

    Peppermint Hard Candy – Long lasting with an intense peppermint flavor. Shelf Life: 12-18 months.

    MRE Cakes – Candy is great but MRE cakes will provide a smile when it seems impossible. Shelf Life: up to 7 years.

    It would be recommended to store all of these foods – even the MRE desserts –  in a vacuum sealed bag via a Foodsaver to extend life as far as possible.

    While there is not a food in existence that can fix property destruction and heal wounds – the mental anguish often associated with disasters may be lessened just a bit – with morale boosting foods.

    What’s your favorite?

    Rourke


    line

    Support 1776PatriotUSA in 3 Simple Steps……

    1.  Click on any Amazon link.

    2.  Purchase any item at no additional cost to you.

    3.  Accept my humble “Thank You!”

    Amazon-Logo-schwarz

    Amazon Camping & Hiking

    Amazon Backpacks and Bags

    Amazon Hunting and Fishing

    Amazon Hunting and Survival Knives

    Amazon Tactical and Defense

    Amazon Shooting Supplies

    Amazon Survival & Preparedness Supplies

    line

    Don’t forget to vote for this website over at the Top Prepper Sites. Click HERE to vote.

    vote

      *    *    *    *    *    *    *    *    *    *    *

    Recommended reading for every Patriot? 

    Untitled design (8)

  • Survival & Preparedness Books, Guides, & Manuals

    Survival & Preparedness Books, Guides, & Manuals

    NOTE: The following is a duplicate of a page found HERE on this website. Thinking many may have missed it, it is being provided below……


    Here is a collection of survival & preparedness books, magazines, guides, manuals, and other documents.

    These are available as a FREE download, however, there is no guarantee how long any will be available.


    American Survival Guide – Mar 1988

    American Survival Guide – Apr 1988

    American Survival Guide – Jun 1988

    American Survival Guide – Jul 1988

    American Survival Guide – Aug 1988

    American Survival Guide – Sept 1988

    American Survival Guide – Oct 1988

    American Survival Guide – Nov 1988

    American Survival Guide – Dec 1988

    American Survival Guide – Jan 1989

    American Survival Guide – Mar 1989

    American Survival Guide – Apr 1989

    American Survival Guide – Jun 1989

    American Survival Guide – Jul 1989

    American Survival Guide – Aug 1989

    American Survival Guide – Sept 1989

    American Survival Guide – Dec 1989

    American Survival Guide – Jan 1990

    American Survival Guide – Mar 1990

    American Survival Guide – Apr 1990

    American Survival Guide – May 1990

    American Survival Guide – Aug 1990

    American Survival Guide – Oct 1990

    American Survival Guide – Nov 1990

    American Survival Guide – Dec 1990

    American Survival Guide – Jul 1991

    American Survival Guide – Aug 1991

    American Survival Guide – Oct 1991

    American Survival Guide – Jan 1992

    American Survival Guide – Feb 1992

    American Survival Guide – Apr 1992

    American Survival Guide – DOOMSDAY Spring 2015

    American Survival Guide – GEAR GUIDE Fall 2015

    American Survival Guide – Jan 2015

    American Survival Guide – Feb 2015

    American Survival Guide – Mar 2015

    American Survival Guide – Apr 2015

    American Survival Guide – May 2015

    American Survival Guide – June 2015

    American Survival Guide – July 2015

    American Survival Guide – Aug 2015

    American Survival Guide – Sept/Oct 2015

    American Survival Guide – Nov 2015

    American Survival Guide – Dec 2015


    Modern Survival Magazine

    Modern Survival – Oct/Nov 2001


    Recoil Magazine

    RECOIL – Jan/Feb 2015

    RECOIL – Mar/Apr 2015

    RECOIL – May/Jun 2015

    RECOIL – Jul/Aug 2015

    RECOIL – Sept/Oct 2015

    RECOIL – Nov/Dec 2015

    RECOIL – Jan/Feb 2016

    RECOIL – Mar/Apr 2016


    Self Reliance Illustrated

    Issue #1

    Issue #2

    Issue #3

    Issue #4

    Issue #5

    BOOKS/GUIDES

    1881 Household Cyclopedia

    American Handgunner Magazine – SURVIVE SPECIAL ED – Fall/Winter 2014

    American Warrior Magazine

    America’s Survival Guide

    Are You Ready?

    A Long Term Survival Guide

    Blackout Survival Guide

    Boston’s Gun Bible

    Effect’s of Nuclear Weapons

    FEMA Nuclear Survival

    FM 21-11 First Aid For Soldiers

    FM 21-150 COMBATIVES

    FM 21-75 Combat Skills of The Soldier

    FM 21-76 US Army Survival Manual

    FM 21-76-1 Survival, Evasion, and Recovery

    FM 3-4 Tactics, Techniques, Procedures for NBC Warfare

    FM 3-5 NBC Contamination

    FM 90-10-1 Combined Arms Operations in Urban Terrain

    Foxfire Vol. 1

    Foxfire Vol. 2

    Foxfire Vol. 3

    Foxfire Vol. 4

    Foxfire Vol. 5

    Hand Dug Wells

    How To Prepare For Any Disaster

    How to Survive the Collapse of Civilization

    Improvised Lock Picks

    Infinite Dangers

    Last Minute Survival Secrets

    LDS Preparedness Manual

    Living Ready Magazine – Summer 2013

    Military Hand to hand Combat Guide

    Military Operations On Urbanized Terrain

    Modern Survival Retreat

    Nuclear War Survival Skills

    Nuclear Weapons Effects

    Off The Grid

    Prepper & Shooter Magazine #2

    Prepping For Pennies

    Ranger Handbook

    Ready for Anything: The Ultimate No B.S. Survival Manual

    Successful Home Defense

    Survival Cabins

    Survival Guns

    Survival Medicine

    Survival Shotgun

    Survival TACFIT

    Survive Any Disaster

    Survive the Collapse

    Survive The End of Days

    The 5 Most Crucial Components of Any Serious Survival Plan

    The Medical NBC Battlebook

    The Preppers Playbook

    The Scoundrels Guide to Survival

    The Survival Handbook

    The Urban Prepper

    The Zombie Survival Guide

    Total Resistance

    Ultimate Survival Skills

    Wilderness Survival Skills

    You Will Survival Doomsday

    Your Basement Fallout Shelter


  • Prepare

    Prepare

    So – you’re a prepper?

    First off you will be pleased to know that you are not a nut case. Feel better?

    Although preparedness is becoming more widespread mainstream preppers are still often looked at strangely by those that are non-believers. The vast majority of people today go through life with little concern with what the future holds.

    If you are reading this then your opinion is likely similar to mine – those folks are wrong…..dead wrong. Bad stuff happens to good people every single day. Since we are good people and live in this world it seems pretty logical to take precautions in case something were to happen to disrupt our lives. No one thinks it’s crazy to buy car insurance.

    One of the statements I have heard from family members and friends that find out I am a prepper is…..”You are just paranoid because nothing’s ever going to happen.” If you haven’t heard it yet get ready because it’s coming.

    If you are preparing now or looking into it no doubt there is something on your mind that lead you here. So – why prepare? Maybe the better question is “What might happen?”

    Here is a list:

    power outage

    severe winter storm

    hurricane

    tornado

    severe drought

    tsunami

    grid failure

    crime wave

    terrorism

    food shortage

    pandemic

    flood

    fire

    unemployment

    EMP attack

    solar flare

    inflation

    hyperinflation

    economic collapse

    nuclear war

    terrorism

    earthquake

    nuclear power plant meltdown

    gas/fuel shortage

    overpopulation

    martial law

    hurricanepreparedness

    Granted some of these are MUCH more likely to happen than others but the fact remains that the world is a dangerous place. It is not insanity to prepare for what might happen – it is a responsibility.

    Everyone’s living situation is different. There are geographical differences, climate specifics as well as economic considerations. Someone living in Maine may very well prep for a grid down event in the middle of winter. That would certainly be different than someone else who lives in Arizona in the desert and prepares for an economic collapse and water shortage.

    In summary, the decisions are your own and you should feel proud of yourself for taking responsibility for you and your family. It doesn’t matter if you are a senior citizen or just graduated high school – hopefully, the preparing that you do never pays off and no major life-changing event occurs. But if it does – you will be ready.

    Take care –

    Rourke

  • The “NEW” First 100 Things To Disappear After The SHTF

    The “NEW” First 100 Things To Disappear After The SHTF

    The original “Top 100 Things To Disappear After a Disaster” list has been passed around the internet for a number of years. It remains a viable list of barter items and accurate in every way. Due to the list being fairly old and times have changed a few prepper friends and I have pulled together and updated it. While many if not most of the original items remain – some changes were necessary.


    The “NEW” First 100 Things To Disappear After The SHTF

    1. Generators
    Prices can range from a few hundred dollars to thousands. Lots of fuel must be stored(away from home).

    2. Water Filters/Purifiers
    The Sawyer Mini Water Filter is highly recommended and widely available. For higher usage volume check out the Sawyer Bucket Kit.

    3. Zippo Lighters, butane, Bic lighters

    4. Seasoned Firewood
    (About $100 per cord; wood takes 6 – 12 mos. to become dried, for home uses.)

    5. Lamp Oil, Wicks, Lamps
    (First choice: Buy CLEAR oil. If scarce, stockpile ANY!)

    6. Tents

    7. Guns, Ammunition, Pepper Spray, Knives, Clubs, Bats and Slingshots
    Any means of defense will be highly sought after.

    8. Manual Can Openers
    These can be picked up for as little as $1.00 each.

    9. Sweeteners such as sugar and honey.

    10. Rice – Beans – Wheat
    (White rice is now around $20.oo – 50# bag @ Sam’s Club, pack in Mylar with oxygen absorbers)

    11. Vegetable oil (for cooking)
    (Without it food burns/must be boiled, etc.)

    12. Charcoal and Lighter fluid
    These will disappear QUICKLY post-event.

    13. Water containers
    Any container that can hold water. Water will need to be stored AND transported.

    14. Propane Heaters
    This includes the larger Mr. Heater models and smaller versions.

    15. Grain Grinder (Non-electric)

    16. Propane Cylinders

    17. Silver/Gold

    18. Buckets

    19. Baby Supplies: Diapers/formula/ointments/aspirin, etc

    20. Laundry Supplies for Manual Use
    Washboards, plungers, and also compact washer machines

    21. Cookstoves
    (Propane, Coleman, and Kerosene)

    22. Vitamins
    Important due to changed diets.

    23. Cough drops

    24. Feminine Hygiene/Haircare/Skin products

    25. Thermal underwear
    (Tops and bottoms)

    26. Bow saws, axes and hatchets and Wedges (also, honing oil)

    27. Aluminum foil Reg. and Heavy. Duty
    (Great Cooking and Barter Item – available at Dollar Store)

    28. Gasoline containers
    (Plastic or Metal)

    29. Garbage bags
    Emphasize 13 gallon and larger 30+ gallon sizes. Impossible to have too many.

    30. Toilet Paper, Kleenex, paper towel

    31. Milk – Powdered and Condensed
    (Shake liquid every 3 to 4 months.)

    32. Garden seeds
    Heirloom seeds only. Seed banks can be purchased for under $20.

    33. Clothes pins/line/hangers

    34. Pet food

    35. Clothes – underwear, socks, pants, shirts, jackets, hats

    36. Fire extinguishers – such as this one

    37. First aid kits

    38. Batteries (all sizes…buy furthest-out for Expiration Dates)
    Prioritize AA/AAA and CR123 types

    39. Garlic, spices and vinegar, baking supplies

    40. women’s makeup

    41. Flour, yeast, and salt

    42. Matches
    (“Strike Anywhere” preferred. Boxed, wooden matches will go first.)

    43. Writing paper/pads/notebook/pencils/solar calculators

    44. Insulated ice chests
    (good for keeping items from freezing in Wintertime)

    45. Work boots, belts, Levis and durable shirts

    46. Flashlights/Light Sticks and torches, “No.76 Dietz” Lanterns

    47. Prescription medications/insulin/syringes

    48. Plastic Garbage Cans
    (great for storage, water, transporting – if with wheels)

    49. Shampoo, Toothbrush/toothpaste, Mouthwash/floss, nail clippers, etc

    50. Cast iron cookware (sturdy, efficient)

    51. Fishing supplies/tools

    52. Mosquito repellent

    53. Duct tape

    54. Tarps/stakes/twine/nails/rope/spikes

    55. Candles

    56. Laundry detergent (Liquid)

    57. Backpacks and Duffle bags

    58. Garden tools and supplies – manual

    59. Scissors, fabrics and sewing supplies

    60. Canned Fruits, Veggies, Soups, stews, etc.

    61. Bleach
    (plain, NOT scented: 4 to 6% sodium hypochlorite)

    62. Canning supplies (Jars/lids/wax)

    63. Knives and Sharpening tools: files, stones, steel

    64. Bicycles…Tires/tubes/pumps/chains, etc.

    65. Sleeping bags and blankets/pillows/mats

    66. Saline solution for contacts

    67. Board Games Cards, Dice, cards

    68. d-Con Rat poison, MOUSE PRUFE II, Roach Killer

    69. Mousetraps, Ant traps and cockroach magnets

    70. Paper plates/cups/utensils (stock up, folks…)

    71. Baby Wipes, oils, waterless and Anti-bacterial soap
    (saves a lot of water)

    72. Rain gear, rubberized boots, emergency rain poncho’s, etc.

    73. Shaving supplies
    (razors and creams, talc, after shave)

    74. Hand pumps and siphons
    (for water and for fuels)

    75. Soy sauce, vinegar, bouillons/gravy/soup base

    76. Reading glasses

    77. Chocolate/Cocoa/Tang/Punch (water enhancers)

    78. Rain barrel kits(valve assembly)

    79. Woolen clothing, scarves/ear-muffs/mittens

    80. US Army Survival Manual FM 21-76

    81. Plastic sheeting for insulating windows and shelter creation

    82. Food storage products such as freeze dried food/buckets/pouches

    83. Walkie-Talkies/ham radios/CB radio

    84. Socks, Underwear, T-shirts, etc. (extras)

    85. Lumber (all types)

    86. Wagons and carts
    (for transport to and from open Flea markets)

    87. Cots and Inflatable Mattresses (for extra guests)

    88. Gloves: Work/warming/gardening, etc.

    89. Solar panel kits – small for charging batteries and devices

    90. Screen Patches, glue, nails, screws, nuts, and bolts

    91. Teas

    92. Coffee

    93. Cigarettes

    94. Wine/Liquors (for bribes, medicinal, etc.)

    95. Paraffin wax

    96. Glue, nails, nuts, bolts, screws, etc.

    97. Chewing gum/candies

    98. Air guns and bb’s/pellets/CO2 cartridges

    99. Hats and cotton neckerchiefs

    100. Goats/chickens

    SHTF, prepper, preparedness, barter, SHTF, top 100 things to disappear,


  • Rourke’s Recommendations

    Rourke’s Recommendations


    Every Thursday I recommend a few things such as movies, books, and an assortment of gear – all kinds of stuff. Some of these are related to survival & preparedness – while others are just stuff I like. Most are on Amazon but not all.

    So – for this week……here is my list:

    Books:

    Strategic Relocation

    Going Home – Book One

    Surviving The Economic Collapse

    Nuclear War Survival Skills

    Urban Emergency Survival Plan


    Movies/TV:

    Blade Runner – the original

    Heroes – The Complete Collection

    Surface: The Complete Series

    Under the Dome: The Complete Series

    Fringe: The Complete Series


    Gear:

    Vortex StrikeFire II Red Dot Optic

    HoloSun Micro Red Dot Model HS403A

    Ozark Flip up Aluminum Sights

    Wood Burning Camp Stove – nice

    Mini Alcohol Stove


    *     *     *     *     *     *     *

    SHTF, Fight Like a Girl, prepper fiction, book, kindle, paperback

  • 5 Prepper Items To Take On Vacation

    5 Prepper Items To Take On Vacation


    How many of us head out to the beach, the mountains – the lake – and wonder the same question: “What if something happens and we’re not at home with all our preps?” Tough situation and the answers vary really depending on the specifics of the vacation.  Flying can really restrict items to be taken. The state traveled to – and all those traveling through getting there can impede certain items from being brought along.

    Firearms are not mentioned as personal security should be a given. Follow all state and local laws. With that said here are 5 prepper items to take on vacation:

    Identification and Contact Information – Print out papers with contact information for friends and family. If there is access to a laminator. cards can be made. Additional information such as home address, car, and medical insurance should be carried. Copies of all drivers licenses, social security cards, and insurance cards can also be made using a simple copying machine.

    Cash – Cash is king and should you vacation location lose power cash will be extremely valuable. How much to take? At least a few hundred dollars with bills running from small to larger denominations.

    Perscription Medications/Spare Glasses – Don’t forget critical prescriptions. The last thing needed when fun is desired is to have a flare up of that Bohemian Devil Rash you contracted a couple years earlier.   If you depend on glasses to see where you are going bring along AT LEAST one extra pair. From personal experience, this has worked out well for me several times.

    Toilet Paper – Yup – a roll or two of toilet paper could provide serious relief should that jaunt out in the middle of nowhere end up being the same time the Mexican buffet the night before decides to reappear. Nature calls…..whenever it wants.

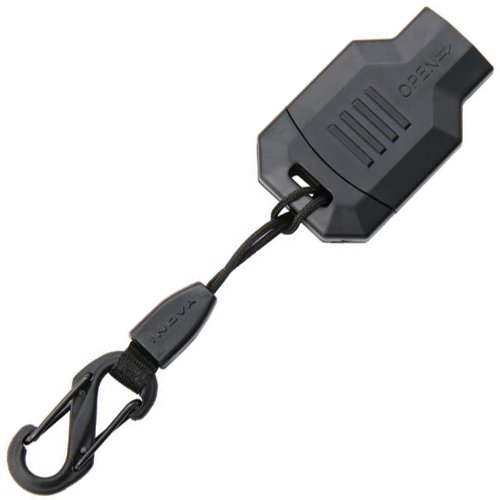
    Flashlight – Vacations tend to involve hotels, cabins, and such that we are just not familiar with. Having a flashlight to navigate the strange hallways and coffee tables may prevent that excruciating shin smack. If the method of travel does not allow a flashlight being taken, one should be purchased locally. They are inexpensive, but oh so useful. Check out these zipper pull lights – very handy.

    The list of items to have while on vacation is nearly endless. So many factors have to be considered. The five above is simply a common sense approach leaning towards most vacation destinations and activities.

    Anything specific you always take along?

  • Rourke’s Recommendations

    Rourke’s Recommendations


    Every Thursday I recommend a few things such as movies, books, and an assortment of gear – all kinds of stuff. Some of these are related to survival & preparedness – while others are just stuff I like. Most are on Amazon but not all.

    So – for this week……here is my list:

    Books:

    Survival Theory

    Countdown to Preparedness

    Zombie Preparedness 101

    Survival Hacks

    Guide to Survival Knots


    Movies/TV:

    Funny Farm

    Raiders of the Lost Ark – a classic

    Looper

    Spotlight

    The Magnificent Seven


    Gear:

    Nite Ize Squeeze Zipper Light

    Olight PL-Mini Weapons Light

    Anker Elite Dual USB Charger

    Bushnell Drop Zone-223 Reticle Riflescope

    Ultimate Rifle Build Scope Mount

    *     *     *     *     *     *     *

    SHTF, Fight Like a Girl, prepper fiction, book, kindle, paperback

  • How To Paint Your AR-15

    How To Paint Your AR-15

    I’ve made a few attempts to paint AR’s and the results were amateurish at best. While Cerakote and other specialty coatings are very popular(and expensive) – a good-ole paint job can do wonders to enhance your AR.

    The video below shows a great technique. Think I’ll try it on my next build.

    On with the show……

    Looking for full auto conversion plans? Check FullAutoPlans.com. For informational purposes only.

  • One Example of the BOB/GHB

    One Example of the BOB/GHB


    All of us have some type of bug out bag or get home bag in our vehicle – right? The video below shows one example with a great description as to what is included and why. This is a minimalist version of what many people put together. Often larger kits are upwards of 40-80 pounds. My preference is a medium sized kit no more than 30 pounds give or take.

    There are pros and cons to smaller and larger kits. The most obvious pro’s with smaller kits they are lighter allowing for faster travel on foot and likely attract less attention. Larger kits weigh more thus slowing progress, however, they provide more supplies which could be important.

    Everyone has to build their kit for specifics that only they know. Weather, geography, fitness level – these are but a few criteria that should be considered.

    On with the video from 21st Century Prepper……….

    line


  • Review: 10,000mAh Solar Power Bank Charger

    Review: 10,000mAh Solar Power Bank Charger


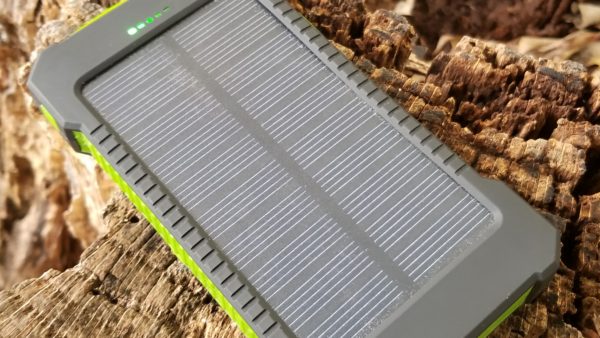
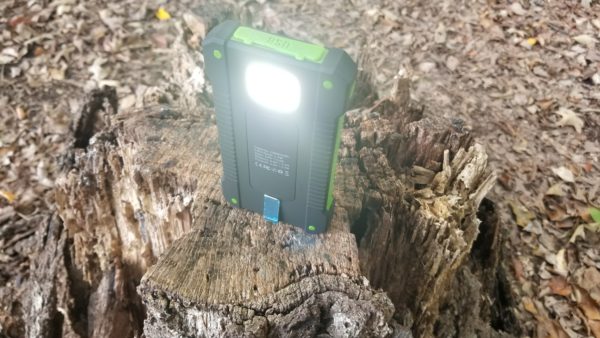
    This will be a fairly short and simple review. I’ve been using this 10,000mAh solar power bank since November of 2016. It works and works well. Numerous trips including my jaunt down the Virginia Creeper Trail I’ve used this external battery pack to keep my cell phone topped off. Communications with family, being able to take pictures and videos, as well as keeping in touch with others is important.

    This solar power bank can also charge other batteries for things like flashlights and walkie-talkies.

    With 10,000mAh of capacity, it can charge most modern smartphones at least twice or keep it topped off for hours and hours.

    The solar function is primarily for topping off the unit or charging it fully if it is left in the sun and not used. It takes days to charge it via the sun so understand that is not a primary means for charging. The 10,000mAh solar power bank is meant to be charged at home – then taken on the go.

    Recently I ran the power bank almost dead and left it outside for several days. It did eventually charge completely and survived at least two days of downpours and also one night of freezing temperatures. So – after a year of use I can fully endorse and recommend it.

    For more information click HERE.


    PICTURES

    [slideshow_deploy id=’9628′]


  • Marlin 336W .30-30 Lever Action Rifle Review

    Marlin 336W .30-30 Lever Action Rifle Review


    With the large selection of modern semi-auto “black” rifles such as the AR-15 and AK-47, the lever action is rarely discussed. Although many would argue there is little reason to consider a lever action in .30-30 Winchester with the availability of low-price semi-auto’s – options are a wonderful thing. As stated in the video there are numerous areas around the country where semi-auto, magazine fed weapons are illegal. The lever action in those areas would be a good option. Besides – there are a lot of uses for firearms than just self-defense.

    Growing up it was common to see pickup trucks with rifles mounted in the rear window. More frequently than not at least one of those rifles was a lever action and the other a shotgun. Sometimes called a “truck gun”, the lever action certainly attracts less attention from people than an AK-47.

    While there are pro’s and con’s to the design, function, and ergonomics of the lever-action – it is found in thousands of gun safes all across the United States.

    I wonder how many deer have been harvested with lever actions?

  • Project: AR Pistol Build

    Project: AR Pistol Build


    I’m addicted to building AR’s. I admit it. I’ve been actively searching for a support group to get help. Unfortunately, they all meet at my local gun shop and we end up walking out with lower parts kits, bolt carrier groups, and triggers. It’s not helping.

    For my latest build, I went after another AR pistol(aka legal SBR). I’m not going to go through every pin, spring, and part as it was put together. That’s boring and will take too long. Here are the basics with a summary at the end:

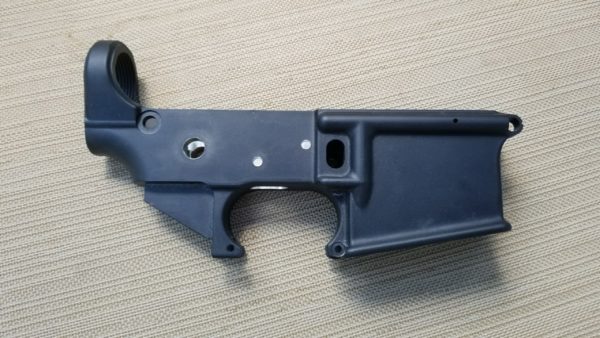
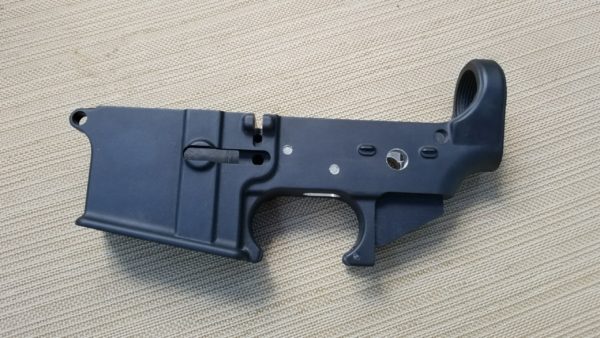
    Lower:  80% non-serialized, completed to 100%


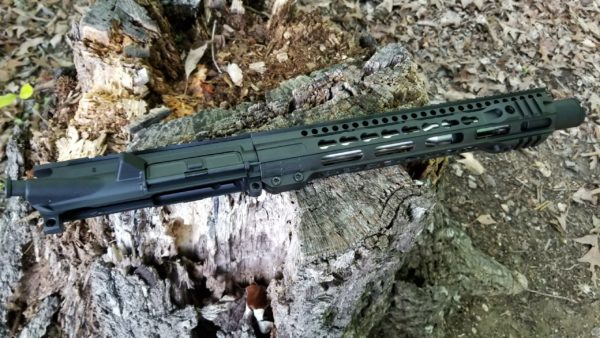
    Upper: Mid State Firearms 10.5″ SS 5.56/.223 Slanted Hybrid Keymod & Flash Can with Phosphate M16/AR15 Bolt Carrier Group


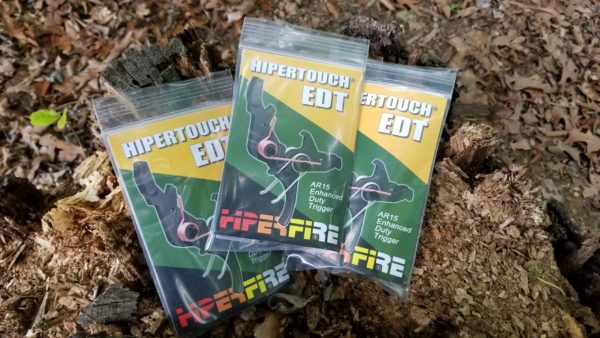
    Trigger Group: HIPERTOUCH EDT


    Charging Handle: Strike Industries AR Charging Handle with Extended Latch

    Lower Parts Kit: Basic Anderson kit


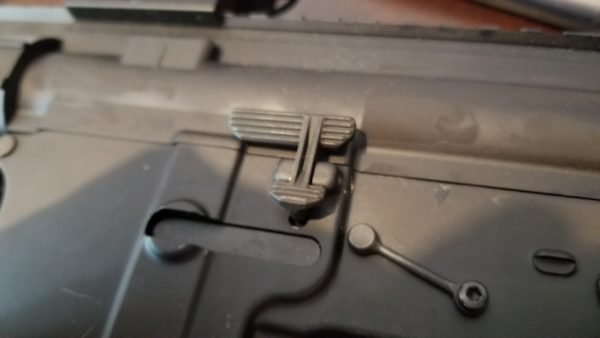
    Bolt Release: Strike Industries Extended Bolt Catch XBC

    Fire Control Pins: KNS MOD-2 Anti-Rotation/Anti-Walk Pin Kit


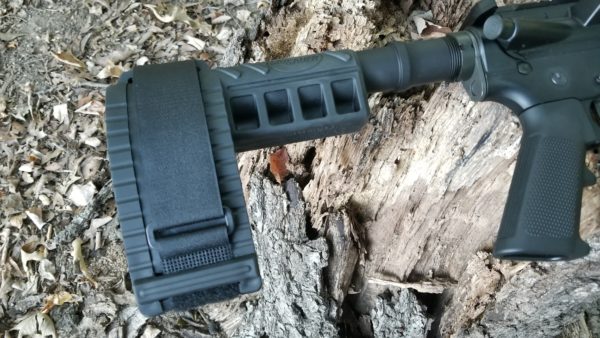
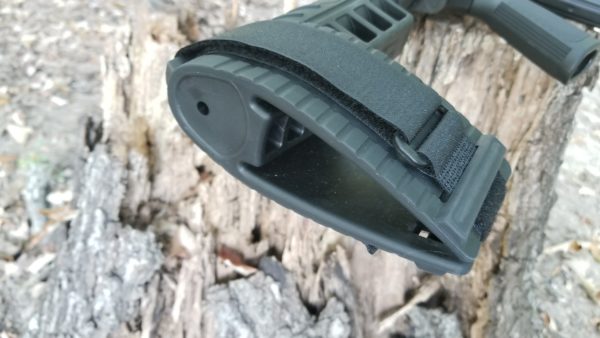
    Stock/Brace: Sig SBX15 Brace with KAK Buffer Tube Kit


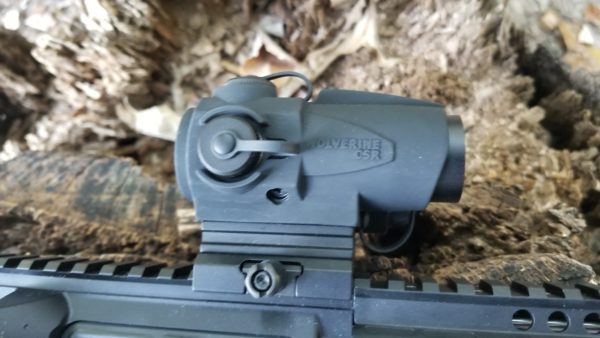
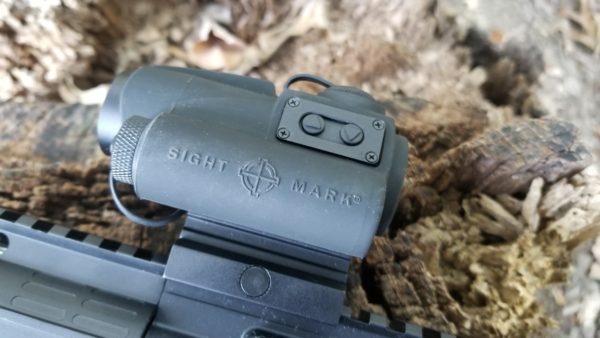
    Optic: Sightmark Wolverine CSR

    SLIDESHOW

    [slideshow_deploy id=’9532′]

    So – why did I build this gun? Did I have some objective? Is it in my arsenal to fill a specific role?

    Come on. I built it because I wanted to!!

    AR pistols are some of the most fun firearms you can own. They can serve numerous functions when it comes to self-defense as well. In fact, my “SHTF Go To” gun is an AR pistol.

    The barrel is 10.5″ in length. For a “pistol” build I prefer 10.5″ as it is MUCH quieter and has MUCH less concussion than a 7.5″ and retains better ballistics as well. The Sig brace was chosen as I wanted to do something different. Previous projects used the Shockwave Blade. I didn’t think I would care for the Sig brace however after putting it to use I love it. So comfortable and makes for a great cheek weld.

    The Phosphate M16 Bolt Carrier Group is a budget bolt however it works. I have one in another gun with many rounds through it and so far so good.

    The Hipertouch EDT trigger is phenomenal. Crisp, short reset, almost no take up at all, and breaks at around 5.5 pounds. For around $90 it is a bargain. I use it in my of my AR’s.

    The Mid State Firearms upper has performed perfectly. The front handguard is extremely comfortable and lends itself to a c-clamp grip. The Sightmark CSR optic so far has done well. Seems very well built and has stayed zeroed through a few hundred rounds. The red dot has a slight touch of flaring but nothing that will be an issue for ranges this gun is likely to see. Controls are perfect. 50,000-hour battery life is nice.

    The flash can helps drive the concussion and noise forward. I struggle to tell a difference but it certainly protects the muzzle.


    Summary:

    As with all AR pistols, this project is small, light, portable, and incredibly handy.


  • 30 Christmas Gifts for Prepper’s

    30 Christmas Gifts for Prepper’s


    Have a prepper on your Christmas list? Here are a few ideas within different price ranges on what to get them. Forget the socks and the ties…..get them something they will really like.

    Merry Christmas!!


    $50+

    Cold Steel Recon Tanto Knife – exquisite

    Bushnell TRS-25 AR Red Dot Optic – a favorite of mine

    Armasight Spark NV Monocular

    Bushnell Equinox Night Vision

    Maxpedition Condor-II Backpack


    $25 – $50

    Baofeng UV-5R Duel Band Two-Way Radio – probably the most common radio used among preppers. Not the best – but good to start with.

    Tecsun PL-360 AM/FM/Shortwave – listen for information locally and around the world.

    Nebo iProTec 190 lumen Weapons Light – budget friendly light providing 190 lumens via LED diode.

    Helotex G2 Flashlight – my favorite light. Uses AA or CR123 batteries.

    North American CAT Tourniquet – this is THE recommended tourniquet.

    326 Piece Hard Case First Aid Kit – nice and very good to have around.


    $10 – $25

    Mora Companion Outdoor Knife  – super sharp and handy knife, the Mora is legendary for being an incredible value.

    CIMA Survival Knife – excellent survival knife with a full tang blade. A clone of an ESEE costing around $100. Bargain.

    SOG Responder Bag – have it in the trunk….just in case.

    Tac-Mag Gun Magnet – holds up to 25 pounds and allows gun mounting almost anywhere.

    Midland 22 Channel FRS/GMRA Walkie-Talkies Set – great 1-2 mile communications tool.

    Tenergy CR123 Lithium-ion Battery Pack/12 – Great price on these high capacity and powerful batteries.

    Survival Garden 15,000 Heirloom Seed Bank – great pack of seeds for growing food.

    MTM AR/M16 Magazine Case – holds 15 AR magazines – ready to go.

    Sawyer Mini Water Filter – the prepper’s water filter.

    4 Pack Mechanical Yo Yo’s Fishing Reels – automatic fishing. Great tool for gathering food while doing other tasks.

    Spartan AR Wall Mount – pretty cool.


    $1 – $10

    VISM Dump Pouch – economical “catch-all” bag

    OD Green Vinyl US Flag Stickers – perfect for mounting on AR just above the magazine.

    Lucas Gun Oil – formulated for high performance in all firearms.

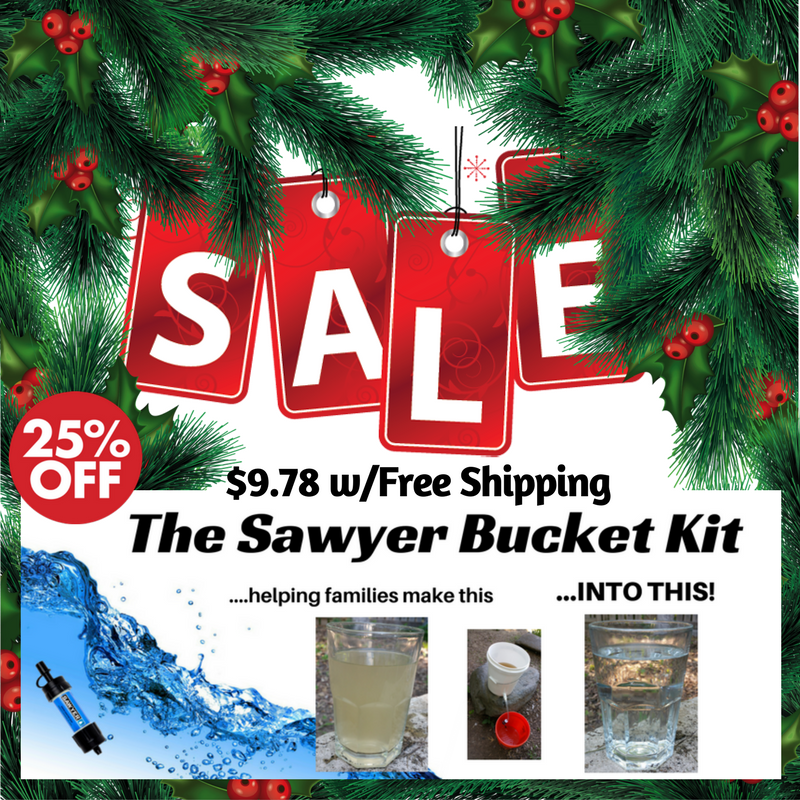
    Sawyer Mini Water Filter Bucket Kit – adapts the Sawyer for bucket use. On Sale – $9.78

    Red Dawn – the classic survival movie

    Classic Pocket Survival Tool – perfect stocking stuffer!

    Folding Camp Grill – super portable and useful.

    Israeli Battle Dressing – should be in every back and vehicle.


    …….and for those wishing to buy me a Christmas present – here are 10 ideas!!

    Schrade SCHF38 Frontier Knife

    MTM AC4C Ammo Crate

    Streamlight TLR-1 Weapons Light

    Paratus 3 Day Operators Backpack

    ATN Thor Thermal Optic

    Raptor Whisper Air Rifle .177 caliber

    Barnett Recruit Recurve Crossbow

    Condor Modular Chest Rig

    Trijicon ACOG 4×32 Scope

    Vortex Strikefire II Red Dot Optic

    ….gee….I’m not hard to buy for.


    Take care all!!

    Rourke

  • Alert: Proof of The Communist Elite Agenda In The USA

    Alert: Proof of The Communist Elite Agenda In The USA


    Communism has been feared in the United States since World War I. An acceleration of this fear occurred through the 40’s and into the 1950’s as many believed that communism would spread and infiltrate the United States. Although history shows that communism declined as a domestic concern and was eradicated internally by the end of the Cold War, many believe that a communist agenda remained behind the scenes all these years.

    Look – I’m not a conspiracy theorist nor do I have a very large inventory of tin foil hats. I will say that my mind has opened to many things that just 5-10 years ago I would have called ridiculous. If you are so inclined to believe what is in this video – how does it change your perspective on prepping and politics?

    On with the video……

  • Rourke’s Recommendations

    Rourke’s Recommendations


    Every Thursday I recommend a few things such as movies, books, and an assortment of gear – all kinds of stuff. Some of these are related to survival & preparedness – while others are just stuff I like. Most are on Amazon but not all.

    So – for this week……here is my list:

    Books:

    Week-by-Week Vegetable Gardener’s Handbook

    EMP-Hardened Radio Communications

    Nuclear War Survival Skills

    Survivalist Family


    Movies/TV:

    Goodbye World

    Dragon Day

    Remnants

    Electronic Armageddon


    Gear:

    TACT Bivy Emergergeny Sleeping Bag

    Outcast Survival Fishing Kit

    TUFF 1911 5 Magazine Pouch

    GLOCK 10 Magazine Pouch – OEM

    *     *     *     *     *     *     *

  • Simple & Inexpensive Prepper Lighting Solution

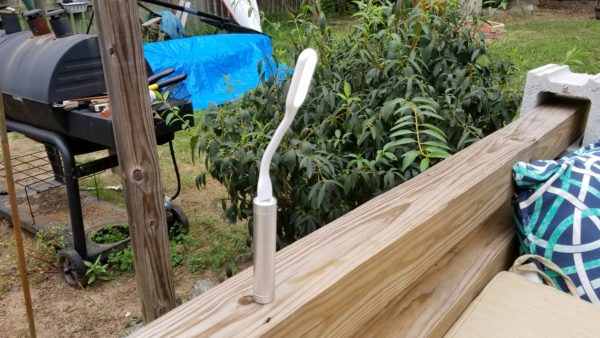
    Simple & Inexpensive Prepper Lighting Solution


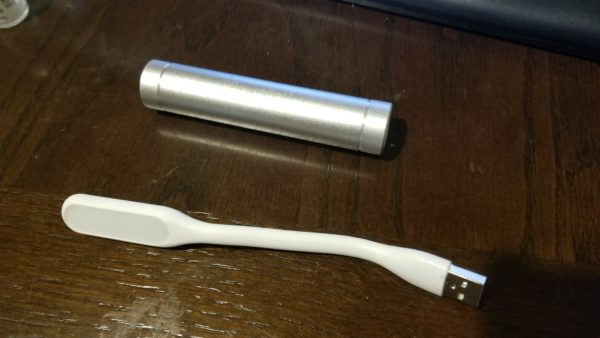
    Powers out. The suns going down. Temperatures are dropping. The zombies are…..OK, I’m getting carried away. Lighting when the powers out is not a very popular topic. Beyond flashlights, candles and oil lamps are mentioned frequently. A more modern alternative to candles and oil lamps are LED USB lights. These are small LED lights that plug into any USB port. As soon as I saw them I thought of seeing how they will work on a portable power bank.

    I have numerous portable power banks. They really come in handy when regular charging methods are not available.

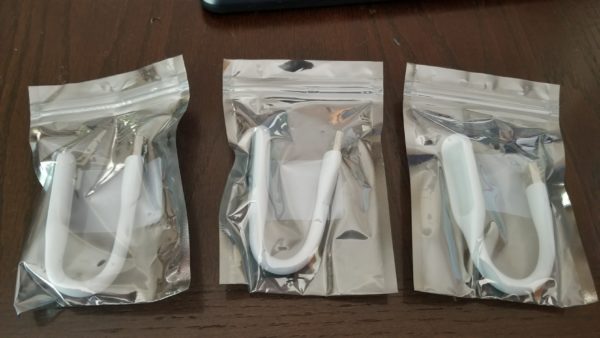
    After receiving three of the LED USB lights from GearBest.com I did a little testing. At about $3.00 each these are easy on the wallet.

    Above: LED USB Light with 3000mAh portable power bank


    Above: Here’s a pic during the day to better see the setup.


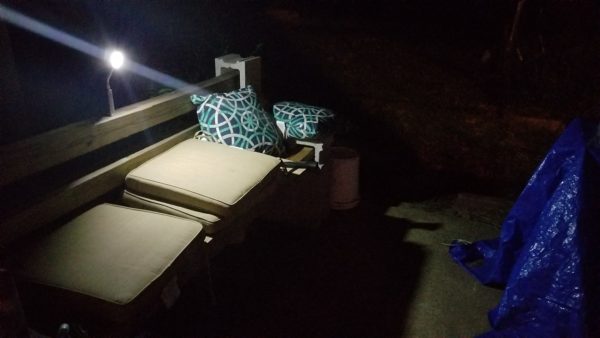
    Above: Back patio with a small amount of light coming from the kitchen.

    Below: LED USB light turned on. Picture doesn’t do it justice as to how much it lights up the area.


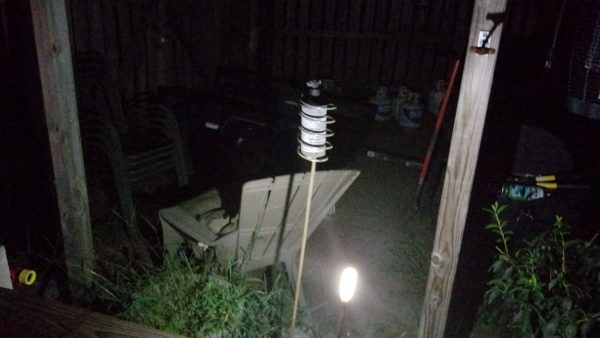
    Above: View from the backside after I turned it around. That fence line and those propane tanks are about 30 feet away.


    Based on my calculations a 10,000mAh power bank – such as this one – will run the USB light for over 40 hours. This is significant. Sips power.

    These can be used to walk around with or position in a house to light up an entire room or area. In fact, a good part of a campsite could be illuminated enough to walk around and check for the occasional bigfoot or zombie.

    LED USB lights – $3 each. Not bad. Think I will order a few more.


  • Chicken Noodle Soup Taste Test: 4 Years Expired

    Chicken Noodle Soup Taste Test: 4 Years Expired


    While I stock up on freeze dried and bulk foods such as rice, canned goods are the staple of my own food storage program. I have written about the myths surrounding expiration dates and suffice it to say canned foods will last years past labeled expiration date if properly stored. This goes for almost every kind of canned food including meats, soups, stews, fruits, and vegetables.

    I’ve saved an assortment of canned goods over the years that the wifey wanted to throw out. Every so often I pull one out and serve it. So far I’ve had no issues with any of them.

    Recently I reached deep into the back behind stacks and stacks of food all over my house and…….well, Ok I went to the cabinet and got a can of chicken noodle soup. The can expired in 2013 which makes it well over 4 years past the point most people would have thrown it out.


    I opened the can, heated it up and put it in my belly. No issues whatsoever. As I expected the appearance, smell, texture, and flavor we all like the can was processed the day before. So while I would like to write up some eloquent article on my taste test it really boils down to opening a can, heating it up – and eating it.

    ****Note: Do not consume canned that are bulging or leaking. It’s not good for canned food – or people.

    [slideshow_deploy id=’9383′]

  • Rourke’s Recommendations

    Rourke’s Recommendations


    Every Thursday I recommend a few things such as movies, books, and an assortment of gear – all kinds of stuff. Some of these are related to survival & preparedness – while others are just stuff I like. Most are on Amazon but not all.

    So – for this week……here is my list:

    Books:

    Select Fire 10/22: The TEK Full Auto Conversion

    US Army Guide to Booby Traps

    Shelters, Shacks, and Shanties

    The Trappers Bible


    Movies/TV:

    In the Line of Fire

    Heartbreak Ridge

    Night Hawks

    Eye See You


    Gear:

    Daisy Folding Slingshot (don’t forget extra bands)

    Gamo Varmint Air Rifle .177 cal 1250fps

    Ruger Magnum Air Rifle .22 cal 1200fps

    Gerber Suspension Multi-Tool

    *     *     *     *     *     *     *

  • Converting a Cargo Trailer Into a Camper

    Converting a Cargo Trailer Into a Camper

    A little over a year ago I was looking into converting a cargo trailer into a “camper”. The purpose behind this was not only to be ready-to-go for camping at a moments notice but also for bugging out. The vehicles I had at the time had fairly low maximum pounds which I could pull. Even a pop-up camper weighed too much. After seeing the video below I was intrigued and started seriously looking into a cargo trailer conversion. I felt with a smaller trailer conversion I would come in close to the weight I could handle.

    Inevitably I never proceeded forward. I ended up buying an old military two-wheeled trailer and it currently sits at a local shop being customized. Possibly before the next Presidential election, I may get it back as they have had it WAY too long. The cost of the customizing is dirt cheap so I don’t have a lot to complain about. Regardless, the cargo trailer conversion to a camper is a budget-friendly solution.

     Warning – turn off the sound otherwise you may just go insane.

  • Strengths and Weaknesses


    I’ve had some older folks suggest that they are useless should the SHTF. They talk about their bad knees, inability to run, or other physical limitations. Others will say they are just not “tactical” enough and don’t have an aggressive mindset. It is disappointing to hear talk like this and the display of such defeatist perspectives.

    We all have value. We all can contribute.  The fact is we also all have limitations and some of those limitations can be determinantal. While certainly there are cases which weakness can be changed the reality is we are who we are. For preppers, those weaknesses must be identified and dealt with.

    Example:    Your group has 12 members. Two are over 70 years old. Three of the others are obese and have physical limitations when it comes to exerting themselves. One member is a Crossfit athlete. The rest are ordinary people in average shape.  The decision on sending a patrol out 3-5 miles from the property to watch for traffic on a popular rural road and report back their observations would have to take physical limitations – as well as mental ones – into consideration.

    Example: The group arrives at the retreat. The retreat arrival checklist is pulled out and responsibilities are divided. Responsibilities and tasks revolving around food prep, cooking, sanitation, logistics/inventory control, security, water/water filtration, etc. are all critical to the success of the group. The Crossfit athlete has a serious reading/writing problem, and one of the 70-year-olds worked for the Post Office in logistics. Strengths and weakness must be considered.

    Example: Over the last three days the perimeter of the property has been tested by someone on a motorcycle. It is apparent they are testing the waters to see how the group is reacting and to gather intelligence. Two of the group members are ex-military and suggest an attack is imminent. A defensive plan specifically geared towards this known threat must be implemented. One of the 70+-year-olds fought in Vietnam. The other member was in the first Gulf War. The tactical experience and knowledge level must be considered for all members as a plan is devised.

    It would be great if we could all be John J. Rambo with advanced medical degrees. That is just not realistic. Having the ability to not take offense is also important. There’s no room for ego’s when it comes to survival.

    Assessing skills and making decisions that are in the best interest of the group is critical. Everyone needs to be on the same page and the entire topic should be discussed well before the “bug out” takes place.

    Lastly  – if you realize you have weakness consider making changes to eliminate them. Certainly, some are unavoidable. Having limitations due to being overweight can be improved. If your cardio just plain sucks and you could not walk 6 miles if your life depended on it then get out there and start walking. Even small improvements over time will add up.

    p.s. A self-sufficient home base is one of the best force multipliers for any prepping group. Begin planning your homestead at Homestead Launch.

  • Rourke’s Recommendations

    Rourke’s Recommendations


    Every Thursday I recommend a few things such as movies, books, and an assortment of gear – all kinds of stuff. Some of these are related to survival & preparedness – while others are just stuff I like. Most are on Amazon but not all.

    So – for this week……here is my list:

    Books:

    Prepper’s Home Defense

    The Submachine Gun: Home Workshop Guns

    Home Workshop Silencers

    Full Auto, Volume 1: AR-15


    Movies/TV:

    Wicked Tuna: Season 1

    Mountain Men: Season 1

    Dual Survival: Season 1

    Seinfeld: The Complete Series


    Gear:

    SOG Responder Bag

    4″ Israeli Battle Dressing

    Tactical Medical Trauma Kit

    Tenergy CR123 Battery Pack/12 count

    *     *     *     *     *     *     *

  • Panhandle Rancher: Living with the Model 1911 Caliber .45ACP Pistol [Part 2]

    Panhandle Rancher: Living with the Model 1911 Caliber .45ACP Pistol [Part 2]

    Part 1 can be seen HERE.


    Range safety

    Extend your right hand ahead and out at shoulder level. Move the hand to the right noticing the effort required. With the hand again pointing forward, move the hand to the left, again noticing the effort required. For the same reason that it is easier (but not safer) to rack the pistol slide with thumbs pointing in the opposite direction, the large chest muscles make it easer to move the hand toward and past the centerline of the body. Therein lies a clue for the assistant and/or coach. Smart assistants will generally stand on the strong hand side of the shooter, which is to the right hand side of a right-handed shooter. Smart assistants will also stand slightly behind the shooter. The alert smart assistant is then in a position to control any unexpected pointing or extension of the pistol to the right of the shooter, potentially toward the assistant. This is much harder to do when standing on the weak hand side of the shooter and makes it impossible for the assistant to observe proper drawing and holstering of the pistol.


    Drawing and holstering a loaded and cocked handgun including the 1911 can be fraught with peril. As the pistol handle is gripped, the grip safety is automatically disengaged. A properly holstered pistol will have the slide safety engaged and the properly instructed shooter will have the trigger finger OUTSIDE of the trigger guard until ready to shoot. As the pistol comes on target, the strong hand thumb disengages the slide safety, trigger finger is moved inside the trigger guard, and target engaged. At the conclusion of a course of fire, the slide may be locked back on an empty magazine. The assistant/coach and shooter should both inspect the pistol to ensure the magazine is empty and that there is no round in the chamber at the conclusion of a practice set. At that point the shooter can eject the empty magazine and insert a loaded magazine or gently lower the slide on an empty chamber and holster. In either event, the shooter should automatically engage the slide safety when the slide is closed into battery before starting the holstering process.


    Holstering a loaded pistol has its own dangers. The slide safety should be engaged and trigger finger held outside of the trigger guard at all times during the holstering process. It is easy to fall into a habit of pointing the muzzle excessively toward the rear of the shooter when holstering. This is to be avoided as the muzzle can point toward another person to the rear of the shooter. Range safety officers are always alert for shooters with this bad habit and should position themselves accordingly while offering helpful suggestion to the shooter. Put that trigger finger inside of the trigger guard when drawing or holstering and a loud bang will be heard accompanied by the occasionally ventilated buttocks or side of the leg. The slide safety should always be on and the trigger finger should always remain outside the trigger guard until actually engaging the target!


    Speed in drawing and holstering comes with thousands of rounds of practice and is not a thing to be hastened. Speed and smoothness will happen with practice and patience. Speed should never be rushed.


    Before firing that first round at a target

    Always begin a range session by checking the pistol barrel for obstruction. Pointing the weapon in a safe direction at all times, the magazine is removed, slide safety disengaged, and round ejected. The slide is manually locked back and the shooter peers into the chamber, verifying that no round is present. The shooter also looks through the magazine well in the grip, verifying it is clear of obstruction and debris. At this point the shooter either inserts a cleaning rod from the muzzle and observes the end protruding from the chamber or actually peers down the muzzle. The latter practice is discouraged. Any foreign object or debris lodged in the barrel upon firing a round can cause rupture of the barrel and slide, possibly injuring or killing the shooter and/or bystander and certainly wrecking the pistol. Any foreign debris and or obstructions to the barrel bore must be removed before firing!


    Hang fire and squib powder charges

    In days gone past, bullet propellant (gunpowder) and primers were less reliable. Ball powders were actually remanufactured from decades old WWI naval rifle powder. Shooters would on occasion pull the trigger on a chambered round, the hammer would fall with a mechanical click, and the expected report and recoil not happen immediately. This condition was known as a hang fire or delayed ignition. Whenever the trigger is pulled and bang not heard immediately, always ALWAYS keep the weapon pointed in a safe direction, remove the trigger finger from the trigger and keep it outside of the trigger guard. Expect the weapon to discharge at any time without further action by the shooter.


    Count to sixty using the one thousand, two thousand, method of counting seconds during which time the pistol is always pointed in a safe direction. Remember, the weapon could unexpectedly discharge at any time. If a minute passes with without the round firing, eject the bad round and examine the primer for firing pin indent. If there is no indent, the weapon has probably malfunctioned and must be repaired before attempting to fire again. If the primer is indented, set the round aside until it can be safely discarded by burying or similar. Reload with another round and proceed with the practice session.


    Squib charges are cartridges holding a less than normal propellant charge and in the worst case, no propellant at all. In both cases the shooter will hear more of a pop than a bang upon squeezing the trigger. The firing report will certainly sound different than normal. If the cartridge case was lacking a propellant charge, recoil will be absent and the report quite mild. Either condition is highly dangerous should a subsequent round be fired without removing the bullet that is likely stuck in the barrel. This danger is enhanced in a single action self-loading semi-automatic pistol such as the 1911.


    What has happened is that the primer fired as expected resulting in enough energy to propel the bullet into the forcing cone of the barrel where it likely stuck resulting in an obstructed barrel. Hopefully the recoil was insufficient for proper function of the auto loading capability of the pistol and it failed to eject the fired cartridge case and load another round from the magazine. The absence of a normal report is a clue.


    Keeping the weapon continually pointed in a safe direction, count to 60 using the aforementioned method, remove the magazine and pull the slide fully back ejecting the offending round. Lock the slide open and visually check the chamber to ensure it is empty.


    You performed a barrel check for obstructions before starting to shoot, didn’t you? Take the cleaning rod you used to perform this check and try to insert it down the full length of the barrel. If the tip will not pass beyond the chamber, you have a bullet stuck in the barrel. Had you attempted to fire the weapon again, the barrel would likely have exploded perhaps causing serious injury or death to the shooter and/or bystander. Always wear shooting or ANSI rated protective glasses when shooting or observing shooting.


    A stuck bullet condition is not as melancholy as it seems. Disassemble the weapon for cleaning and with barrel removed from the slide, the stuck bullet should be visible from either end of the barrel. Place the end of the barrel with the shortest distance to the bullet on a soft piece of wood. Insert a length of 3/8” dowel rod into the upper end of the barrel and tap gently with a small hammer. This will eventually force the bullet from the barrel and if it was closest to the chamber end when jammed, upon reaching the chamber, the bullet will drop free. If the bullet was closer to the muzzle end, tap from the chamber end until the bullet nose is even with the muzzle and repeat the tapping process while holding the entire barrel freely in one hand. The bullet will emerge from the muzzle and drop free.


    Clean the barrel and inspect carefully for any bulging or cracking. If none are observed, reassemble the weapon. It is ready for use. If there is any question whatsoever as to the condition of the barrel, the weapon should be examined by a competent gunsmith before shooting again.


    Hang fires are very rare these days but there is always the potential for both newly manufactured ammunition and that a half century old or older. With either a hang fire or squib charge, always keep the muzzle pointed in a safe direction while counting to 60. The possibility of experiencing a squib load increases when shooting reloaded ammunition. Having shot nearly a million rounds, I have never experienced a hang fire and only one squib load that occurred early in my reloading practice at about age 12. Regardless of the weapon being fired, the competent shooter must remain aware of the possibility of both hang fire and squib load.


    Mastering recoil and report induced trigger yank or flinch

    Having learned the fundamentals of safe handling and mechanical operation of the 1911, you proceed to the target range and fire off a few boxes of ammunition. Of course you are wearing ear and eye protection. You shot better at the beginning of the session than at the end with final target hits stringed in vertical orientation. This is good news proving you are human, but bad news demonstrating almost total mastery of a bad and hard to break habit.


    Experienced shooters understand what has happened. Rather than gently squeezing the trigger, in anticipation of the report and recoil, you have begun to yank the trigger. This is an unconscious action and must be overcome before that pistol will be of much use other than as a noisemaker. Choosing to and acting toward, overcoming this bad habit defines a transition between hobby shooter interested in nice toys with an accompanying bang and a developing warrior capable of successfully wielding the 1911 pistol in a combat situation.
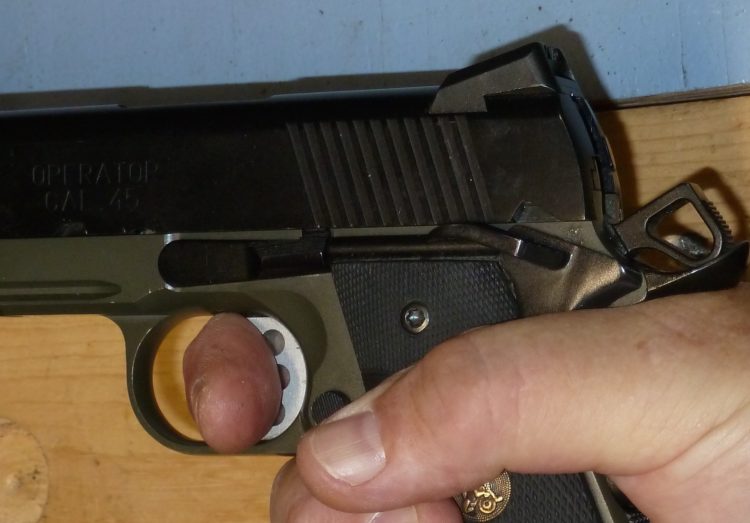
    [Improper finger trigger placement]

    What produces that vertical string begins with the unconsciously yanked trigger. Abrupt trigger movement starts the muzzle moving downward while the bullet is transiting the barrel. Depending upon how the pistol is held and amount of finger engaging the trigger [see photo above], the vertical stringing may be slanted to the right or left. Proper finger trigger placement allows the trigger to be squeezed straight back along the longitudinal axis of the pistol in a manner causing minimal lateral movement of the pistol [see photo below].
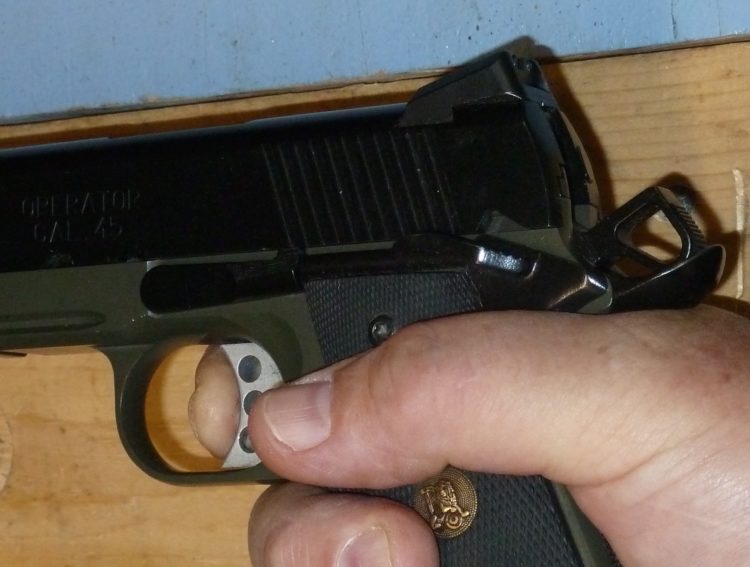
    [proper trigger finger placement]

    Trigger finger placement is an easy fix. That flinch induced trigger yank producing vertical stringing of rounds on target is not so easy and in my experience has only one cure requiring an assistant, optimally a knowledgeable pistol coach. Introducing a second person into the new shooter firearm mix can be fraught with danger for all involved.


    The best cure for that nasty bad habit of trigger yank is achieved by having your assistant or coach either loading or not, one round into a magazine, and releasing the slide chambering a round, or simply easing the slide closed on an empty chamber. If choosing not to chamber a round, the assistant must cleverly slow down the closing of the slide in order to prevent the type of damage described previously to the weapon. That clever assistant will also slow down the slide when chambering a round so that the shooter, even when wearing ear protection, cannot discern by slide sound alone whether a round actually chambered because without care, closing the slide on an empty chamber will sound different than when the weapon strips a round from the magazine and chambers. This difference is even more apparent when the shooter is wearing amplified hearing protection.


    The assistant/coach must wear both eye and ear protection. The use of amplified hearing protection makes communication between assistant and shooter much easier and safer while preserving hearing from loud noise-induced damage.


    This same clever assistant will randomly vary the time in which this closing of the action is accomplished, as the process is easier and faster when not loading a round into the chamber. In either case, the assistant must be certain that the slide is closed in battery and slide safety engaged before passing the pistol to the shooter. The assistant should produce a weapon that is either loaded or empty, in a totally transparent manner that leaves its status completely unknown to the shooter.


    At all times both shooter and assistant must practice safe weapon handling, keeping the trigger finger outside of the trigger guard and slide safety engaged until just before intentionally firing a round.


    The method I use when coaching the flinching shooter is to stand on the shooter’s strong hand side and slightly behind. Initially, I load a magazine to capacity, chamber a round, and engage the slide safety. Holding the pistol in my left hand [see photo below, safely passing a loaded pistol], with trigger guard covered by my hand on one side and my fingers on the other (always mindful to keep my fingers outside of the trigger guard) and pistol grip toward the shooter, I announce, “The weapon is cocked and loaded. The slide safety is engaged. At your timing, engage the target, until the weapon is empty.” The pistol is then passed to the shooter.
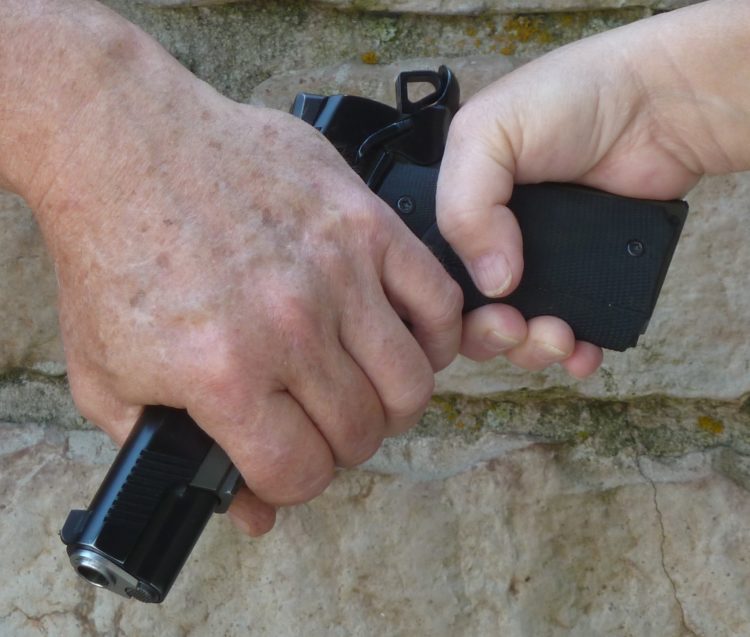
    [safely passing loaded pistol]

    Knowing the shooter has already mastered at least one bad habit; this exercise starts with a full magazine and is thereafter limited to presenting a weapon with either one chambered round or an empty chamber with emphasis on the latter presenting the shooter with an empty weapon more often than not. The initial full magazine shot at one time conditions the shooter to expect the weapon to fire each time the trigger is pulled. It also may produce vertical shot stringing on target indicative of a yanked trigger. If so, this is pointed out to the shooter before continuing.


    Thereafter the assistant will either chamber a round or not announcing, “The weapon is loaded and slide safety engaged. With one round, engage the target.” The weapon is then passed to the shooter.


    Upon receiving the weapon, the shooter points it toward the target, snicks off the slide safety and inserts the trigger finger into the trigger guard. These two actions should proceed in the same manner every time and only after the pistol is trained on the target.


    If the trigger is yanked on an empty chamber, the muzzle will drop in a manner most noticeable to shooter and assistant. The assistant should be in position to notice trigger finger placement on the trigger, control the weapon if necessary, and to observe the motion of the muzzle when the shooter squeezes the trigger. That yanked trigger with an unloaded weapon is most instructive. The upward recoil of the weapon when fired obscures the initial downward motion of the barrel resulting from a trigger yank making the yank invisible to both shooter and observer. Its best diagnostic is trying to fire an unexpectedly empty chamber, which is of course, the purpose of this exercise.


    When acting as the coach/assistant, I tend not to present a loaded weapon after that first magazine has been fired until the trigger yank is under control and the shooter reconditioned to expect an empty weapon. When a loaded weapon is eventually presented to the shooter, surprisingly the point of impact is almost always exactly where the shooter thought it would be based upon the sight picture at time of trigger release. I then transition back to presenting an empty weapon, occasionally introducing two successive loaded weapons in sequence with the goal being to always keep the shooter from knowing whether the weapon is loaded. At this point, the shooter should expect an empty weapon more often than one loaded.


    Two hours of serious practice in this manner may only burn through only a couple of magazines of ammunition so the exercise is much cheaper than banging away at a can while at the same time, the shooter actually improves in ability to hit a target. In my experience, no amount of shooting where the shooter self-loads the weapon or has knowledge of its loaded/unloaded status will ever overcome the yanked trigger habit. Some things just take two people.


    Having the shooter safely holster the weapon after ‘firing,’ and then un-holster an empty weapon and engage the target can provide variety to the yanked trigger exercise. This permits the shooter to practice safe holster technique.


    The Magazine

    Shooting the 1911 will provide plenty of practice loading magazines. Tactical pistol shooters should always practice loading magazines with heads up, eyes looking around, and not focused on the magazine. Focusing on the activity of loading a magazine ensures a degradation of situational awareness. If the head is consciously kept up with eyes scanning the surroundings, reloading will soon become an automatic activity.


    There are several large capacity magazine carriers for the 1911 that are easily attached to a plate carrier or belt [http://amzn.to/2yvjuTh] and other magazine carriers have a molded rail which is handy for keeping a laser and weapons light such as the Streamlight [http://amzn.to/2iSDHvs] ready for situationally dependant mounting on the pistol rails.


    Comments on cleaning the pistol

    A most useful aid for cleaning all firearms can be made from a quarter inch diameter brass rod about six to eight inches in length. Form a one-inch diameter finger loop on one end of the rod for ease of handling and file a straight slot screwdriver blade on the other end. This rod makes an excellent fowling scraper to remove burned powder residue from bolt faces, feed ramps, and from frame and slide grooves. Brass is much softer than the hardened metal of the slide and frame and should not damage the gunmetal or finish. An application of Hoppe’s or similar powder residue solvent before scraping is of benefit. As an aside, a hard to remove residue often builds up on the front face of revolver cylinders and in the worse case, impedes rotation of the cylinder. This scraper tool is perfect for removing this residue [see photo below].
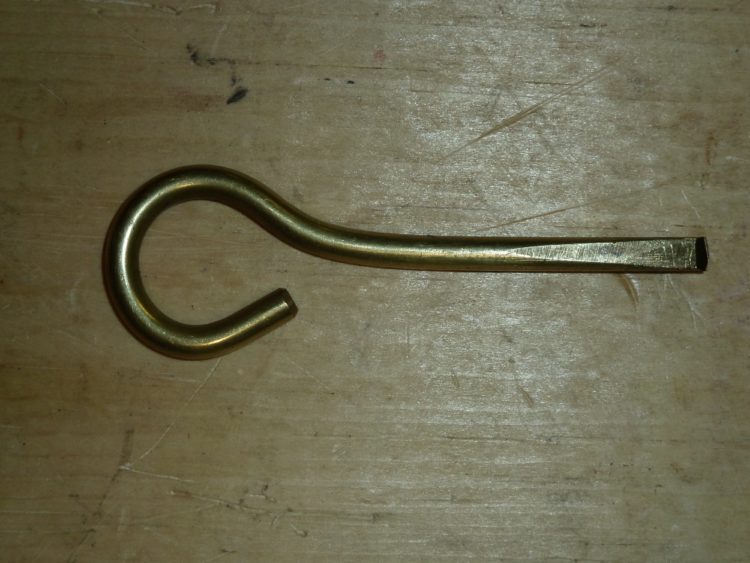
    Holsters for the workingman

    During much of my career as a suit and tie agent, I carried a .45 in a thumb break, leather holster, worn on a thick leather belt. The thumb break is essential in this type holster to secure the weapon against accidental loss and for retention should someone attempt a weapon grab. Opportunity for the latter is minimized by keeping the weapon hidden unless in use. A slightly forward-slanting holster draws easier than a vertical holster and provides increased difficulty for someone trying to take the weapon from behind. Cross draw holsters beg someone to take your pistol and shoot you with it. Shoulder holsters may have their place in the coat and tie crowd but it is hard to beat the quick drawing capability of a weapon carried in a proper holster worn on the belt.


    Some of the new Kydex and carbon fiber holsters are really excellent but criticized by the slight noise being made when drawing. Leather holsters are almost always quiet. Regardless of carry methodology, weapon retention practice should be a regular part of concealed carry training.


    Any belt worn holster should if its design permits, be worn with the belt passing through the front holster loop, then through the side of the pants belt loop and proceed through the rear holster loop. This anchors the holster to the shooter. The belt buckle always positioned nearest to the holster and by always threading the belt to the holster in this manner, it is more difficult for the holster to freely fall from an opened belt buckle.


    Upon retiring, I became the co-owner/manager of a ranch in West Texas. That experience taught new lessons in pistol packing. One of the first lessons was just how bad it hurt to be bucked from a two-year-old horse – and landing with the holstered pistol between body and earth. This is a special kind of hurt that endures.


    If that ranch produced one species of critter in excess of the most fecund jackrabbit it was the rattlesnake. The wife having been bitten by one of these vile creatures declared war and no one went outside without packing a pistol. I first tried carrying pistols in the same manner as in government service, in a form fitted snap break leather holster. Days outside in the rare rain but all too often wind-driven sand worked their way on the exposed pistol.


    Working outside on the ranch taught an old lesson and I learned anew why the US horse cavalry carried revolvers in a flapped holster. Slow to the draw but protecting the pistol from the weather it is and before long, I had a US Military style flapped holster. It helped somewhat with the wind-born sand and debris of life on a working ranch but I soon gravitated to a full flap holster that covered much of the pistol handgrip.


    Most full flap holsters are sized for a 1911 with uncocked hammer because the military method was to carry the .45 with hammer down on an empty chamber. The flap holster makes drawing slow and having to chamber a round upon drawing even slower. A saddle maker or other competent leather worker should be able to relocate the flap closure mechanism and/or manufacture a longer flap that will cover the cocked hammer. While the flap is being worked on, the belt loop should be relocated as far upward on the holster as practical. This will help the holster hold the weapon closer to the body. Holsters for full-size weapons that have the belt loop near the center of the holster will eventually let the handgrip cant outward from the body which ensures it will snag on almost anything while generating a most Barney Fife look.


    The Bathroom

    Many methods have been used in attempt to secure the belt worn pistol when in the toilet. For those with a holster on a belt loop, the weapon tends to end up on the floor where it might even be accessible to someone in an adjacent stall. Some have placed the pistol on the coat hook on the back of the door hanging by the trigger guard. This is very dangerous as the pistol can be easily jarred from off of the hook and fall on the floor potentially making the pistol accessible to another or in worse case actually discharging. Others have placed their handgun on the back of the toilet on top of the water tank. Both of these methods remove the pistol from the immediate person and the latter makes it easy to forget the handgun when exiting the stall.


    The best place for the holstered pistol when on the toilet is in your underwear between your feet. This keeps it immediately accessible and in a location impossible to forget.


    Final Comments

    Modern 1911 series .45 caliber pistols are sophisticated weapons for self-defense. The presence of multiple safeties, some automatically engaged, can make this pistol safe to carry with the hammer cocked on a loaded chamber but it is imperative the shooter receive hands-on training from a coach familiar with pistols of this design. Whenever possible choose a modern 1911 pistol incorporating the new safety features. The beginning shooter proceeding direct from the gun store with a loaded 1911 series weapon is exposed to a multitude of potential lethal dangers. Competent hands-on training should always be sought before chambering that first round.

    This article advocates keeping the weapon in a loaded, ready to fire condition. When not carried on the person, any weapon in this condition should be secured in a safe or protective container designed for weapons. Children are naturally curious about handguns and may go to unexpected lengths to retrieve a weapon from what was thought to be a perfect hiding place. All weapons when not being carried should be protected from accidental handling by children or curious adult.


  • Gun’s & Fun: Lightweight AR Build

    Gun’s & Fun: Lightweight AR Build


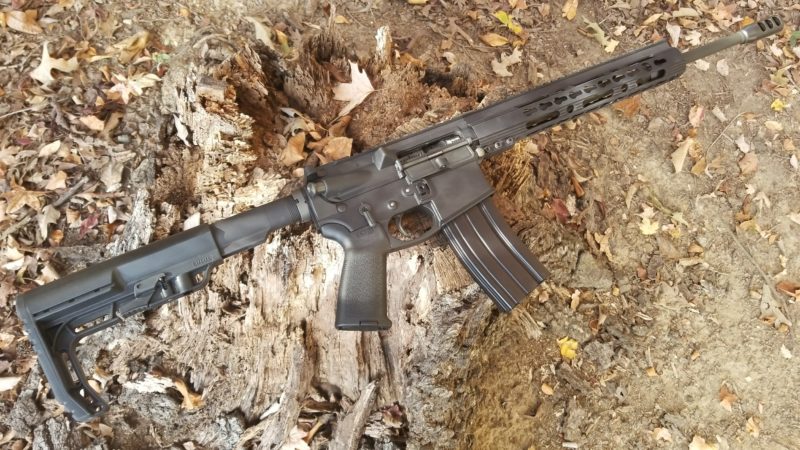
    I’ve slowly built this budget AR-15 over the last few months. It came out pretty much as expected. The first question everyone wants to know is – “How much does it weigh?” I have to give an estimate as I used various methods for weighing it and came out with a few different results. The average of the measurements was 5.8 pounds. This is significantly lighter than many AR’s commercially made – and just a tad lighter than some others. The typical AR with an optic and a couple of rail attachments easily peaks out over 8-9 pounds. So yeah – 5.8 pounds is obviously lighter.

    The picture below shows it in its complete form minus sights. The budget on this gun was under $700 and I barely made it.
     

    The components were as follows:

    Mid State Firearms custom upper – see MidStateFirearms.com

    MFT AR Minimalist Stock

    Anderson Lower Parts Kit

    Odin Works BCG

    Fostech Lightweight Stripped Lower

    Standard Mil-Spec Buffer Tube and Spring

    Magpul MOE Grip

    Standard Ambi Safety Selector

    Rousch AR Charging Handle

    [slideshow_deploy id=’9145′]

    Summary:

    Moving around with a sub-6 pound AR versus my Stag which runs around 8.5 pounds really highlights the weight difference. While there are ultralight AR’s out there costing upwards of $3,000 – a budget lightweight build is very possible. In fact – this particular build could have easily had a few ounces shaved off. A different flash hider could drop a couple ounces. The all-metal handguard could be replaced with a polymer one. Those that partake in the challenge of building ultra lightweight AR’s go to extremes with exotic metals and extremely expensive componentry.
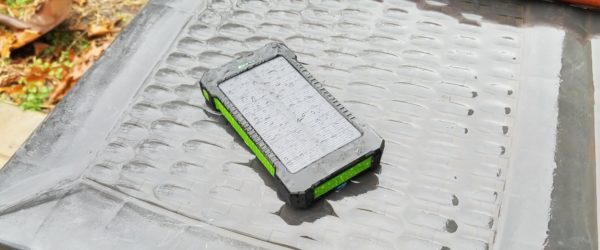
    Why go lightweight? Ounces equal pounds. Pounds equal fatigue. Weight matters.  Pounds removed from the rifle can equal more pounds of ammunition carried. Options.

    A standard AR is not too heavy. Quality of components, barrel type, comfort, etc. is much more important to me than weight. But – weight is on the list.

    A special thanks go out to MidStateFirearms.com for custom building the upper for me.

    Let the fun begin!!!!!

    Rourke

  • 5 Tips for Improving Your Shooting Accuracy

    5 Tips for Improving Your Shooting Accuracy


    It happens to every shooter, whether you are a novice or an experienced shooter. You get to a point where you miss targets that you know you should hit. Sometimes you may be new to shooting, but you seem to have plateaued in your shooting skills. Or maybe you are just trying to improve your skills to become a better shooter. Either way, it is important you develop discipline and use these tips to improve your accuracy


    Slow Down

    Everyone wants to shoot well and shoot fast. However, speed always comes at the expense of accurate shots. If you are unable to group your shots, the first step you need to take is to slow down. Once you manage to group the shots, you can then start picking up the pace. To learn how to slow down, here is an important tip, which can work great for you.

    Put an aiming point at close range; when using a handgun, this can be at five yards, for a rifle, start at 25 yards. Aim at the center of mass and fire around. Now take as much time as possible to empty the rest of the clip without enlarging the initial bullet hole. That is impossible for any shooter to achieve.

    However, that will help you to focus on the basic of shooting. These are breath control, trigger control, and sight picture. This slow-fire drill helps to reinforce muscle memory needed for accuracy. Now double the distance and repeat the drill. It is also a great way for you to get rid of a flinch.


    Squeeze Trigger Don’t Pull

    The trigger challenge can be divided into two. These are the mental and physical aspect of squeezing the trigger. The mental aspect is the hardwired response in our mind, which causes us to flinch when squeezing the trigger. This will cause the bullet to miss whatever you were targeting. To avoid this, ear protection and practice can really help.

    Since the trigger is below a short barrel in a handgun, unlike a rifle, it is quite easy to tip the barrel if the trigger is pulled too fast. Thus, instead of yanking at it in anticipation of the bang, try to slide it along the same axis as the barrel. This will only work if the index finger is in the right position.

    Avoid having the index finger pressing sideways on it. Press on it straight back like you would when you click on a pen. Besides that, you need to be holding the gun in the correct position. You also need to take your focus away from the loud bang and focus on the trigger. If you do not get used to focusing on the trigger, your mind will always try to pull you away each time. You will find that you flinch quite often when trying to make a shot.


    Alignment is Important

    At the most basic, you need to learn how to align the sights while you focus on the front sight. When you do that, the rear sights should be blurry as should be the target. The front sight should be clear.


    Practice Shooting Drills

    Another important aspect of being good at shooting is practice. After you learn all the skills, you will quickly forge unless you practice often. If you want to become a professional, that will mean hitting the shooting range as often as possible. If possible, look for good drill online, such as this resource that you can use. Try them often until you get that your skills are good.


    Muscle Memory

    The instantaneous and intuitive manipulation of a firearm is one of the most important skills you can learn at a shooting range. However, there is both bad and good muscle memory. For instance, you do not want to pick up bad habits that could affect your accuracy during a competition or when hunting.

    Such situations are stressful, and you want to make the most of them in the least amount of time possible. That will mean you practice as often as possible. Besides that, it will mean you have to use weapons and ammunition that are close to the real thing that you use in hunting or during a competition.

    Additionally, if you use any gear, ensure that it is similar to what you would use in a real-life situation. In short, muscle memory is about learning all the right skills and practicing them as often as possible.


    Alex Briggs is a contributing writer and media specialist for Galco Gunleather. He regularly produces content for a variety of gun and personal safety blogs.


  • Tactics for The American Reformation Part 6: Individual Movement Techniques & Fire Team Formations

    Tactics for The American Reformation Part 6: Individual Movement Techniques & Fire Team Formations


    Note: Information being provided is meant to encourage research, education, and training. The posts in of itself are merely brief summaries at most. Consider the information to be an introduction to the topic. Topics are published in no particular order.

    The main perspective of this ongoing series is a defensive response to a potential threat. Watching a video is not going to take the place of active, hands-on firearms and tactics training. For many, access to training is limited either due to finances or lack of qualified trainers in their area. Getting a group together and practicing tactics learned via video or books is certainly better than just watching John Wick.

    The following video shows basic movement tactics while under fire and threat from fire. The animation is rather dated however the information is quite valid.

    There are numerous military manuals available that cover similar topics including the FM 7-8 The Infantry Rifle Platoon and Squad manual.

    Get your group. Discuss scenarios. Practice. Train. Practice some more.