Tag: 45ACP

  • Panhandle Rancher: Living with the Model 1911 Caliber .45ACP Pistol [Part 2]

    Panhandle Rancher: Living with the Model 1911 Caliber .45ACP Pistol [Part 2]

    Part 1 can be seen HERE.


    Range safety

    Extend your right hand ahead and out at shoulder level. Move the hand to the right noticing the effort required. With the hand again pointing forward, move the hand to the left, again noticing the effort required. For the same reason that it is easier (but not safer) to rack the pistol slide with thumbs pointing in the opposite direction, the large chest muscles make it easer to move the hand toward and past the centerline of the body. Therein lies a clue for the assistant and/or coach. Smart assistants will generally stand on the strong hand side of the shooter, which is to the right hand side of a right-handed shooter. Smart assistants will also stand slightly behind the shooter. The alert smart assistant is then in a position to control any unexpected pointing or extension of the pistol to the right of the shooter, potentially toward the assistant. This is much harder to do when standing on the weak hand side of the shooter and makes it impossible for the assistant to observe proper drawing and holstering of the pistol.


    Drawing and holstering a loaded and cocked handgun including the 1911 can be fraught with peril. As the pistol handle is gripped, the grip safety is automatically disengaged. A properly holstered pistol will have the slide safety engaged and the properly instructed shooter will have the trigger finger OUTSIDE of the trigger guard until ready to shoot. As the pistol comes on target, the strong hand thumb disengages the slide safety, trigger finger is moved inside the trigger guard, and target engaged. At the conclusion of a course of fire, the slide may be locked back on an empty magazine. The assistant/coach and shooter should both inspect the pistol to ensure the magazine is empty and that there is no round in the chamber at the conclusion of a practice set. At that point the shooter can eject the empty magazine and insert a loaded magazine or gently lower the slide on an empty chamber and holster. In either event, the shooter should automatically engage the slide safety when the slide is closed into battery before starting the holstering process.


    Holstering a loaded pistol has its own dangers. The slide safety should be engaged and trigger finger held outside of the trigger guard at all times during the holstering process. It is easy to fall into a habit of pointing the muzzle excessively toward the rear of the shooter when holstering. This is to be avoided as the muzzle can point toward another person to the rear of the shooter. Range safety officers are always alert for shooters with this bad habit and should position themselves accordingly while offering helpful suggestion to the shooter. Put that trigger finger inside of the trigger guard when drawing or holstering and a loud bang will be heard accompanied by the occasionally ventilated buttocks or side of the leg. The slide safety should always be on and the trigger finger should always remain outside the trigger guard until actually engaging the target!


    Speed in drawing and holstering comes with thousands of rounds of practice and is not a thing to be hastened. Speed and smoothness will happen with practice and patience. Speed should never be rushed.


    Before firing that first round at a target

    Always begin a range session by checking the pistol barrel for obstruction. Pointing the weapon in a safe direction at all times, the magazine is removed, slide safety disengaged, and round ejected. The slide is manually locked back and the shooter peers into the chamber, verifying that no round is present. The shooter also looks through the magazine well in the grip, verifying it is clear of obstruction and debris. At this point the shooter either inserts a cleaning rod from the muzzle and observes the end protruding from the chamber or actually peers down the muzzle. The latter practice is discouraged. Any foreign object or debris lodged in the barrel upon firing a round can cause rupture of the barrel and slide, possibly injuring or killing the shooter and/or bystander and certainly wrecking the pistol. Any foreign debris and or obstructions to the barrel bore must be removed before firing!


    Hang fire and squib powder charges

    In days gone past, bullet propellant (gunpowder) and primers were less reliable. Ball powders were actually remanufactured from decades old WWI naval rifle powder. Shooters would on occasion pull the trigger on a chambered round, the hammer would fall with a mechanical click, and the expected report and recoil not happen immediately. This condition was known as a hang fire or delayed ignition. Whenever the trigger is pulled and bang not heard immediately, always ALWAYS keep the weapon pointed in a safe direction, remove the trigger finger from the trigger and keep it outside of the trigger guard. Expect the weapon to discharge at any time without further action by the shooter.


    Count to sixty using the one thousand, two thousand, method of counting seconds during which time the pistol is always pointed in a safe direction. Remember, the weapon could unexpectedly discharge at any time. If a minute passes with without the round firing, eject the bad round and examine the primer for firing pin indent. If there is no indent, the weapon has probably malfunctioned and must be repaired before attempting to fire again. If the primer is indented, set the round aside until it can be safely discarded by burying or similar. Reload with another round and proceed with the practice session.


    Squib charges are cartridges holding a less than normal propellant charge and in the worst case, no propellant at all. In both cases the shooter will hear more of a pop than a bang upon squeezing the trigger. The firing report will certainly sound different than normal. If the cartridge case was lacking a propellant charge, recoil will be absent and the report quite mild. Either condition is highly dangerous should a subsequent round be fired without removing the bullet that is likely stuck in the barrel. This danger is enhanced in a single action self-loading semi-automatic pistol such as the 1911.


    What has happened is that the primer fired as expected resulting in enough energy to propel the bullet into the forcing cone of the barrel where it likely stuck resulting in an obstructed barrel. Hopefully the recoil was insufficient for proper function of the auto loading capability of the pistol and it failed to eject the fired cartridge case and load another round from the magazine. The absence of a normal report is a clue.


    Keeping the weapon continually pointed in a safe direction, count to 60 using the aforementioned method, remove the magazine and pull the slide fully back ejecting the offending round. Lock the slide open and visually check the chamber to ensure it is empty.


    You performed a barrel check for obstructions before starting to shoot, didn’t you? Take the cleaning rod you used to perform this check and try to insert it down the full length of the barrel. If the tip will not pass beyond the chamber, you have a bullet stuck in the barrel. Had you attempted to fire the weapon again, the barrel would likely have exploded perhaps causing serious injury or death to the shooter and/or bystander. Always wear shooting or ANSI rated protective glasses when shooting or observing shooting.


    A stuck bullet condition is not as melancholy as it seems. Disassemble the weapon for cleaning and with barrel removed from the slide, the stuck bullet should be visible from either end of the barrel. Place the end of the barrel with the shortest distance to the bullet on a soft piece of wood. Insert a length of 3/8” dowel rod into the upper end of the barrel and tap gently with a small hammer. This will eventually force the bullet from the barrel and if it was closest to the chamber end when jammed, upon reaching the chamber, the bullet will drop free. If the bullet was closer to the muzzle end, tap from the chamber end until the bullet nose is even with the muzzle and repeat the tapping process while holding the entire barrel freely in one hand. The bullet will emerge from the muzzle and drop free.


    Clean the barrel and inspect carefully for any bulging or cracking. If none are observed, reassemble the weapon. It is ready for use. If there is any question whatsoever as to the condition of the barrel, the weapon should be examined by a competent gunsmith before shooting again.


    Hang fires are very rare these days but there is always the potential for both newly manufactured ammunition and that a half century old or older. With either a hang fire or squib charge, always keep the muzzle pointed in a safe direction while counting to 60. The possibility of experiencing a squib load increases when shooting reloaded ammunition. Having shot nearly a million rounds, I have never experienced a hang fire and only one squib load that occurred early in my reloading practice at about age 12. Regardless of the weapon being fired, the competent shooter must remain aware of the possibility of both hang fire and squib load.


    Mastering recoil and report induced trigger yank or flinch

    Having learned the fundamentals of safe handling and mechanical operation of the 1911, you proceed to the target range and fire off a few boxes of ammunition. Of course you are wearing ear and eye protection. You shot better at the beginning of the session than at the end with final target hits stringed in vertical orientation. This is good news proving you are human, but bad news demonstrating almost total mastery of a bad and hard to break habit.


    Experienced shooters understand what has happened. Rather than gently squeezing the trigger, in anticipation of the report and recoil, you have begun to yank the trigger. This is an unconscious action and must be overcome before that pistol will be of much use other than as a noisemaker. Choosing to and acting toward, overcoming this bad habit defines a transition between hobby shooter interested in nice toys with an accompanying bang and a developing warrior capable of successfully wielding the 1911 pistol in a combat situation.
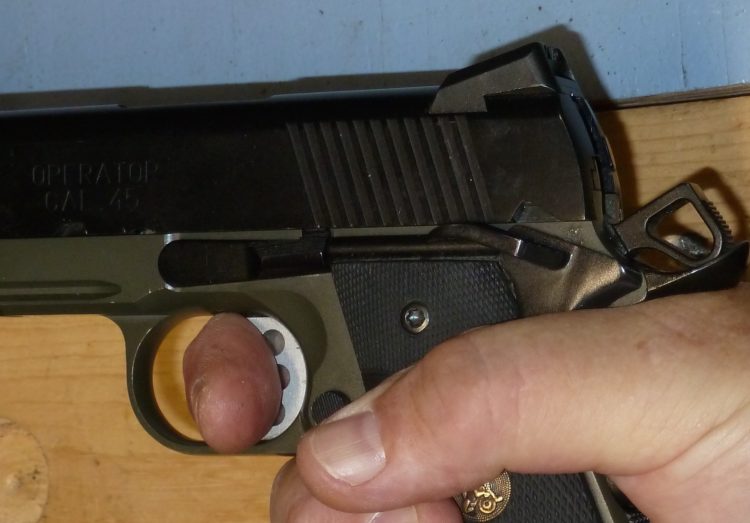
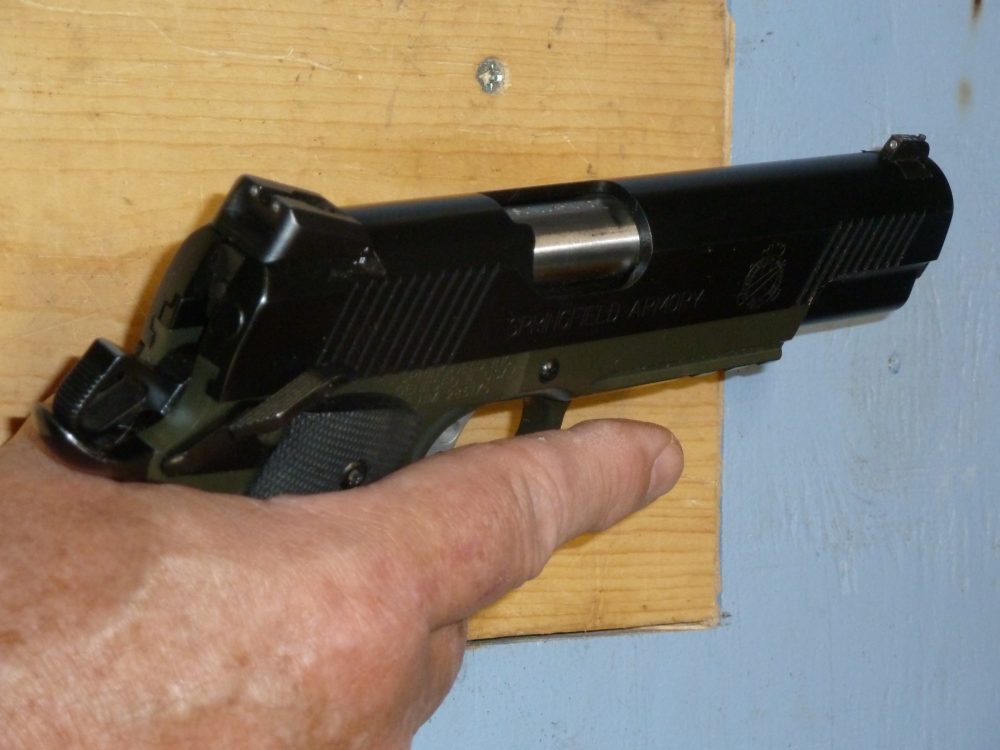
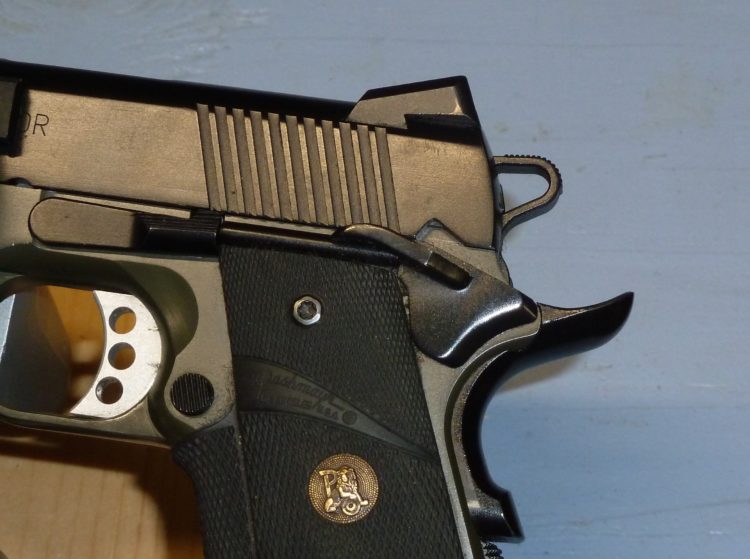
    [Improper finger trigger placement]

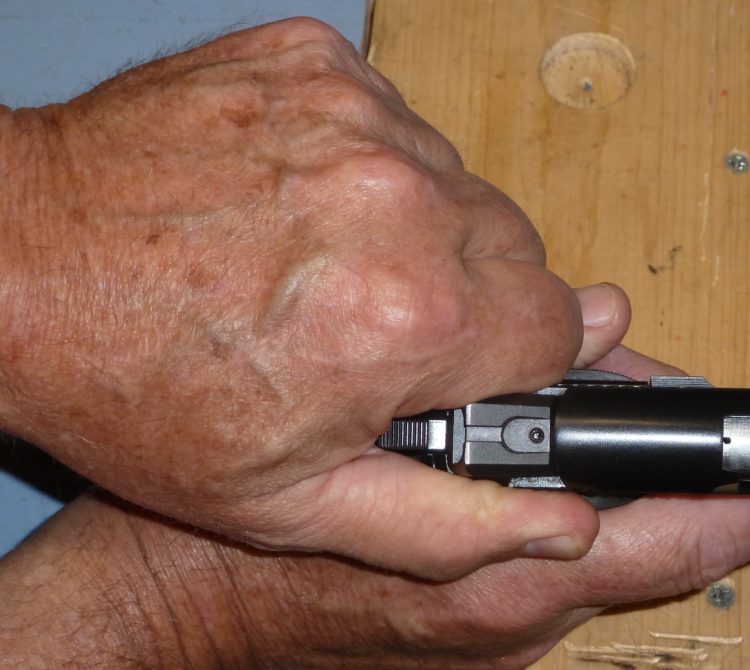
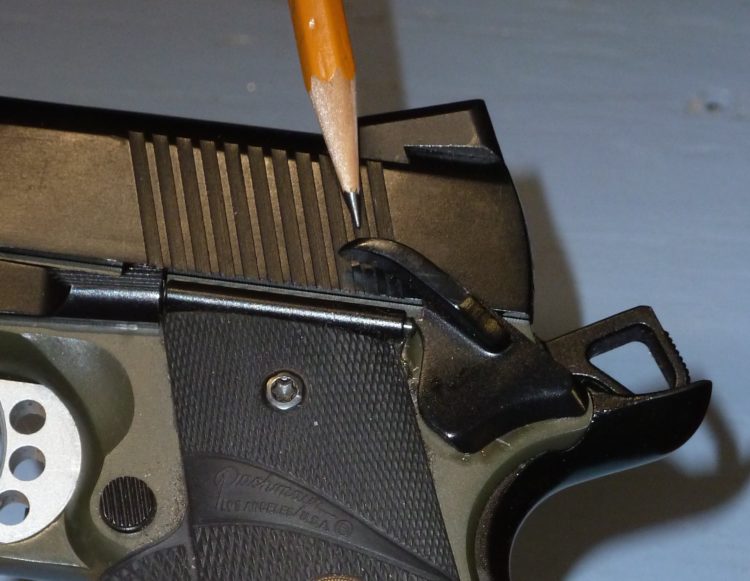
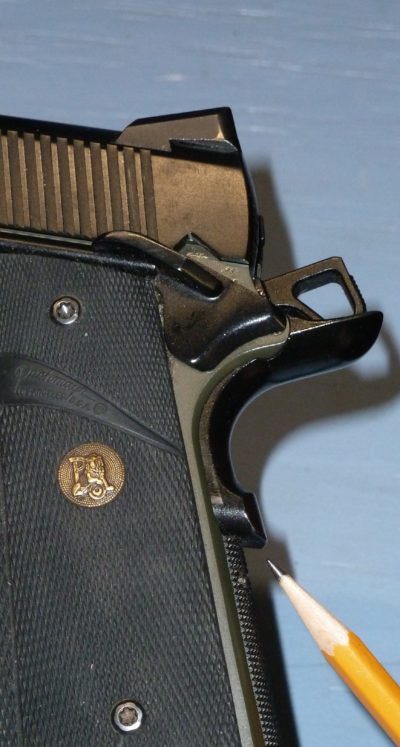
    What produces that vertical string begins with the unconsciously yanked trigger. Abrupt trigger movement starts the muzzle moving downward while the bullet is transiting the barrel. Depending upon how the pistol is held and amount of finger engaging the trigger [see photo above], the vertical stringing may be slanted to the right or left. Proper finger trigger placement allows the trigger to be squeezed straight back along the longitudinal axis of the pistol in a manner causing minimal lateral movement of the pistol [see photo below].
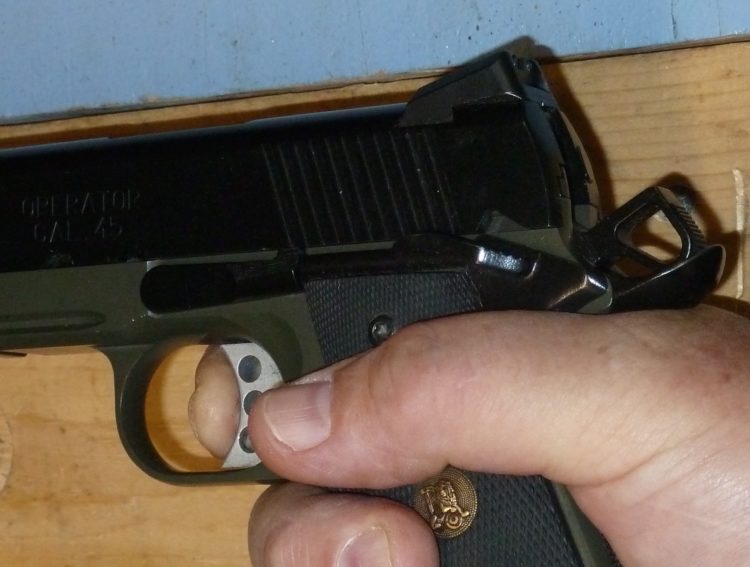
    [proper trigger finger placement]

    Trigger finger placement is an easy fix. That flinch induced trigger yank producing vertical stringing of rounds on target is not so easy and in my experience has only one cure requiring an assistant, optimally a knowledgeable pistol coach. Introducing a second person into the new shooter firearm mix can be fraught with danger for all involved.


    The best cure for that nasty bad habit of trigger yank is achieved by having your assistant or coach either loading or not, one round into a magazine, and releasing the slide chambering a round, or simply easing the slide closed on an empty chamber. If choosing not to chamber a round, the assistant must cleverly slow down the closing of the slide in order to prevent the type of damage described previously to the weapon. That clever assistant will also slow down the slide when chambering a round so that the shooter, even when wearing ear protection, cannot discern by slide sound alone whether a round actually chambered because without care, closing the slide on an empty chamber will sound different than when the weapon strips a round from the magazine and chambers. This difference is even more apparent when the shooter is wearing amplified hearing protection.


    The assistant/coach must wear both eye and ear protection. The use of amplified hearing protection makes communication between assistant and shooter much easier and safer while preserving hearing from loud noise-induced damage.


    This same clever assistant will randomly vary the time in which this closing of the action is accomplished, as the process is easier and faster when not loading a round into the chamber. In either case, the assistant must be certain that the slide is closed in battery and slide safety engaged before passing the pistol to the shooter. The assistant should produce a weapon that is either loaded or empty, in a totally transparent manner that leaves its status completely unknown to the shooter.


    At all times both shooter and assistant must practice safe weapon handling, keeping the trigger finger outside of the trigger guard and slide safety engaged until just before intentionally firing a round.


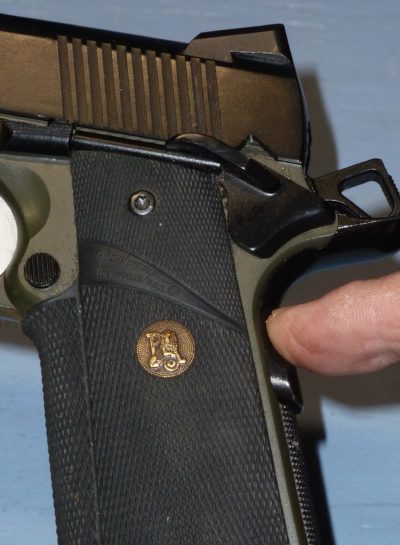
    The method I use when coaching the flinching shooter is to stand on the shooter’s strong hand side and slightly behind. Initially, I load a magazine to capacity, chamber a round, and engage the slide safety. Holding the pistol in my left hand [see photo below, safely passing a loaded pistol], with trigger guard covered by my hand on one side and my fingers on the other (always mindful to keep my fingers outside of the trigger guard) and pistol grip toward the shooter, I announce, “The weapon is cocked and loaded. The slide safety is engaged. At your timing, engage the target, until the weapon is empty.” The pistol is then passed to the shooter.
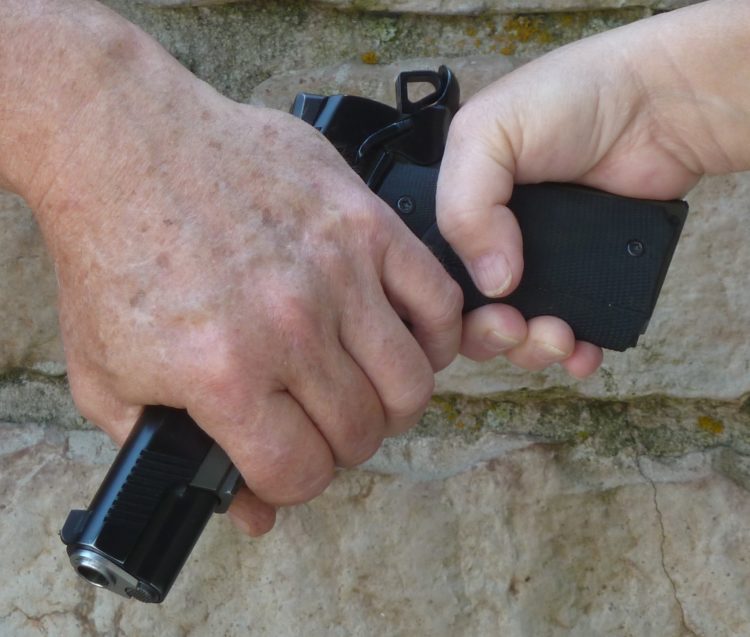
    [safely passing loaded pistol]

    Knowing the shooter has already mastered at least one bad habit; this exercise starts with a full magazine and is thereafter limited to presenting a weapon with either one chambered round or an empty chamber with emphasis on the latter presenting the shooter with an empty weapon more often than not. The initial full magazine shot at one time conditions the shooter to expect the weapon to fire each time the trigger is pulled. It also may produce vertical shot stringing on target indicative of a yanked trigger. If so, this is pointed out to the shooter before continuing.


    Thereafter the assistant will either chamber a round or not announcing, “The weapon is loaded and slide safety engaged. With one round, engage the target.” The weapon is then passed to the shooter.


    Upon receiving the weapon, the shooter points it toward the target, snicks off the slide safety and inserts the trigger finger into the trigger guard. These two actions should proceed in the same manner every time and only after the pistol is trained on the target.


    If the trigger is yanked on an empty chamber, the muzzle will drop in a manner most noticeable to shooter and assistant. The assistant should be in position to notice trigger finger placement on the trigger, control the weapon if necessary, and to observe the motion of the muzzle when the shooter squeezes the trigger. That yanked trigger with an unloaded weapon is most instructive. The upward recoil of the weapon when fired obscures the initial downward motion of the barrel resulting from a trigger yank making the yank invisible to both shooter and observer. Its best diagnostic is trying to fire an unexpectedly empty chamber, which is of course, the purpose of this exercise.


    When acting as the coach/assistant, I tend not to present a loaded weapon after that first magazine has been fired until the trigger yank is under control and the shooter reconditioned to expect an empty weapon. When a loaded weapon is eventually presented to the shooter, surprisingly the point of impact is almost always exactly where the shooter thought it would be based upon the sight picture at time of trigger release. I then transition back to presenting an empty weapon, occasionally introducing two successive loaded weapons in sequence with the goal being to always keep the shooter from knowing whether the weapon is loaded. At this point, the shooter should expect an empty weapon more often than one loaded.


    Two hours of serious practice in this manner may only burn through only a couple of magazines of ammunition so the exercise is much cheaper than banging away at a can while at the same time, the shooter actually improves in ability to hit a target. In my experience, no amount of shooting where the shooter self-loads the weapon or has knowledge of its loaded/unloaded status will ever overcome the yanked trigger habit. Some things just take two people.


    Having the shooter safely holster the weapon after ‘firing,’ and then un-holster an empty weapon and engage the target can provide variety to the yanked trigger exercise. This permits the shooter to practice safe holster technique.


    The Magazine

    Shooting the 1911 will provide plenty of practice loading magazines. Tactical pistol shooters should always practice loading magazines with heads up, eyes looking around, and not focused on the magazine. Focusing on the activity of loading a magazine ensures a degradation of situational awareness. If the head is consciously kept up with eyes scanning the surroundings, reloading will soon become an automatic activity.


    There are several large capacity magazine carriers for the 1911 that are easily attached to a plate carrier or belt [http://amzn.to/2yvjuTh] and other magazine carriers have a molded rail which is handy for keeping a laser and weapons light such as the Streamlight [http://amzn.to/2iSDHvs] ready for situationally dependant mounting on the pistol rails.


    Comments on cleaning the pistol

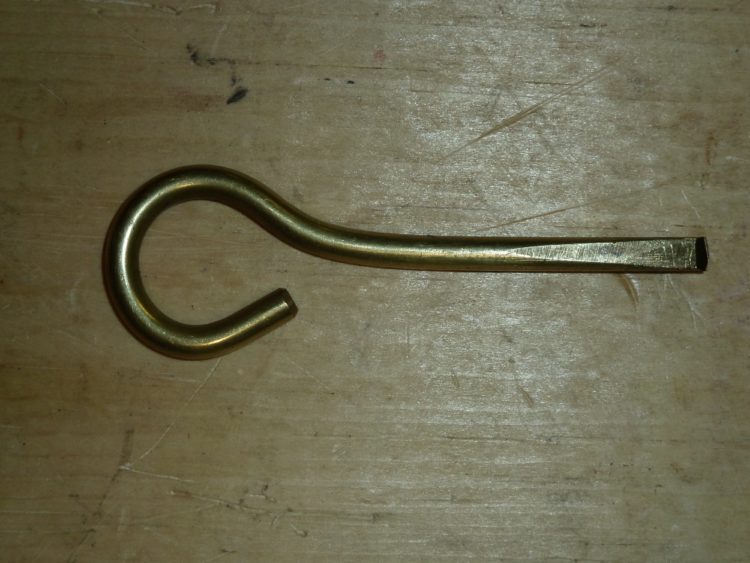
    A most useful aid for cleaning all firearms can be made from a quarter inch diameter brass rod about six to eight inches in length. Form a one-inch diameter finger loop on one end of the rod for ease of handling and file a straight slot screwdriver blade on the other end. This rod makes an excellent fowling scraper to remove burned powder residue from bolt faces, feed ramps, and from frame and slide grooves. Brass is much softer than the hardened metal of the slide and frame and should not damage the gunmetal or finish. An application of Hoppe’s or similar powder residue solvent before scraping is of benefit. As an aside, a hard to remove residue often builds up on the front face of revolver cylinders and in the worse case, impedes rotation of the cylinder. This scraper tool is perfect for removing this residue [see photo below].
    Holsters for the workingman

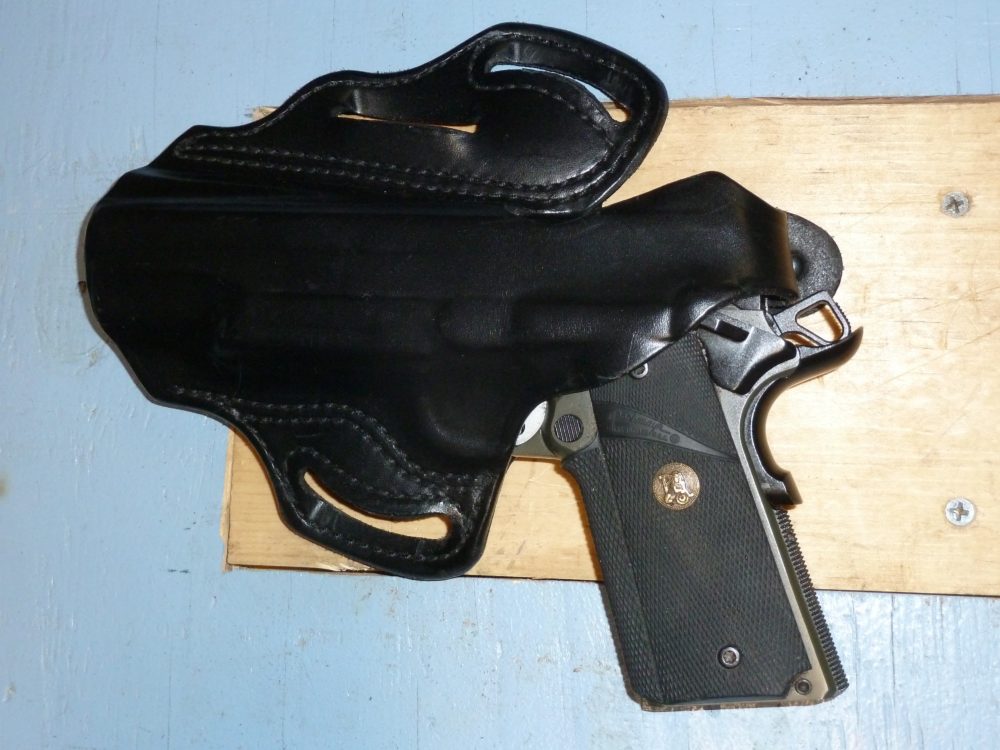
    During much of my career as a suit and tie agent, I carried a .45 in a thumb break, leather holster, worn on a thick leather belt. The thumb break is essential in this type holster to secure the weapon against accidental loss and for retention should someone attempt a weapon grab. Opportunity for the latter is minimized by keeping the weapon hidden unless in use. A slightly forward-slanting holster draws easier than a vertical holster and provides increased difficulty for someone trying to take the weapon from behind. Cross draw holsters beg someone to take your pistol and shoot you with it. Shoulder holsters may have their place in the coat and tie crowd but it is hard to beat the quick drawing capability of a weapon carried in a proper holster worn on the belt.


    Some of the new Kydex and carbon fiber holsters are really excellent but criticized by the slight noise being made when drawing. Leather holsters are almost always quiet. Regardless of carry methodology, weapon retention practice should be a regular part of concealed carry training.


    Any belt worn holster should if its design permits, be worn with the belt passing through the front holster loop, then through the side of the pants belt loop and proceed through the rear holster loop. This anchors the holster to the shooter. The belt buckle always positioned nearest to the holster and by always threading the belt to the holster in this manner, it is more difficult for the holster to freely fall from an opened belt buckle.


    Upon retiring, I became the co-owner/manager of a ranch in West Texas. That experience taught new lessons in pistol packing. One of the first lessons was just how bad it hurt to be bucked from a two-year-old horse – and landing with the holstered pistol between body and earth. This is a special kind of hurt that endures.


    If that ranch produced one species of critter in excess of the most fecund jackrabbit it was the rattlesnake. The wife having been bitten by one of these vile creatures declared war and no one went outside without packing a pistol. I first tried carrying pistols in the same manner as in government service, in a form fitted snap break leather holster. Days outside in the rare rain but all too often wind-driven sand worked their way on the exposed pistol.


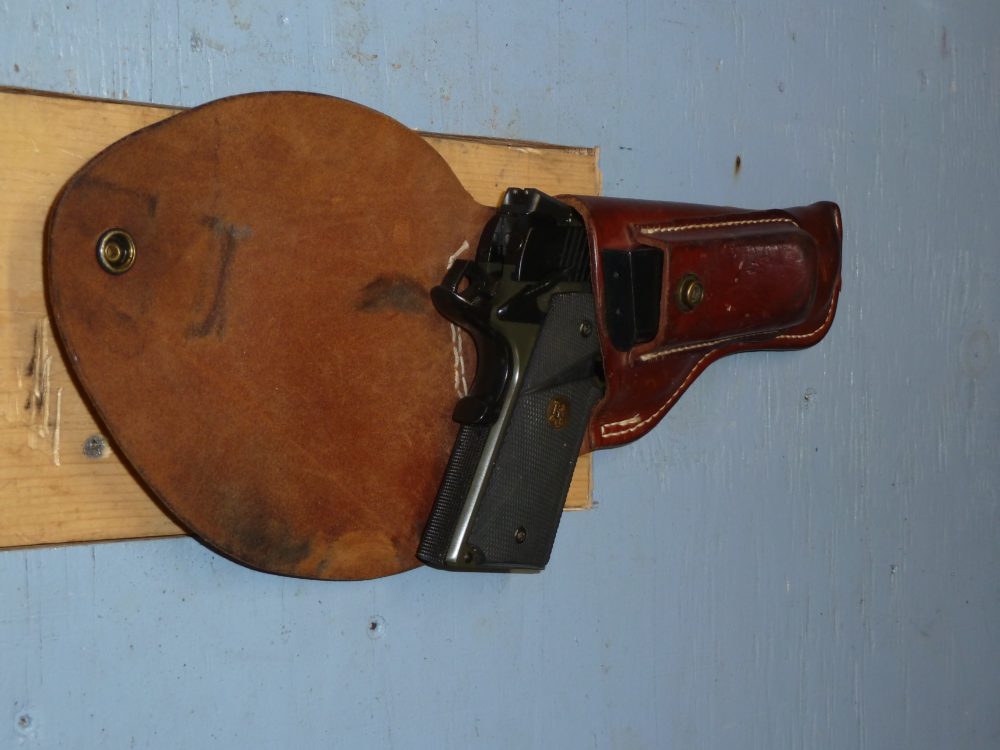
    Working outside on the ranch taught an old lesson and I learned anew why the US horse cavalry carried revolvers in a flapped holster. Slow to the draw but protecting the pistol from the weather it is and before long, I had a US Military style flapped holster. It helped somewhat with the wind-born sand and debris of life on a working ranch but I soon gravitated to a full flap holster that covered much of the pistol handgrip.


    Most full flap holsters are sized for a 1911 with uncocked hammer because the military method was to carry the .45 with hammer down on an empty chamber. The flap holster makes drawing slow and having to chamber a round upon drawing even slower. A saddle maker or other competent leather worker should be able to relocate the flap closure mechanism and/or manufacture a longer flap that will cover the cocked hammer. While the flap is being worked on, the belt loop should be relocated as far upward on the holster as practical. This will help the holster hold the weapon closer to the body. Holsters for full-size weapons that have the belt loop near the center of the holster will eventually let the handgrip cant outward from the body which ensures it will snag on almost anything while generating a most Barney Fife look.


    The Bathroom

    Many methods have been used in attempt to secure the belt worn pistol when in the toilet. For those with a holster on a belt loop, the weapon tends to end up on the floor where it might even be accessible to someone in an adjacent stall. Some have placed the pistol on the coat hook on the back of the door hanging by the trigger guard. This is very dangerous as the pistol can be easily jarred from off of the hook and fall on the floor potentially making the pistol accessible to another or in worse case actually discharging. Others have placed their handgun on the back of the toilet on top of the water tank. Both of these methods remove the pistol from the immediate person and the latter makes it easy to forget the handgun when exiting the stall.


    The best place for the holstered pistol when on the toilet is in your underwear between your feet. This keeps it immediately accessible and in a location impossible to forget.


    Final Comments

    Modern 1911 series .45 caliber pistols are sophisticated weapons for self-defense. The presence of multiple safeties, some automatically engaged, can make this pistol safe to carry with the hammer cocked on a loaded chamber but it is imperative the shooter receive hands-on training from a coach familiar with pistols of this design. Whenever possible choose a modern 1911 pistol incorporating the new safety features. The beginning shooter proceeding direct from the gun store with a loaded 1911 series weapon is exposed to a multitude of potential lethal dangers. Competent hands-on training should always be sought before chambering that first round.

    This article advocates keeping the weapon in a loaded, ready to fire condition. When not carried on the person, any weapon in this condition should be secured in a safe or protective container designed for weapons. Children are naturally curious about handguns and may go to unexpected lengths to retrieve a weapon from what was thought to be a perfect hiding place. All weapons when not being carried should be protected from accidental handling by children or curious adult.

  • Panhandle Rancher: Living with the Model 1911 Caliber .45ACP Pistol [Part 1]

    Panhandle Rancher: Living with the Model 1911 Caliber .45ACP Pistol [Part 1]


    Living with the Model 1911 Caliber .45ACP Pistol

    By Panhandle Rancher


    Warning: the following article is intended to provide an overview on the safe handling of the M1911 series caliber .45acp semi-automatic pistol. This article is not a substitute for professional hands on instruction, which the shooter must have before proceeding to load and safely handle this weapon.


    Introduction

    Many consider the Browning designed Colt Model 1911 (named from the year adopted by the US Government) semi-automatic, short recoil pistol, chambered in .45ACP (Automatic Colt Pistol) the finest combat pistol of all time. Others have a love/hate relationship with this venerable weapon but all recognize that it is a war proven man stopper. Over the decades, this fine weapon has been gradually improved and streamlined however the fundamentals of operation and safe handling remain unchanged.

    US Government service in a three-letter organization provided me with some of the very best training in fighting techniques with handguns. Several things happen over the course of years and even decades when shooting from an unending box of ammunition: one becomes smooth and in so doing speedy, accuracy improves dramatically, and one learns what really works and what does not. Speed and smoothness of use come naturally with time and if rushed, all sorts of unintended consequences may follow, perhaps even lethal. Concentrate on always handling weapons in measured, controlled, and smooth manner without jerkiness or overt abrupt motion. Proper practice over a period of time will produce speed of deployment as a byproduct of safe handling and shooting.


    This article will discuss how to make certain a 1911 series pistol is actually safe for the shooter to handle, how to almost completely eliminate the possibility of an accidental discharge (based upon decades of being around pistolarios professional to gang banger), and will offer suggestions on the carry, shooting, and cleaning of this century-old weapon design.


    The reader may have been trained by the military or in a law enforcement academy and consider himself or herself an expert with this weapon. Due to the long period of time it has been in use, a number of bad and even dangerous handling and shooting techniques have been taught. Regardless of your experience level with this or any other handgun, I urge you to read this article in detail. Comments, observations, and suggestions are always welcome and I look forward to hearing from you.


    Shooters in the United States have a wide selection of handguns from which to choose. A choice right for one may be awful for another. The frail or weak may be better off with a revolver as manipulating a pistol slide demands both a measure of strength and dexterity. The small-handed shooter of normal strength may be better off with a revolver or pistol in a smaller caliber, as these weapons tend to have a smaller sized handgrip. For those with normal sized hand and strength, the 1911 has long proven to be a superb combat weapon. With proper training and experience, this pistol is capable of exceedingly fast deployment, great reliability, and awesome accuracy.


    Some nomenclature

    Modern handguns fall into broad categories, break action, revolvers, pistols, and short barreled rifles meeting the legal definition of a pistol. Some handguns have even been manufactured that are bolt action (Remington XP-100, the first I believe in that third category), single shot break action (the Thompson Contender) and others made from shortened double barrel shotguns, another type of break action.


    A double action trigger pull is long and heavy; the single action trigger pull is short and light. Revolvers are generally fed from a revolving cylinder and can be both double action and single action as in the S&W Model 10, or single action only as in the Model 1873 Colt Single Action Army (SAA), also known as the Peacemaker and ‘the gun that won the west.’ This revolver is often chambered in .45 Long Colt.

    Pistols are generally magazine fed, self-loading, and semi-automatic in function.  Pistols may have an external hammer, an internal hammer, or striker. They may be double action only, double action on the first shot and thereafter single action (the SIG P220 for instance), or single action only, such as the Colt 1911 series pistol.


    Both the Model 1873 Colt SAA revolver and Browning-designed Colt Model 1911 semi-automatic pistol (and variants) are known colloquially as ‘Colt .45s,’ These two handgun models are generally chambered for two non-interchangeable .45 caliber cartridges of approximately the same power. This article will focus on the pistol.


    Each of these handgun action types were designed to fit a particular need. Each has distinct advantages and disadvantages. Some handgun designs such as the 1911 may require more training in safe handling than other designs but generally provide a perceived advantage as a combat weapon. The ability to safely carry a modern 1911 with round chambered and hammer cocked coupled with a light single action trigger makes this pistol a very fast first round on target weapon.


    Safe handling of the 1911

    So then, how does one handle the 1911? The glib answer is with care. The shorter any firearm in overall length, the easier it becomes to inadvertently point the muzzle on a partner, bystander, treasured animal, and/or valuable inanimate object. Accordingly, more accidents seem to occur with pistols than with rifle and shotgun.


    The 1911 pistol is a single action only self-loading, magazine fed, semi-automatic characterized by a very light trigger; and although capable of single action firing, revolvers are primarily double action with long and heavy trigger pull. If your finger is on the trigger of a 1911 at the wrong time with safety off, this weapon is ready to discharge, and all too often with sad and sorry result. It is one thing to deliberately and with witting intent, take pistol in hand with the intention of ending a human life. It is quite another to take pistol in hand and accidentally wound self or worse, kill your spouse or child. Each has serious ramifications but the latter, oh the unending and mournful grief.


    The first three rules of safe firearm handling enumerated below are often heard and stand the test of time. The fourth rule is based upon personal experience and if followed along with the preceding three rules, should completely eliminate the possibility of an accidental discharge.


    Rule One: Don’t point the muzzle of a pistol or any other firearm toward anything you don’t intend to shoot.


    Rule Two: Keep the slide safety (sometimes called the manual safety, slide lock safety, or thumb safety) engaged and your trigger finger outside of the trigger guard until ready to shoot.


    When under stress of imminent combat these first two rules are paramount.


    Many 1911 series pistol platforms are not safe with hammer down and round chambered. An unexpected blow on the lowered hammer with a round in chamber may cause a predictable loud noise. Accordingly, the modern 1911 can be safely carried in a holster with round chambered, slide safety engaged, automatic grip safety engaged, and hammer cocked. One has only to draw, unsafe the weapon, and fire. If the pistol is always maintained in a cocked and locked condition with chamber loaded, there is never a doubt of the lethal status of the weapon.


    Always keep that trigger finger outside of the trigger guard and slide safety engaged until ready to fire. Haste coupled with an awkward position, for instance sitting in an automobile or laying prone on the ground, makes it very easy for a finger to accidentally come in contact with the trigger when drawing and holstering. Make absolutely certain the slide safety is engaged and the trigger finger outside of the trigger guard until ready to fire.

     [finger outside of the trigger guard, slide safety engaged]


    Rule Three: Accidental and unintended discharge commonly happens with the so-called ‘empty’ weapon. Always, always make certain the pistol is empty, magazine removed, and no round chambered, before handling for any purpose other than to intentionally discharge the weapon.


    Rule Four is a partial safeguard when Rule Three is disregarded: After shooting and cleaning the pistol, load the magazine, chamber a round, activate the slide safety, remove the magazine, top with an additional round, reseat the magazine in the pistol gently until it latches, and holster the weapon. DO NOT handle the weapon outside of its holster again until intentionally intending to shoot. Following this and the preceding rules should almost eliminate the possibility of a handling related unintentional discharge. It should go without saying that alcohol and many drugs, over the counter, prescription, and illegal, make handling and shooting of any firearm exceedingly dangerous.


    Rule Four necessarily includes a prohibition against dry firing.  Dry firing, or snapping the hammer on an empty chamber or one with a chambered dry fire cartridge made for this practice, has probably been the cause of more unintended discharges than from any other form of weapon handling. Dry firing has long been advocated as a method of developing trigger and weapon control however when this practice is regularly engaged in, that unexpected loud noise is occasionally heard. This happens with experienced target shooters and trained police. An innocent woman was recently killed by a policeman wielding an ‘empty’ weapon during a police academy practice exercise, http://www.latimes.com/nation/nationnow/la-na-police-academy-exercise-death-20160810-snap-story.html.


    The only really safe way to practice tactics involving pointing a firearm at other people is to have the firing pin removed and a quarter inch in diameter gas relief hole drilled in the barrel just after the chamber!


    How to safely ensure the 1911 is unloaded

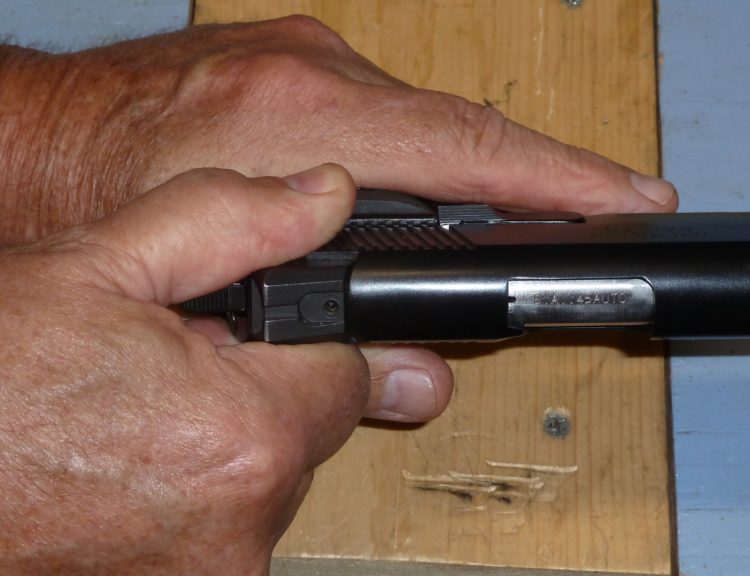
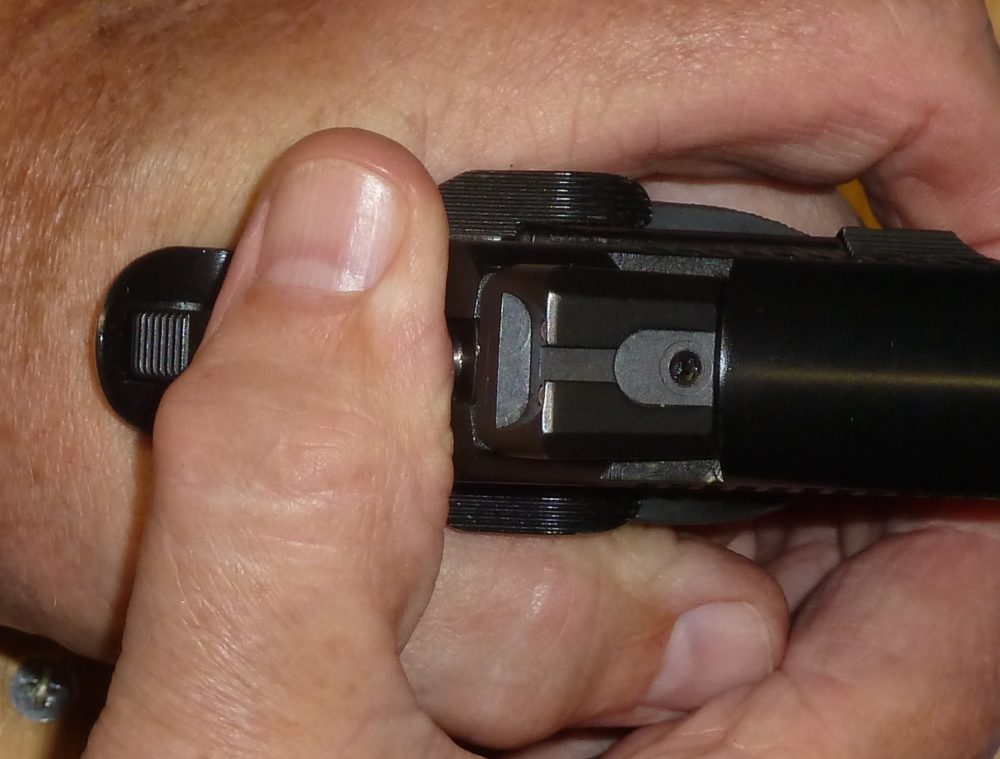
    Withdraw the weapon from the holster and ensure the slide safety is engaged. Keep the trigger finger outside the trigger guard and point in a safe direction. Remove the magazine, empty if necessary, and ensure the magazine contains no ammunition. Re-insert the empty magazine into the pistol, and snick off the slide safety. Hold the weapon in your strong hand. If you are right-handed, the thumb on your right hand will lay alongside the left hand side of the pistol handgrip; if left handed the thumb of the left hand will lay alongside the right hand of the pistol handgrip [see photo’s below]. Some pistols have friction ridges toward the muzzle. The same technique is used with the forward ridges however care must be used to ensure no body parts extend beyond the muzzle. Lefties using the forward friction ridges have their right hand palm ready to catch an ejected round.

    [right-handed]


    [left-handed]

    Pointing the pistol in a safe direction and with trigger finger remaining outside of the trigger guard, pull the slide to the rear until it locks back. The empty magazine follower should automatically engage the slide hold open locking mechanism. Verify the chamber is clear and remove the magazine. The weapon is now safe for handling and if necessary can be disassembled for cleaning. With a little practice and dexterity, it is possible to engage the slide hold open mechanism with the right hand thumb. This is however not recommended for unloading the pistol because if a loaded magazine is seated and the slide accidentally slips from the fingers of the weak hand, a round will chamber.


    Resist the urge to slam seat the magazine into the grip well. This practice is often dramatically depicted in the movies to emphasize determination and if followed religiously, is guaranteed to eventually deform magazine feed lips, damage the magazine latching notch, and cause damage to the magazine latching mechanism of the pistol. Any of which conditions can cause ammunition feed problems with predictable jams. Gently, press the magazine into the grip well until seated properly. This is always more difficult with a full magazine. A telltale click of the magazine latch will accompany proper magazine seating. Tug on the extending forward edge of the magazine floor plate to ensure the magazine is fully seated and locked into place.

    [showing improper technique]

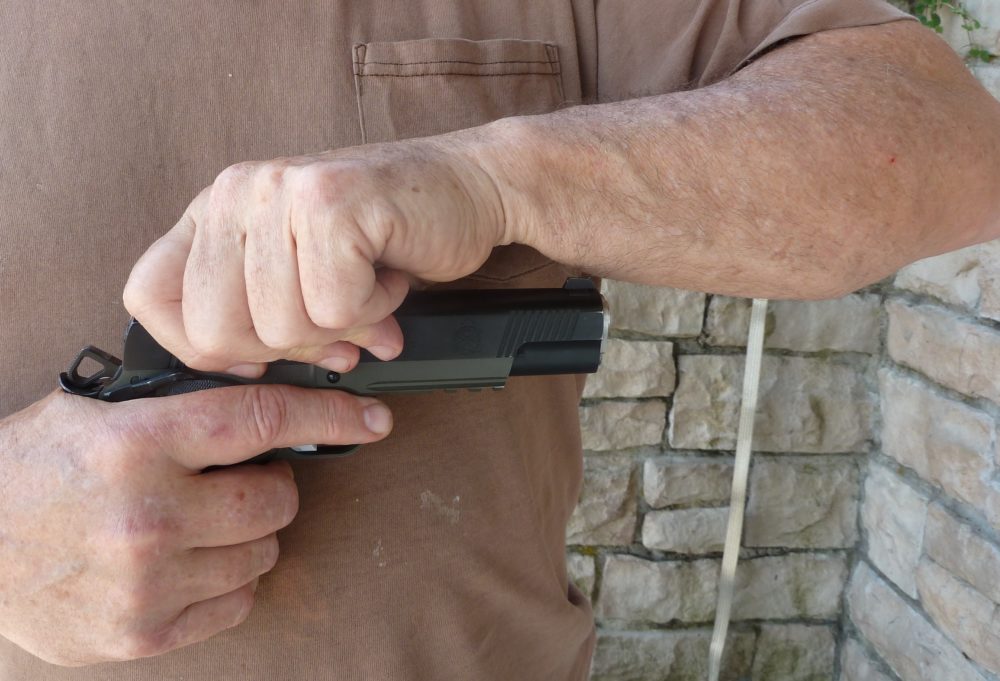
    A commonly seen loading and unloading technique begins by holding the pistol in the right hand with muzzle pointing to the left. The slide is covered in the top middle with the left hand, gripping the side between the fingers and thumb/palm. This method is dangerous and should never be used. This technique requires the shooter’s left and right thumbs to be on the same side of the slide, pointing in opposite directions. The left hand covering the slide makes it difficult to observe and control muzzle direction. The ‘cover the top of the slide’ technique even when properly executed obstructs the shooter’s view of a large part of the barrel orientation and points the muzzle in a lateral more difficult to observe orientation with muzzle often aligned with the shooter’s left underside forearm.


    Another popular combat taught technique is similar but with the pistol muzzle pointing forward with the rear half of the slide gripped between the fingers and palm of the other hand. When executed properly this method is safe. We, however, have a lifetime of gripping objects using our opposing thumb and fingers and many find the finger/palm approach unrealistic and unnatural.

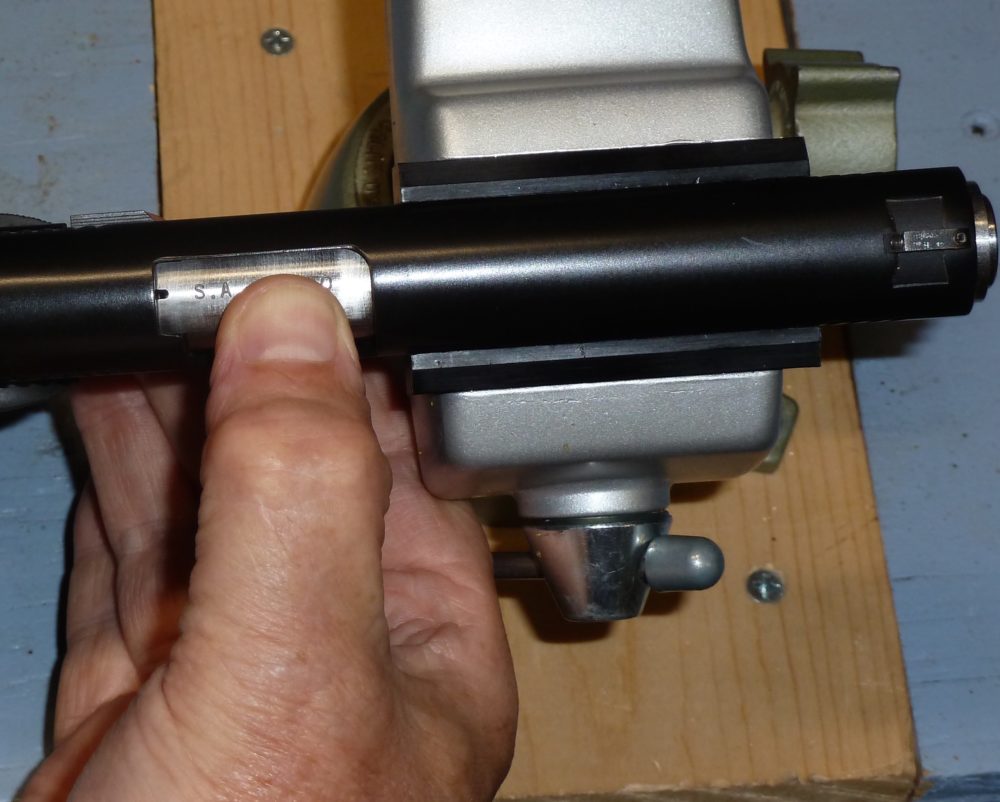
    [witness slot]

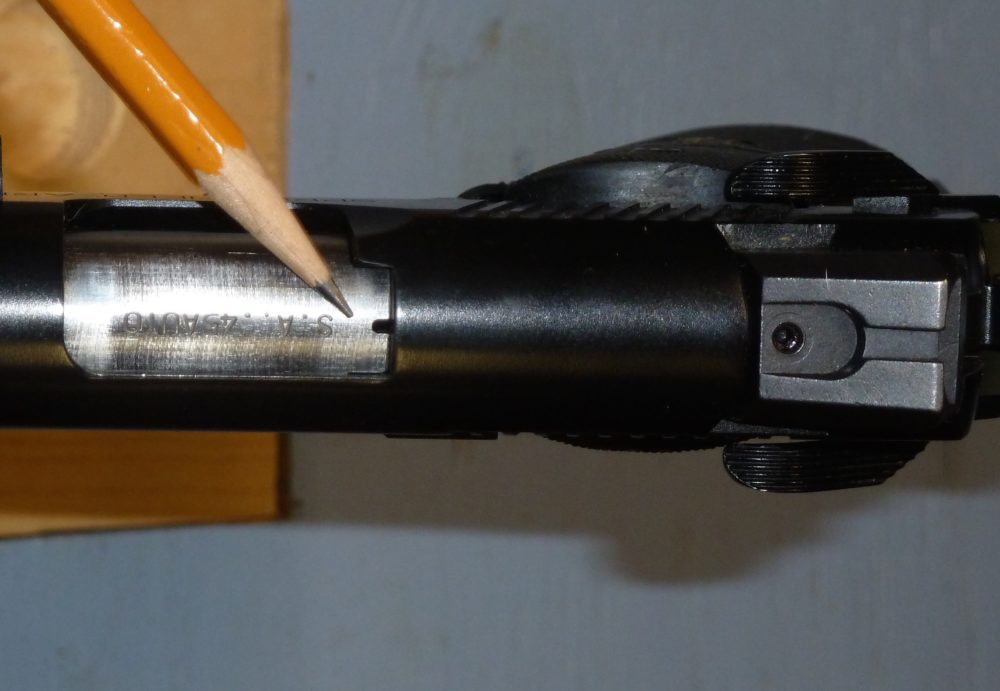
    Some 1911s have a loaded chamber indicator or witness slot in the rear of the barrel. The former may be as simple as an extractor protruding from the outside rear barrel area indicating a round is chambered, and the latter, a small slot milled in the breach end of the barrel allowing a portion of the rim of a chambered round to be seen. If your weapon has either type loaded chamber indicator, make checking of the witness device a routine practice, especially when handling an unfamiliar weapon. If your weapon is always maintained in a locked and loaded condition, then there is no need to ever perform a press check or to be uncertain as to whether a round is chambered.


    Why use both thumbs facing toward the muzzle technique of slide manipulation?

    The body is biomechanically more suited to rack the slide while holding the weapon with left and right thumbs pointing in opposite directions on the same side of the slide. This method makes use of opposing large chest muscles. You probably have done this in the past or observed others doing so. This points the weapon laterally across the body, sometimes toward the left forearm and usually to the left hand side for right-handed shooters. This potentially aims the muzzle toward a partner or other bystander and certainly not in the normal direction the eyes are pointed. Racking the slide in this manner to either chamber a round or to remove a round from the chamber absolutely ensures that it is difficult to track where the muzzle is pointing because the barrel and muzzle are hidden below the left hand and forearm.


    Safe slide manipulation as described earlier with thumbs pointing in the same direction but on opposite sides of the pistol ensures the weapon is pointed at least somewhat forward with muzzle oriented in an easily seen and highly controllable direction. This action is more difficult bio-mechanically and thus not commonly seen. Make this both thumbs forward on opposite sides of the pistol technique a habit whenever racking all semi-automatic pistol slides. It will become easier with practice. This method is depicted in the operator’s manual from Springfield Armory http://www.springfield-armory.com/wp-content/uploads/2014/03/1911Manual_5.pdf pages 21, 33, and others. Unfortunately, a dangerous method of uncocking the hammer of older model 1911s is shown on the same page (a safe technique for all 1911 models is described following).


    Strive never to allow the slide to slam shut if not stripping a round from the magazine into the chamber. Doing so can cause damage to frame, slide, and sear, potentially wrecking a good trigger. Chambering a round from the magazine reduces slide forces to design thresholds. An exception to this rule follows.


    How to test the 1911 for proper operation and safety functionality

    The modern 1911 pistol can be safely carried with chamber loaded and hammer cocked only because of multiple redundant safeties and proper training with the pistol. The correct function of these safeties should always be verified after field stripping and cleaning.

    1. Ensure the pistol is unloaded following the previous instructions.


    1. With empty chamber and magazine removed, ease the slide forward into battery. Holding with a normal one-handed grip, point the pistol in a safe direction and squeeze the trigger. The hammer should drop.

    [hammer in half-cock]

    1. Testing the half-cock sear notch. Point an empty pistol in a safe direction. With the slide forward and hammer down, ease the hammer back toward the cocked position stopping after the first click. With safety off, grip the pistol normally and while still pointing in a safe direction, squeeze the trigger. The hammer should not drop out of the half cock position. The Colt Mark IV Series 80 model introduced after 1983 will drop the hammer but with reduced force supposedly insufficient to actually fire a round. Series 80 1911s also have a firing pin block safety with internal levers and a plunger to positively block the firing pin from moving until the trigger is pressed. The pistols also have a redesigned half cock notch eliminating the possibility of the weapon firing if the hammer is struck. Other modern manufacturers of 1911s have incorporated some or all of these features and if so, should be described in the operator’s manual. The half cock sear notch is designed to catch the hammer should it slip while being lowered and is not intended as a normal carry position.

    [Pistol hammer completely lowered]

    There are many older design 1911 pistols in circulation. Treating every 1911 as if it were of the old style avoids a multitude of problems, especially when handling an unfamiliar 1911 series pistol.

    1. Sear reset test. Point an empty pistol in a safe direction and with hammer down, pull and hold the trigger. Pull the slide back and engage the slide hold open mechanism. Press down the slide hold open mechanism permitting the slide to slam into fully closed battery onto an empty chamber. Yes, this might cause damage as pointed out earlier but easing the slide down will not provide enough of a shock to fully test the sear reset mechanism. With the slide now in battery, the hammer should remain in the cocked position created when the slide was pulled back. Release the trigger and pull. The hammer should fall normally. If the hammer fell automatically following the slide closing, a dangerous situation exists that may permit full and likely uncontrollable automatic fire. Do not shoot the pistol until the sear reset is repaired to full functionality.

    [slide safety fully engaged]

    1. Slide safety test. Hold the empty weapon in the right hand, slide closed and hammer cocked. Pointing in a safe direction, engage the slide safety. Still holding the weapon as if to fire, squeeze the trigger. It should not move much if at all. The normal shooting handhold automatically disengages the grip safety yet the hammer should not fall due to the action of the slide safety. Other than a very slight movement of the trigger, no perceived movement of any mechanism should occur within the pistol. Grip the rear friction ridges of the slide with the left thumb and outside first finger (thumbs on each hand are pointing in same direction on opposite sides of the pistol). Try to pull back the slide. It should not move. Squeeze the trigger again and release. Disengaging the slide safety should not cause the hammer to drop.

    [grip safety disengaged]

    [grip safety engaged]

    1. Grip safety test. With the empty weapon pointed in a safe direction and slide safety off, cock the hammer. Reposition the holding hand so as to disengage the grip safety [see photo’s above]. Squeeze the trigger. It should either not move or move very little. The hammer should not fall.

    [safety disconnector test]

    1. Safety disconnector test. With an empty weapon pointed in a safe direction, manipulate the slide ¼” back out of battery. The grip safety should be off (pressed into grip). The slide safety mechanically cannot be engaged. Squeeze the trigger. The hammer should not drop. Ease the slide forward, squeezing the trigger in increments of slide movement. The hammer should not drop until the trigger is pulled with slide closed in battery.

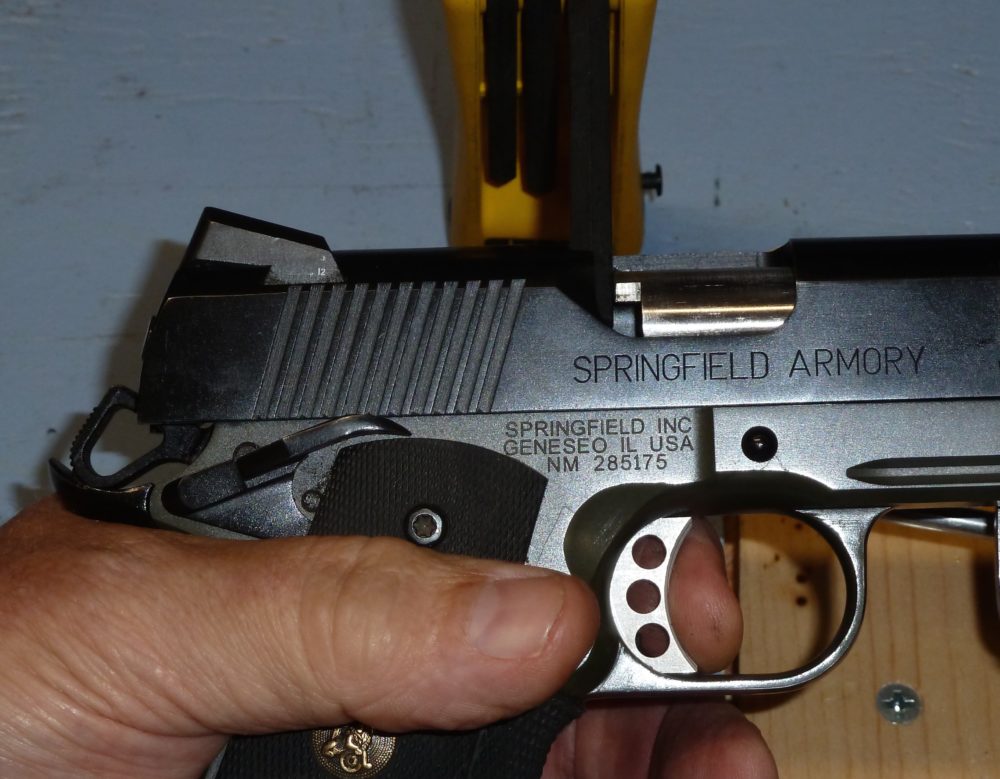
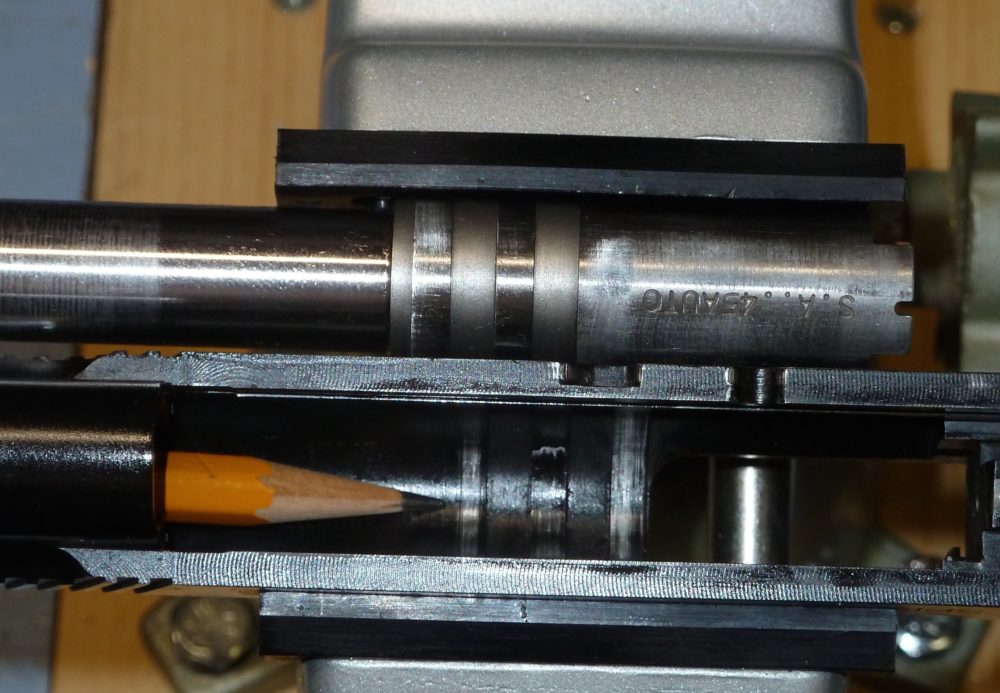
    [interlocking barrel and slide ridges that lock the barrel to the slide]

    1. Barrel lock engagement. With an empty pistol pointed in a safe direction, slide fully forward in battery, with grip and slide safeties disengaged, forcibly push down on the exposed area of the chamber. There should be very little or no movement. Keeping as much of the body as possible out of the path of the barrel, try to push the barrel back into the slide. Again, there should be very little or no movement. A lot of movement in either of these tests indicates that the barrel is not locking up with slide in battery. Firing the weapon in this condition may damage the weapon and shooter.

    [barrel locking engagement]

    Faulty barrel locking may cause the action to open before pressure from firing subsides (indicated by the bang when the bullet exits the barrel) and the partially unsupported brass case from the opening action and/or primer may breach from the high pressure. If so, a dangerous release of high-pressure gasses, powder, powder residue, brass fragments, and primer fragments may result. Always wear protective eyeglasses and hearing protection when shooting any firearm.


    1. Slide lock open (or back) on empty magazine test. With an empty chamber, no magazine in the firearm, and slide forward in closed battery, point the pistol in a safe direction. Insert an empty magazine into the slide well. Pull the slide fully to the rear and release. The magazine follower should raise and automatically engage the slide hold open locking mechanism to hold the slide open. There are numerous magazine manufacturers and magazines for the 1911 have been made over many decades resulting in large variations of fit, finish, and wear. As a result, this test should be duplicated with every magazine used with the weapon. Features such as the automatically held open slide on empty speeds the process of reloading.


    1. Magazine release test. Point an empty weapon in a safe direction and insert an empty magazine fully into the magazine well. Holding the pistol in a normal firing position, press the magazine release. The empty magazine should drop from the pistol. Repeat this test with all magazines used with the pistol.


    1. Magazine drop test. Hold a fully loaded magazine at shoulder level and drop on a hard ground level surface. No rounds should eject from the magazine. Repeat for all magazines used with the pistol.


    Should the pistol fail any of the above tests it should be inspected by a competent gunsmith and repaired as needed. Magazines failing Steps 9, 10, and 11 should be replaced with properly functioning magazines.


    How to safely lower the hammer on a 1911 pistol with round chambered

    There is only one way to safely lower the hammer on a loaded 1911 pistol. The hammer is lowered in exactly the same manner that the pistol is properly handled: with care.


    One popular manufacturer shows a method whereby the hammer is gripped between the thumb and first finger, trigger squeezed, and hammer lowered. This practice followed often enough with an early generation 1911 will eventually result in a loud noise accompanied by ringing in the ears. Likewise will lowering the hammer by use of a thumb over the external margin hammer friction ridges. With either technique, the hammer will eventually slip, the half cock safety fail, and that loud noise will occur.


    The competent pistol handler will habitually keep the muzzle pointed in a safe direction with slide safety engaged while keeping the trigger finger outside of the guard until actually ready to shoot. If for some unlikely reason, that unexpected loud noise is heard, no serious damage should result. With this safe handling posture as a starting point, and firm understanding of the following three actions, the hammer can be safely lowered to the full down position.


    The shooter is encouraged to practice and master the following safe method of lowering the hammer with an empty pistol before attempting with a loaded chamber.


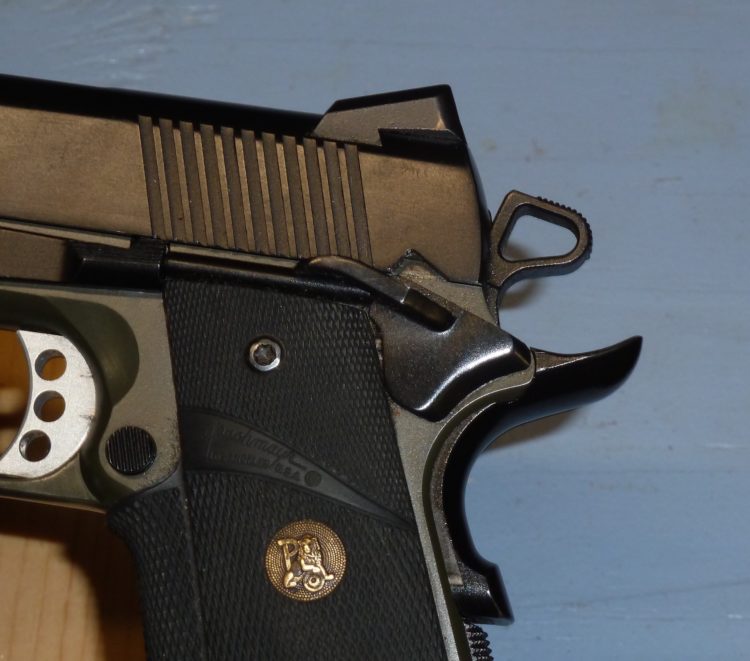
    1. Hold the cocked pistol in the right hand. While always pointed in a safe direction, interpose the thumb of the left hand between the slide and hammer[see picture below].

    1. Squeeze the trigger. The hammer should move slightly coming to rest on the outer margin of the left thumb.


    1. Roll the left hand and thumb toward the body while at the same time gradually lifting the thumb from between the hammer and rear of slide. This allows a controlled release and gentle lowering of the hammer.

    With a little practice, the hammer can be safely and quickly lowered on a loaded chamber and without pinching the thumb.


    ……….Check back tomorrow for Part 2.


  • From the Desk of John Rourke – September 22nd, 2017

    From the Desk of John Rourke – September 22nd, 2017


    Hurricane Maria Update: It appears that Maria will head out into the Atlantic. This is excellent news, however, anything could happen. It is days away from affecting the United States and if it should take a westerly track change it could present a very big problem.

    ◊ ◊ ◊ ◊ ◊

    The sanctions just imposed on North Korea to eliminate their nuclear efforts might – and that is a big MIGHT – be effective. Interesting in that the United States has basically told the rest of the world if you wish to do business with the United States – do not do any business with North Korea. The already crippled economy of North Korea will now be decimated. Unfortunately, it is the North Korean people who will suffer the most.  Hopefully, someone in the government will rise up and take Kim out.

    ◊ ◊ ◊ ◊ ◊

    In the UK – for 5 years straight – Muhammad is the top name given to babies. Hmmm……for some reason I think this is not a good thing.

    ◊ ◊ ◊ ◊ ◊

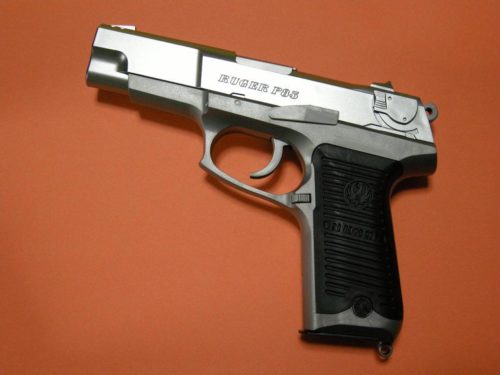
    Ruger makes some great guns. Reliability has always come to mind when I think, “Ruger”. Ergonomics? Not so much. Their P85/P95 line of pistols just never really felt right in my hands. Your mileage may vary.

    For whatever reason I’ve been wanting the old Ruger P85. Several variants exist and reportedly can be purchased online for around $250. A P90 or P345 in 45ACp is another I would like to throw in the safe – and blast away with once in a while. Maybe someday. Finances are tough right now.

    ◊ ◊ ◊ ◊ ◊

    Hope everyone has a great weekend. 


    SIGN UP TODAY – FREE!!

    line

    As a member of The Patriot Brigade, you will receive a FREE digital copy of my book – A Survival Story. You will also receive periodic emails providing information on current events, projects, and special offers and discounts.

    Don’t worry. You will not have your email blown up with emails every other day or receive SPAM.

    the patriot brigade, survival, 1776patriotusa, prepper, shtf, politics, patriot

    Have a Kindle or an Amazon Fire tablet? You could literally go years without ever buying a book to read as there are thousands of free eBooks available. Don’t have a Kindle or Fire? Not a problem. You can download apps for most any cell phone or computer completely FREE! No excuses!

    Today’s Freebies

    Self Defense: An Illustrated Guide

    Apocalyptic Survival

    Water Purifying

    Grid Seekers

    Off Grid Living

    NOTE: If you see a free preparedness eBook that you’re interested in get it now as prices can change quickly.  If it lists a price or says “read for free” or has a price for Prime members the book is not free anymore. Visit FreePrepperEbooks.com and sign up for more free survival & preparedness related ebooks.